Text and photos by Diwan Bhathal

Yesterday I found out a very simple way on how to adapt a shutter release cable and a tripod screw hole. You might be interested in doing this, it takes the best of a half hour and a few home tools, a drill and a metal file.
Here is how it is done:
If you open the camera, there are two black screws where the lens is. Remove them and remove the film carrier contraption. The shutter mechanism is now exposed.
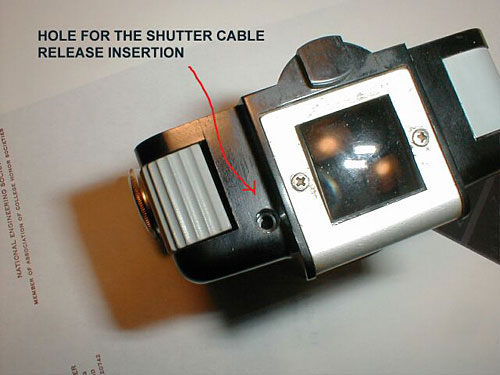
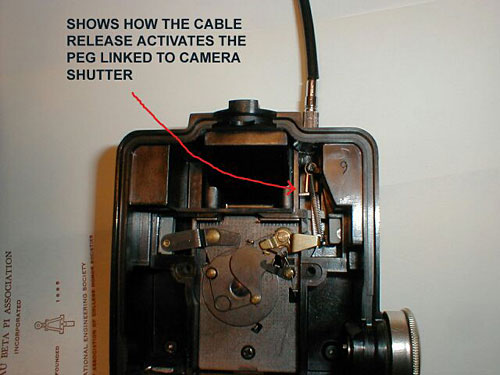
If you look to the right top, where the shutter release is, there is a spring that is the tensioning and return spring. This spring is attached to a brass lever at the bottom, and a "peg" at the top. Look carefully, and you will find that there is some space between this peg and the inside top of the camera. This corresponds to an area between the viewer and the shutter release on the outside of the camera.
I found out that if you get a small nut that will fit the screw end of your shutter release cable, typically a 6-32 nut or something like that. It is possibly, by filing the vertices of this nut to insert it in the space between the peg and the top of the box. Filing the tips of the nut will center the nut so that the screw hole falls into a clear space and the cable release plunger can engage the camera shutter release.
Then get a coat hanger wire and make a loop with it. The tips of the wire need to be facing each other. This will be the depth indicator. Use this as a location gauge for the hole to be drilled. This hole falls to the right of the aiming window, but not too much, something like 1/16th. The gauge will indicate the position precisely.
After that, drill a small pilot hole where the depth indicator showed that the hole of the nut goes. Subsequently, find a drill size that has the same section as the metal shaft of the shutter release. Drill a hole this size from the top of the camera using the pilot hole as a guide, so that the bid drill does not slip or walk.
Make sure that this hole takes a half moon bite out of the "peg". This peg is strong enough and this semi circle bite out allows for the plunger of the shutter release to go through.
Install the nut from the inside of the camera. Screw the shutter release from the outside. Activate the plunger for smooth operation. Hold everything in place and glue carefully with JB Weld (Home Depot). Hold patiently the shutter release cable until the glue sets (2-3 mins), and then carefully remove shutter release and let cure for a day.
The shutter release plunger has enough depth to click the shutter by pressing on the piece of metal that fires the shutter.
Now, make sure that you find a piece of cloth, felt or something like that to cover this area. There is a hole there that may bring in light inside the camera when shutter release not installed. I put a rectangular piece of hobby store thin felt to light seal the whole thing. It works.
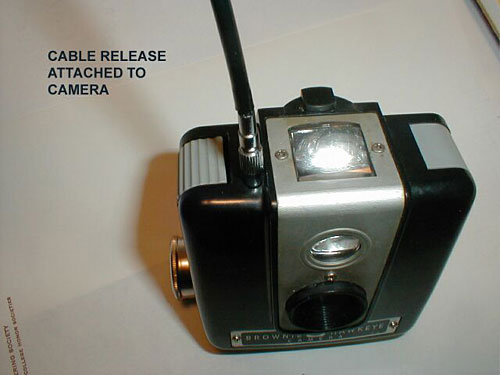
Now you have a shutter release hole and fitting with no visible change to the camera.
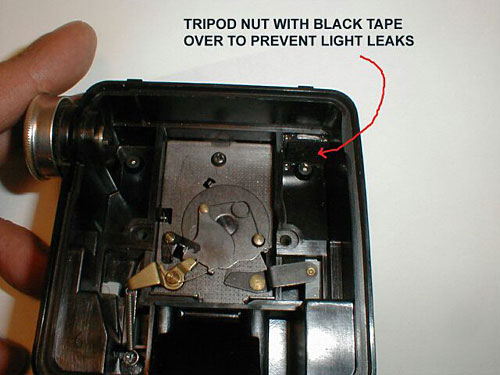
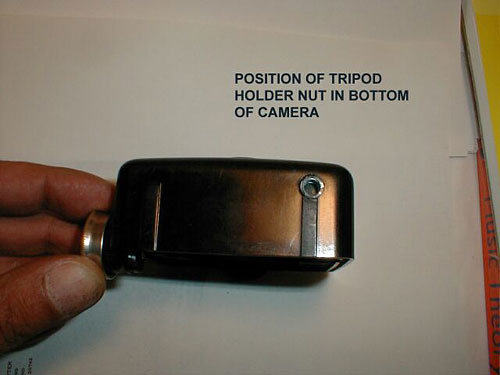
Look at the left bottom of the camera. There is a space there. With a blind nut 10-24 or something like that, just find a nut that fits on the tripod head screw...
Now, cut or file that nut to fit into the small cavity. Once the nut fitted, reinsert the film holder to make sure that it fits flush with the camera body.
Using the wire loop as gauge, perform location of center. Mark on outside. Drill to fit. The nut needs to have the "barbs" removed and is inserted with shank downwards. The camera body is quite thick at that point and the tripod screw is not long enough to reach. Just put the pointy end of the nut downwards. Test for fit and glue. Once glue set, put some black felt on top for light leak through top of hole.
Insert and screw film carriage. And Presto! Modified Brownie Hawkeye to produce non-blurry photos while retaining look of camera.
Hope this is useful to someone.
Some additional emailed notes:
As can be seen the "surgery" does not invade the cosmetics of the little box, quite easy to do also. The trick is to have the courage to drill the first pilot hole, the rest is easy. If the hole is in the approximate area, it will work...The tripod mount has a glued on black felt on top to eliminate light leaks through the nut. Gluing it makes it permanent.
I use the Hawkeye with it a $6 very flimsy and lightweight tripod that I got at a K-Mart type store. So flimsy that it hardly weighs anything, very easy to carry around.
Another gadget is a box of 120 film with top and bottom flaps removed to fashion an anti-glare screen for the camera viewer, found to be a great eyesaver.
Text and photos reproduced here with the permission of the author.
Copyright © 2006, Diwan Bhathal
Hawkeye Flash Main Page
Home