


 Whether you are new to shooting film or are a grizzled veteran, you’ve likely heard someone mention a fundamental rule of photography called “The Sunny 16 Rule”.
The Sunny 16 rule is something that was developed to help teach exposure calculations in daylight situations without the use of a light meter.
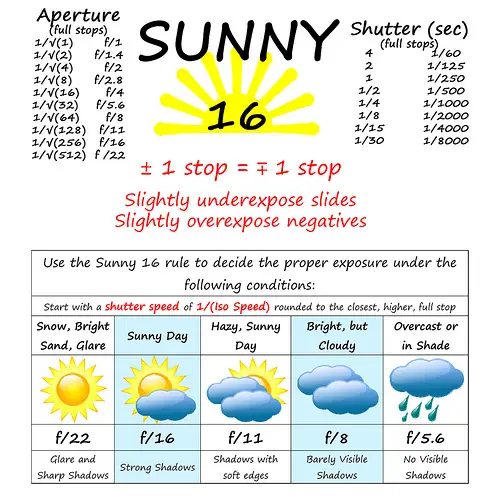
Sunny 16 says on a bright and sunny day with clear skies, proper exposure is achieved with your aperture set to f/16, and your shutter speed set to 1/(FILM SPEED). So for example, using ISO 100 film, on a bright and sunny day, if you set your aperture to f/16 and your shutter speed to 1/100 (or whatever is closest), your images will be properly exposed.
You could stop right there and you’d already have a basic understanding of the Sunny 16 rule. This rule (or some variant of it) has been used by photographers since the earliest days of photography, well before the name ‘Sunny 16’ was actually thought up. Amazingly, the Sunny 16 rule isn’t limited only to film. It works on any camera ever made, even digital cameras. As long as your camera gives you the ability to manually control aperture and shutter speed, you can use Sunny 16 on it. In fact, I think that practicing Sunny 16 using a digital camera is a great idea as it will allow you instant feedback to see how each setting impacts your images.
Sunny 16 has been covered time and time again on the Internet in many excellent articles, blog posts, FAQs, and so on. I’ll include a link to some of the better ones at the bottom of this article if you want to read them (and you should because they’re great).
The problem with the Sunny 16 Rule is that in an effort to explain it, most articles tell you more than you need to know to get started. They use terms like “reciprocal”, “f-stops”, and “exposure values” that may be intimidating for the first timer. Sunny 16 is designed to be flexible, and these articles try to cover so many different shooting situations that I think the simplicity of the rule can easily get lost. There aren’t many of these articles aimed at the beginner who might be intimidated by the prospect of shooting a film camera without the safety of a meter.
Another problem with Sunny 16, is that it’s not so much of a “rule” but more of a set of guidelines that get more confusing the more you read about them. Variables like the time of day, amount of reflected vs direct light, your position on the earth, and variances in shutter accuracy can affect your exposure.
One of the first lessons you should learn as a beginner to film photography is that you do not have to get your exposure perfect to get a good image. Film has this amazing characteristic called “latitude” which means that it can tolerate too much or too little light and still turn out great. Some of the most flexible films can handle as much as 4 to 8 times too much light without ruining your image. Film latitude is why it is not so important to get a perfect exposure, just get it close and you’re fine. This frees you up to spend more time thinking about focus and composition without having to worry about exposure settings.
One of the first lessons you should learn as a beginner to film photography is that you do not have to get your exposure perfect to get a good image.
If consistent and perfect exposure is your goal, you really should use a meter, or at least be prepared to have a much better understanding of exposure than this article will be able to provide.
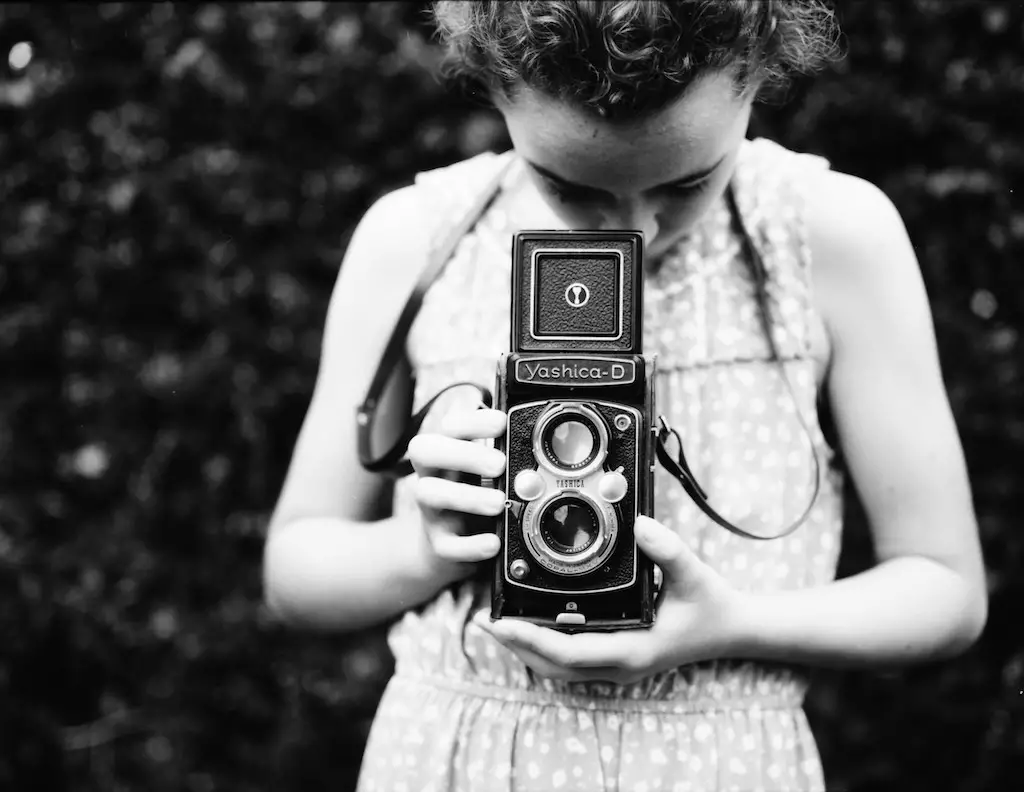
Lets say you’ve never shot film before and you want to try out your grandpa’s Rolleiflex or Nikon F that you found in his closet. Most cameras that were made prior to the 1960s did not come with a light meter, and if they did, they were most likely made using something called Selenium or Cadmium Sulfide, both of which have a tendency to lose accuracy over the decades. While some of these old light meters still work, many do not and are not reliable ways to measure exposure today.
If you are new to shooting old cameras and are intimidated by even the simplest of Sunny 16 articles, this is my attempt to simplify the Sunny 16 rule into something I am calling the “Outdoor Eight” rule. I won’t trademark the name, but I did check Google, and as of this writing there are no articles that I could find for an Outdoor Eight rule, so you’re reading it here first!
What is the Outdoor Eight Rule?
The Outdoor Eight rule says when shooting images outside in the middle of the day, if you use ISO 100 speed film, set your aperture to f/8, and your shutter speed to 1/100 (or 1/125), you will get an image that is pretty close to being properly exposed.
I remember the first time I read about Sunny 16, it seemed hard to believe that such a vague set of rules would work. After all, don’t modern digital cameras require state of the art CPUs with features like “3D Matrix Metering”, lasers, and infrared sensors to get exposure correct? If all that technology is required to get correct exposure on a digital camera, how could some vague set of suggestions work on film? And even if it does, how could simplifying an already simplified formula work at all?
Why either of the Sunny 16 or Outdoor Eight rules work isn’t important and is beyond the scope of this article. Simply, they just do. The Outdoor Eight rule is a simplified version of Sunny 16 that gives the beginner a starting point. In fact, my Outdoor Eight rule very closely mimics the saying “f/8 and Be There”, first coined by Arthur “Weegee” Fellig who was a famous New York street photographer in the 1930s and 40s. Arthur used the term as a reference to shttps://en.wikipedia.org/wiki/Weegeeetting your camera in a way that gave you the best possible chance of a good exposure under the most number of circumstances. If your camera is at f/8 you can just “be there” and not have to worry about anything else. Arthur Fellig was a professional who set his camera to the same settings for every shot and it worked for him, so it can certainly work for you too.
Edit: After posting this article, someone pointed out to me that disposable cameras are designed to use settings very similar to what I am recommending with the Outdoor Eight rule. Cheap disposable cameras have a single shutter speed, do not have light meters, and have no control over exposure at all, yet in most cases, the images they make are properly exposed. How is that possible?
They were designed to use a single shutter speed and aperture combination that takes advantage of the latitude of film to accomplish the same thing as the Outdoor Eight rule.
I use the Outdoor Eight rule myself, and I believe that it is the perfect starting point for someone new to vintage cameras as it can handle almost all lighting situations from bright sunlight to overcast shade and still give you a good image.
Note (for the Pros): I am perfectly aware that a shutter speed of 1/100 @ f/8 using ISO 100 film is technically two stops over in bright sunlight, but if you already know that, this article isn’t for you. I am using the latitude of color and B&W to compensate for the difference in order to give beginners a place to start.
Before you Shoot
I do make a few declarations that must be followed in order for the Outdoor Eight rule to work. These are all very important, so I recommend reading these four bullet points before trying it yourself.
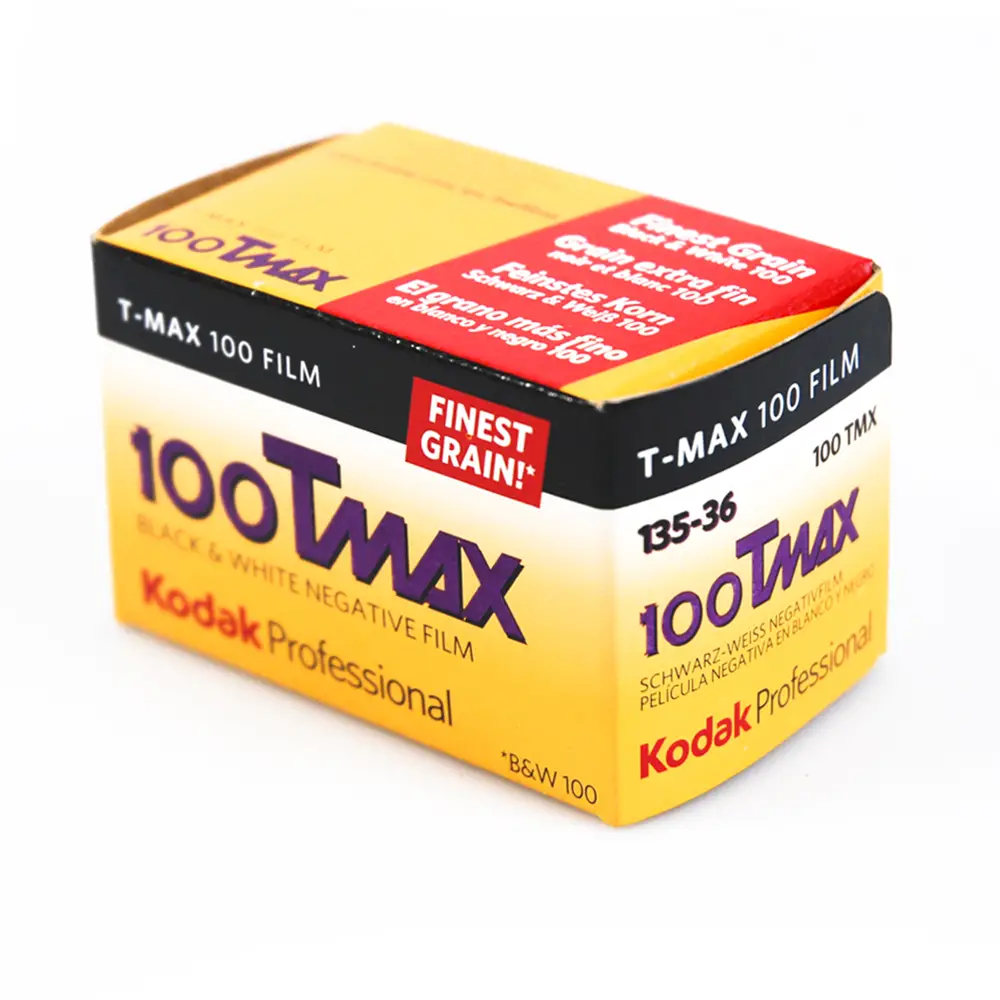
- First, you should stick with black and white or color negative films with a speed close to ISO 100. I recommend starting with black and white film for your first roll as it has the most latitude for exposure. For your first roll, I recommend Kodak TMax 100, Ilford Delta 100, or Ilford FP4 125. If you are interested in color, try Kodak Ektar 100, Kodak Portra 160, or Lomography 100. There are certainly more options than just these, such as those made by Fujifilm, Kentmere, Cinestill, or Adox that will work too, but the only kind of film I do not recommend for the beginner is color positive or “slide” film. Slide film is far less forgiving and requires a bit more knowledge to get the exposure correct.
-
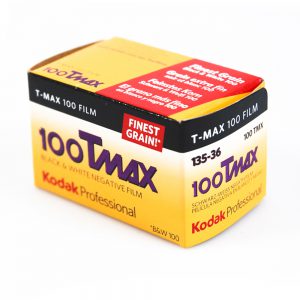
Kodak TMax 100 is an excellent fine grain 100 speed black and white negative film that is a perfect choice for the beginner. An aperture size of f/8 is ideal for a couple of reasons. The first is that f/8 is right smack in the middle of the appropriate apertures for all outdoor lighting. For the pros, f/8 will never be more than 2 stops over or under in most outdoor lighting situations giving you the best chance of getting an image that is within the latitude of the film you are using. Next is that pretty much any lens ever made is at it’s peak sharpness at f/8. The physics of how light travels through a lens result in a sharp image with very little, if any, distortion at f/8 which means you’ll get the sharpest possible shots from your camera at f/8. Finally, on most lenses, f/8 gives the beginning photographer a large area of ‘in focus’ area to where the subject will be correctly in focus. This is especially useful for older cameras that have small or dim viewfinders.
-
I chose a shutter speed of 1/100 or f/125 not just because it most closely matches the films I am recommending, but many older cameras have shutters that have slowed down over time and are no longer accurate. Unless your camera has been professionally serviced, it is highly likely that its slowest and fastest speeds will be off by at least a little, but sometimes a lot. I have many cameras in my collection that don’t work at all at their slowest speeds. For these cameras, shutter speeds around 1/100 are the ones that have the best chance of being close to accurate because they do not require the use of slow speed governors, or additional tensioning springs for faster speeds. If you are using a vintage camera for the first time, a shutter speed of 1/100 or 1/125 will give you the best chance at getting accurate exposure, so that’s a good shutter speed to start with.
- Last but not least, and probably the most important, is that you should use your camera at a time and place where it will give you the best lighting, which is outside on a well lit day. Do not attempt to shoot your meterless “vintage” camera indoors, during a thunderstorm, or at night. Sure, there are ways to compensate for less than ideal lighting, but the Outdoor Eight rule is aimed at the beginner, and beginners should learn to crawl before they run. Once you master the basics of exposure, and can see the results from your first few rolls, then you can venture into less than ideal lighting situations.
My Thoughts
One of the best things about shooting film, especially with older mechanical cameras is the process. There is a lot more tactile feel with an old camera. They’re often very heavy, made using a lot of metal and very little plastic. Cameras from the mid 20th century were precision instruments made by dedicated craftsmen and were designed to last a long time. Using these cameras requires a lot of extra motions that you no longer have to do today, from installing a new film cassette into the camera, threading the leader onto the take-up spool, winding the lever to advance and set the shutter, and so on.
Shooting film slows you down and is definitely not for everyone, but if you’re open minded enough to give it a try, you’ll find some unexpected benefits of shooting film. By being conscious of how the camera works and thinking about your exposure before every shot, you’ll start to understand what the camera has to do for each shot. The more time you think about your image before you take a shot, even if only for a second, the better your images will turn out. You’ll be less likely to take for granted what the camera has to do to calculate exposure and you’ll begin to instinctively do it on your own. Shooting film has the potential to make you a better photographer.
When you strip down photography to it’s most basic elements, and control things like exposure and focus manually, you have more time to think about what makes a good image. I will never suggest that film photography is universally better than digital, but it will give you tools that work with digital too. The lessons you learn in film can be applied almost seamlessly with digital.
As you gain more experience calculating exposure, you can venture into less than ideal lighting situations. You can try different combinations of shutter speed and aperture. In full shade, you might want to try f/5.6 or f/4. Try a slower or a faster shutter speed if you want to capture a moving object or intentionally induce motion blur for creative effect. Make a log of the settings you chose and reflect back on that log after you see your developed film to see what worked and what didn’t. Don’t be afraid to make mistakes. Not every image from your first, second, or even hundredth roll of film will come out perfect, but that’s ok, as long as you learned something along the way.
If you are eager to get out and use your grandpa’s Rollei, you now have enough info to get started without needing a light meter. Is the Outdoor Eight rule all you’ll ever need to know about unmetered photography? Of course not. This is just a place to get you started.
If you don’t have your grandfather’s camera, but have some experience shooting film with a metered camera, I still recommend trying to shoot it without the meter. Some cameras will make a recommendation on proper exposure without actually controlling it for you. These are ideal cameras to try this on as you can compare your metering choices with what the camera has recommended without taking the control away from you.
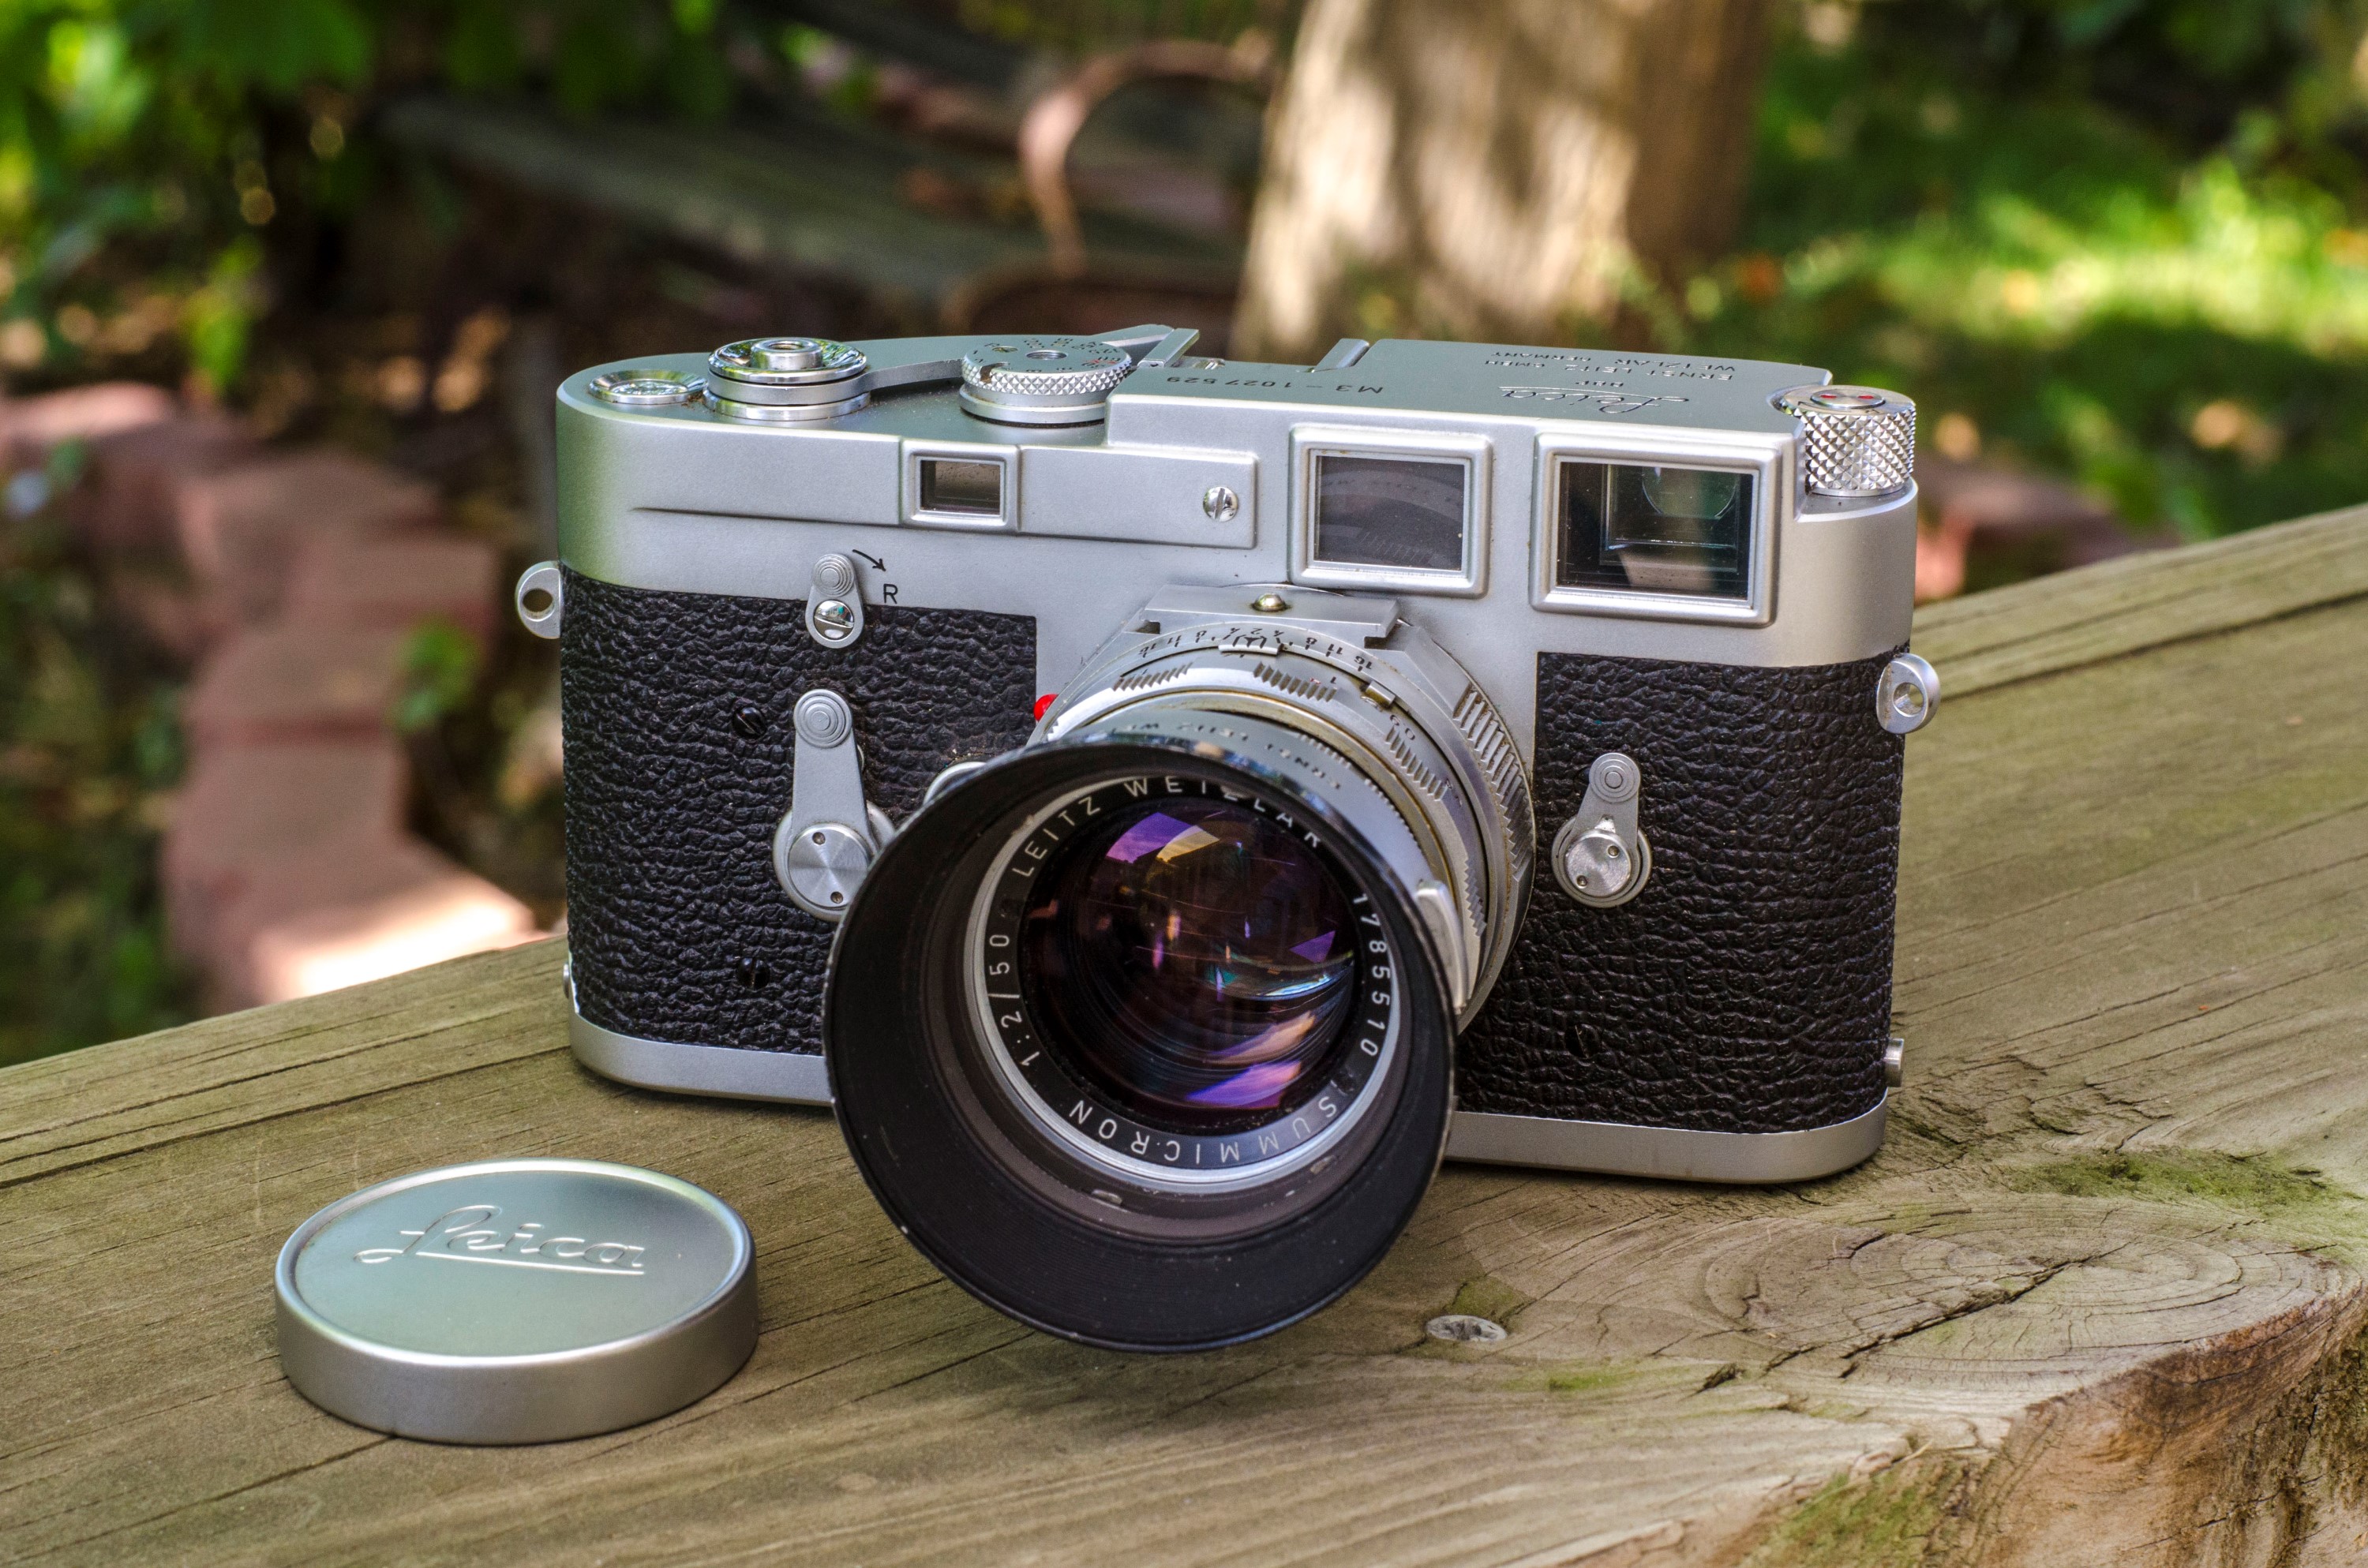
When you learn how to shoot your camera without the convenience of a meter, you are prepared in the event the battery dies on your meter and the camera is stuck in full manual mode. Many classic cameras like the Nikon FM, Canon FTb, or Minolta SRT series will work unmetered with a dead battery, you just need to know what settings to use. Or maybe you want to try out older cameras like the Leica M3, Canon P, or a Rolleiflex that never had meters to begin with.
Even though I have a pretty solid understanding of exposure and can change aperture and shutter speeds on the fly and almost always get good images, I find myself defaulting to f/8 and 1/100 each time I try out a new camera because that is what gives me the best chance of success with an untested camera. This is especially true with the older models in my collection like the Clarus MS-35 that only works at 1/100. My Foth Derby only works at 1/50, so I use that instead and compensate. It’s worked for me for quite some time, and I am sure it will work for you.
What do you think of the Outdoor Eight rule? If you’ve tried it yourself, I’d love to hear about your results in the comments below. Once you’ve used the Outdoor Eight rule a couple of times, you can learn some other rules. Outdoor Eight is not the be-all of photography, it is merely a starting point. Remember, photography is supposed to be fun. Once you master your old camera, you might even find that you prefer all of the mechanical controls over modern digital cameras that do everything for you. Whether you only shoot one roll or a hundred rolls of film, I promise you, the lessons you learn with an old film camera will make you a better photographer.
Additional Resources
I’ve resisted giving you more information than you need to get started, but hopefully by the time you reach this point in this article, you’ve at least considered the possibility of giving this a try. As I said earlier in this article, there are many, many excellent articles on the Internet talking more about exposure. Here are some of my favorites:
https://medium.com/@efaja/the-ultimate-guide-to-the-sunny-16-rule-part-1-f8f524a785eb
http://istillshootfilm.org/post/111300624658/an-in-depth-guide-to-the-sunny-16-rule
https://www.slrlounge.com/photography-essentials-the-sunny-16-rule/
https://www.photographytalk.com/beginner-photography-tips/7183-how-to-master-the-sunny-16-rule
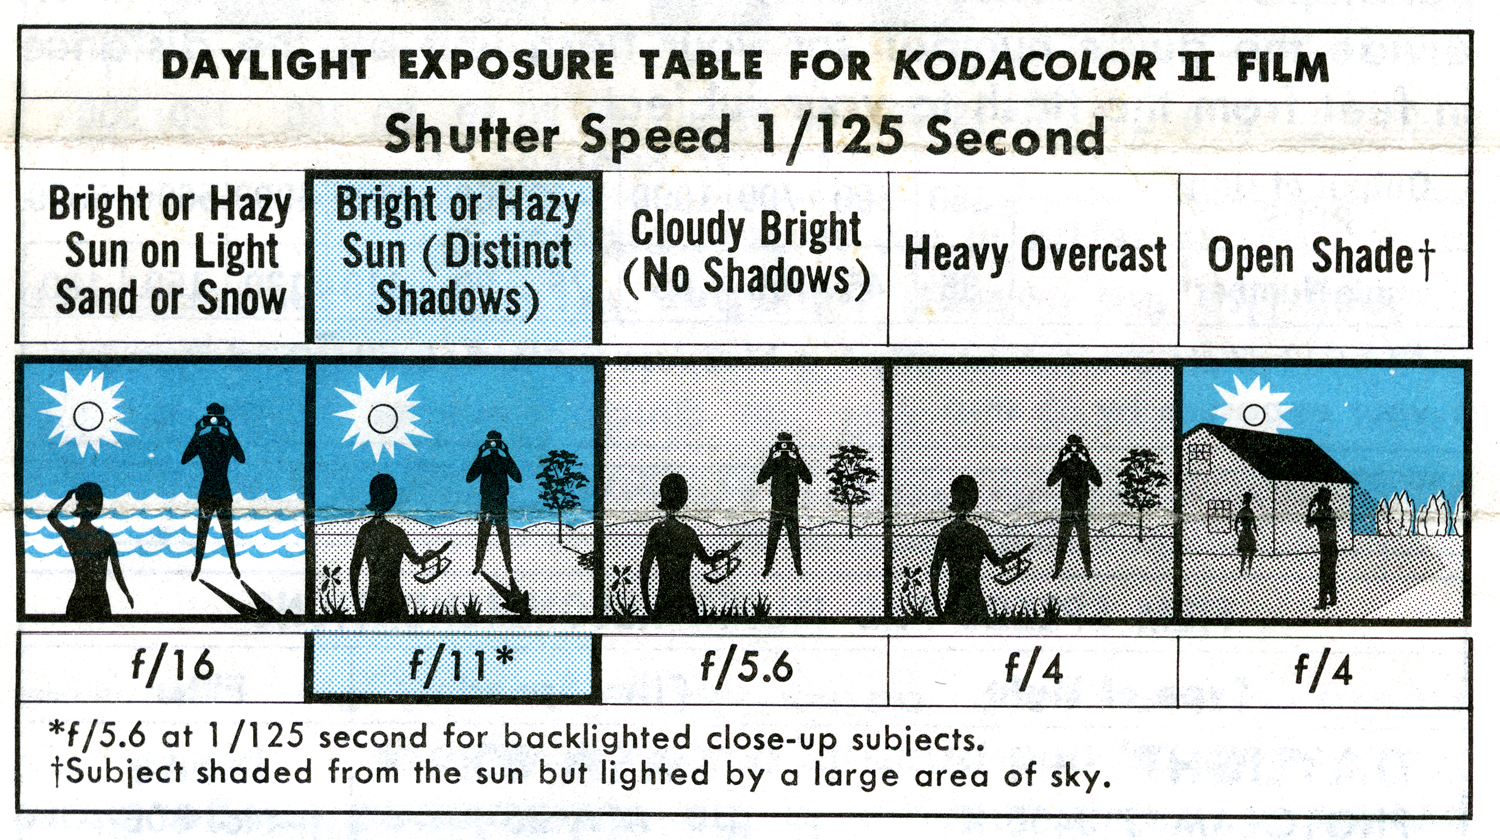
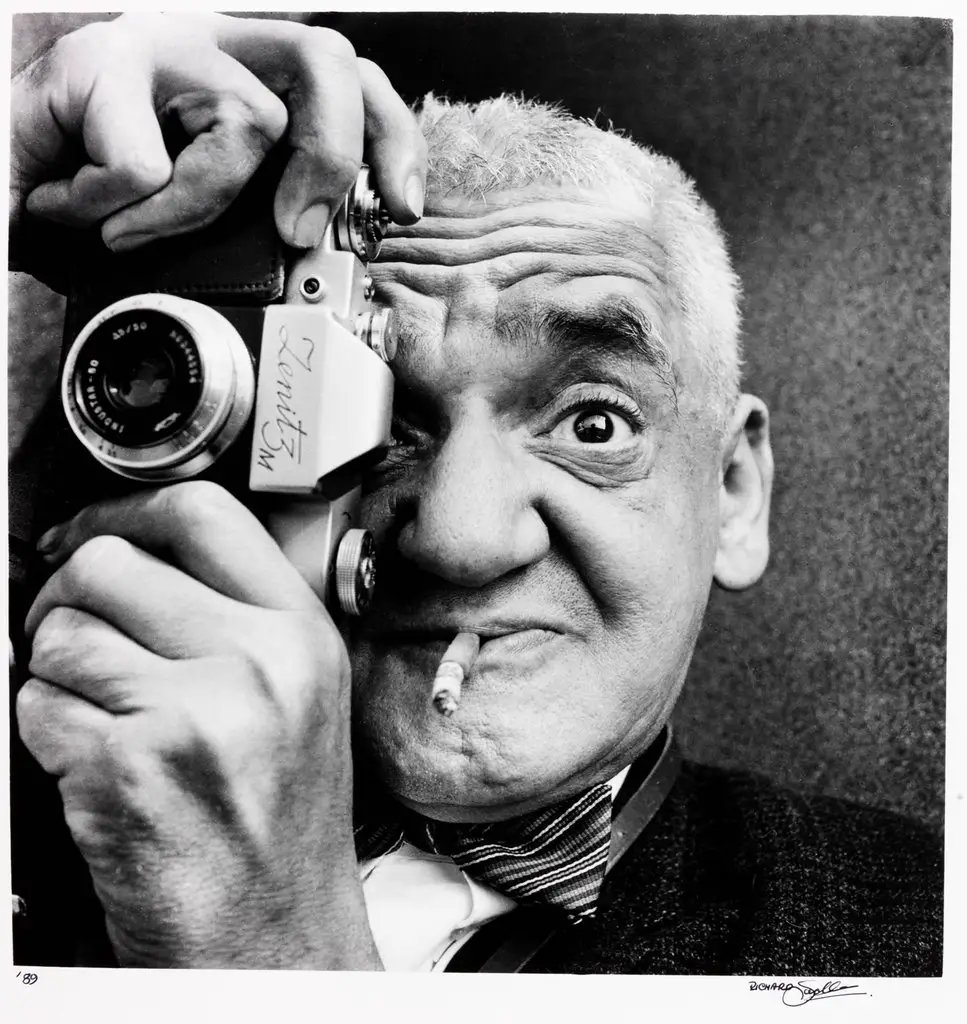
That exposure chart for Kodacolor II brings back memories. I enjoyed the shot of the legendary WeeGee. Not many know who he was but he was a great NY original who did awesome Noir like shots of gritty NYC back in the day. I have a book of his work. He was really good.
Interesting note. I took some pictures on an Agfa Vista 400 today. Strictly applying the “Sunny 16 rule” would mean using f/16 and shutter speed 1/400 (or 1/500 on my Leica M3). Instead, I used f/8 (and shutter speed f/250 when light was not too bright). Hopefully I got the exposure OK.
Well, fingers crossed until the film is sent to the film lab 🙂
Why encourage indiscipline and carelessness among beginners by promoting a bad rule of photography? Why not learn to use a meter as these days there are quite good meter apps on smart phones?
I understand why you asked your question, but I disagree that this is a bad rule or an undisciplined way to learn.
Different people learn in different ways. Not everyone can jump in feet first the first time they use a meterless camera and use an external meter, get an EV value, and translate that to an appropriate shutter and aperture combination every time they make a photograph.
As anyone who has shot film for a long time knows, there is often many ways to accomplish the same thing, and just because one way is different than another, it does not make it wrong.
If the only way to properly measure exposure was to always use a light meter, then you could say Sunny 16 is bad and undisciplined too, yet countless photographers (myself included) have been using it successfully for years.
I state many times in this article that the Outdoor Eight rule is just a starting point for beginners. I encourage people to continue learning newer and better ways to do things, but for the novice who is on the fence about jumping into film photography with a vintage camera, the Outdoor Eight rule might just be that first step that gets them interested in learning more.
ಸೀತಾ,
i totally disagree with you. When i started learning photography as a student, all i could afford was only a basic camera with no other accessories. i m not the only one who loves the hobby but was short of cash. There were many others, students and working adults who took up photography on a tight budget.
We learnt to get around shortages in this and that unlike the spoilt and demanding society of today. We were hungry to learn whatever knowledge there was whether it was gotten from a expensive photography guide book or a tear-out from a film box. We had to forego the luxury of addition technological aid till we could afford one.
From the limitations we had, we disciplined ourselves to observe each step and apply them to each precious exposure. If the pictures turned out bad, we learnt it the hard way and make remedies on the next try should we encounter a similar situation.
Learning to understand light from a proven and tested exposure chart not only promotes deeper understanding of lighting conditions. It also matures one’s approach without shooting thoughtlessly and recklessly with the limited supply of exposures. Serious amateurs would strive to get as many pictures “correct” as possible. It promoted more discipline and carefulness than those who started learning , depending completely the on bells and whistle and automation and whatever aid.
How do you classify it as an ‘indiscipline and careless’ thing? That’s the basic rule anyone started out with when film was the to-go thing back in the day. Even today, you can still use the rules the author has described.
What would be careless is not using it when your smart phones go off without any battery juice left. In fact, this should be the disciple for anyone learning to shoot film with mechanical cameras to start with rather than rely on smart phone apps and light meters. Of course, they do come in handy (light meters not smart phone apps) when spot metering is required for extremely contrasty situations.
You’re basically making the same argument as someone who says we shouldn’t learn basic math because we have calculators… which I think most people would agree is absurd. I think learning how to properly gauge lighting and how to set your aperture and shutter speed to match it is not only helpful for those times when you don’t have your special app available but also just makes you appreciate the craft even more.
Learning how to judge light conditions “encourag[ing] indiscipline and carelessness”?
Ooo-kay…
I call it “developing leet skillz”.
I think that the sixteen rule is a good starting point. In a previous life as a medical photographer in the 1960s I had to to take a wide range of photographs in the operating theatre.
Because there were no automatic cameras then and flash guide numbers were useless under the prevailing conditions I had to make up a set of tables for use with each different focal length of lens and different subject matter, ranging from a complete spine to an ulnar nerve.
These tables could be regarded as ‘rules’ which, if followed, would guarantee a correct exposure. With experience the tables could be dispensed with as each rule was automatically applied through memory.
I believe that this approach exemplifies British Empiricism so that if the rule doesn’t work for you then devise one that does until you become automatically proficient.
Back in the days of film I used a similar rule to this for taking action shots when there was no time to use a light meter. When I bought my first Canon EOS camera I soon abandoned this method; it was no longer necessary. Nowadays, of course, film is almost obsolete and, consequently, so are rules like this. That is a good thing because it leaves one free to concentrate on getting other aspects of the picture right.
I have a blonde woman with a whip follow me around just to make sure I obey all rules and precisely meter all exposures. It is the only way to create true art. On her days off I use “sunny 16”.
Mike, I’m gradually working through your site and came across this. When I started out with the hobby in 1960, films of that era were less forgiving of exposure and so I came up through the “get it right” camp. I invested in a basic meter, a Hanimex Sekonic. Also, as I quickly got into doing my own enlarging, as a youngster I could little afford unnecessary wastage, paper wasn’t cheap, even if I could get away with using Government surplus film. A main reason for getting the exposure more or less spot on was uniformity of the density of the negatives on a roll; this saved much aggro at the printing stage; one series of test strips for the first negative formed the basis for the rest. And overexposing b/w film accentuated grain. Then with experience came an assessment of little tweaks from one neg to the next. Colour neg would have been worse as inevitable and uncontrollable colour shifts would be introduced if the -/+ exposure exceeded certain limits. The “Outdoor 8” rule wouldn’t have been that viable then.
Today, though, with most film users not doing their own d&p, but going straight to scanning, and with today’s modern emulsions, even colour negative stock, using Sunny 8 is far more viable, and in may ways I feel is actually preferable to Sunny 16 for beginners. Why? I’ve seen images posted of colour negative images which have been grossly overexposed but which seem to have survived, well certainly good enough for web use and although not quite so good with underexposure, the results still seem to have been OK. This leads me to believe that the “middle of the road” approach of Outdoor 8 is a very good compromise indeed and leaves the photographer to solely concentrate on taking the picture, the very point you make.
At least one photographer has used this technique, or something similar to it. I can’t remember who, now, it was so long ago when I read his article, that I can’t give him the credit. But his reasoning was interesting. He would set his exposure when he set off in the morning and not change it at all during the day. By doing this he captured his images with each one bearing a direct exposure relationship to the next. So if the sun came out, the images would reflect the contrast and shadows, and if it went in, the images would be flat and having little contrast. Normally, our exposure meters cause us to pull back exposure with very bright light and push it when it’s dull so the relationship is lost by this “artificial” manipulation. Although I haven’t tried this technique, I can appreciate its appeal.
When I first posted this article, several people had negative “knee jerk” reactions to the oversimplification of exposure that I proposed.
But they missed the intent of the post which I am happy to see you saw. This is meant to eliminate the “intimidation” of exposure for beginners. It’s not meant as the definitive guide to exposure for any situation, but rather a starting point and once you master it, you can go from there.
I wrote this article from my own perspective. For as much credit as I think some people give me for this site, I am not a long time film photographer. Sure, I had a couple point and shoot 110 film cameras when I was a kid in the 80s, but I did not pick up my first serious film camera until 5 years ago.
As I’ve written this site, I’ve grown with my understanding of exposure and composition. I can very much say that using film cameras has improved me as a photographer, regardless of the medium, and I thought there would likely be others out there like me who have never taken the plunge into film photography because of the unjustified perception of a steep learning curve.
I say that learning curve isn’t as steep as some people might think and armed with the knowledge of posts like this one, I think more people might try film!
Good post Mike, I’m having a bit of a laugh at all the comments on how this is such a waste of film, how this teaching a bad habit and so many people are getting upset.
Everyone seems to have forgotten that there were countless point and shoot cameras made that had one aperture, and one shutter speed. For the most part they were all around f11 to f16 and 1/30 to 1/60 of a second. The Brownie Hawkeye is a prime example. There were countless others starting with some of the first box cameras, right up to todays disposable point and shoot film cameras.
I think this advise would be a good starting point for a novice that wanted to try a film camera and be able to get acceptable results.
F8 AND BE THERE!
Yeah, some people got a little perturbed that I dare simplify exposure so much. I don’t think that people like that remember what it’s like to be a beginner. This is just a starting point, as you said.
Very great review, and very great camera.
I love the M3, it is a fantastic camera.
I have not own a Bessa but a Rollei 35 RF, which is just gorgeous with a wonderful meter, I have used it with a Rokkor 40 which is also a fantastic lens. Now, I use only the M3, black one DS from 1965, with a Summicron 40 or a Voigt Nokton, or a LTM Canon 50 f1,4, or a Leica Tele_elmarit 90 f2’8, and others lens, I can also used in my Sony A7 RII.
I have loved the Rollei 35 RF which is too expensive because he has the Role name, but it is a Best, so my thought is a Best is great. I prefer the Leica M3, only for the feeling of a wonderful masterpiece.
Like you, with a 40 mm, I use all the viewfinder and it works well. Sometimes I feel the Nokton a lille soft, where the sum micron seems for me more bright, bit it depends of subjects and focus. I mostly shot at F8, to use enough DOF and have great sharpness. The M3 at f8, with a Tmax 100 with one 40 mm is a combo.
Thanks for the compliments Eric. Sounds like you’ve had access to some wonderful cameras over the years!
Hi Mike. Thanks for the excellent post. As an M3/M2 shooter, mostly wandering around the streets, I’ve never liked having to pull out a phone to get metering right and have gravitated to the Outdoor Eight rule that you advise.
Although I sometimes check the light on my skin or clothes with the meter in my phone as I am walking around, I find that metering a scene is very intrusive and misses the moment. A big advantage for the method you describe here — for beginners and experts alike — is that you’re always ready to go.
Despite all the autofocus wizardry and in-built light meters, nothing is as fast as zone focus and Outdoor Eight. Does it always work? No. But then neither do meters or autofocus when the measure ‘did it work?’ is ‘did you capture the moment?’
Using film in old cameras can be really intimidating. It’s hard to trust that it’s all going to be ok. And it’s not *all* going to be ok, nothing ever is, but I’m astonished and relieved every time I develop a roll and I see 90% of the images correctly exposed.
Simplifying your advice further, I would say for anyone interested in trying something different with their photography:
(1) Get a camera, don’t pay much for it but get it from someone who you know wants it to be used
(2) Get some cheap colour film
(3) Load the film, apply the Outdoor Eight rule
(4) Go for a walk, or chill with friends or family, on a nice day
(5) Drop off the film
(6) Be amazed by the 5 great shots you got, and forget about the rest!
Thanks for the comments CB!
It’s good to see feedback from people who get my intent with the article. If you’re a pro, or even an amateur wanting perfection, of course this isn’t the rule for you. If you are a beginner or someone who just wants to go out and be in the moment, then like you said, it’s good enough for probably 90% of outdoor images! I wrote this article over 2 years ago and it’s something I still follow on many of my cameras. Looking at sample images I’ve shot on many of my camera articles were shot using something similar to the Outdoor Eight rule!
I have a Gossen Luna-Pro F and a good clip on meter plus a great exposure meter app on the iPhone. I shoot a lot of landscape on bright days using color negative and B&W film with manual cameras.
I don’t even bother to use a meter on those days. I’ve been using Sunny 16 for years. For other than bright sunny days, I have found that it is better to have too much exposure than too little. You can’t do a lot with thin negatives. I like your Outdoor Eight rule for that reason and will especially use it with some of my oldest cameras.
I still rely on the basic principle of the Outdoor 8 Rule with most of my new camera tests and it works really well!
Or you could do what Kodak did for millions of cameras and adopt F11 at about 1/60th and simply vary the shutter speed up or down a notch on very bright or very dull days respectively. That would be more likely to give you correct exposure than the “Sunny 16 Rule” and it would give you better sharpness and depth of field than your “Outdoor 8 Rule”. You would be relying less on the latitude of the film too.
Mike, I know this is an older article, but I am slowly working my way through your wonderful website.
Years ago, my father taught me something close to your rule, except he used 1/60 instead of 1/125. In fact, the camera he taught me on even had the f/stop and shutter speed for his rule painted in red as a starting point, instead of the black paint of the rest of the numbers. I think it over-exposed a bit, but I always liked that look anyway.
Exactly. I shoot a Rolleiflex with HP5 at 250/f11 which is the same combination as your Outdoor 8 Rule. If I point away from the sun, the shadows are properly exposed and if I have full sun, well, overexposure is not a problem. I say the same thing, every frame will be usable if you shoot this way outside.
The choice to meter or not meter needn’t be an either/or proposition. I use only all-mechanical unmetered cameras. I have an assortment of light meters, including a Pentax 1º spot meter that I use for careful work. But once the camera I am using is out of the bag and on a strap over my shoulder the aperture and shutter speed are set to the equivalent of Outdoor Eight and the focus is set to the hyperlocal distance. When I see an interesting subject I have only to raise the camera to my eye, quickly frame the subject and press the shutter button. I now have a usable negative of the subject. Then, and only then, if the subject seems to justify it I can walk around a bit to investigate alternative shooting locations, carefully meter the scene, carefully focus and take a couple of additional shots. More often than not when I go through the whole elaborate process I find I prefer the first spontaneous shot.
Here in England, I think “sunny 16” is pretty optimistic; I’d always assumed it was devised by some early photographer living in California. Sunny f/11 is beach weather around here, so f/8 is far less of a stretch, and is probably right more often than it is wrong.
You’re not wrong. I am in the Midwest United States and I almost never shoot at f/16. I use f/11 and f/8 the most, and that’s given me satisfactory exposures greater than 95% of the time.
I agree with GC, I’ve always felt that, here in England, f16 was a bit optimistic. Certainly, it’s an aperture for abroad. On my M3 pair, I adopt a simply mantra: Good sun f11, some sun f8, no sun f5.6. This has even been okay for the E6 120 in my Rolleicord Va. When I acquired a Leicaflex a few years ago, I got a Gossen Lunalite. But I often estimate then check. The lens I use is the Schneider P.A. Curtagon 35mm f4 that doesn’t have click stopped apertures. Thus I can introduce a fine adjustment to the aperture ring.