

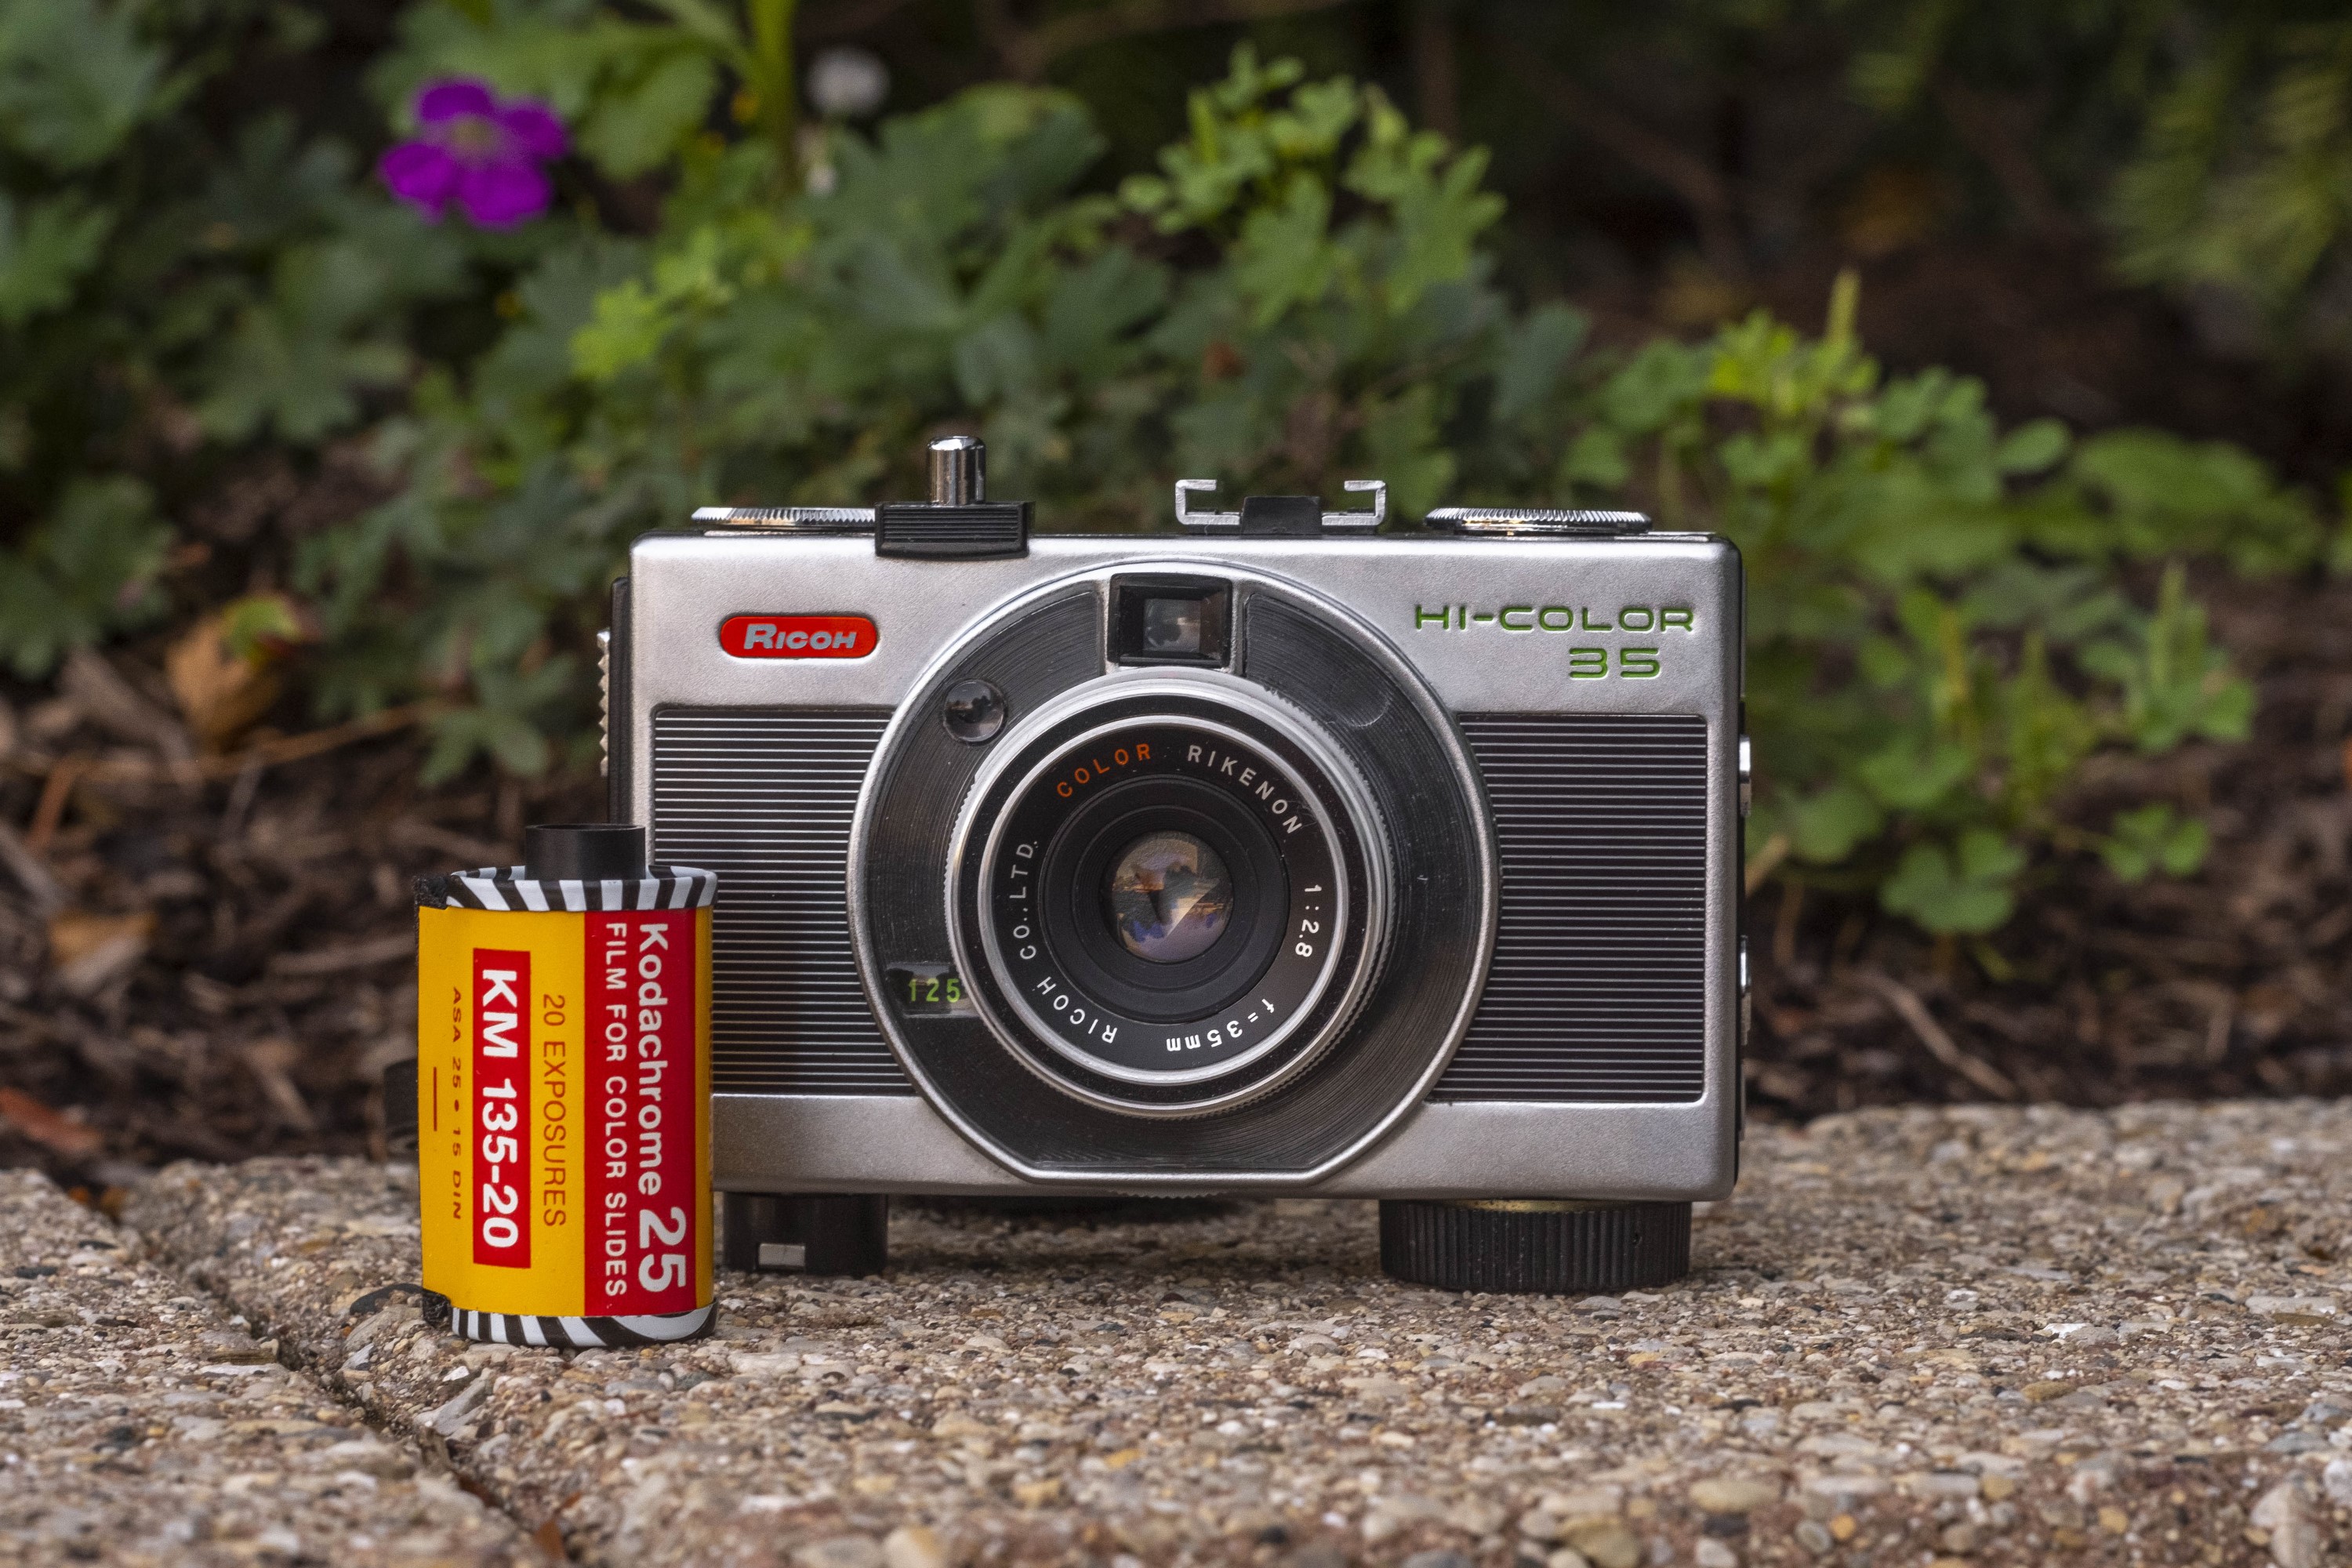
This is a Ricoh Hi-Color 35, a 35mm scale focus camera made by Ricoh Co. LTD of Japan starting in 1968. This model was a mid-level variant in a line up of well featured point and shoot cameras with features like a wind up motorized film transport, shutter priority automatic exposure, a CdS meter, and an accurate Porroprism viewfinder. The Ricoh Hi-Color 35 was a popular choice for photographers looking to downsize into a compact and easy to use camera, but without losing manual control over how the camera operated.
 Film Type: 135 (35mm)
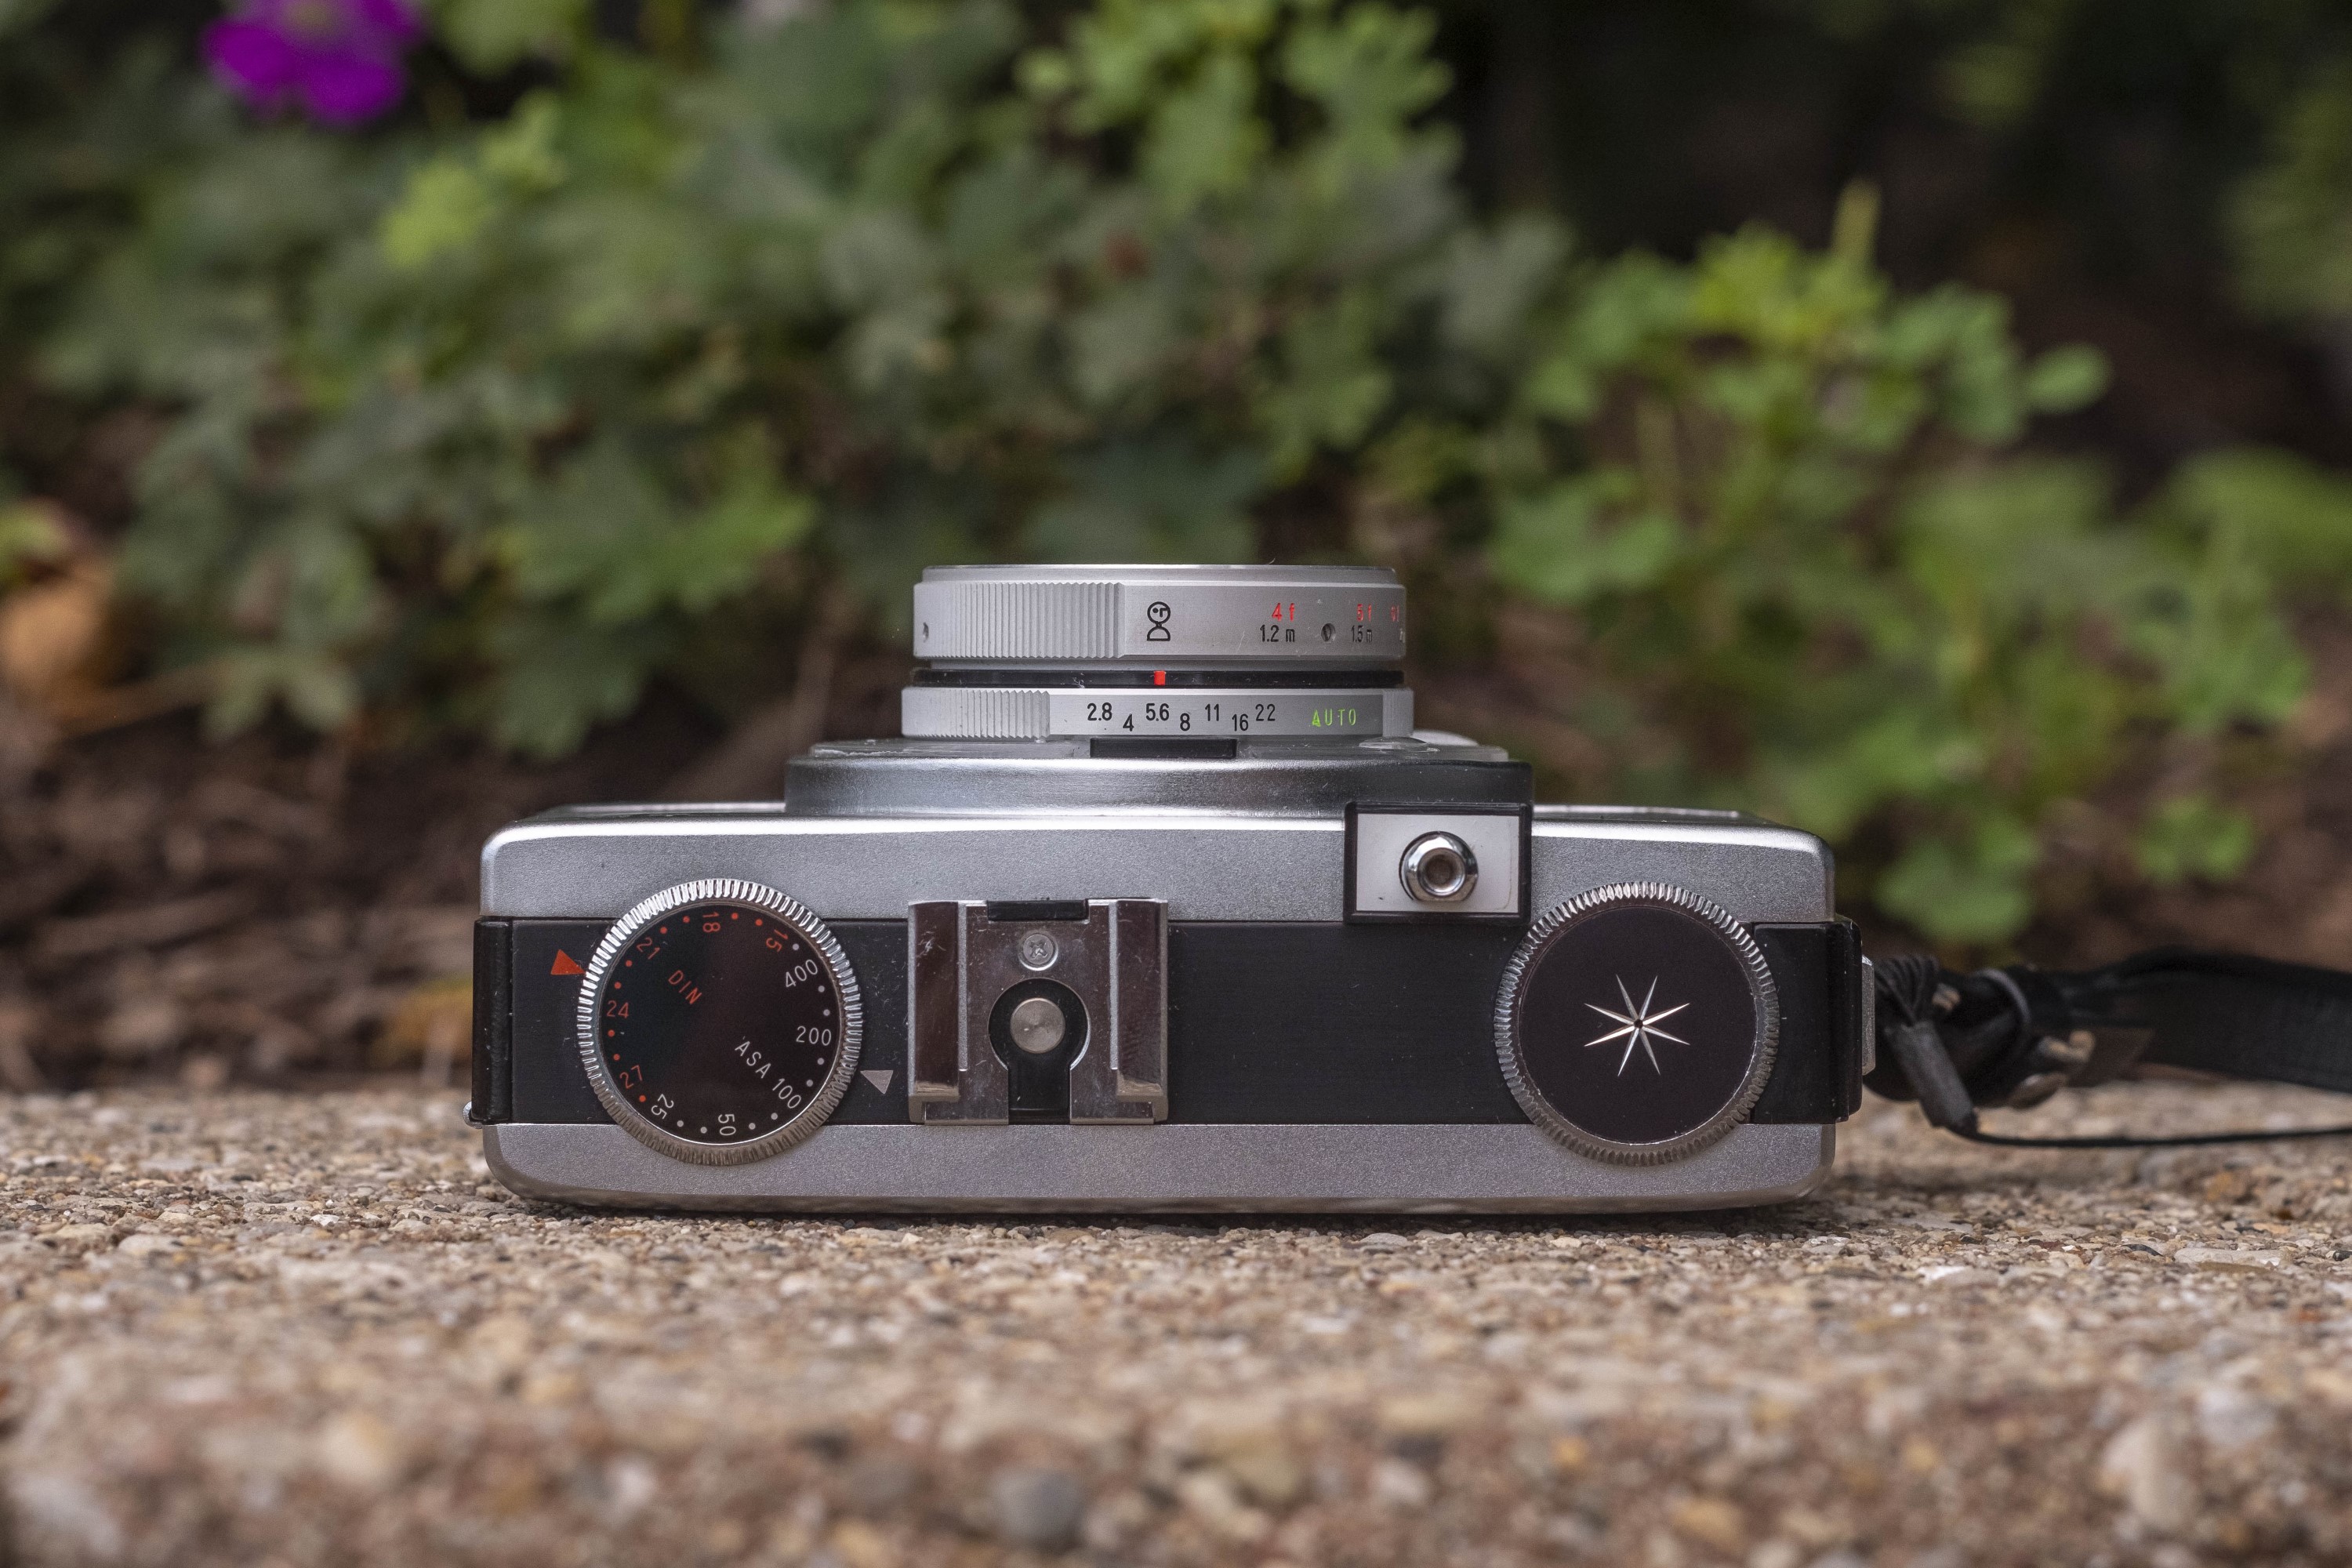
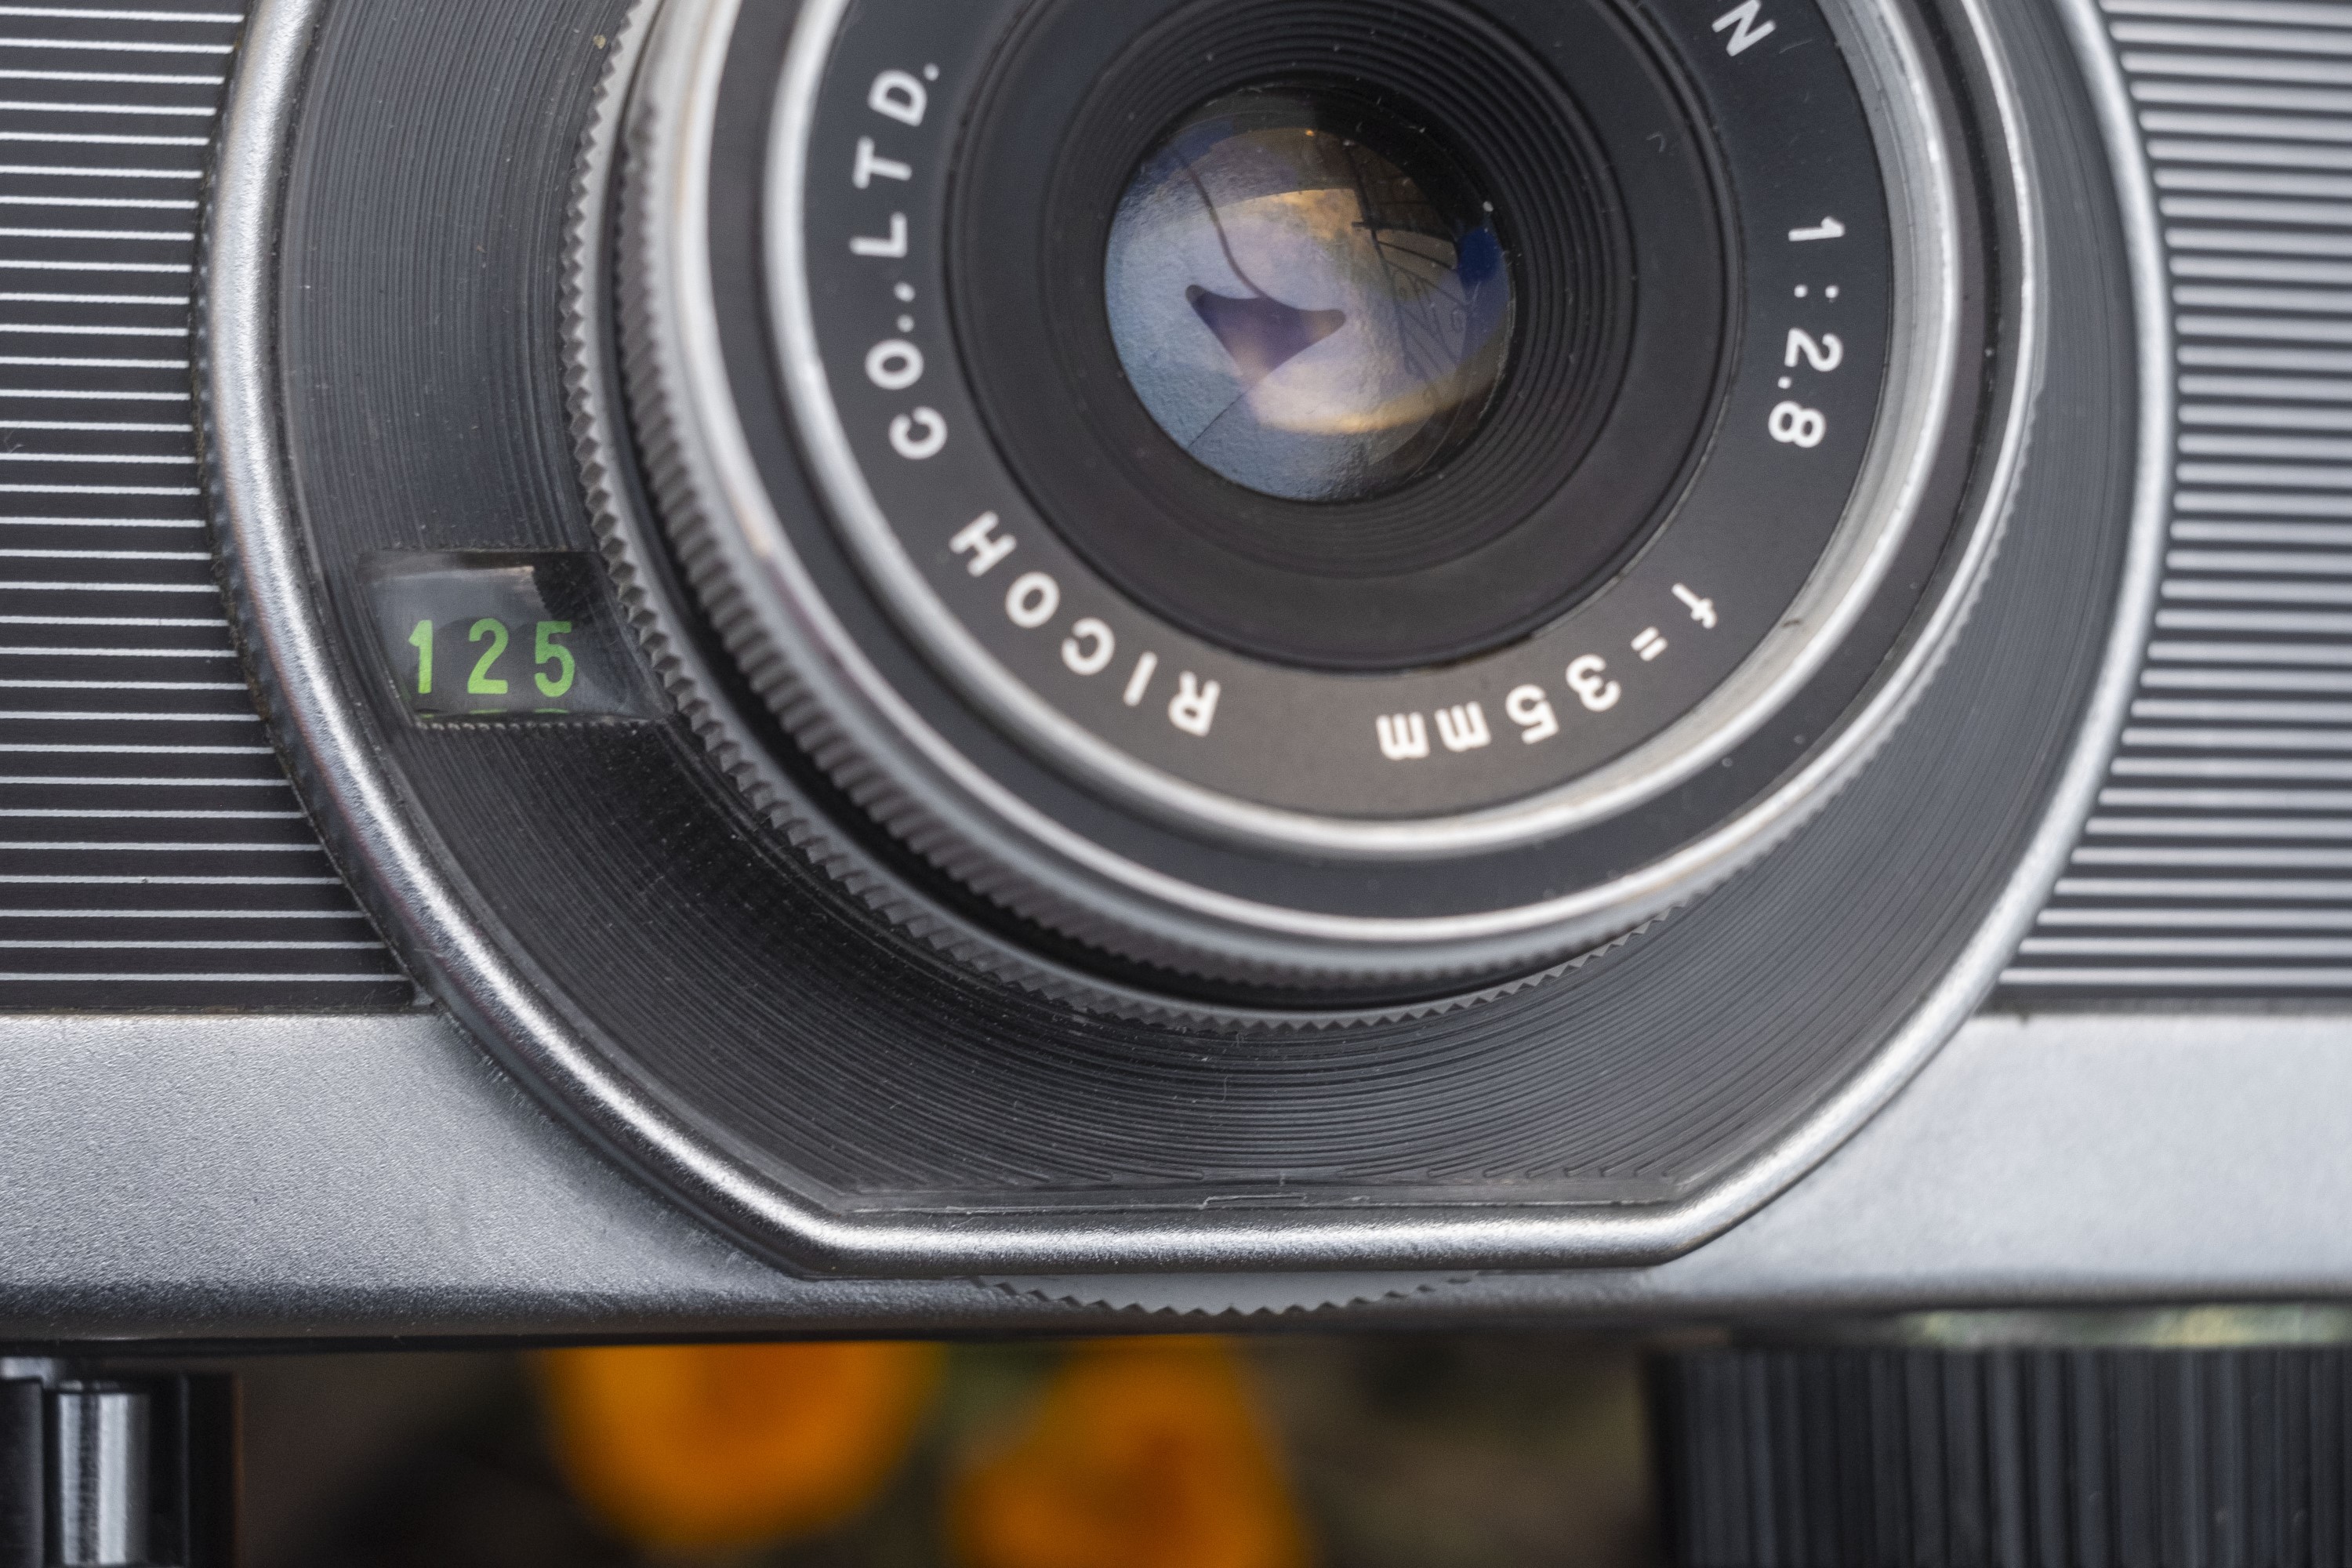
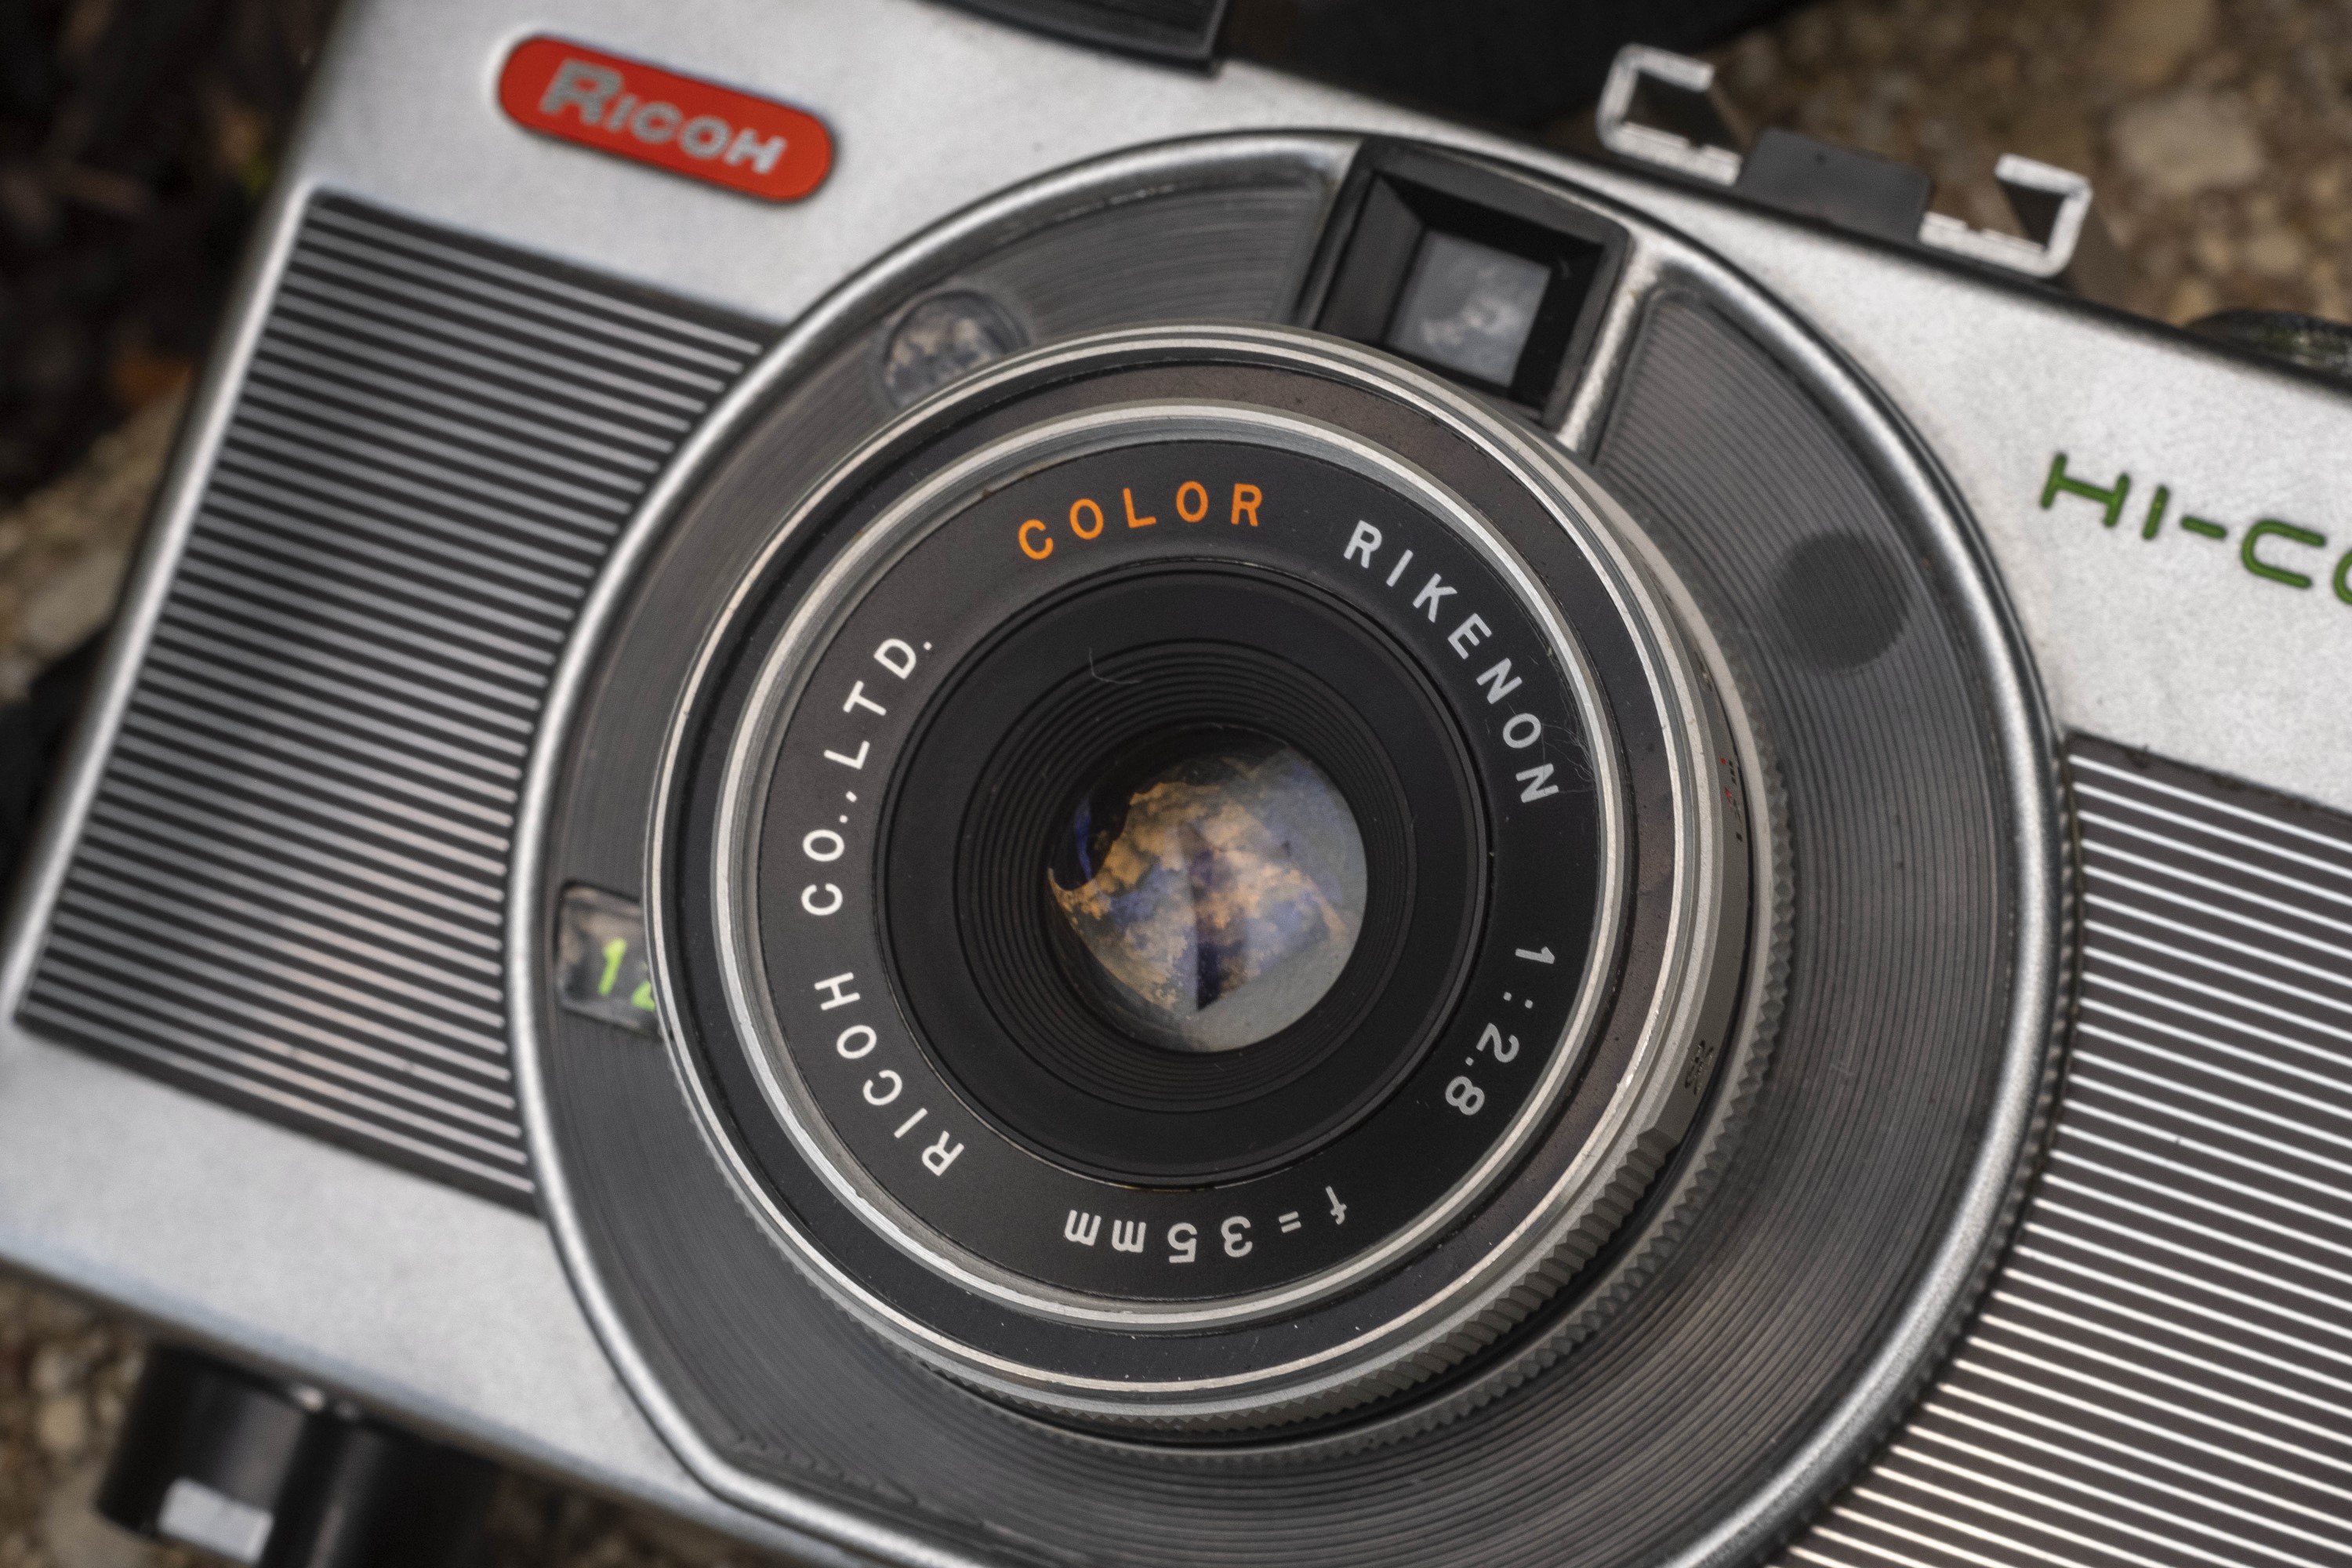
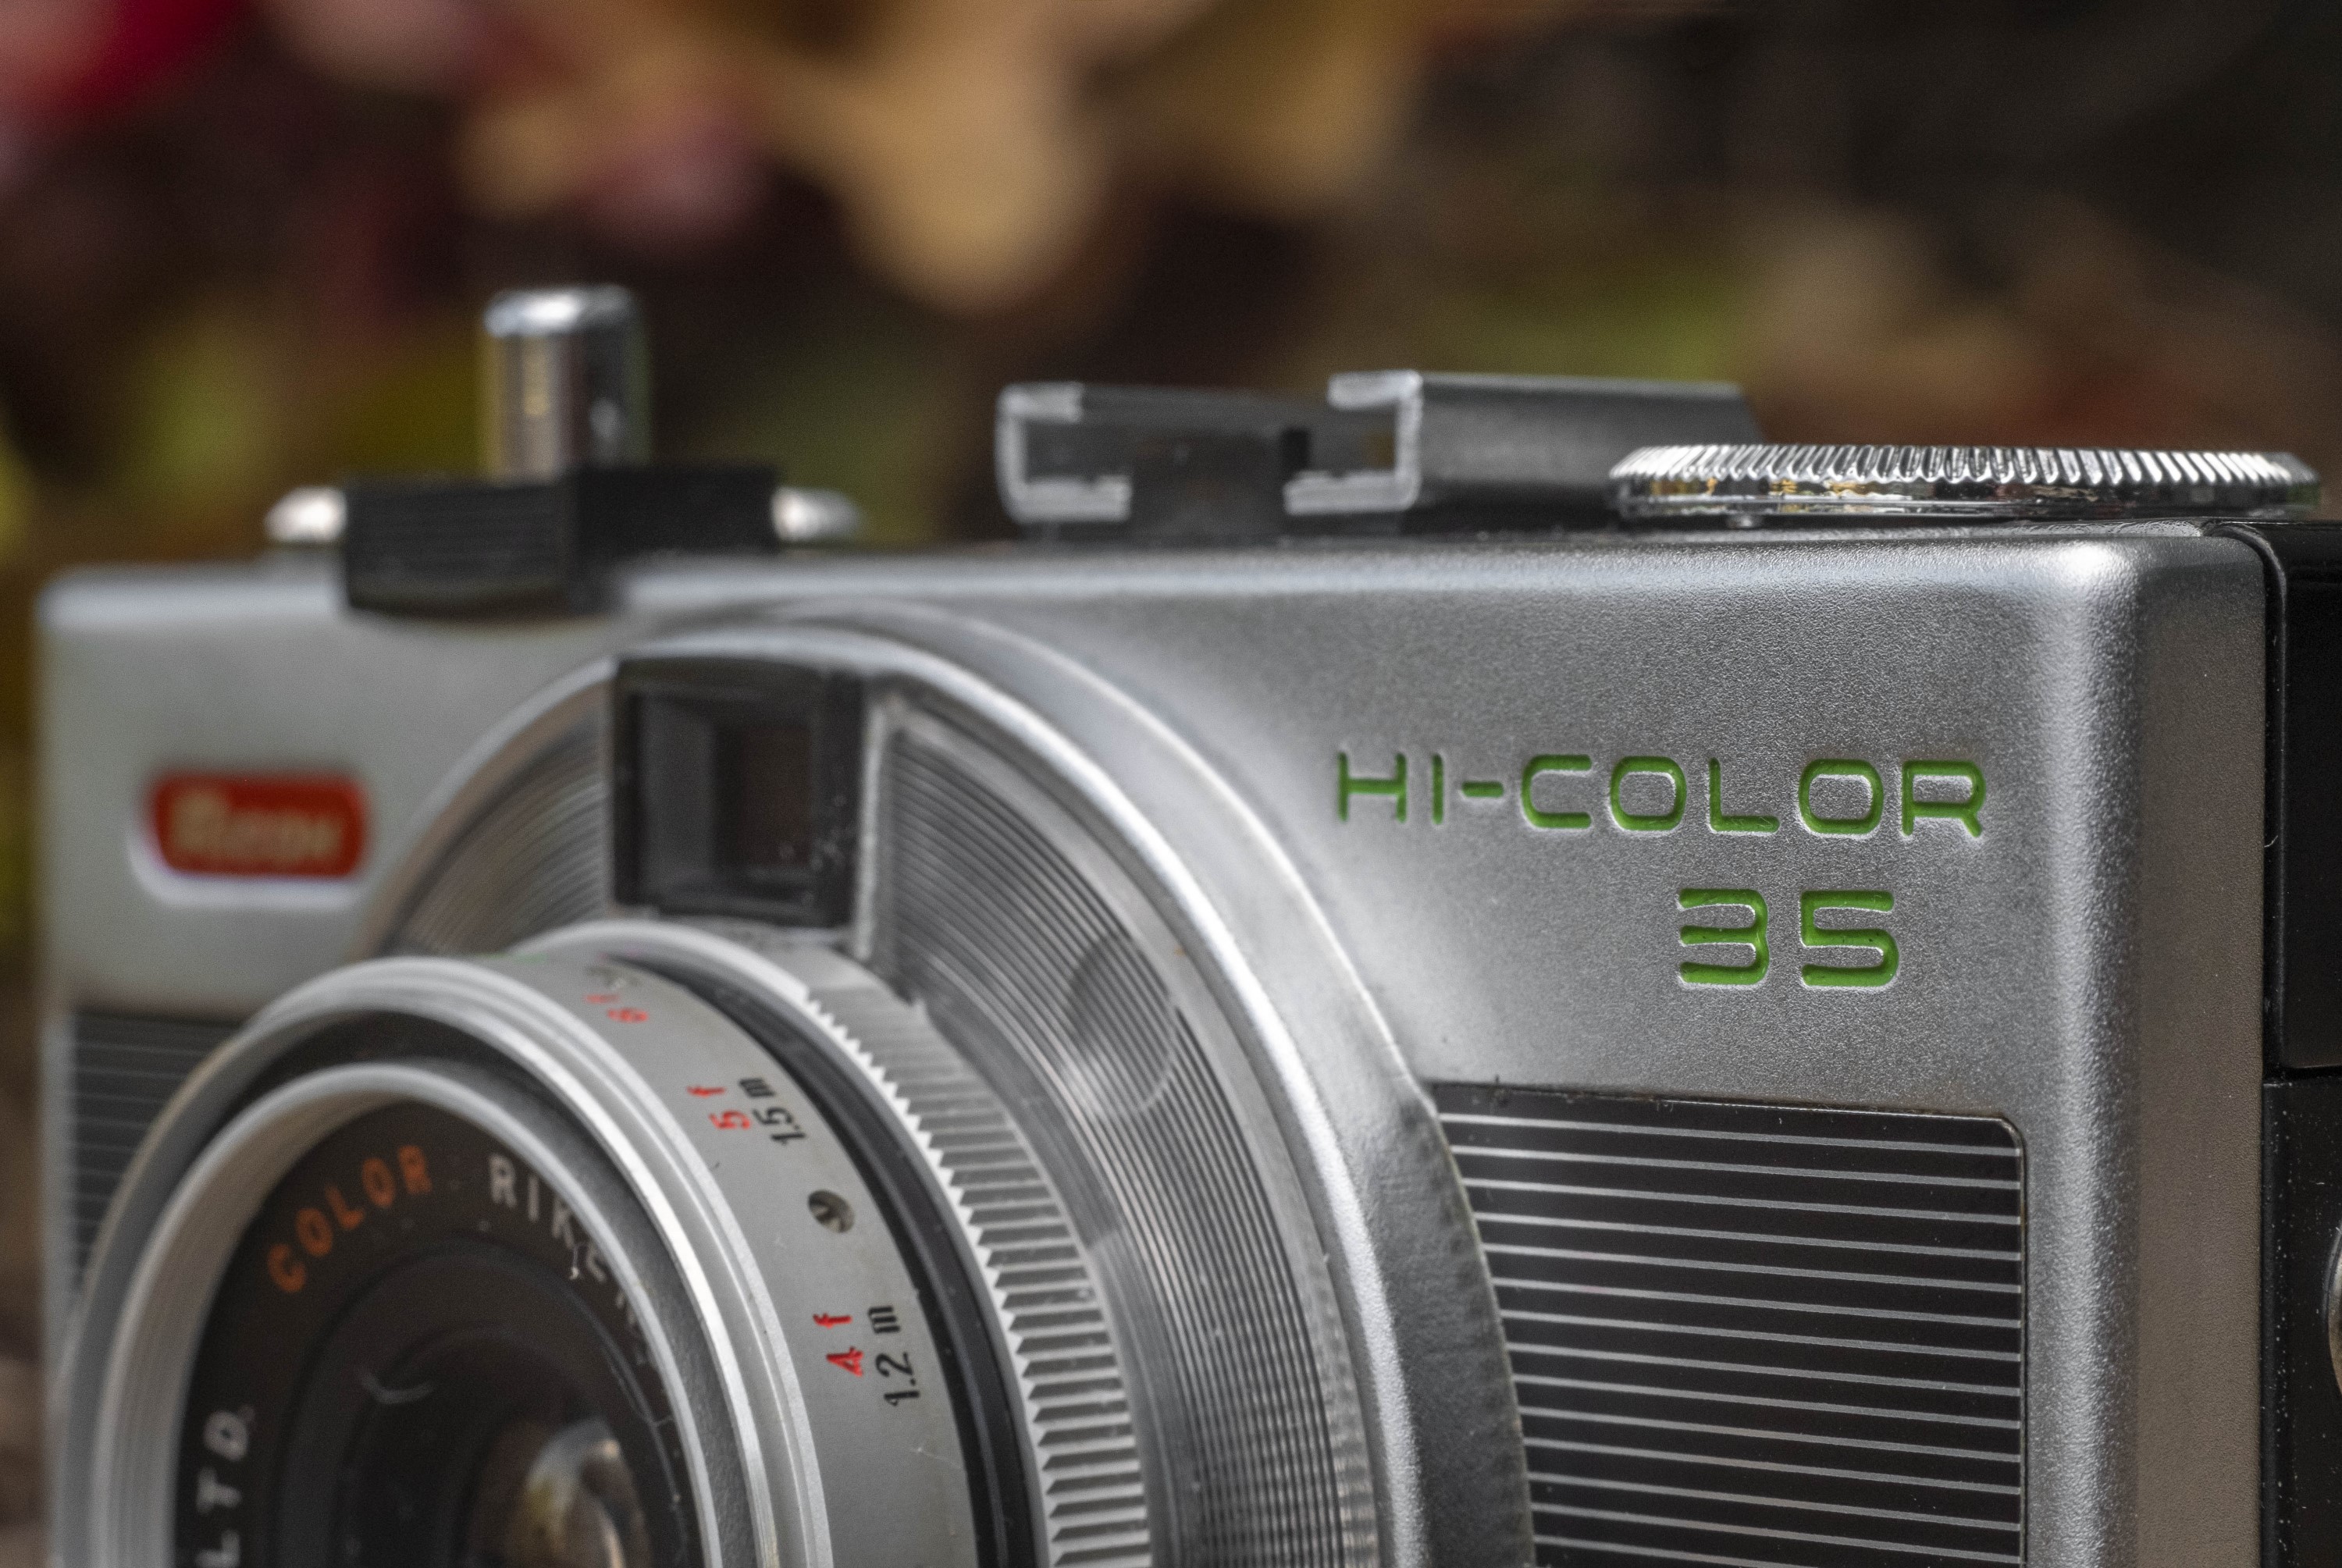
Lens: 35mm f/2.8 Color Rikenon coated 4-elements
Focus: Manual Three Zone Focus System Click Stops for Portrait, Group, and Scenery (3.3 ft, 8.2 ft, and Infinity)
Viewfinder: Double Porro Scale Focus with Underexposure Warning Flag
Shutter: Twin Blade
Speeds: B, 1/30 – 1/300 seconds
Exposure Meter: Coupled CdS w/ Shutter Priority AE
Battery: 1.35v PX675 Mercury (or equivalent) Battery
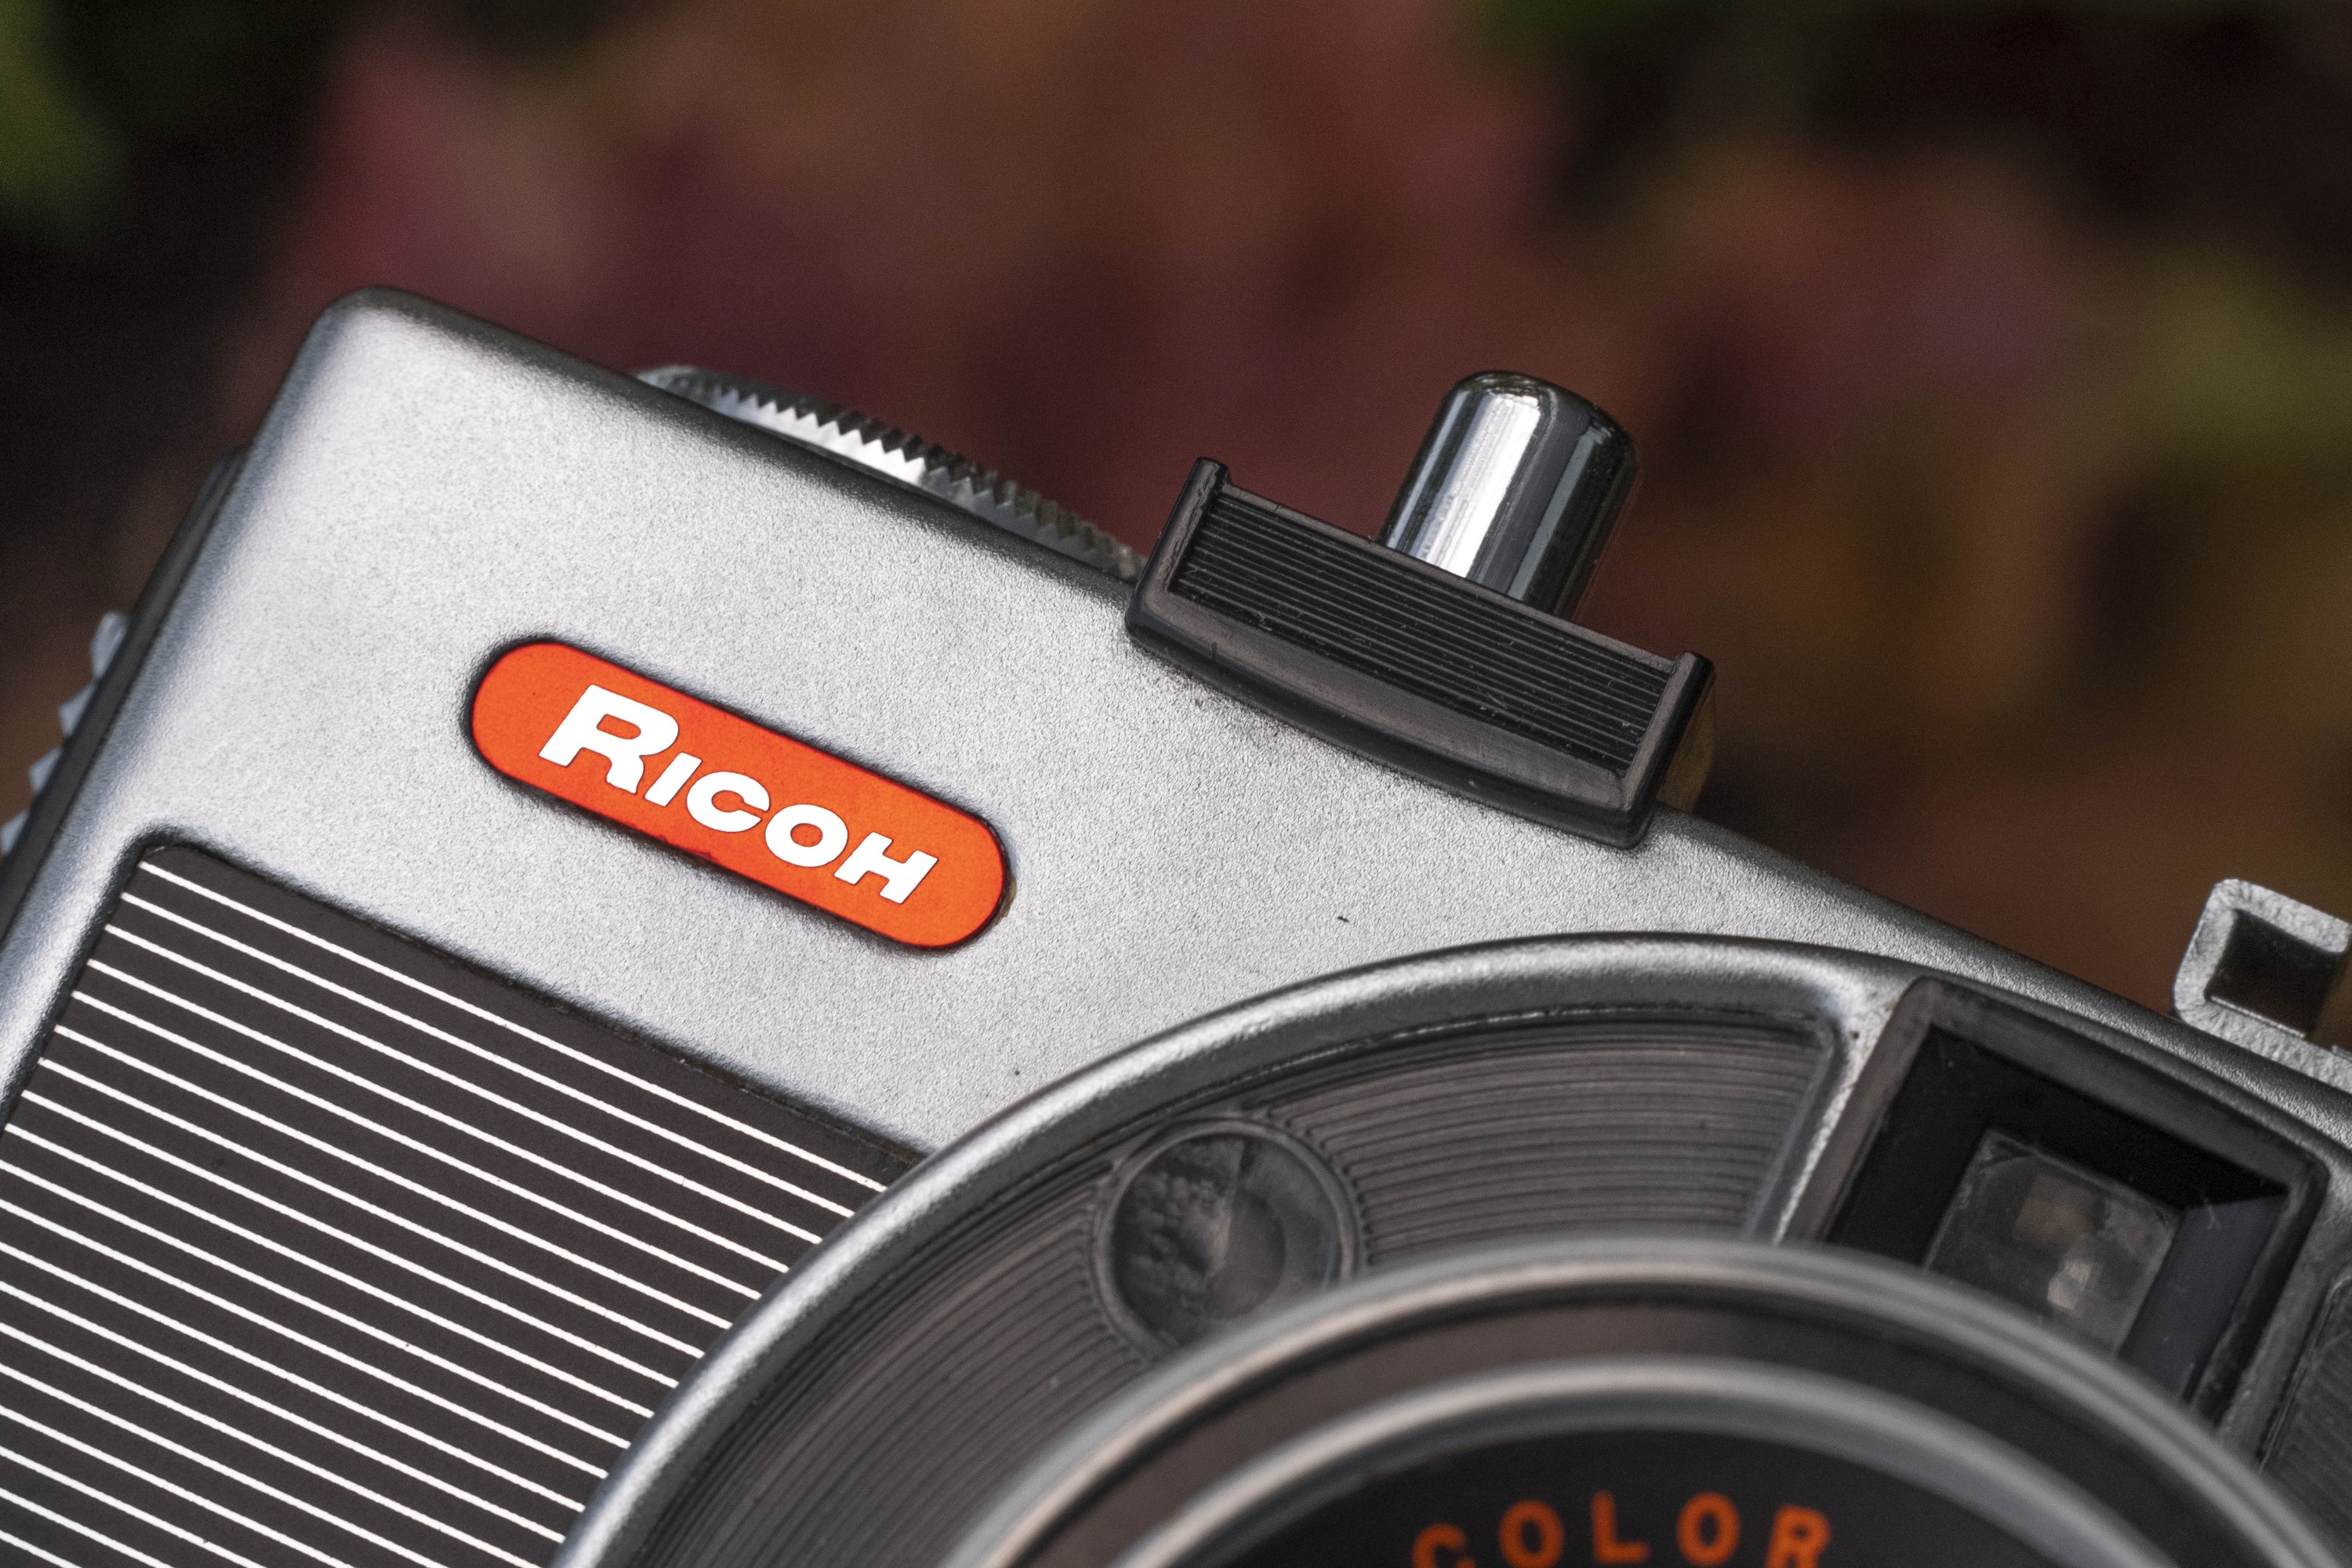
Flash Mount: Hot shoe with 1/30 X-Sync
Weight: 462 grams
Manual: https://www.cameramanuals.org/ricoh_pdf/ricoh_hi-color_35.pdf
How these ratings work |
The Ricoh Hi-Color 35 is an attractive, compact, and very easy to use point and shoot camera that combined with it’s CdS powered automatic exposure and wind up motorized film transport is a perfect camera for candid photos of the family. The wide depth of field afforded by the camera’s 35mm lens means that most shots of 10 or more feet away can be taken without having to focus, giving the camera nearly fully automatic capability, but in a solid, mostly metal vintage design. | ||||||
| Images | Handling | Features | Viewfinder | Feel & Beauty | History | Age | |
| 2 | 2 | 1 | 1 | 2 | 0 | 20% | |
| Bonus | none | ||||||
| Final Score | 9.6 | ||||||
History
Ricoh’s history dates back to 1917 as Rikagaku Kenkyūjo (in English: Physico-Chemical Research Institute) which was a chemical apparatus institute who researched and developed a variety of products, including chemicals used during the manufacture of photographic film. In their earlier years, Rikagaku Kenkyūjo was only a research institute that didn’t actually sell anything in the open market, but in 1926 they changed their name to Rikagaku Kōgyō K.K. and began to market the products developed by the institute.
Rikagaku Kōgyō K.K. products were used in all areas of Japanese manufacturing, but in February 1936, the photographic paper division branched off into it’s own separate company and was known as Riken Kankōshi K.K. The name “Riken” was chosen as an abbreviation to the company’s original name RI-kagaku KEN-kyūjo.
Until the early 1950s, all Riken products used either 120 or 127 roll film making them one of the few Japanese companies to avoid the 35mm market. In 1953 after merging with another Japanese company called Asahi Seimitsu, Riken would release their first ever 35mm camera, a modest model called the Ricolet. The Ricolet was a compact viewfinder camera with a basic 3-element Ricoh Anastigmat lens and a 3-speed shutter.
Throughout the 1950s, Riken would produce a series of quality 35mm rangefinders, culminating with the Five-One-Nine of 1958 and 519M in 1959. These cameras were both fixed lens 35mm rangefinders with fast 6-element f/1.9 lenses and excellent build quality.
There was nothing wrong with Riken’s 35mm cameras, or their medium format twin lens Diacord models, but with a constantly growing Japanese optical industry. Riken struggled to stand out among the many other companies making similar products.
In 1963, perhaps as a way to reinvent themselves, Riken would change it’s name to Ricoh Co., Ltd. Ricoh’s camera offerings became increasingly simpler and down market. Ricoh SLRs used the M42 screw mount until 1977 at which time they switched to the Pentax K-mount. Ricoh would no longer produce high end rangefinder cameras, instead relying on less expense, point and shoot style cameras. The company would still innovate when they could, sometimes offering higher end features in an economically priced camera, but for the most part, Ricoh cameras from the 1960s were of the good, but low end variety.
One of those cameras was the camera being reviewed here, the Ricoh Hi-Color 35. An evolution of the earlier Ricoh Auto Shot, the Hi-Color 35 offered auto exposure through the use of an exposure meter, but unlike the simpler models, also offered full manual control which was becoming an increasingly less common thing to see on consumer oriented cameras.
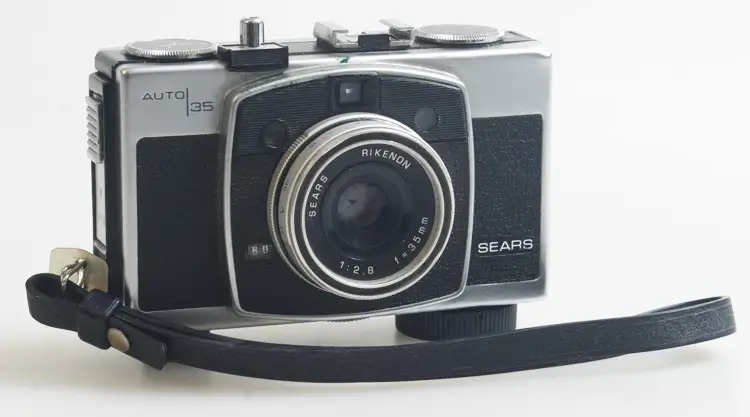
The camera was revised multiple times, the earliest examples having a rectangular shutter release slider on the front plate, and the laters having a more traditional top plate shutter release button. A flash hot shoe was added midway through production, and eventually a model called the Hi-Color 35 S was released that added a self-timer. There was also a rebadged version sold by Sears, Roebuck, & Co called the Sears Auto 35 which also came in chrome and black.
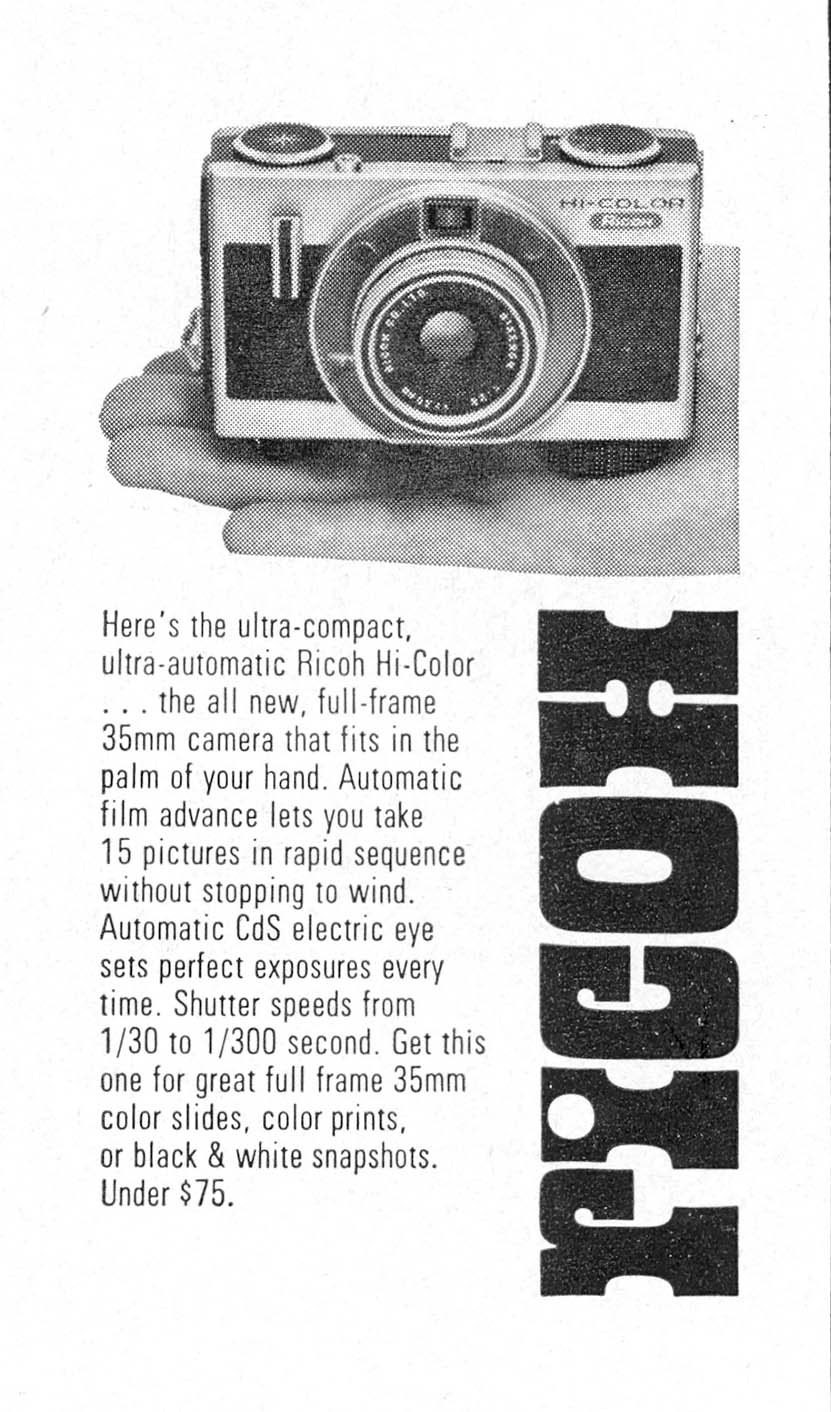
I could not find any advertisements for the later variant of the camera reviewed here, but the earlier one sold in 1968 for “under $75” which usually means $74.99 that when adjusted for inflation compares to about $550 today.
Most examples have a chrome plated body, but some black painted models exist, but strangely feature a more trapezoidal body. Why Ricoh would make two different bodies for the chrome and black cameras is anyone’s guess.
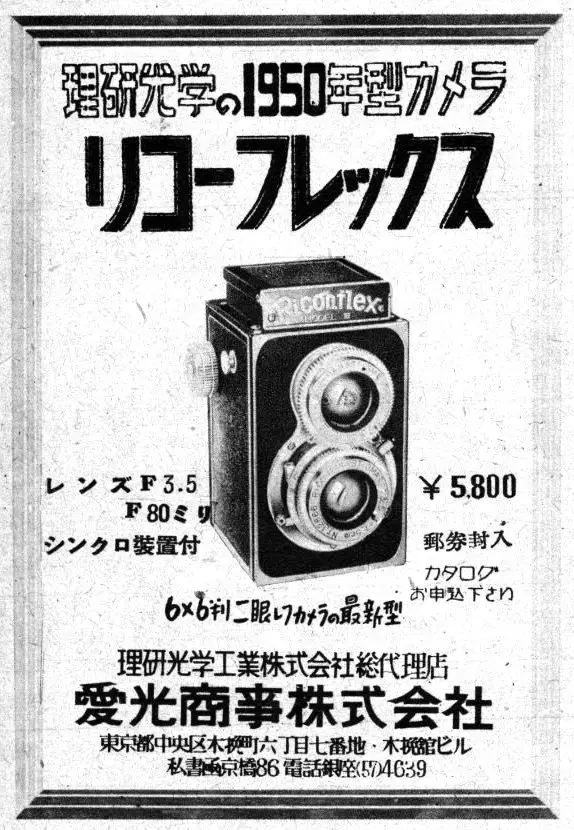
Also, the camera came with a variety of body coverings. The most common is a leather-like vinyl covering like mine has, but there seemed to be three others. These likely were limited to those sold in Japan only as I’ve seen no evidence that they were exported to other territories.
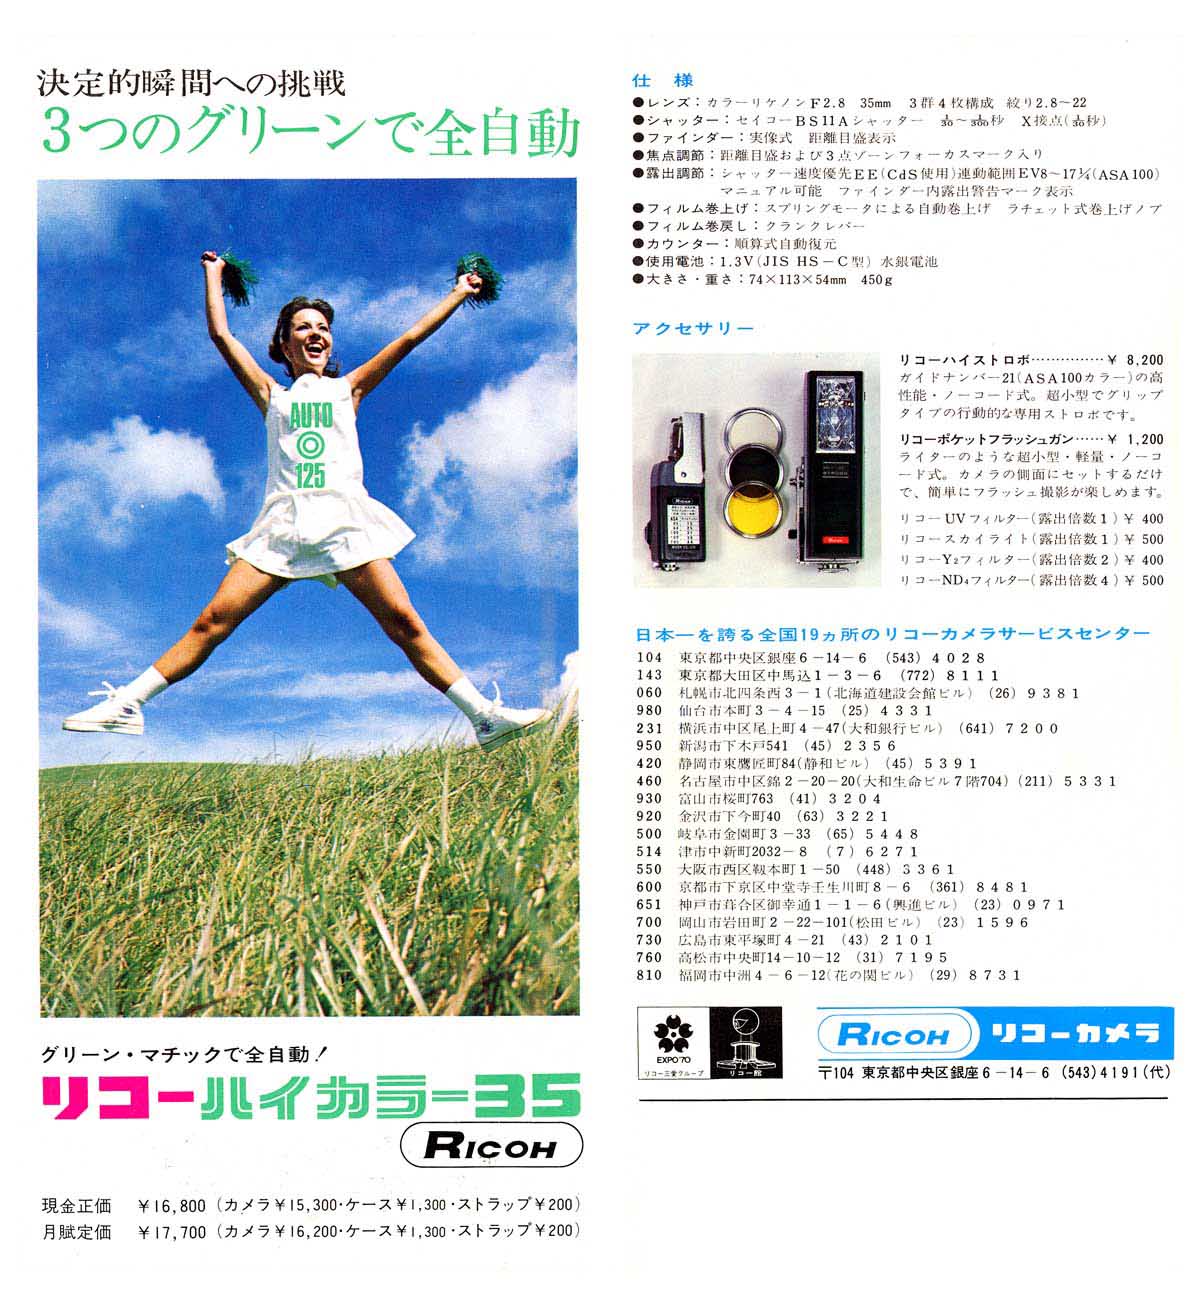
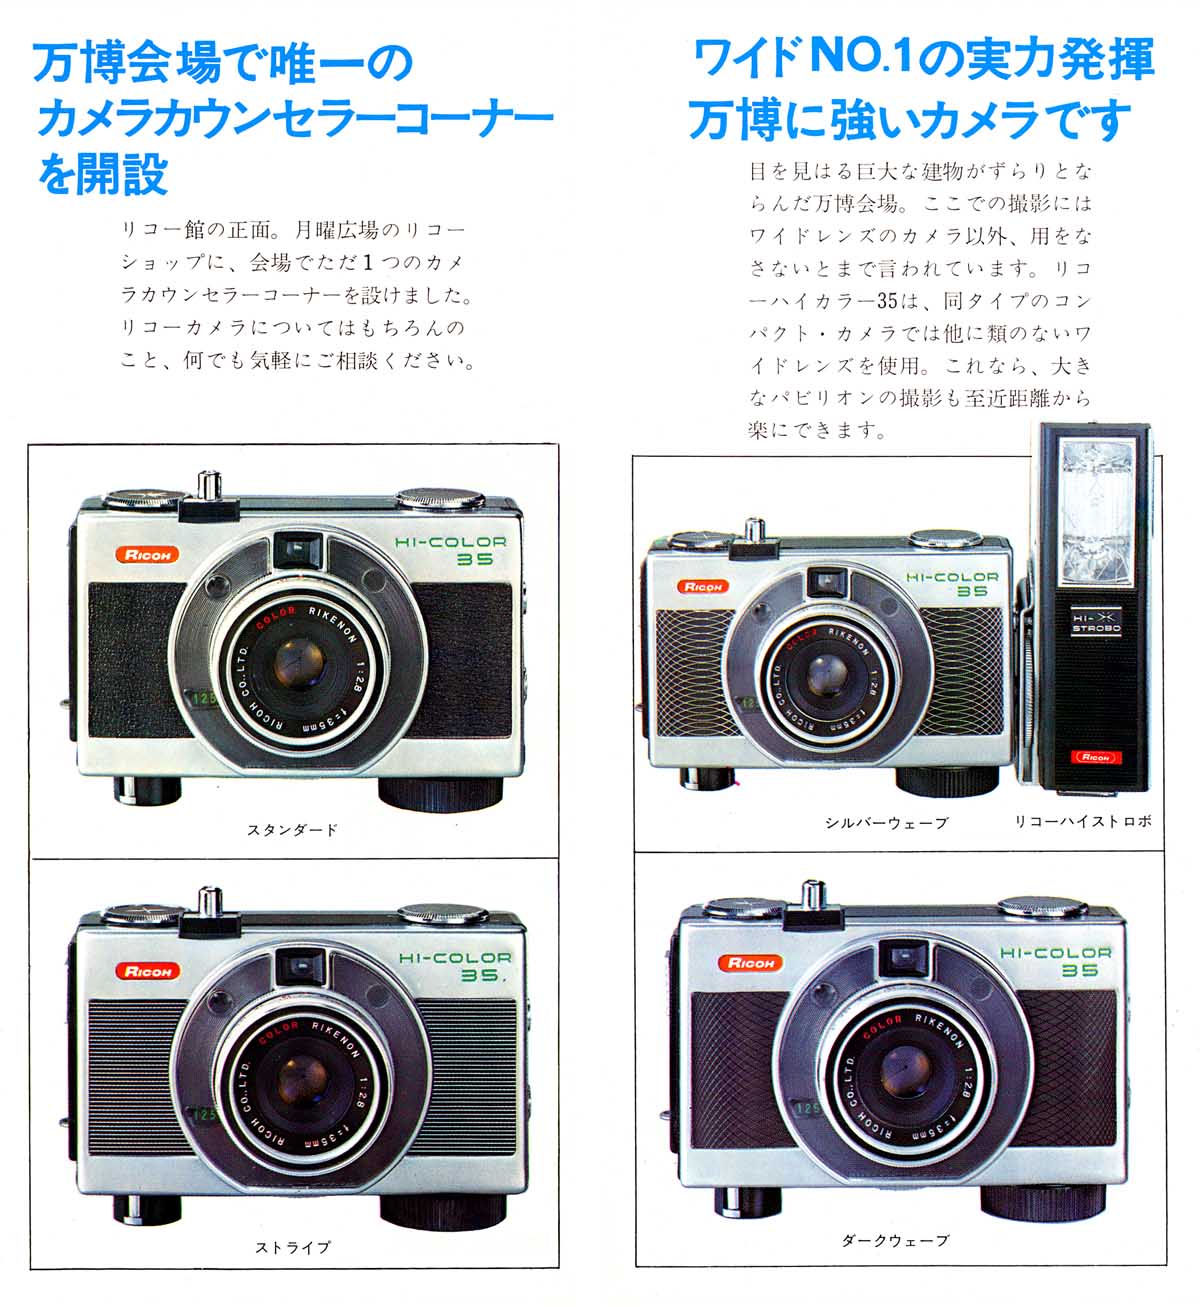
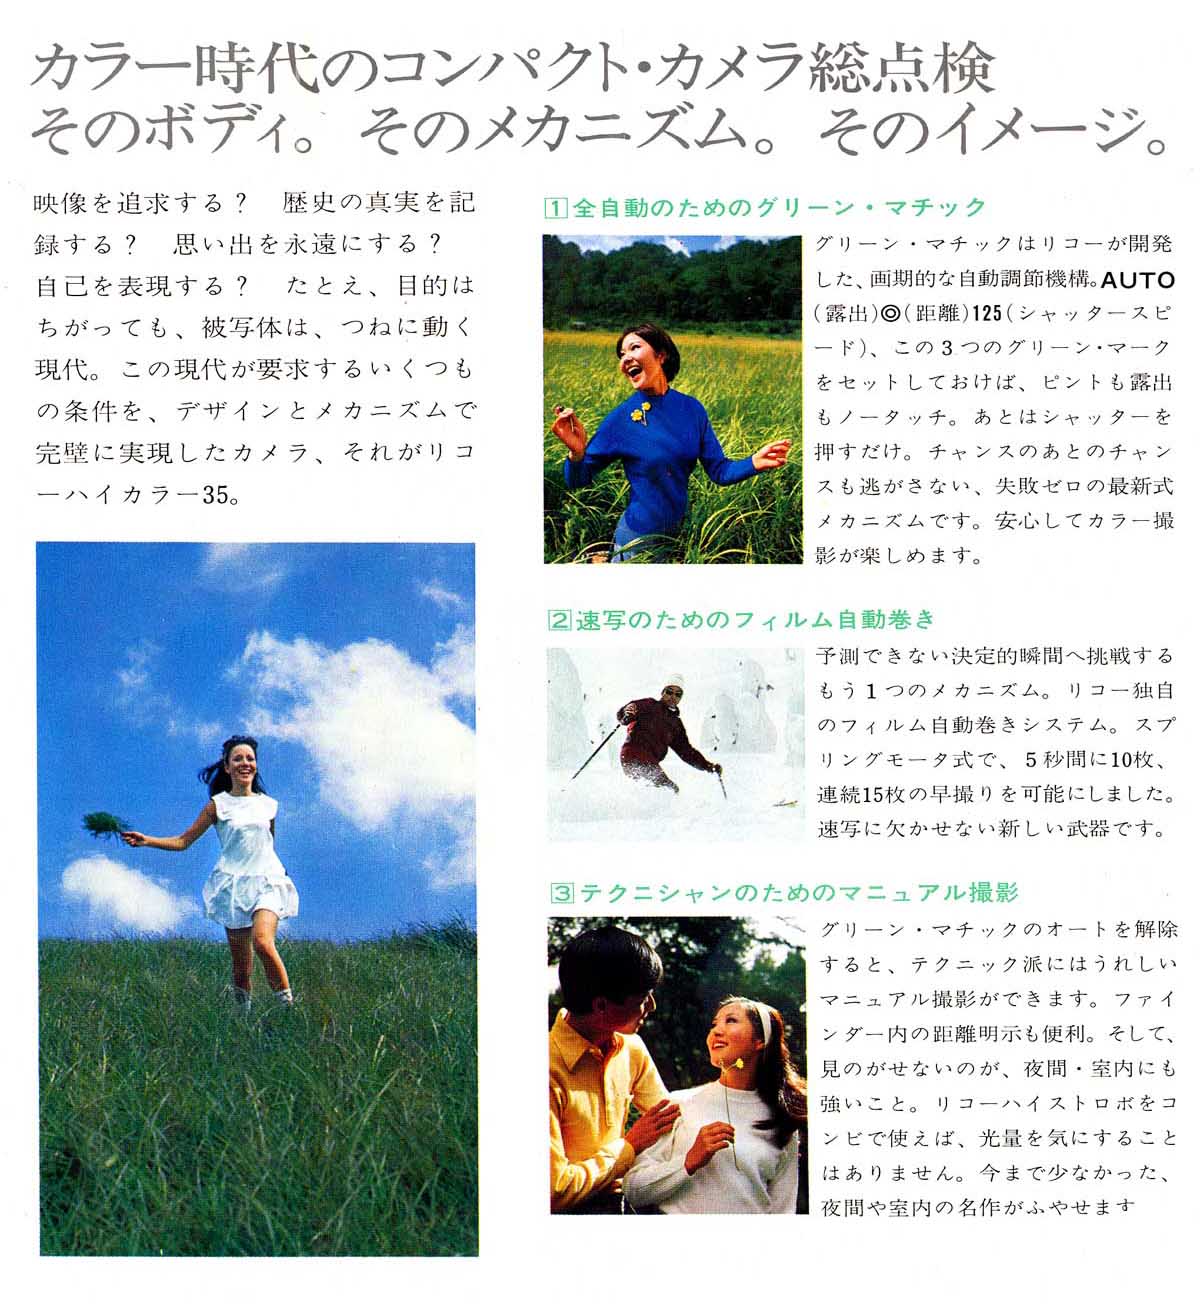
Check out the four page catalog below to see how the Ricoh Hi-Color 35 was marketed in Japan, along with examples of the four different body coverings it came with.
In the decades to come, Ricoh would continue to thrive as a maker of low to medium end point and shoot and SLR cameras. The company also did well in the photocopier and printer business, being an OEM manufacturer for companies like Toshiba and AT&T. In 2004, Ricoh would purchase Hitachi Printing Solutions and in 2008 buying IBM’s printing divisions, making them one of the world’s largest manufacturers of photocopier and print machines.
 In 2011, Ricoh would purchase the entirety of Pentax for 10 billion yen, making a new subsidiary called Pentax Ricoh Imaging Company, Ltd which the company still owns today. Ricoh’s role in the modern photographic industry is a small, but a prevalent one as Pentax digital cameras are still being made.
Today, cameras like the Ricoh Hi-Color 35 are hardly collectible, but represent a small niche of simple yet capable Japanese point and shoot cameras from the 1960s. For people who still appreciate a compact film camera that produces great results, the Hi-Color 35 is an excellent option for it’s quality lens, motor drive, and full manual control that works with or without a meter.
Repairs
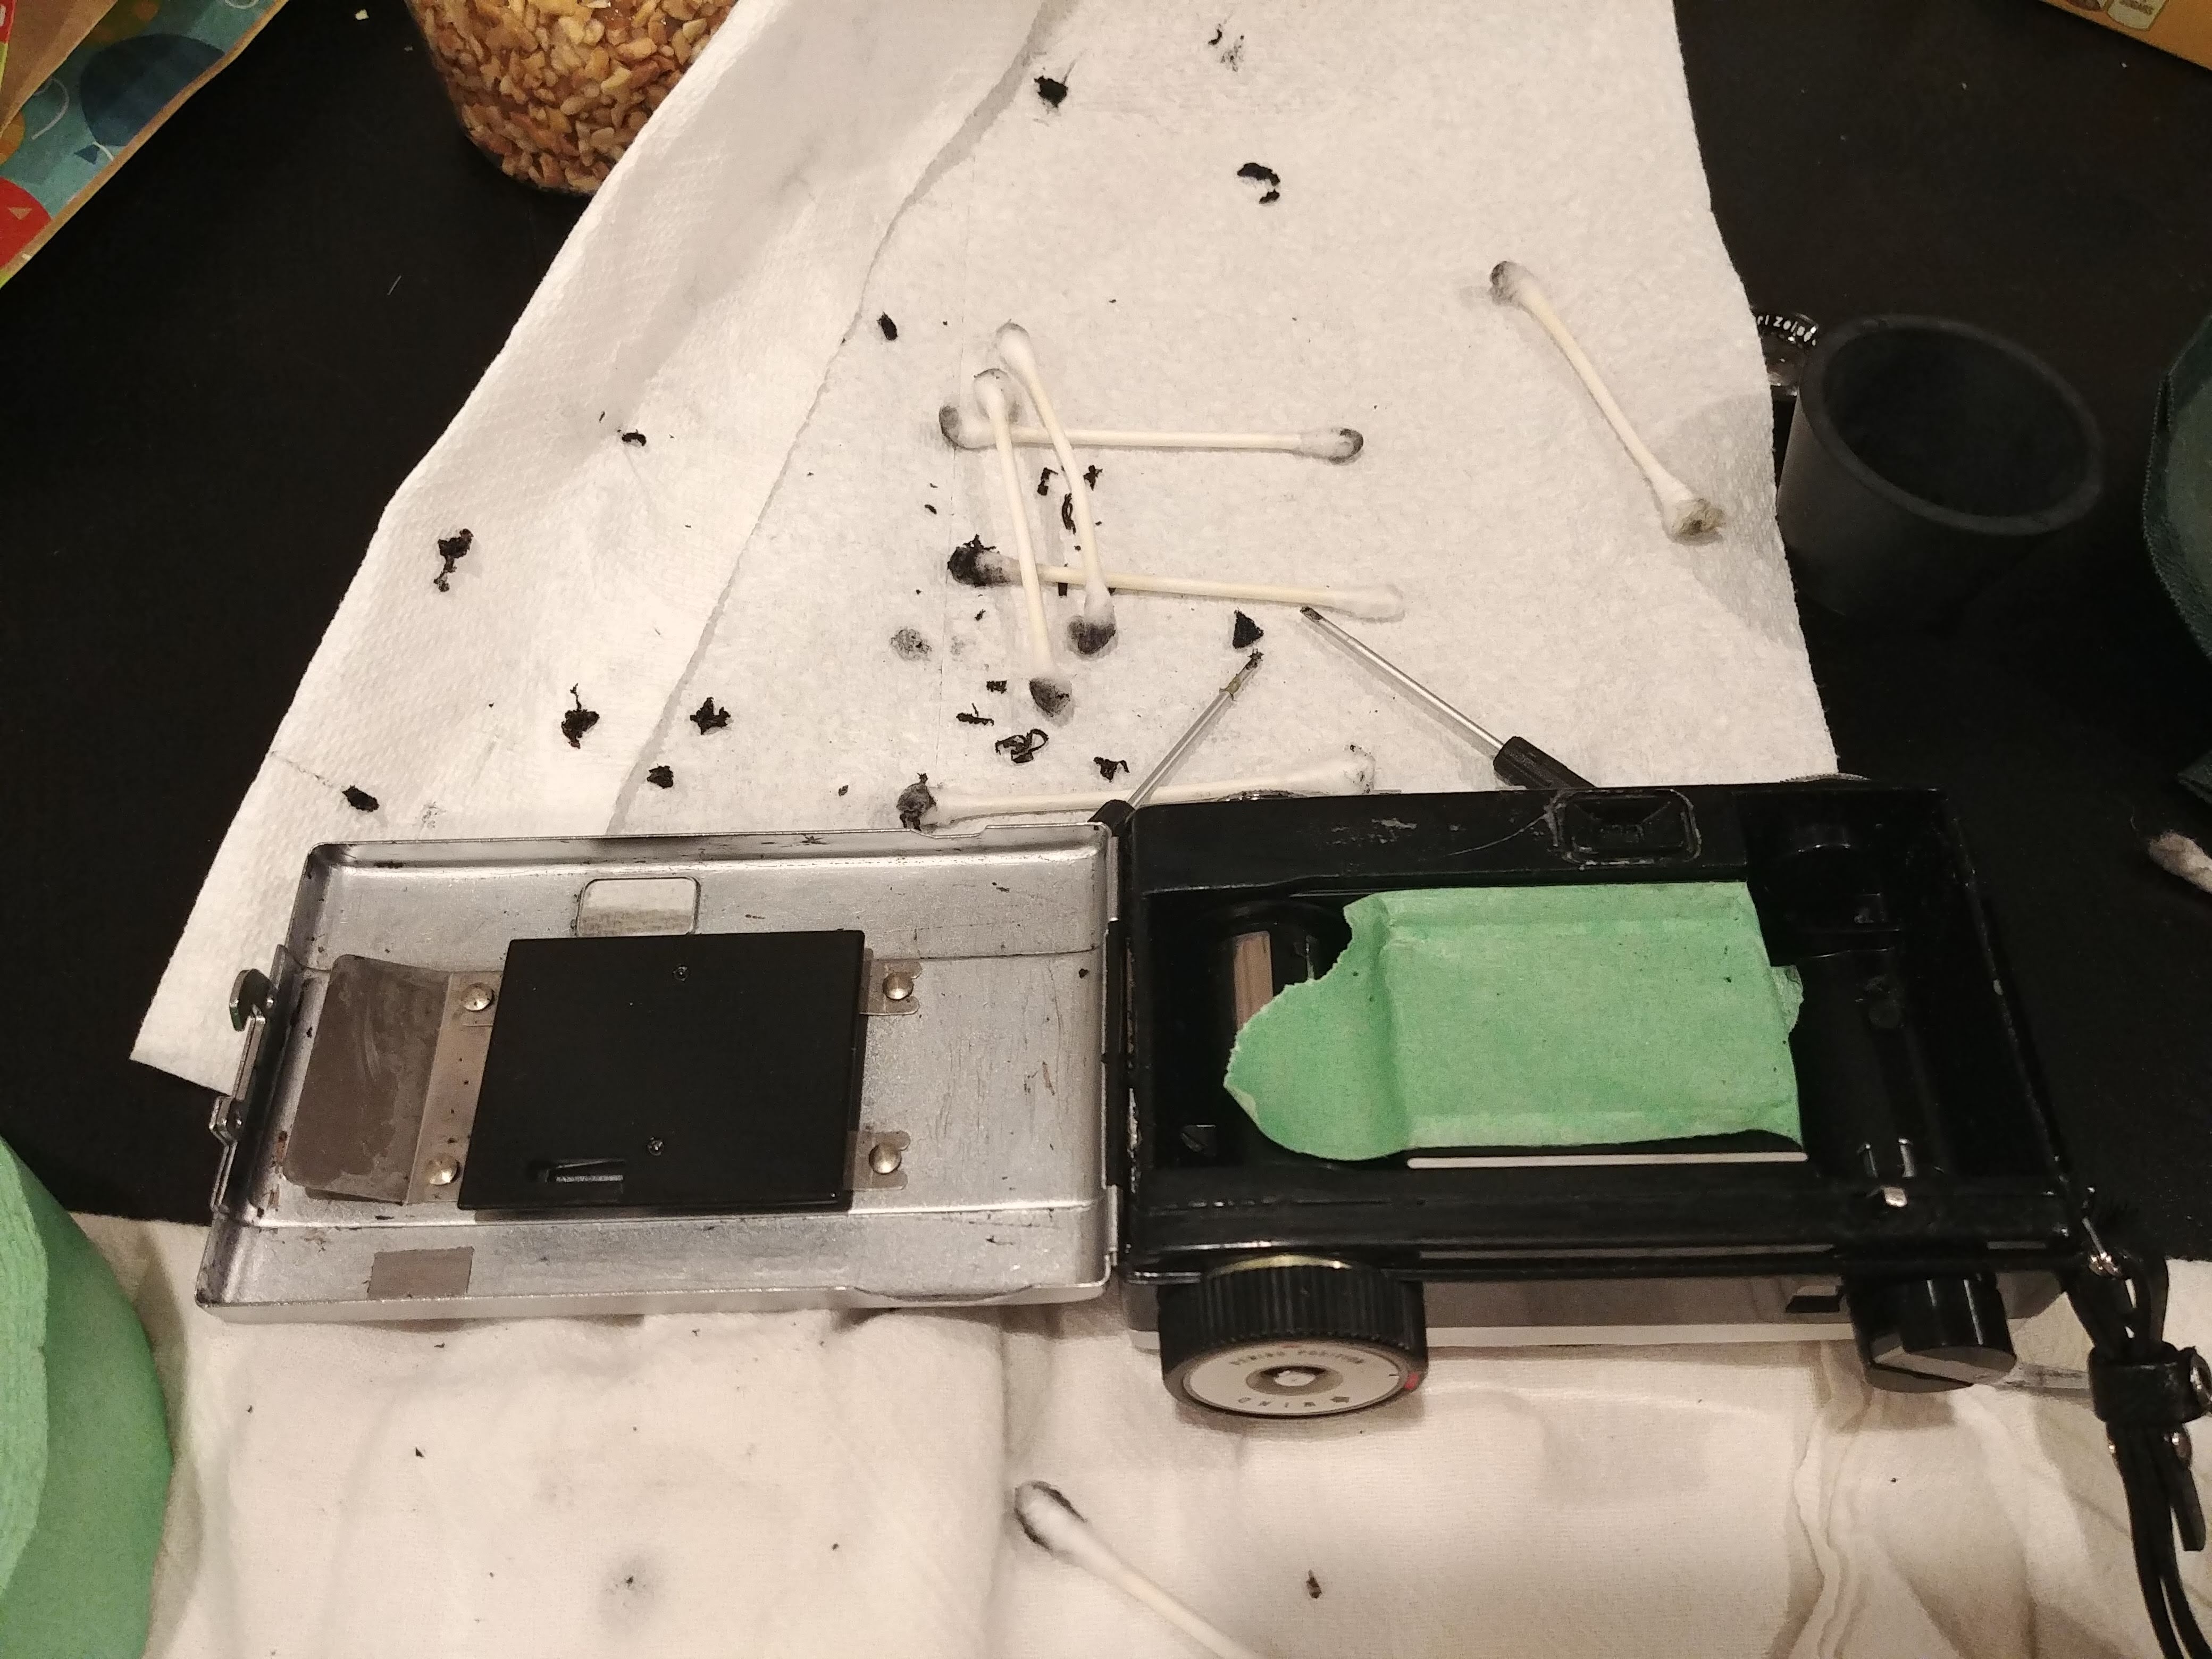
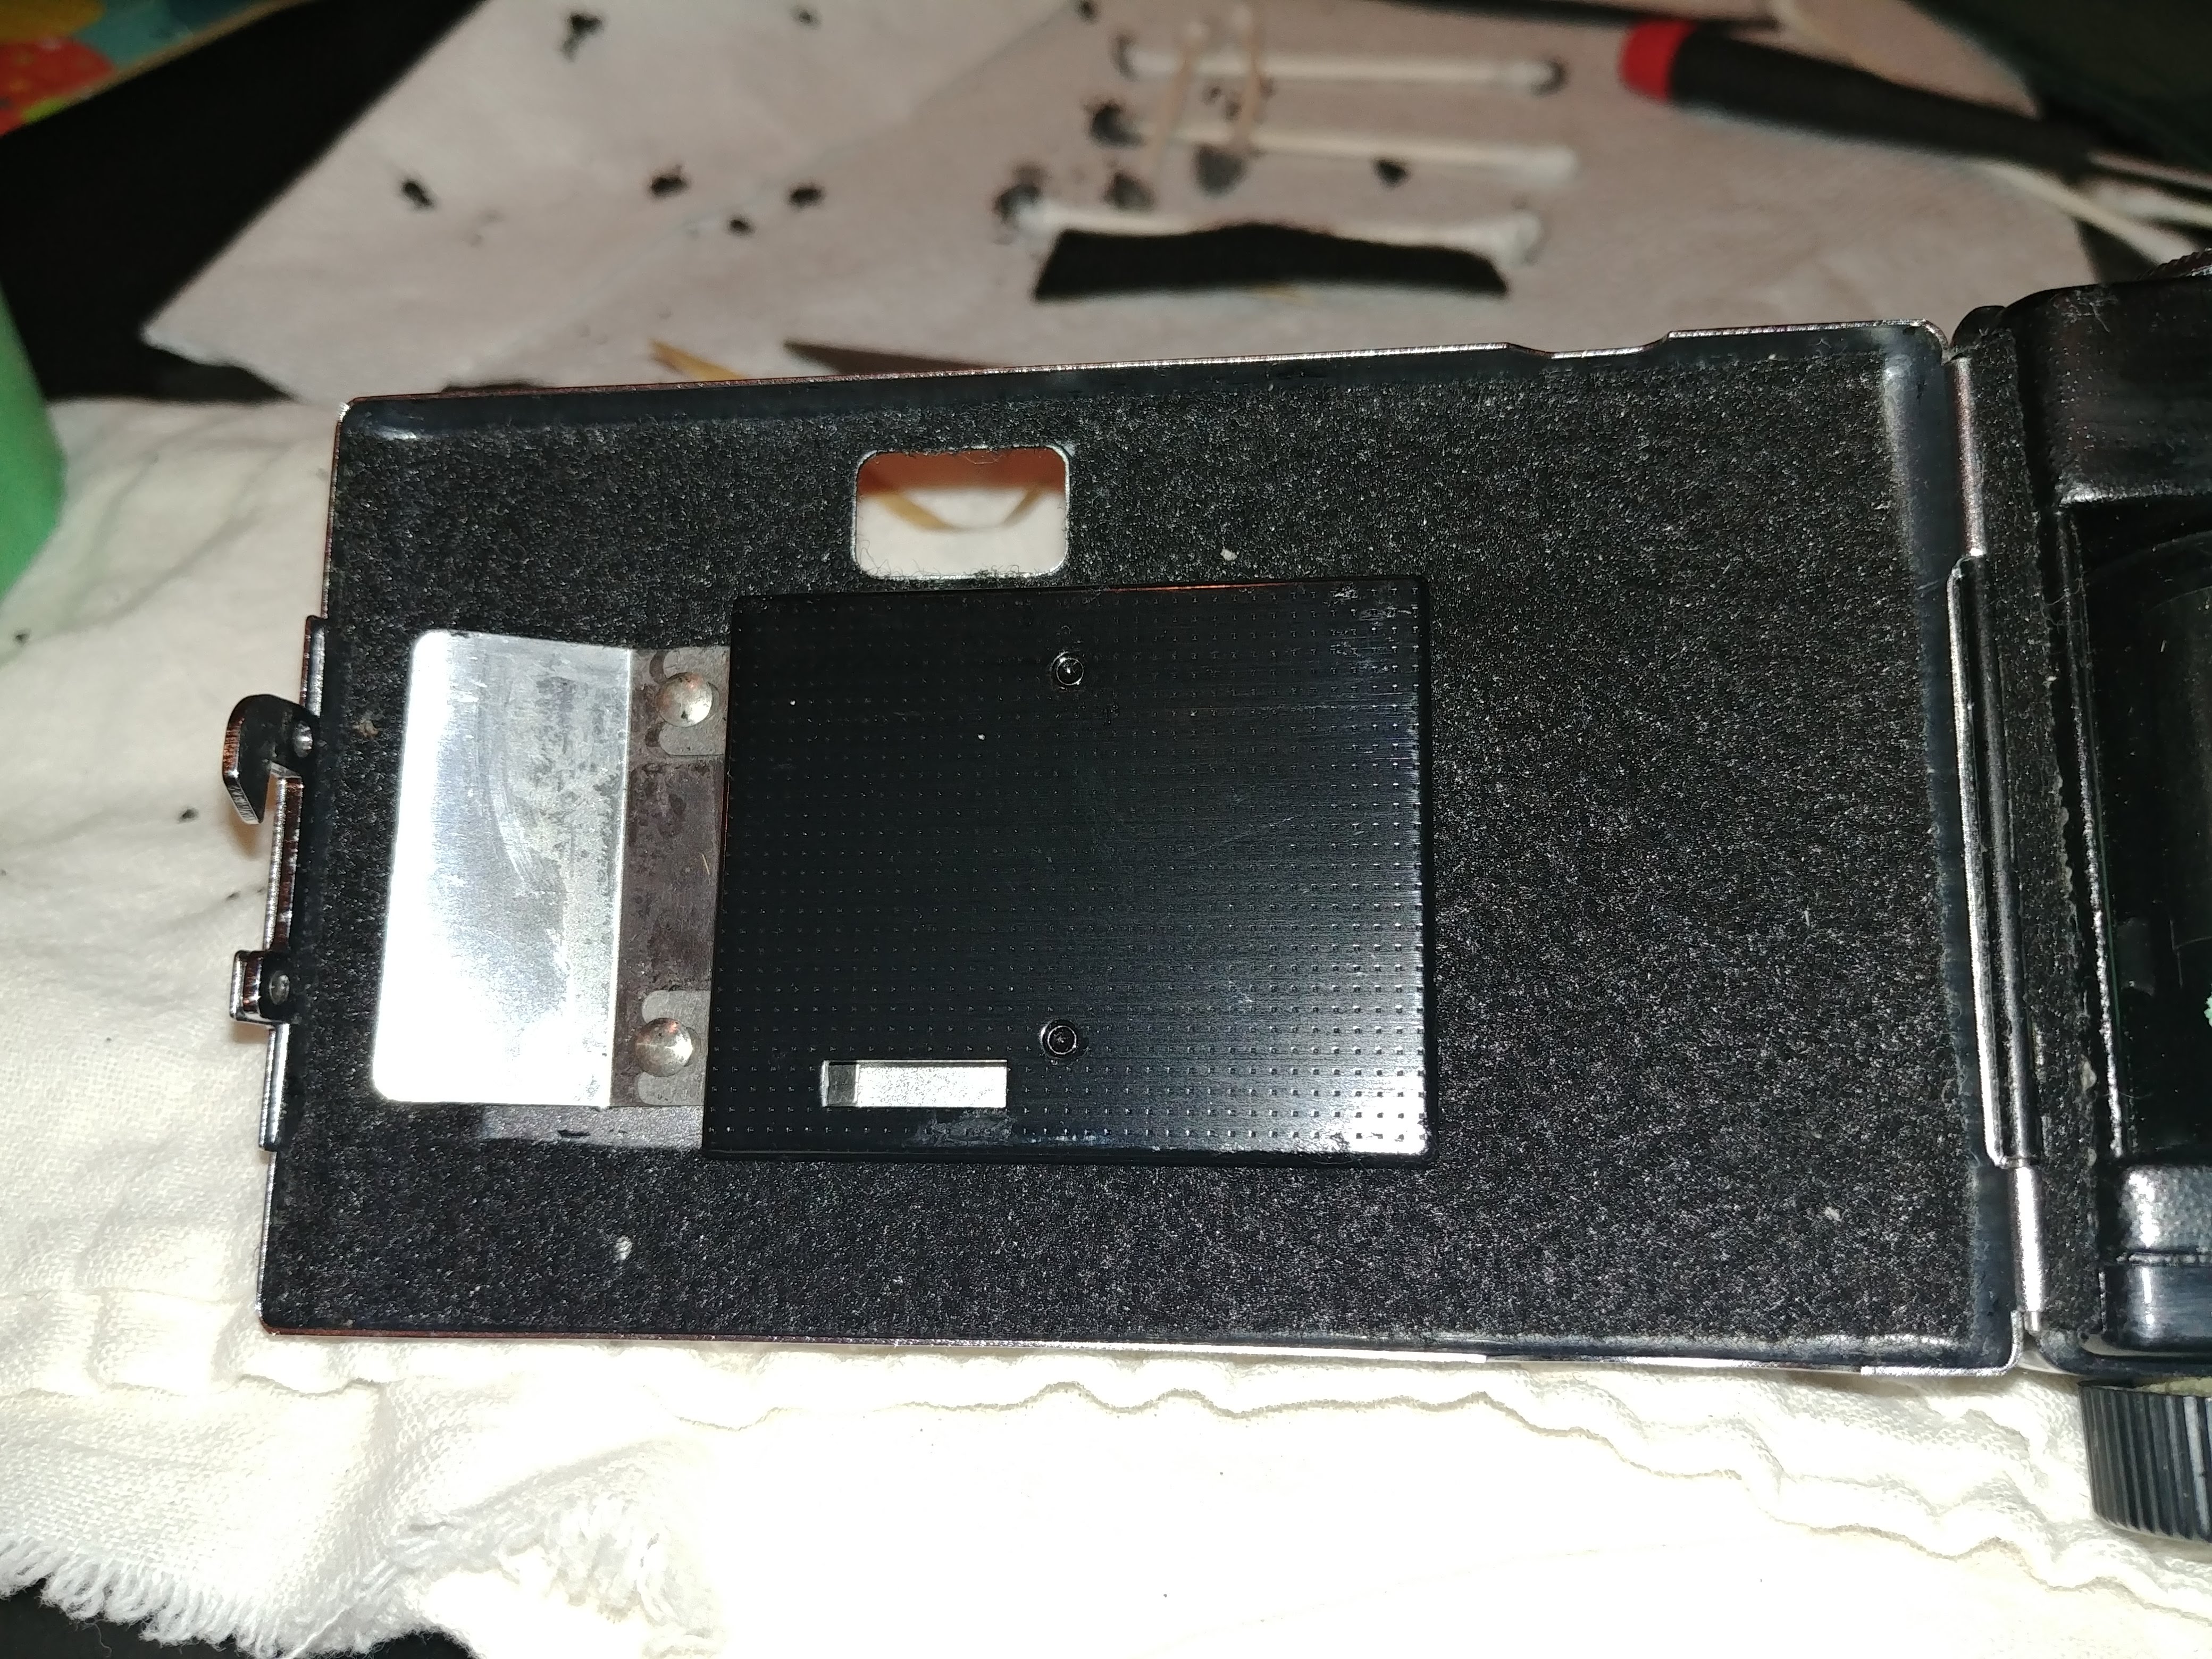
When I received the Hi-Color 35, I was pleased that not only was the camera cosmetically very nice, it seemed to be in good working order. The shutter fired and the exposure system varied the aperture with changes in light and other than the usual wipe down I give every camera, it seemed ready to go…until I opened the film compartment.
In the 1960s, Ricoh used foam light seals like most every other company did. Like foam light seals do in other cameras, they degrade into a sticky and crumbly mess and need to be replaced. Unlike other cameras that have the light seals only in the door channels or near the hinge, the light seals in the Hi-Color 35 cover the entire door, making a huge mess.
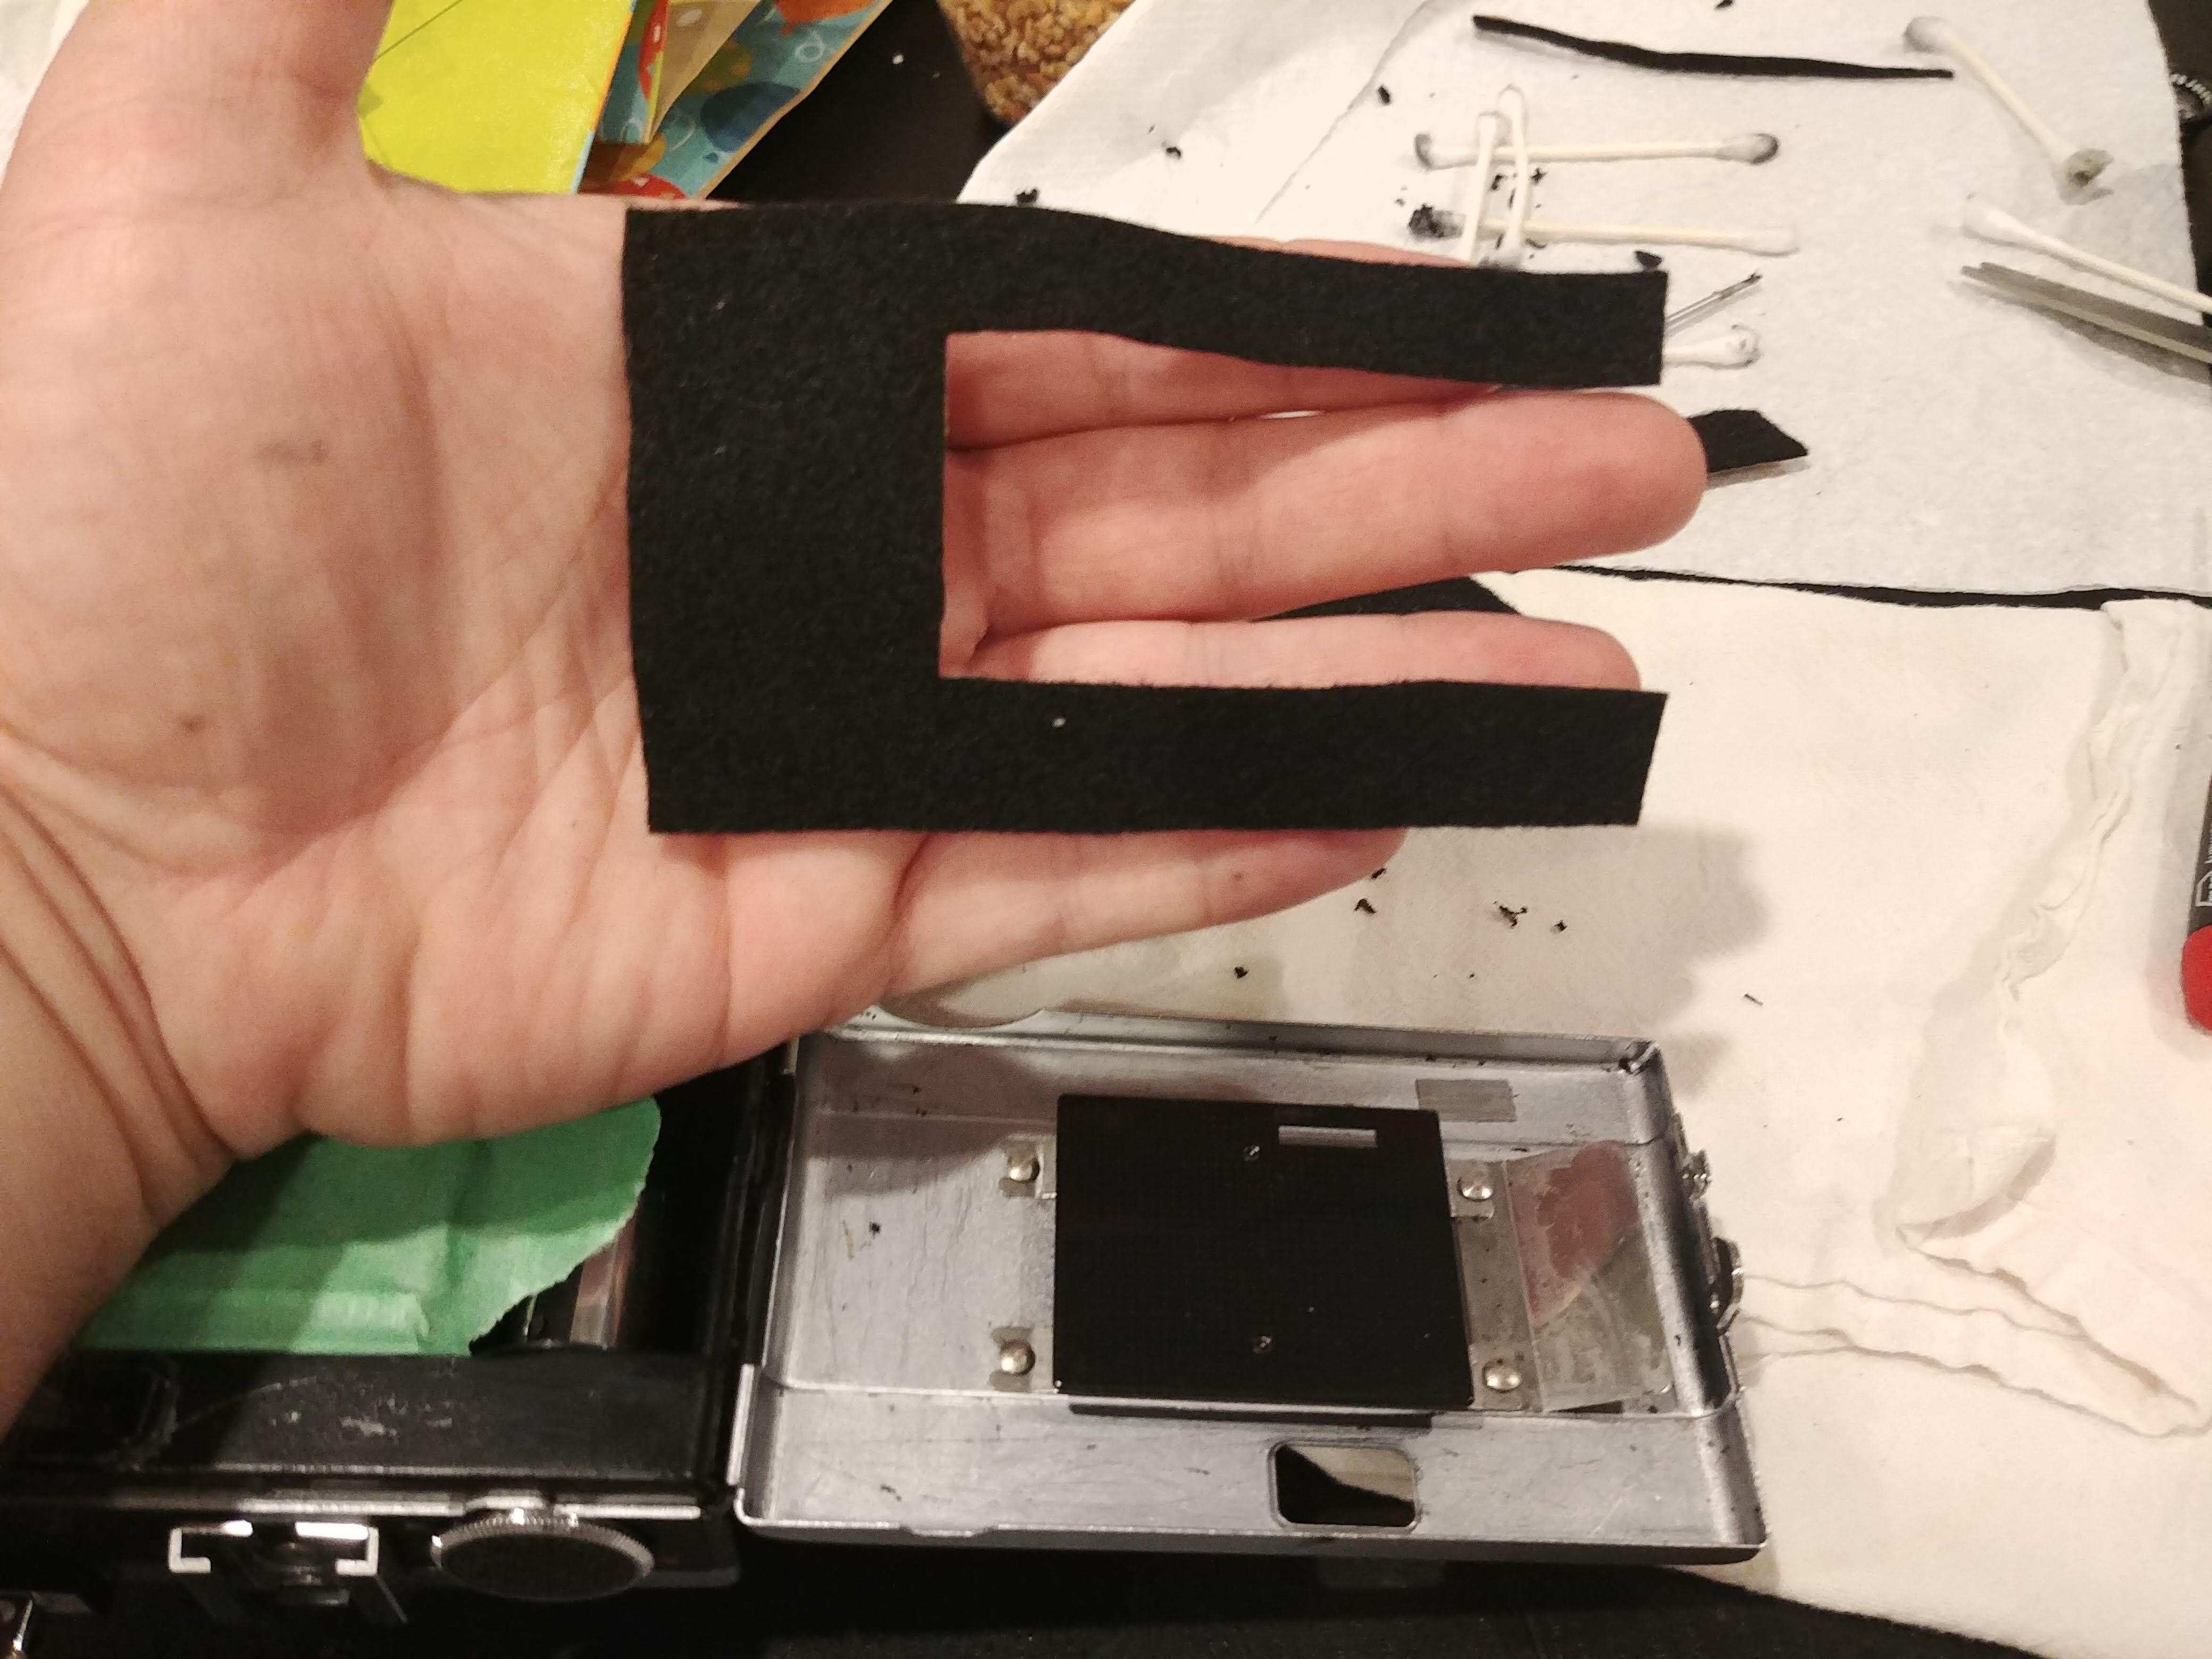
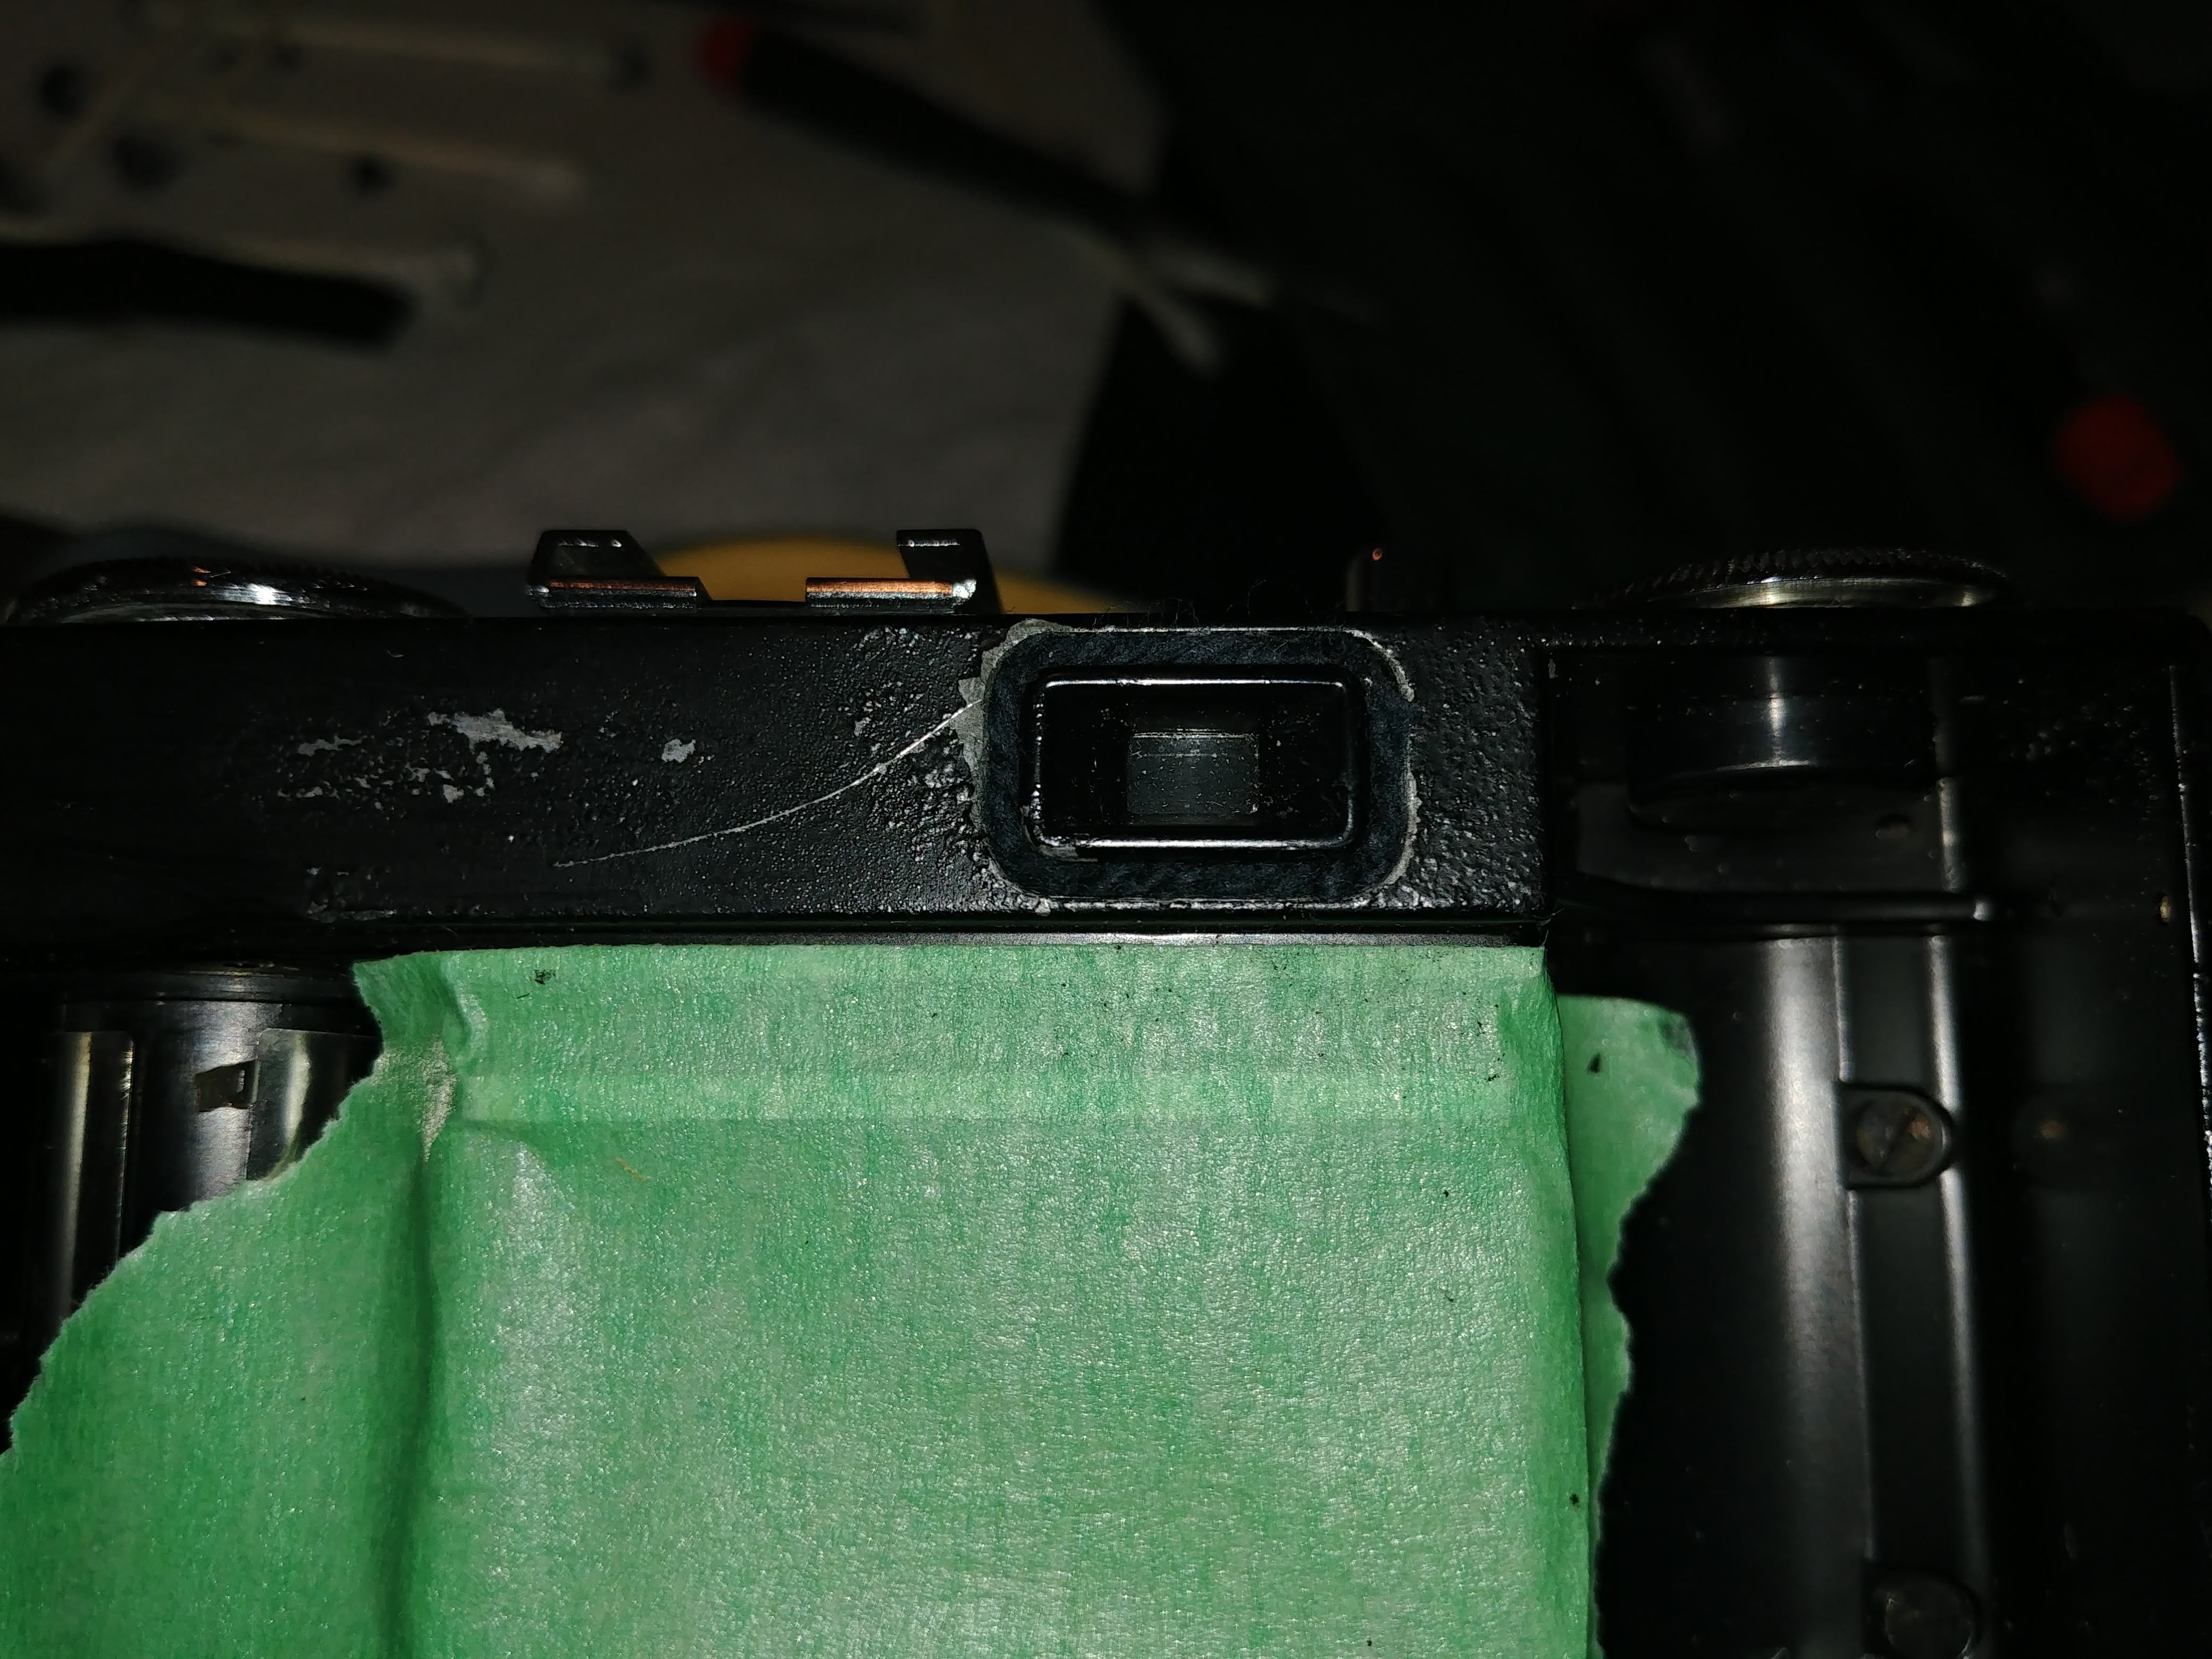
The process for replacing them was the same as it is on every other camera, there’s just a lot more of it. I am not aware of any pre-made kits that you can buy for this camera, so I just made my own using some adhesive backed black felt and a small amount of black cotton yarn for the channel around the rear eye piece.
The gallery below shows six pictures of the job of replacing all of the light seals on this camera. It took me about an hour, but after it was done, I was pleased at how it turned out and felt very confident that this should prevent any light leaks. If you’ve done light seal replacements on other cameras, it’s not any different, just takes much longer. If however, you’ve never done one before, I’d advice against any 1960s Ricoh camera being your first attempt as there are simpler cameras to do.

My Thoughts
The Hi-Color 35 is my third 1960s Ricoh compact 35mm camera, after the Ricoh Auto Shot and Ricoh Auto 35 V. Both were capable cameras with above average lenses and a distinct style that I loved. I thought they would make for great reviews, and someday, that might still happen. The problem with both cameras is that they were entirely dependent on their selenium exposure meters without the option for full manual control and in both cases, the meter was dead. The cameras can still be shot at a single shutter speed with limited exposure control, but I just never got around to it.
Then one day, while browsing the big auction site, I came across a camera called the Sears Auto 35. It was an attractive camera that was clearly a rebadge of something else, but what? The Auto 35 was in terrible condition and sold for way higher than I would have risked on such a poor looking camera so I began researching what it was, only to find out it was a rebadged Ricoh Hi-Color 35. I was hooked. After a few month search, I came across a very nice looking example for less than half of what that Sears camera went for.
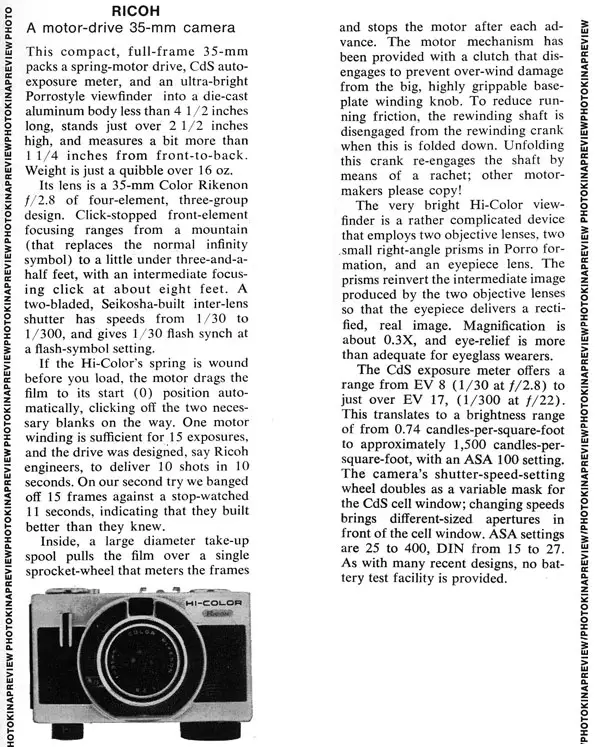
The Hi-Color 35 is a very dense camera made mostly of metal yet somehow manages to keep off excess weight, coming in at only 462 grams. Earlier versions of this camera have a sliding shutter release on the front plate of the camera, but this one has it in a normal location on the top plate. Although I didn’t have access to the earlier version, the camera is small enough that I doubt either location was any more ergonomic than the other.
The top plate has an ASA/DIN speed dial for the meter with a range of 25 – 500 (DIN 15-18), the flash hot shoe, and an elegantly designed circular battery chamber cover which nicely balances out the film speed dial on the opposite end. If you like symmetry like I do, you’ll appreciate this small detail.
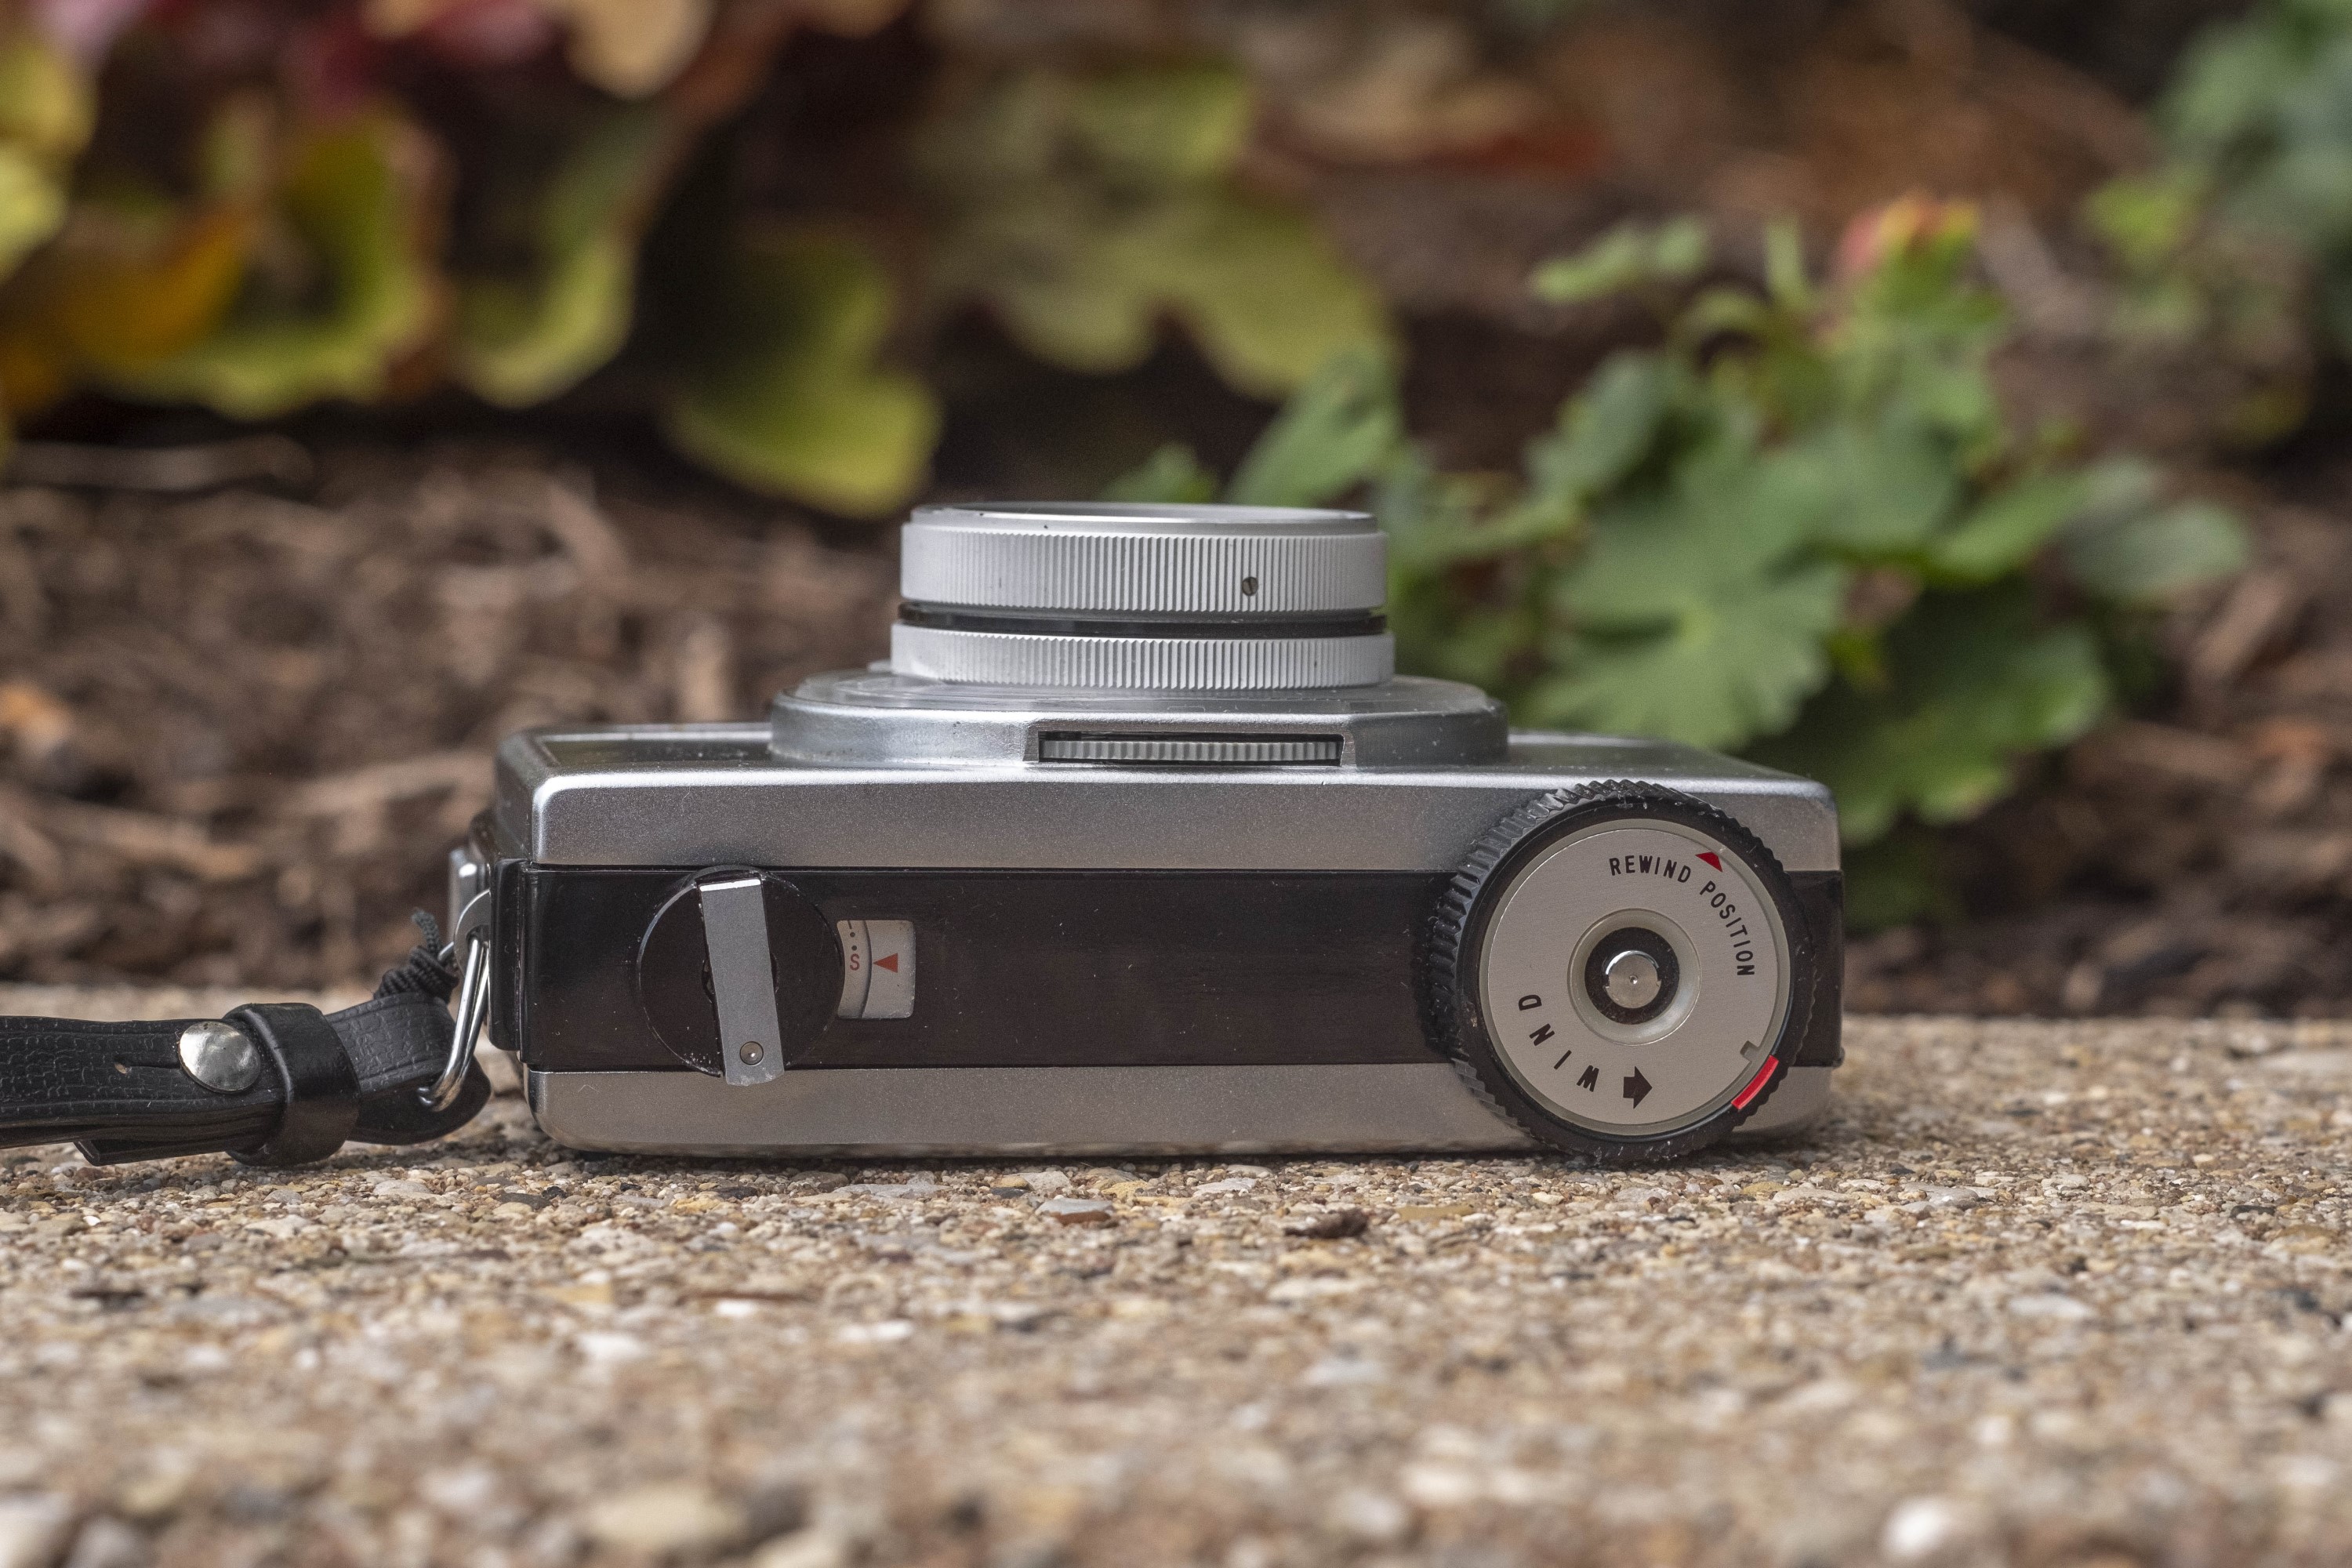
The bottom of the camera has the rewind knob with flip out handle, the automatic resetting exposure counter and the wind knob for the motorized film transport. The diameter of the rewind knob is much smaller than that of the wind knob, negating some of the symmetrical good will from the top plate.
All wind up motor drive cameras have a challenge when rewinding the film in that you have to defeat the tension on the motorized take up spool when you reach the end of the roll. Since the motorized spool is only designed to go forward, allowing it to spin backwards usually means releasing the tension built up within it. Every wind up camera has a different method for accomplishing this, some less elegant than others.
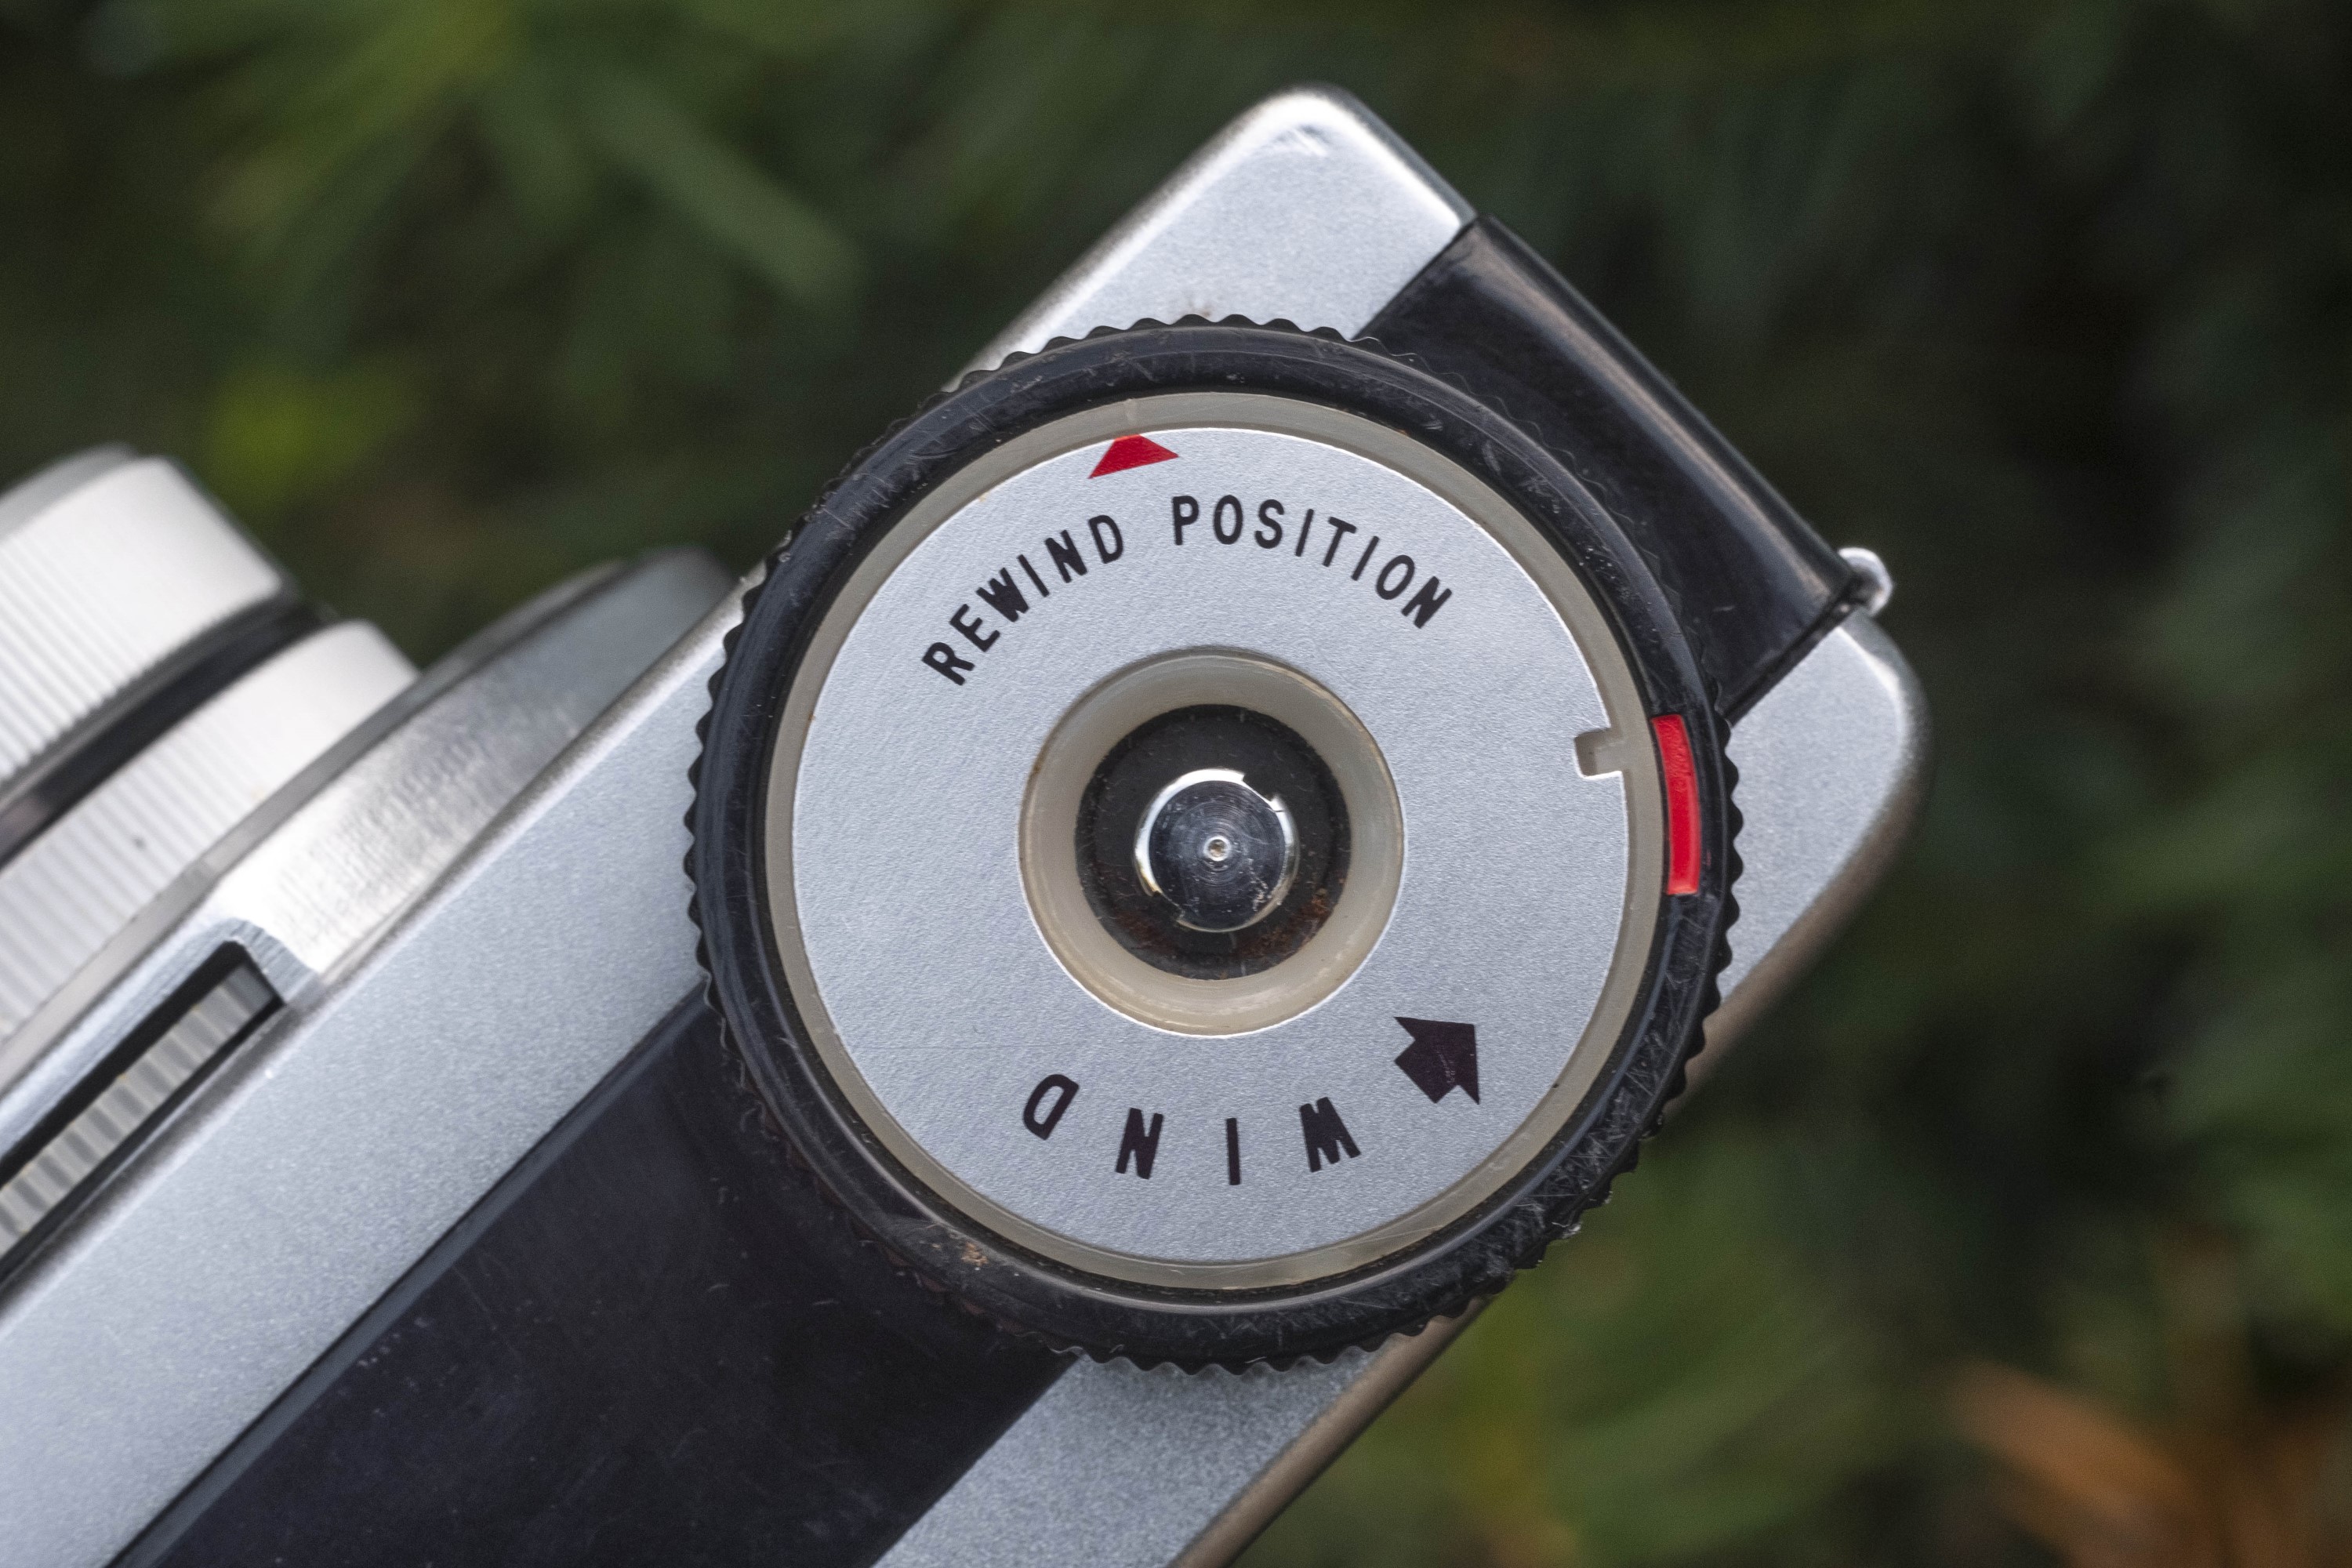
Ricoh approached this in a clever way which I think works quite well. On the inner part of the wind knob is a red arrow with the words “Rewind Position”. When you’ve reached the end of the roll of film and need to rewind it, you must first rotate the outer black part of the rewind knob clockwise until a small red portion on the outer ring lines up with the red arrow. When the two red parts are lined up, press the chrome button in the very center of the knob to lock it into position.
Pressing this button when the two red parts aren’t lined up does nothing, but when they are lined up, this deactivates the motor drive without losing tension on the take up spool. You can completely rewind a roll of film and then load in a new roll without having to wind up the camera again. When you are done rewinding the film, rotate the black outer ring clockwise past the red arrow and the chrome button will pop out and the motor drive will re-engage. Neat!
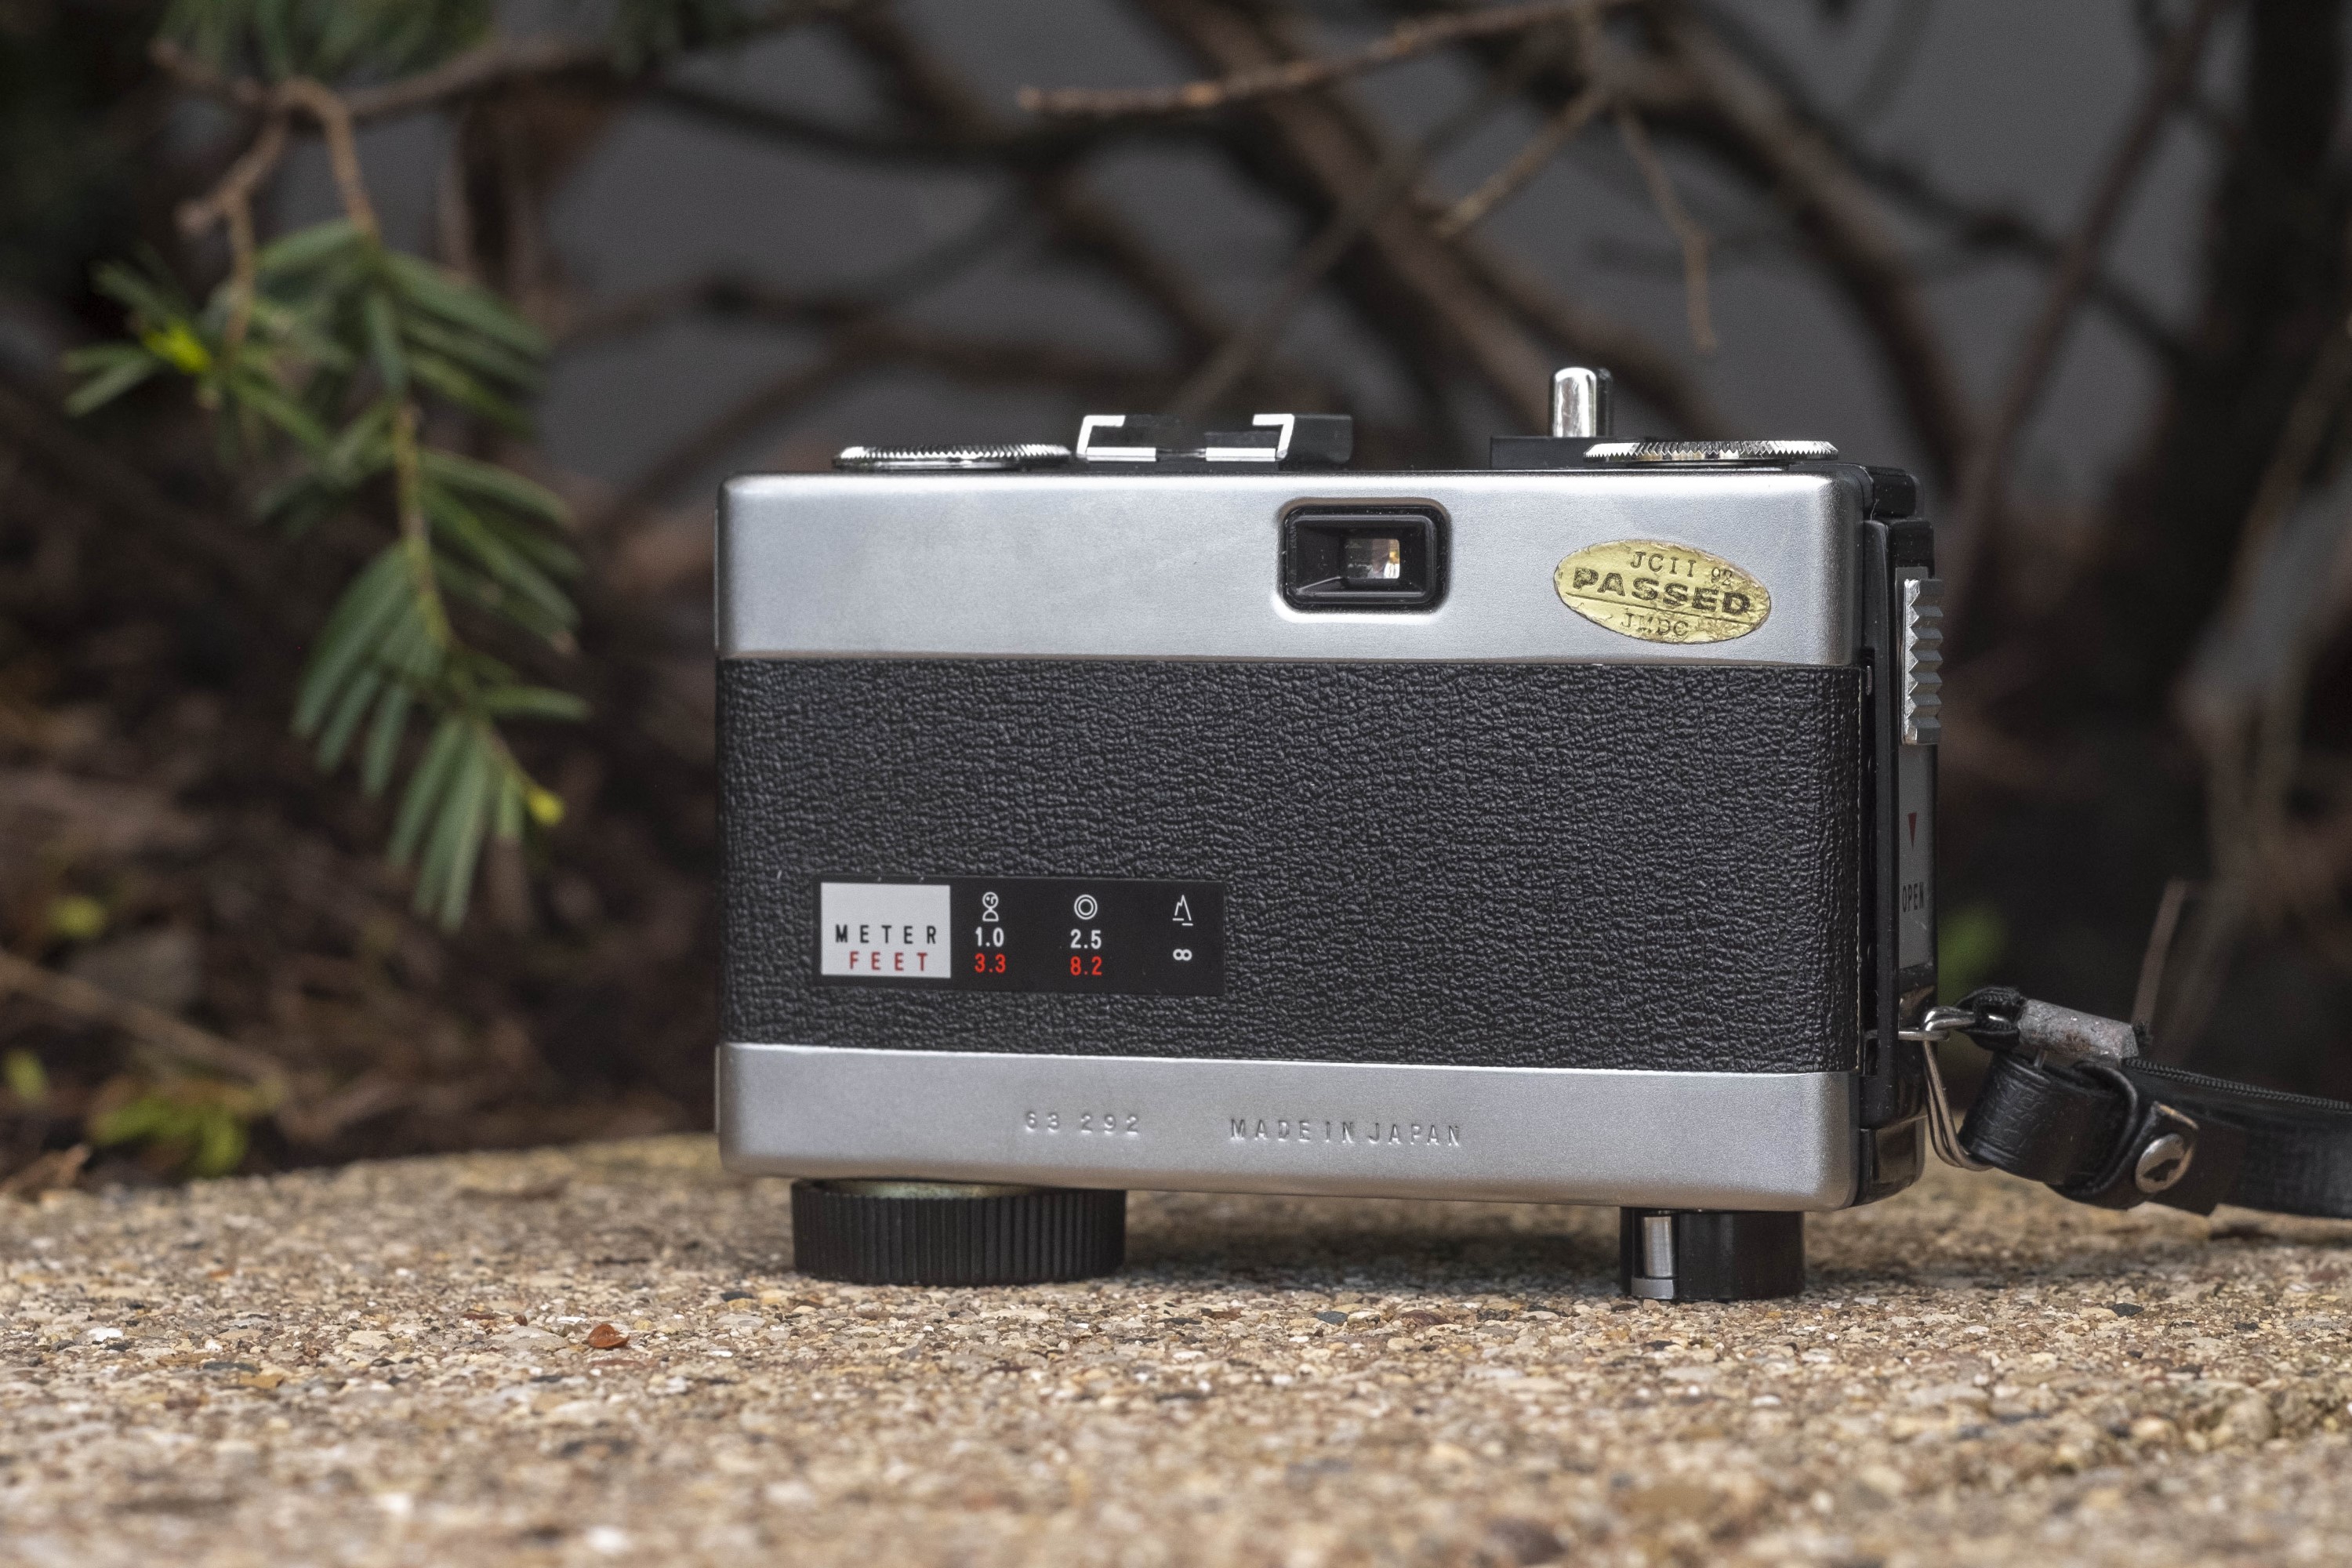
The back of the camera has a small reminder chart for the three focus click stops on the lens, the camera’s serial number, rear eyepiece for the viewfinder, and nothing else. My particular example still had it’s original JCII/JMDC Passed sticker which is often removed by the camera’s original owner.
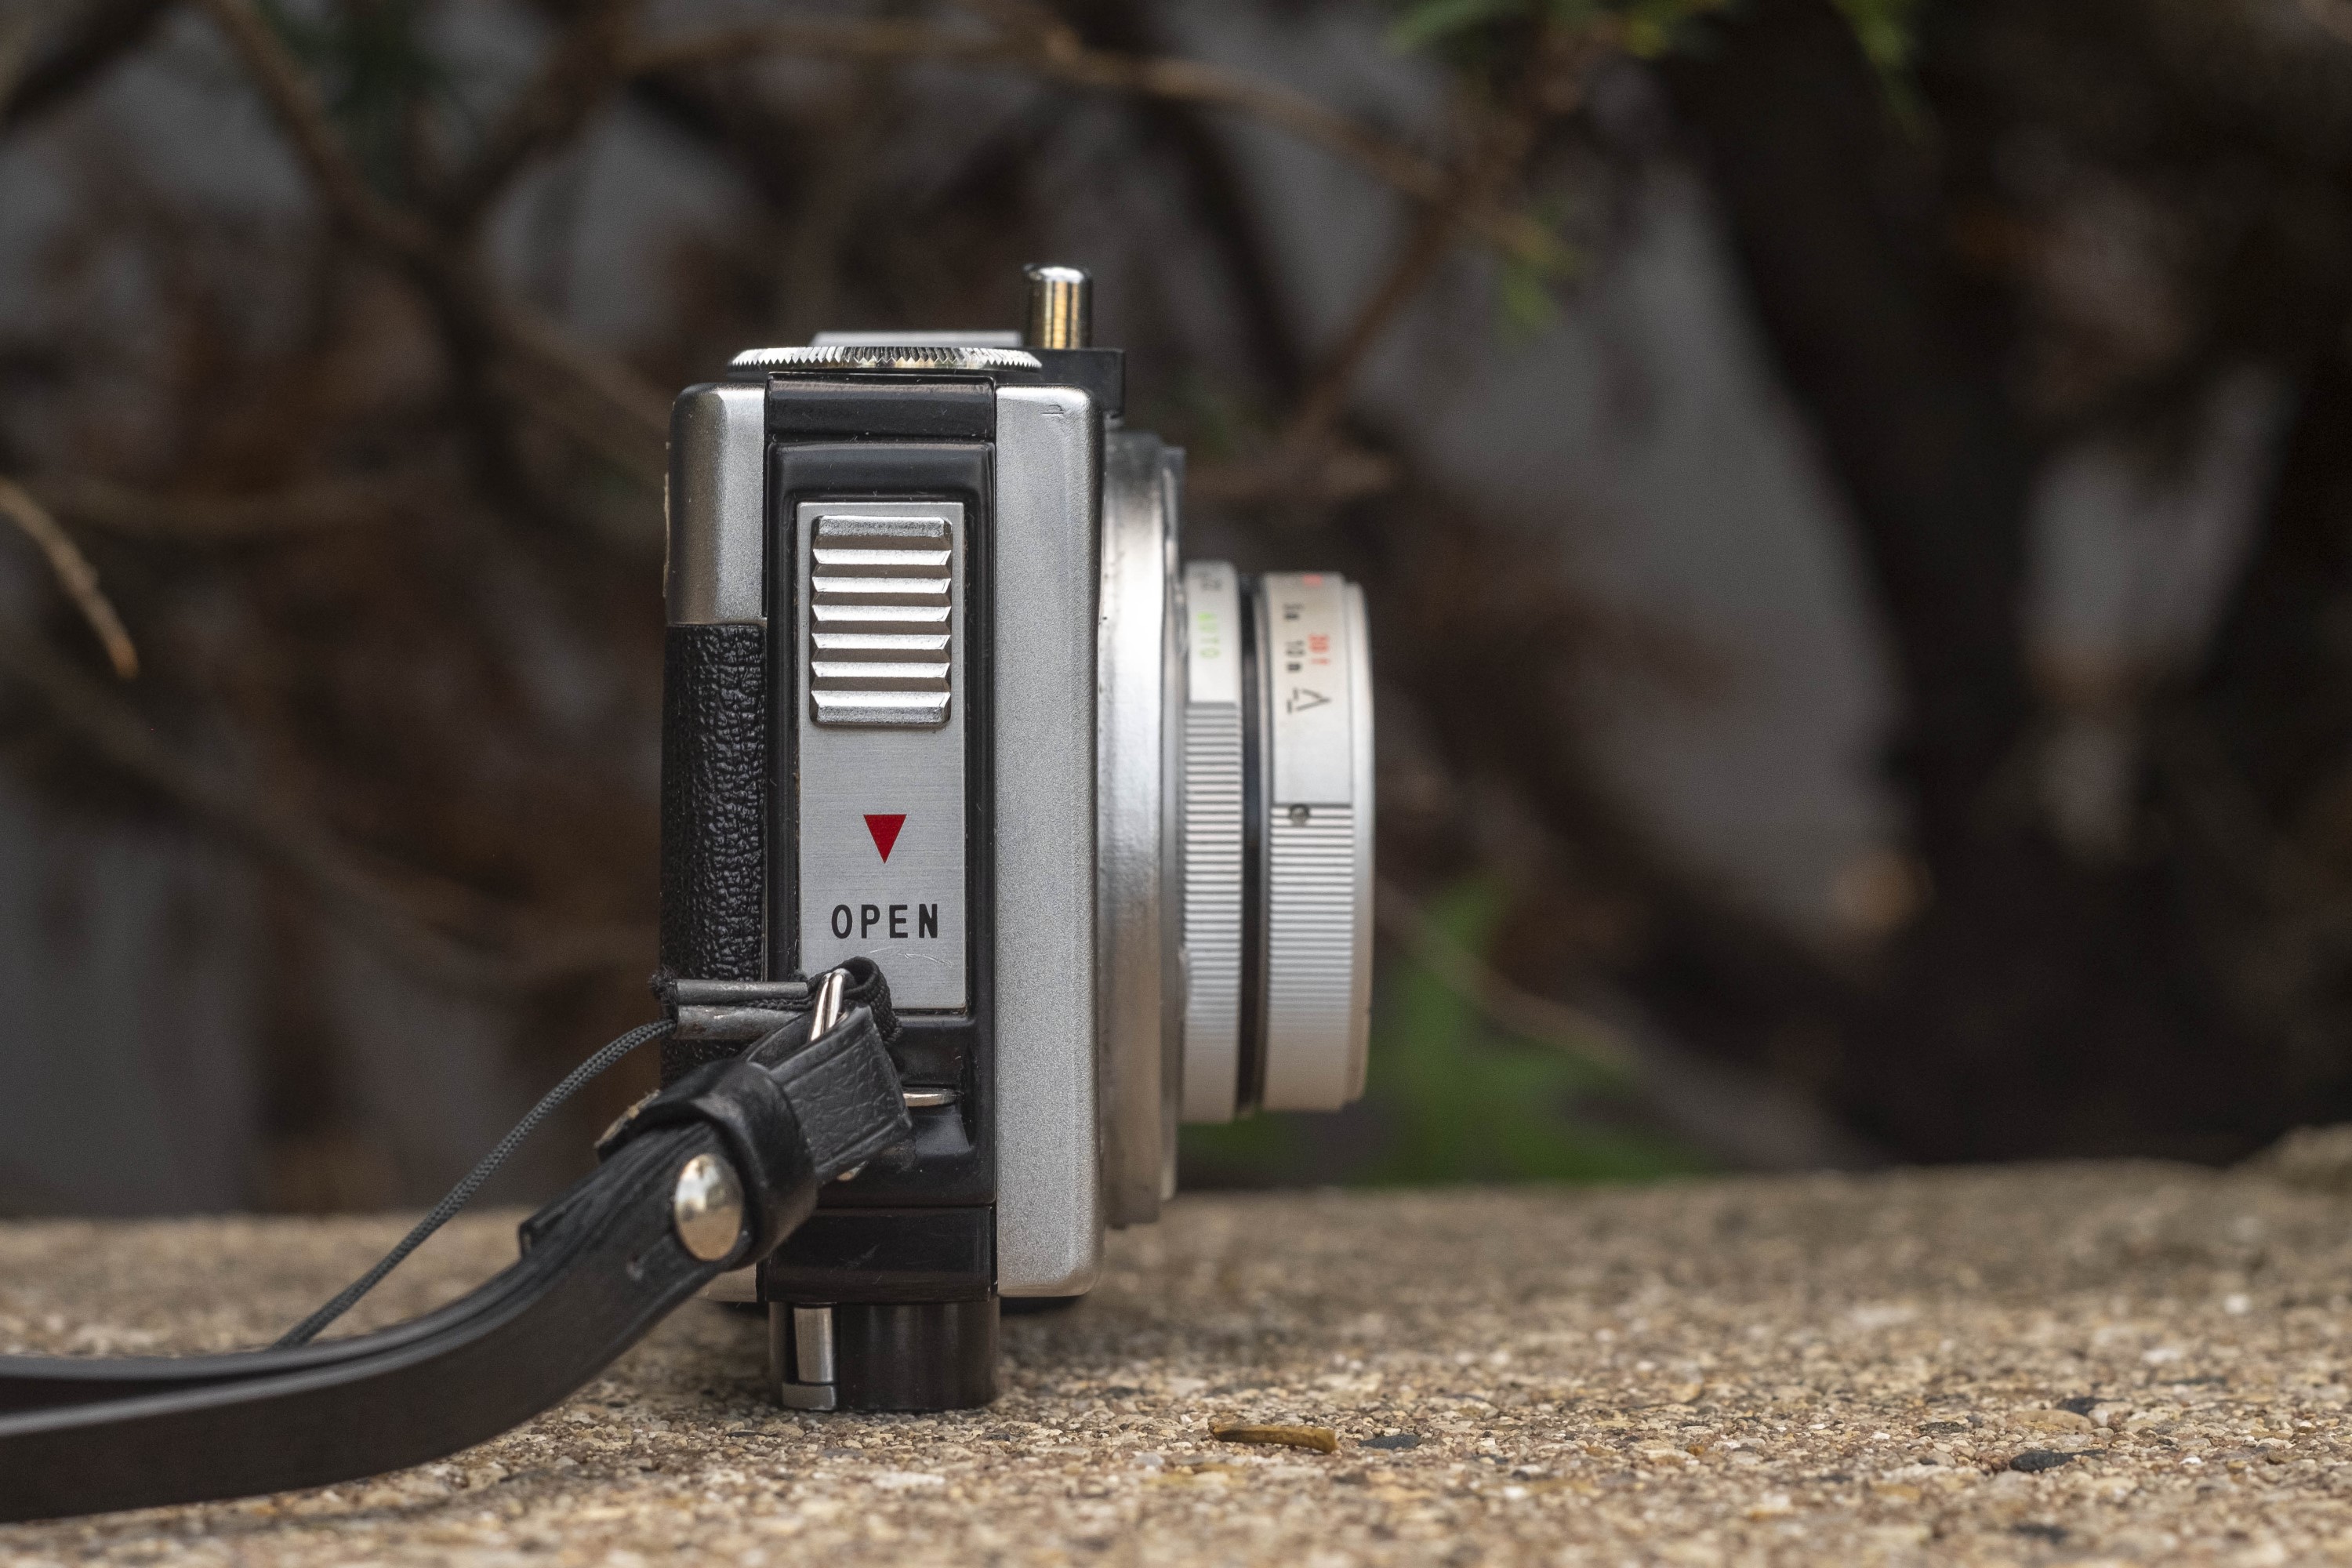
On the right side of the camera is the large sliding switch for opening the rear film compartment and wrist strap attachment. On the other side is a PC flash sync connection and the 1/4″tripod socket (not shown). On mine, it looks like there is a 3/8″ to 1/4″ adapter in the socket, suggesting that a 3/8″ tripod could also be used, but I have to imagine these kind of cameras weren’t often used on tripods.
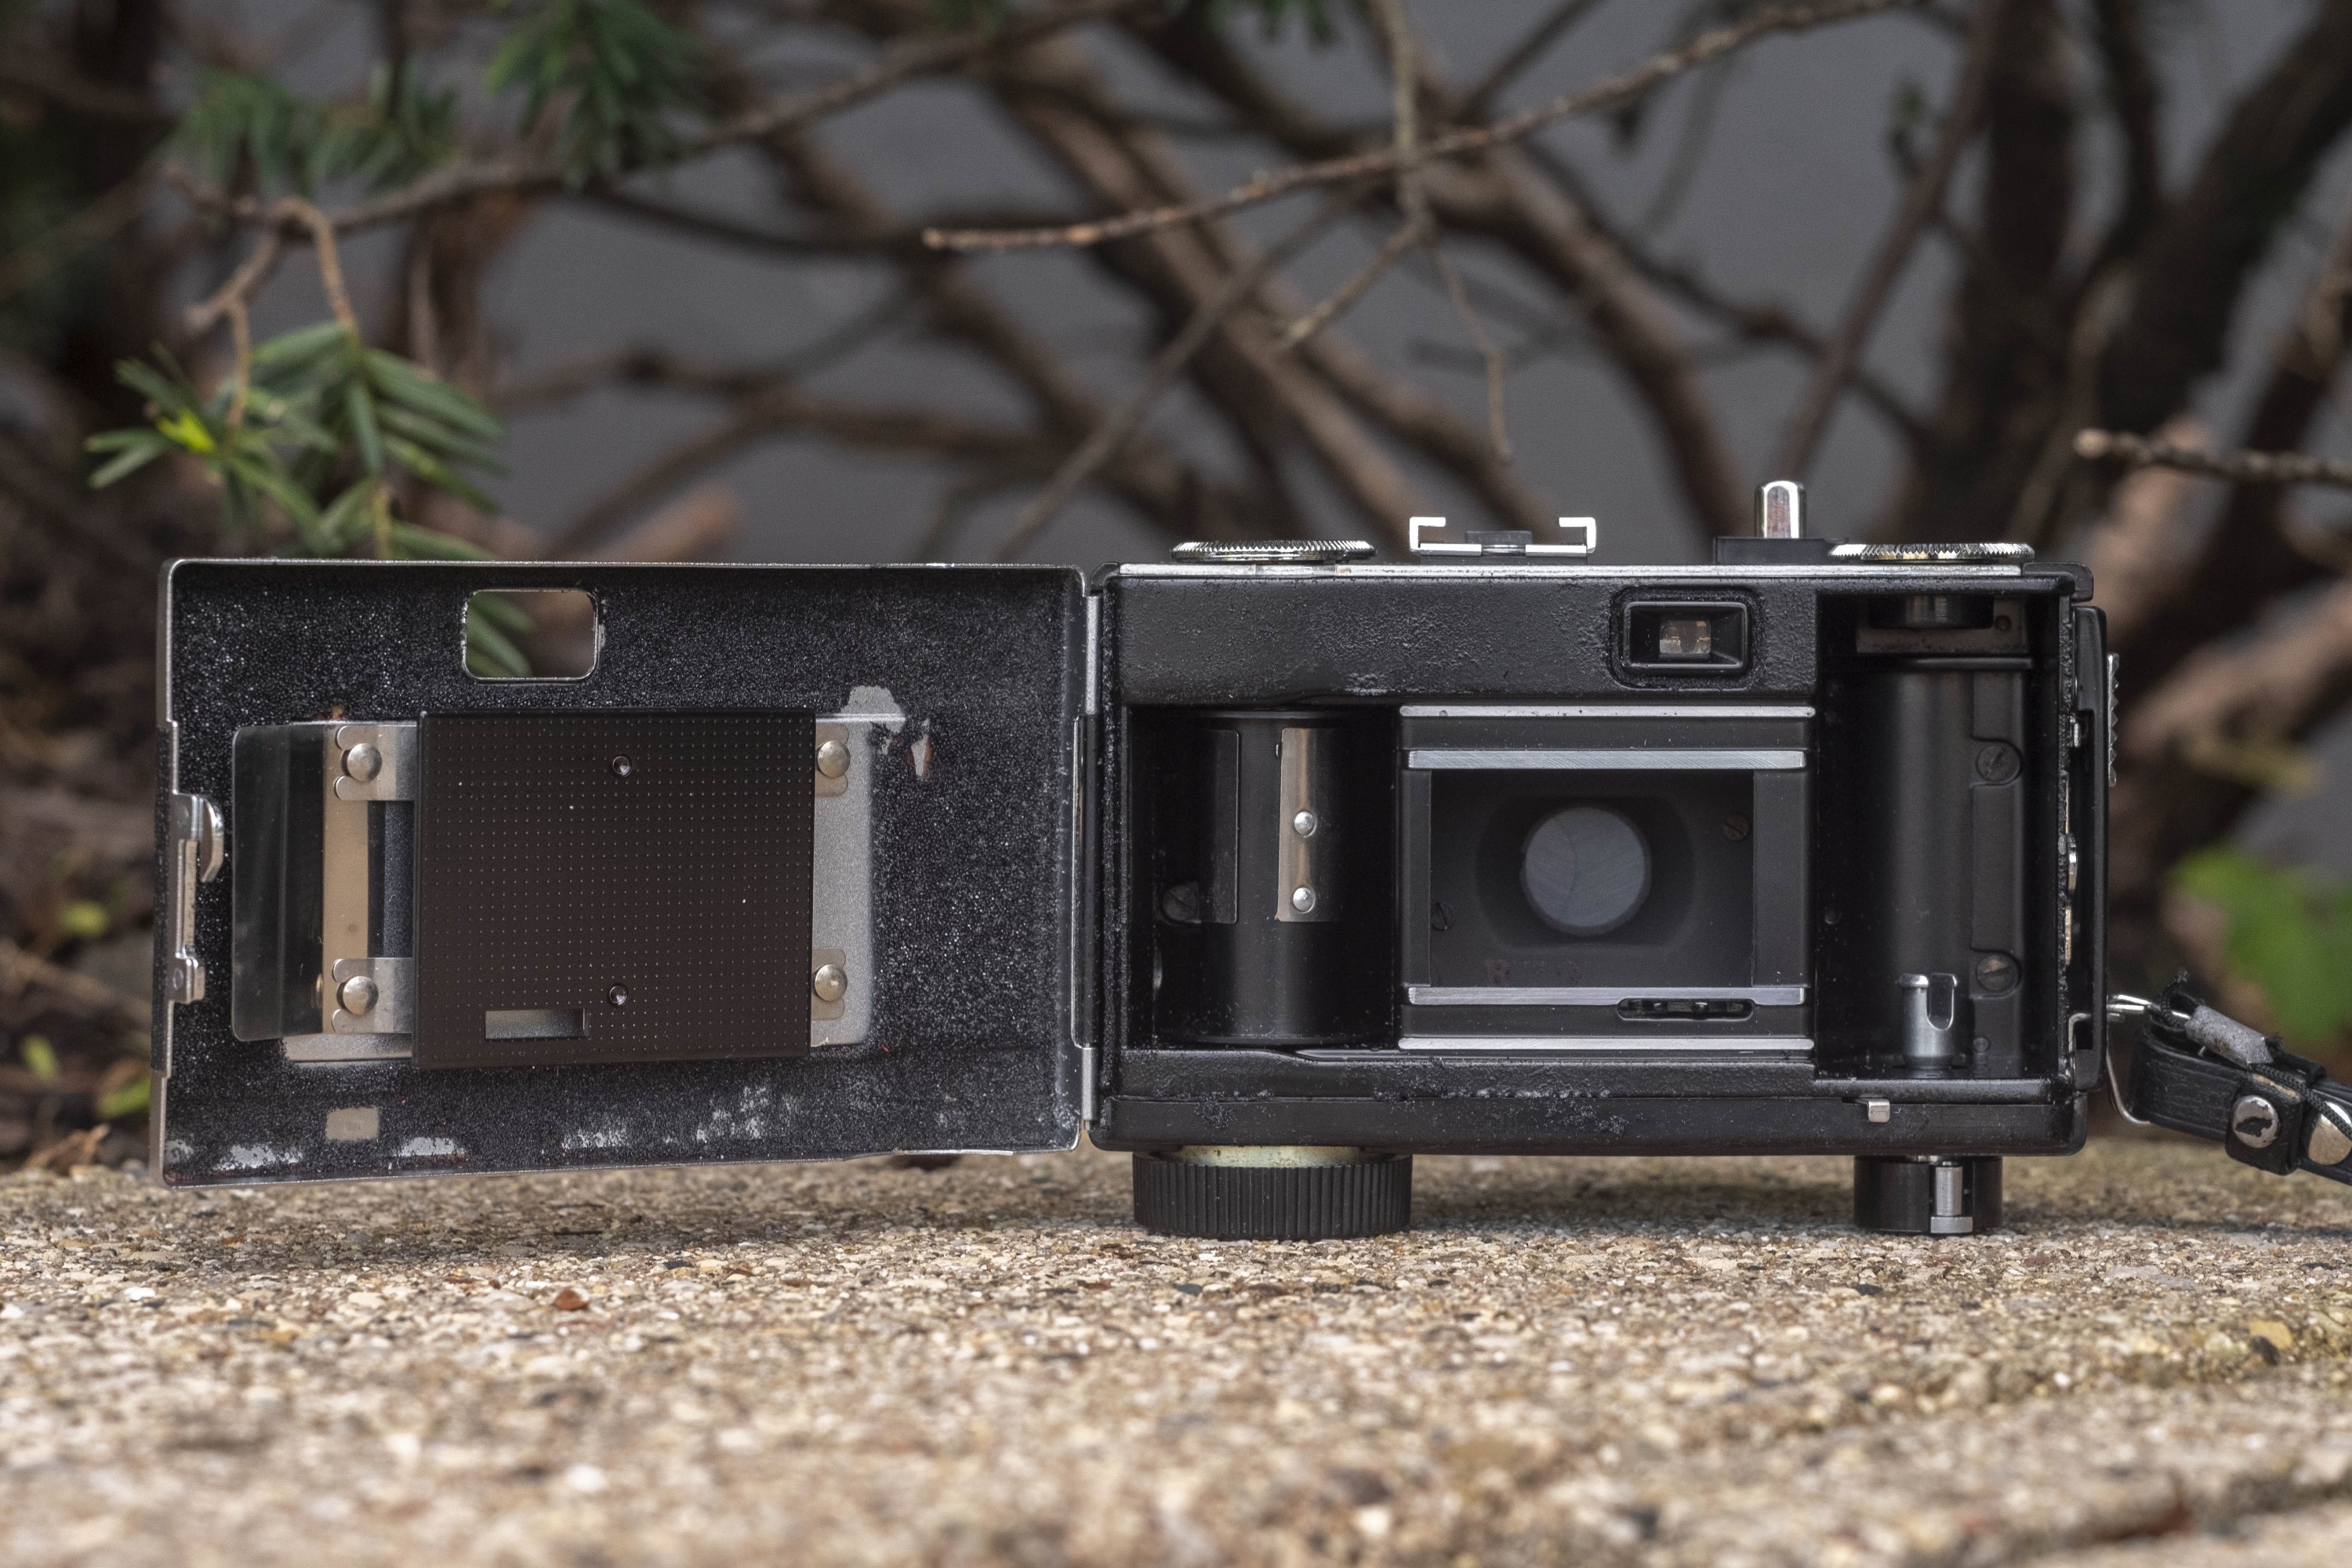
With the rear door open, you can see inside of the film compartment. In the image to the right, I hadn’t yet replaced the original crumbling light seals that this camera came to me with. In the Repairs section above, I go over how this is done. I would not recommend trying to shoot a camera with light seals in this condition, not only due to the strong chance of light leaks, but also that the crumbling material could possibly fall into the shutter, damaging it.
Film transport is opposite of most 35mm cameras and travels right to left. The take up spool is quite a bit fatter, owing to the wind up mechanics behind it, and it has two different chrome notches for attaching the film leader when loading new film. The film pressure plate has divots in it to help remove resistance while film advances through the camera.
If you weren’t familiar with the Hi-Color 35 and picked it up for the first time, it would be very easy to assume this camera was like many other 1960s cameras and was auto exposure only. Looking down at the lens rings, there are only settings for focus and aperture.
It’s not until you look at a small rectangular window near the 8 o’clock position around the lens do you see the shutter speeds. These are changed with a narrow gray plastic wheel beneath the lens. In both manual and Auto model, you can select any shutter speed you want, as long as it’s between 30 and 300!
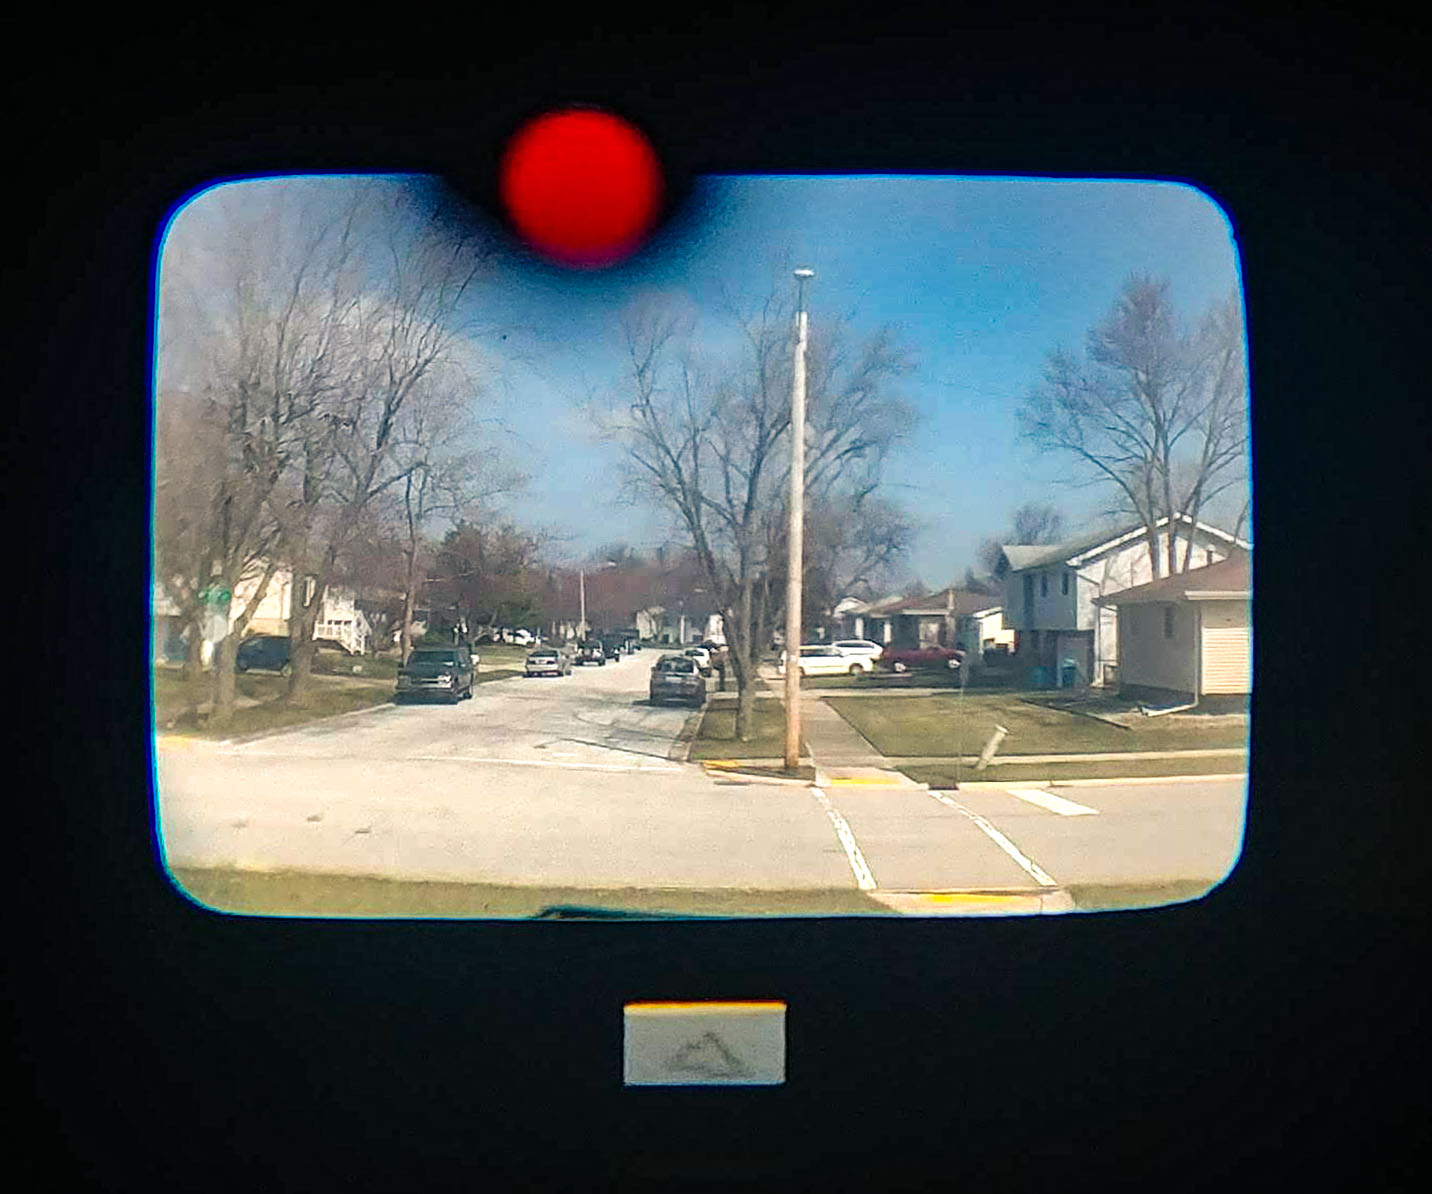
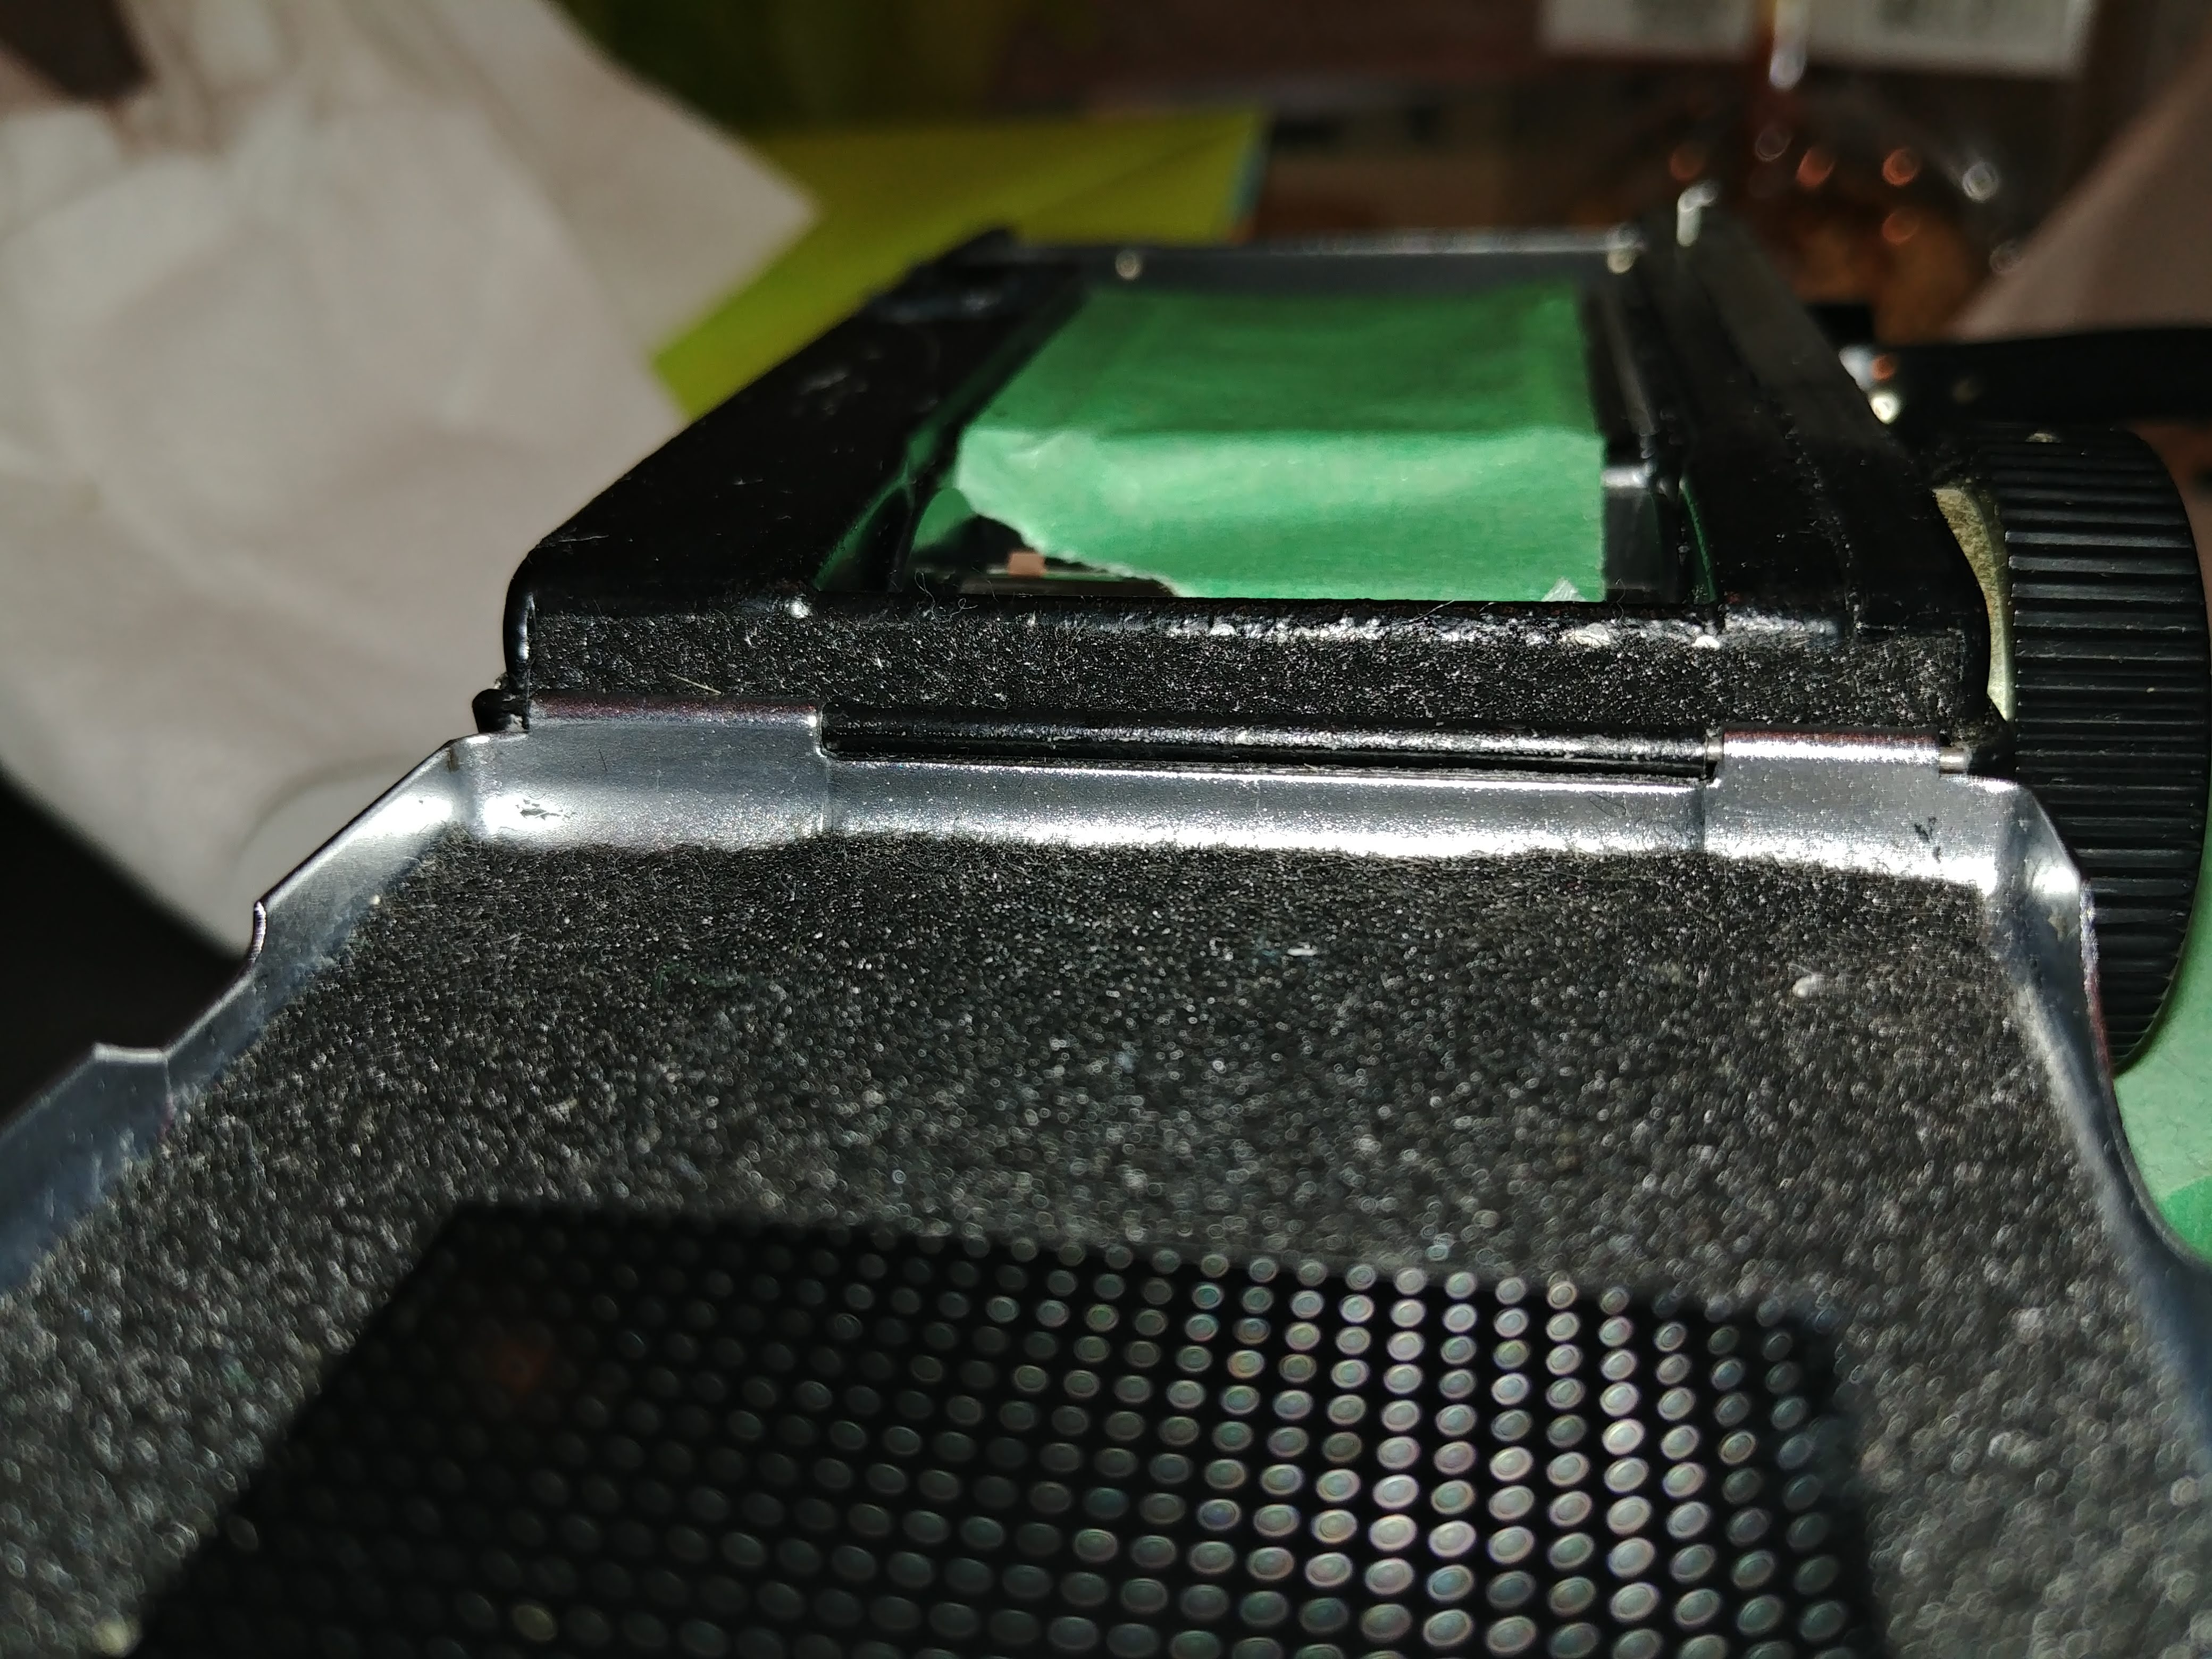
The viewfinder on the Hi-Color 35 is unlike that of most cameras in it’s class as it uses a complex arrangement of lenses and prisms, but I question why it was done in the first place. Originally appearing on the earlier Ricoh Auto Shot, the viewfinder has two optical lenses and two prisms in a double Porro formation that work similarly to how a viewfinder in a pair of binoculars work. This gives a very crisp and exact image that allows you to see an image from immediately above the taking lens, mostly eliminating parallax error that was common on point and shoot cameras of the day. The downside to this design though is that the image is very small. Not quite as small as a pre-war Retina, but it’s quite a bit smaller than the viewfinders found on most late 60s/early 70s 35mm cameras.
On the plus side, at the bottom of the viewfinder image is a “judas window” which allows you to read the focus distance markings on the lens without ever having to take the camera away from your eye. I had no problem seeing the full image while wearing prescription glasses, just everything was very small. Near the top of the window is an underexposure warning flag that shows a red circle whenever there is insufficient light to make an accurate exposure. In the viewfinder image above, I didn’t have a battery in the camera, so the flag is always there.
The Ricoh Hi-Color 35’s greatest feature is it’s simplicity. It’s a scale focus camera with a wide depth of field so that means that most candid outdoor photos don’t require any focusing. The auto exposure and motorized film transport give the illusion of a modern camera, and the lens, well I can already tell you it’s good, but I’ll pretend there’s some suspense and make you read the next section…
My Results
My first experience with the Ricoh Hi-Color 35 was a spontaneous one as I was about to head out for a family gathering in the fall of 2019 to a pumpkin farm and I needed to grab something that was portable and would be quick and easy to use as I knew there would be kids running around and I wouldn’t have a lot of time to be messing with camera controls. The Hi-Color met both of those expectations with it’s small size, motorized film transport, and auto exposure. I loaded it up with a 36 exposure roll of fresh Fuji 200 and went shooting.


It would seem that my spontaneous selection of this camera proved to be a wise one. I guess I shouldn’t have been surprised as I’ve consistently gotten excellent results from other Ricoh made 35mm cameras like the 519M and Anscomark M.
The images all came out sharp corner to corner with excellent contrast and color rendition and no obvious optical anomalies. Of course this being a camera I selected for it’s quick and easy operation I didn’t exactly stress it, mainly using it as a point and shoot “family camera”, but in a way, that’s kind of the point. Cameras like these were designed to be used like a point and shoot by people who wanted a camera capable of good images but without having to worry about things like exposure and manually advancing their film.
Although a scale focus camera without any focus aides, the Hi-Color 35 was very easy to get correctly focused images, due mostly to the large depth of field of it’s 35mm lens. At the camera’s “Group” setting which is about 8 feet, using f/11, everything from 5 to 24 feet will be in focus, and at the 30 ft setting, f/11 will get everything from 8.5 feet to Infinity in focus. This amount of flexibility means that the lack of a rangefinder or any other kind of focus aide isn’t an issue for everything except closeups or scenes with poor lighting.
I didn’t love the viewfinder as it was quite small, but it was very clear, and I had no problems seeing the full frame while wearing prescription glasses. Since I shot the entire roll of film outdoors, I never once needed the low exposure warning, but I could see that being useful for novice photographers who likely would have bought a camera like this when it was new.
I am a huge fan of wind up motorized film advance cameras like this, the Kodak Motormatic 35, and the Fujica Drive. The sound and feel of the camera humming away as the film advances is mechanical music to my ears! There’s something about the sound of clockwork gears and springs moving that is much more pleasing then the grinding whir of an electric motor.
Overall, the Ricoh Hi-Color 35 is a great camera with an excellent lens, an accurate exposure metering system, full manual control, great build quality, and a convenient motorized film advance. For those of you who don’t like to use your old cameras, it’s also very good looking.
With it’s looks, excellent performance, and wide range of features, the Ricoh Hi-Color 35 is a fantastic classic camera for the 21st century version of the same demographic the camera was originally marketed towards, and one I definitely will come back to again in the future.
Related Posts You Might Enjoy
External Links
http://camera-wiki.org/wiki/Ricoh_Hi-Color_35
https://www.photo.net/discuss/threads/ricoh-hi-color-35.425639/
Another interesting review of an overlooked camera – thanks Mike! Ricoh seems to have a “thing” for cameras of different trim colors. When they introduced the Pentax K30 DSLR (in the Japanese home market, at least), they were available in an amazing range of color combos: http://www.steves-digicams.com/news/the_pentax_k-30_is_now_available_in_a_variety_of_colors.html
Maybe their slogan should have been: “Ricoh – Cameras With Pizazz!” 🙂
Another great review! This was one of my Elvis/UFO cameras and I was very fond of it. Stolen out of my car and replaced by a Canon Dial 35
Thanks Kurt! Did you ever get any actual photos of the UFOs?! 🙂
No,(nor Elvis) but I was ready. Others in that category were Kodak Retina (forgot which), Minolta 16QT, Rollei 35, Ricoh Auto Half SE,Olympus XA , Canon Elph, (APS)
Excellent review as usual Mike, thank you! Can you tell me where your getting your light seal foam? I’m looking for a new supplier. Thank you!
Thanks Ed! I don’t use light seal foam. I use adhesive backed black felt that I picked up from Joann Fabrics (or any craft store). It usually comes in 8.5″ x 11″ sheets and one sheet has lasted me through at least 20+ cameras. You just cut it to whatever shape and size you need and the adhesive sticks it to where you need it to be. If you screw up, or later want to replace it with foam, it can easily be peeled off. Some people have told me that they don’t like the idea of using felt as the little fibers can get into the camera, and although I guess it’s possible, I’ve never had an issue. The felt usually gets squished into position and I’ve never had an issue with fibers getting in the shutter or on the film.
This takes me back. The main claim to fame for this camera was that it could be purchased with an underwater housing. The lens had excellent depth of field, and the camera could be set to auto exposure and there was then no need for any controls other than the shutter release.
The clockwork winder was good for about 15 shots, and the camera could use ordinary flash cubes underwater (but not very deep).
In the mid seventies I was working in Jamaica and doing a lot of scuba diving, which is why I bought this camera. My main cameras at the time were Pentax Spotmatics, followed by the first of the Pentax bayonet bodies. When I went to the carnival in Trinidad I didn’t want to risk losing an expensive camera so I took the Ricoh (without the underwater bits) and it performed flawlessly.
Thank you for the interesting post! I may have to try this camera someday. I have tried the Ricoh RT550, but the results were not good, with terrible colors. At least everything was in focus though.