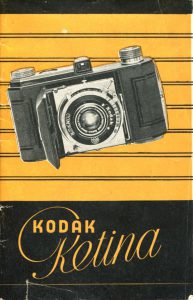
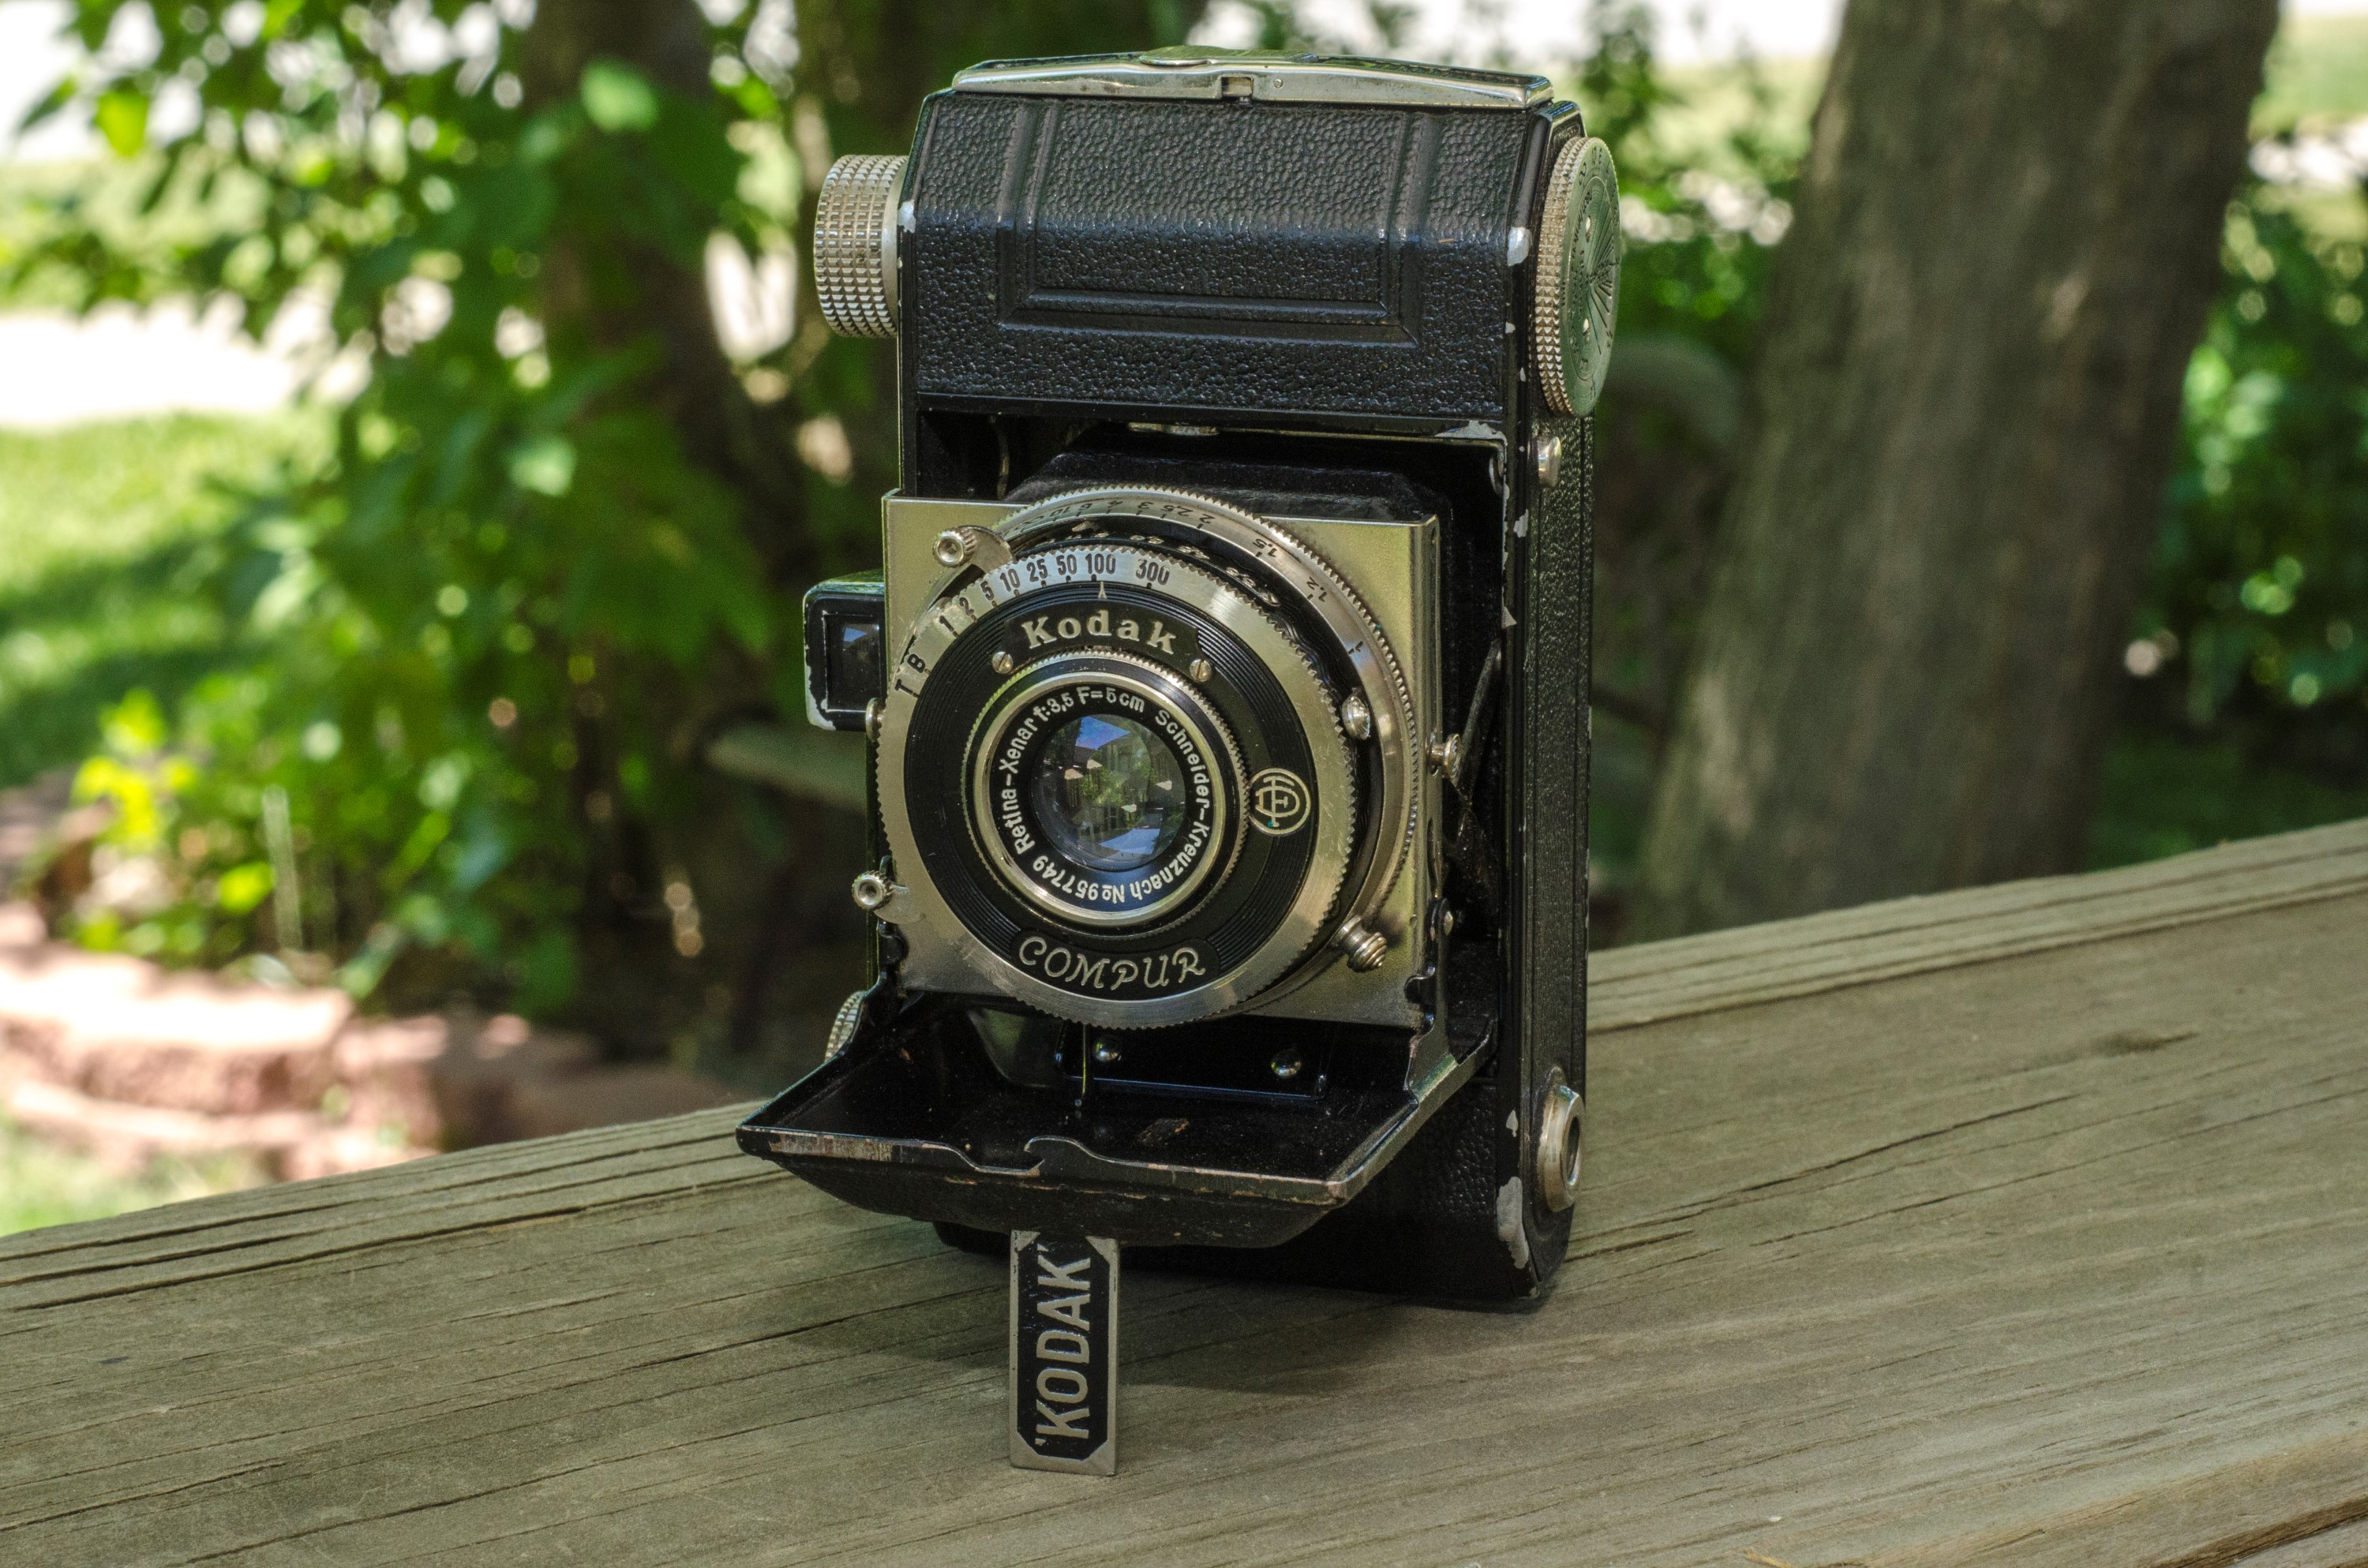
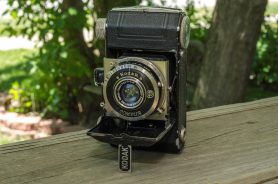
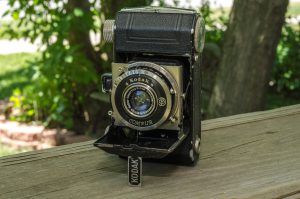
This is a Kodak Retina 35mm folding camera made by Kodak AG of West Germany. This particular model is a type 119 Retina which means it was made between the years of 1936 and 1938. It was the third Retina model after the original type 117 and type 118 models. The Retina series was designed by Kodak to use the company’s brand new format 135 film which was based off 35mm cinema film. It was a revolutionary style of film that came reloaded in a daylight capable film cassette. Type 135 film would become the most popular film ever made, and it was partially due to the success of these early Retinas.
Film Type: 135 (35mm)
Lens: 5cm f/3.5 Schneider Kreuznach Retina Xenar uncoated 4-elements
Focus: 1m to Infinity
Type: Scale Focus
Shutter: Compur Leaf
Speeds: T, B, 1 – 1/300 seconds
Exposure Meter: None
Battery: None
Flash Mount: None
Manual (similar model): http://www.butkus.org/chinon/kodak/kodak_retina_i/kodak_retina_i.pdf
History
You don’t have to be a camera collector or even a photographer to know who Kodak is. The Eastman Kodak company has been one of the most influential companies in the photography industry from the moment the company was founded in 1888, all the way to the start of the 21st century. They dominated the film and photographic paper market for over 100 years. As recently as 1976, the Kodak company accounted for over 90% of the film sold in the United States.
In addition to film and photographic supplies, Kodak had several successful lines of cameras, starting with the Brownie box cameras of the early 20th century, a long line of folding cameras, and then several inexpensive casual cameras in the mid 20th century. Chances are very good that almost every person reading this blog has an ancestor that at one time owned a Kodak camera.
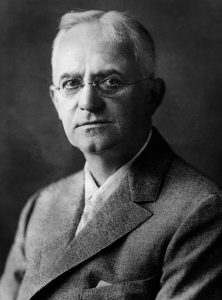
One of George Eastman’s principles in founding the company was to sell cameras cheaply to people in an effort to get them to be repeat customers by buying film and other supplies from him. This type of sales model is still used today with smartphones and video game consoles where the product is sold to the consumer at a loss to the company, with the understanding that customers will be locked in with continuing purchases.
While this business model was very successful in making profits for Kodak, it earned them a reputation by the middle of the 20th century as a lower tier camera maker. Many of their most popular models were simple cameras made of plastic, had relatively slow shutters, and often left out features that were available on more expensive models from Germany and Japan. By the time Word War II ended, if you wanted a top of the line precision camera, you generally would buy something made by someone else.
Perhaps realizing that Kodak lacked the expertise to make truly world class cameras, in 1931 the Eastman Kodak company acquired the Nagel-werke company in Stuttgart, Germany. The Nagel-werke company was founded in 1928 by Dr. August Nagel who had previously worked for Zeiss-Ikon, and had many years of experience building cameras. This new German subsidiary was given the name Kodak AG, and this was where future lines of cameras would be built with German expertise and precision, but sold under the Kodak name.
In the 1920s and 30s, there were a large number of different film formats competing for the purchasing dollar of the public. Many of these early film types were proprietary to a specific brand or make of camera, and could not be used in other models. Around this time, some European companies had started using a type of 35mm film originally designed for cinema and began rolling it into their cameras. 35mm film had the advantage of being a lot smaller than other types of roll film used at the time, which earned it the nickname as a “miniature format”. In addition to being smaller, it also had sprocket holes which meant it could be more easily rolled and advanced within the camera. Although these early formats of 35mm film are the same physical size as modern 35mm film, the sprocket holes did not maintain the same spacing, and not all of these early formats came in a standardized cassette.
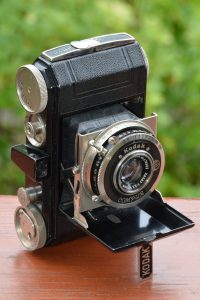
After forming Kodak AG, the Eastman Kodak company began work on an all new standard of 35mm film which would be called 135 format film. This new format would use 35mm film with standardized sprocket spacing and it would come in a standard felt-lined cassette which could be easily loaded in daylight. When the film was wound into a camera, it would stay inside the camera until the end of the roll, at which time the film could be “rewound” back into the cassette and sent in for developing, all while protecting the light sensitive film. The first camera to be released using this new 135 format was the original Kodak Retina in 1934.
Both the Retina and the new 135 format film were immediate successes. Within 2 years, several competing cameras were released such as the Certo Dollina and Wirgin Edinex from 1935, and the Argus A from 1936, all of which used 135 film. After World War II, almost every new compact camera being released used 135 format film. This style of film remained popular throughout the rest of the 20th century and is still the most common type of film still in use today in 2016.
The Retina was designed by Dr. August Nagel, who continued to work for Kodak AG after their acquisition. The design of the first Retina borrowed heavily from an earlier camera Nagel had created in 1929 called the Vollenda, which was a compact folding camera which used 127 roll film. He used his extensive experience working for Zeiss-Ikon to help design the Retina camera.
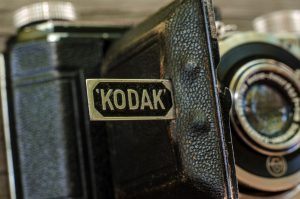
When it was released, the first Retina was pretty advanced for it’s time. It was a folding “clamshell” style camera that was very compact and could easily fit into a coat pocket. It could be purchased with a variety of shutters and lenses, all of which were way ahead of anything Kodak had released in the past. A typical setup included a Schneider-Xenar 4 element 5cm f/3.5 lens and a Compur-Rapid shutter capable of speeds as fast as 1/500th second.
There were three primary models in the Retina line, known as the Retina I, II, and III. This numbering system was not sequential, meaning that the II did not replace the I, rather, the different numbers indicate features of the camera. Retina Is were all scale focus viewfinder cameras. Retina IIs featured a rangefinder on the top plate of the camera for focusing, and the later Retina III had both a rangefinder and a selenium cell light meter for exposure calculation. Many variants of the I, II, and III were produced simultaneously. To further complicate things, when a Retina received a significant upgrade, a letter was added to the end of the number indicating a new version, so for example the Retina IIa is a Retina II with several changes.
To differentiate between all of the types of Retinas, a 3-digit type code was assigned by the factory to each version to help identify them. Sometimes the 3 digit code would change, but there would be very little difference between the two versions. The first Retina model, which was available from 1934 – 35 was called the Type 117. By the start of World War II, there were no less than 12 different “types” of Retinas. The chart below explains the model numbers of all folding Retinas.
| Prewar | Postwar | ||||
| Retina | 1934-35 | Type 117 & 118 | Retina I | 1945-48 | Type 010 |
| Retina I (Black) | 1936-38 | Type 119 | Retina I | 1949-50 | Type 013 |
| Retina I (Black) | 1939-41 | Type 149 | Retina I | 1951-53 | Type 015 |
| Retina I (Chrome) | 1936-38 | Type 126 | Retina I | 1954-56 | Type 018 |
| Retina I (Chrome) | 1939-41 | Type 148 | Retina I | 1957-60 | Type 019 |
| Retina II | 1936 | Type 122 | Retina II | 1945-48 | Type 011 |
| Retina II | 1937-38 | Type 142 | Retina II | 1949-50 | Type 014 |
| Retina IIa | 1939-41 | Type 150 | Retina IIa | 1951-53 | Type 016 |
| Retina IIc | 1954-56 | Type 020 | |||
| Retina IIC | 1957-58 | Type 029 | |||
| Retina IIIc | 1954-56 | Type 021 | |||
| Retina IIIC | 1957-60 | Type 028 |
As time passed, the Retina cameras continued to evolve. By 1954, the Retina line of cameras offered light meters, interchangeable lenses, larger and brighter viewfinders, and redesigned film counters. All of these features helped maintain the Retina’s reputation as a state of the art camera, but it also increased the size of the camera. The later cameras became larger and heavier, and as a result, lost some of the appeal of a small folding camera that could easily fit in your pocket. This change partially divides the collector’s market for Retina cameras. Some people prefer the more advanced features and better usability of the brighter viewfinder in the later models, but some prefer the smaller and more compact design of the earlier ones.
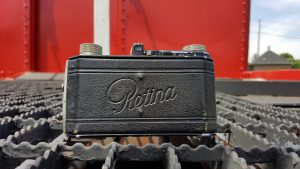
In 1958, a solid bodied Retina was released which no longer featured a folding lens. By 1960, the last of the folding Retinas was made and throughout the rest of the 60s, only solid bodied models were available. Kodak also used the Retina name on an unrelated line of SLRs known as the Retina Reflex from 1957 – 1966.
After the end of the Retina line, Kodak AG continued making cameras but focused their attention on lower end Instamatic models that used 126 and 110 format film. I can’t find any information as to why such a reputable factory who made such excellent cameras, suddenly changed their focus to simple cameras.
The camera being reviewed here is called the Retina I Type 119. It was the third model in the Retina line and the first to be officially called a Retina I as the rangefinder equipped Retina II Type 122 was released at the same time. Both types 117 and 118 Retinas do not have the Roman numeral ‘I’ identifier in their name.
Edit 7/4/2016: After posting this article I was corrected that while the Type 119 is technicially the third in the Retina line, it was introduced simultaneously with the Type 126 which is identical in every way other than having chrome plating instead of Nickel plating.
Today, the Kodak Retinas are seen as the shining exception to the rule that Kodak didn’t make high end cameras. Although the type 119 Retina is not high up on the list of the more desirable Retinas, it still deserves it’s place on a collector’s shelf for its prewar nickel and leather design, not to mention it’s excellent optics.
All Retinas were well built compact cameras with good shutters and excellent lenses that are still capable of extremely nice shots. For these reasons, there are many people who specifically collect Retina cameras. Although they were built in Germany, they are the only example of an American brand name camera sold with such high precision and quality. As a result, used Retinas in good condition can be quite expensive. Its not unusual to find a good condition Retina sell for over $100. Some of the less common models can go even higher than that.
Repairs
Despite their reputation as well built and reliable cameras, like any mechanical device that is nearing 80 years old, the perils of time can have it’s way on various moving parts. This Type 119 Retina was no exception and when I acquired it, the focus was stiff and none of the slow speeds worked. This Retina has a Compur shutter, and unlike other shutter designs, when the slow speeds become sticky, the Compur fires the shutter too fast, whereas other shutter designs cause the slow speeds to become too slow. This is caused by a unique design element of the Compur shutter which when the slow speed mechanism becomes gummed up, it does not engage, as opposed to the other designs which slow down or even stop the shutter from working at all. I do not know if this was an intentional design element as it would have taken nearly half a century to recreate the dried up sticky goo in a shutter, but if it was, it was a genius decision by the people who thought up the Compur. When it fails, at least the shutter functions at a usable speed.
Watch the following video I made before cleaning the camera, where I show the Retina firing at various speeds. Notice that the speeds of 1/25 and under all seem to fire at the same speed.
With these symptoms, a full cleaning of the shutter was required. Now, the entire Retina line has a reputation for not being the easiest cameras to work on. I can personally vouch for the later models like the Retina IIa and IIc being considerably more difficult due to the complexity of the design, but these earlier pre-war models are relatively easy to service.
I have quite a bit of experience cleaning Compur shutters, having done it on a Certo Super Sport Dolly, a Zeiss Icarette, and a couple Japanese Compur clones. The Compur on the Retina is no different than those others, but the first step in a successful cleaning, is to completely remove the shutter and lens from the camera.
The following steps should be the same (or very similar) on all early Retinas. They will also be very similar for many of the early German 35mm folding cameras like those from Welta, Balda, and Certo. While I won’t claim any responsibility, if you have a moderate ability working inside of the camera and have the necessary tools, this is absolutely something you can do yourself.
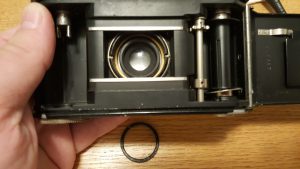 Step 1: The very first step is to remove the rear locking ring which holds the entire shutter to the front standard. This is done by removing the ring around the inner lens element inside of the film compartment. Use a lens spanner tool and rotate the ring counter clockwise. It will be difficult to maneuver the spanner inside of the tiny film compartment window, but there should be enough room to break the ring loose. You wont need the spanner to completely remove the ring. Just loosen it enough so it breaks free and then use precision screwdrivers to help it out the rest of the way. Do not try to remove the rear lens element at this point, it will come out with the shutter and you can remove it later. Also keep in mind that once this ring has been removed, the entire shutter will be loose inside of the camera. The next time you open it, take care to not let the shutter fall out of the camera.
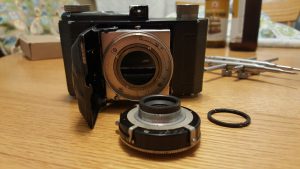 Step 2: Open the front of the camera and be very careful as the shutter is loose and will fall out. It is best to have a towel or something soft on your work area to protect the shutter and lenses as they come out. The picture to the right shows the Retina with the entire shutter and lens assembly removed. You can also see the rear ring that has already been removed.
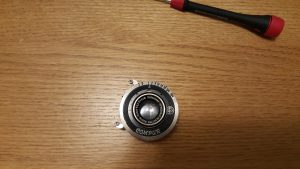 Step 3: The next step is to remove the front lens element. No tools are required for this as it is just screwed in. It might be tight, but just grip the lens firmly and rotate it counter clockwise and it should come out. You’ll also need to remove the two screws on either side of the KODAK name plate. These are very small brass screws to take care not to strip them and keep them in a safe location to be reinstalled later.
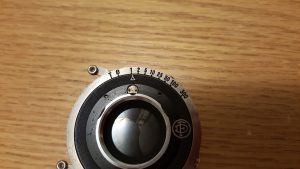 Step 4: Behind the KODAK plate is a locking dial with two divots in it’s face and is mostly round, but has one flat side to it. Using your lens spanner, rotate this dial 180 degrees so the flat side of it is up against the metal ring that the outer lens element was previously screwed into. By rotating this locking ring 180 degrees, this allows the black outer ring (with the COMPUR logo on it) to move freely.
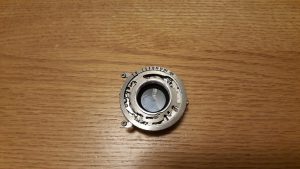 Step 5: With the locking dial in the correct position, rotate the black dial with the COMPUR logo counter clockwise until it cannot go any further. You may need to use precision screwdrivers to help it along it’s path. Pay attention to the circular indentations in the metal ring. There are corresponding circular protrusions on the black dial that will line up with these indentations. Once they are lined up, the black COMPUR ring will lift out. Once again, use your screwdrivers to help pull up on the black ring.
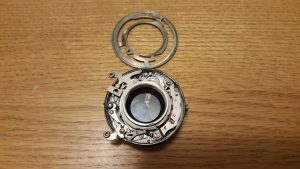 Step 6: At this point, there is only one more piece to remove, but it is the most important. Even if you’ve taken apart a Compur shutter before, I highly recommend getting some kind of digital camera or smartphone and taking many pictures of the shutter as it looks now. You will need to lift off the metal speed ring off the shutter. No tools are required as this ring is held on by friction. When reassembling the shutter, it must go back on in the same orientation and these digital images will greatly help you get it back in place. It is worth mentioning that this speed ring is necessary for all of the shutter speeds to work. Without this ring in place, the shutter can still be fired, but only at one speed.
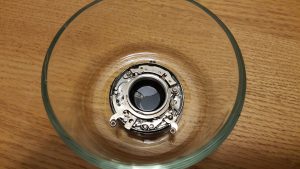 Step 7: With the shutter apart, it is time to soak it in some lighter fluid. I use Ronsonol brand lighter fluid, but any naphtha oil based solution will work. Depending on how dirty your shutter is, you may need to get some Q-tips to clean out any excess sludge in here. When using Q-tips, I prefer the name brand ones as they seem to be more tightly wound than the generic ones and hold up better.
Soak the entire shutter in the Ronsonol for as long as it takes to free up the slow speed governor. Liberally squirt fluid all over the shutter while simultaneously trying to fire it. Dont worry about which speed the shutter is at during this process as it’s more important to get the parts moving to help dissolve the dried up lubricant.
I find it necessary when cleaning shutters to liberally soak the shutter, fire it a couple dozen times, then drain out excess fluid and let the whole thing dry over night. Then the next day, repeat the process by soaking everything and firing it another couple dozen times. Repeat the process one more time, and after the third day, check to see if the shutter still performs at all speeds. You will need to temporarily install the speed ring into it’s original position to properly test the speeds as the shutter will only fire at one speed without this ring in position.
If the shutter still doesn’t appear to be firing at all speeds, repeat the process another day. Do this as long as needed to get it working. I have found that in most cases, 3 of these “cycles” is enough. Once you are satisfied that the shutter is working, put the shutter back together. It is not necessary to add new lubricant inside of the shutter. There is some debate among camera collectors as to what the best way is to lubricate an old shutter. My belief is that these old shutters will still work fine without any lubricant. If you insist on using a lubricant, get a purpose made watchmakers oil and a syringe designed for that kind of oil to put VERY small drops of oil on the moving parts. This is one area where less is more. If you over lubricate a shutter, you can end up causing it to stick again, or even let oil get in places where it doesn’t belong, further damaging the camera.
Step 8: You may also find that there is some debris on the shutter or aperture blades themselves. Using Ronsonol soaked Q-tips, gently drag the wet Q-tips over the surface of the shutter and aperture blades. If you look very closely at each blade, you’ll see that the blades overlap one another in a specific direction. You must not drag the Q-tip against the overlap of the blades as this can cause the Q-tip to snag on the blades. Always go with the direction of the blades. Do not put much pressure on the blades themselves as they are very fragile. Keep dragging your Q-tip over all of the blades until you are satisfied that they are clean and let them dry over night.
Step 9: Since you have both the front and rear elements out of the camera, now is a good time to clean them. Keep in mind that many cameras from this era will have lenses with light scratches or some debris inside of the glass. Most small scratches and small pieces of debris will have no impact on the image quality of the lens. Do your best to get excess haze and dirt off all lens elements and buff them clean with a soft terry cloth towel. I’ve actually found cotton terry cloths to work better than most micro-fiber cloths I’ve tried.
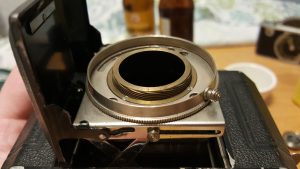 Step 10: Most likely the focus lever on the Retina will be stiff or difficult to move. This is caused by the same dried goo that caused the shutter to stick. With the shutter still out of the camera, look at the lens standard. You will see an internal metal ring with screw threads on it. This is the lens helical. You should be able to move it in and out with your fingers.
Pay very close attention to the orientation of the helical because if you completely remove it from the camera, it can throw the focus off the camera which you’ll have to confirm by collimating the lens. I had every intention of collimating my lens, so I just removed the helical and soaked it in Ronsonol to completely clean it. If you do not want to attempt collimating the lens, you can still clean the helical with it still in the camera, it just takes longer to do it. Using a Q-tip or small pieces of paper tower, soak the screw threads with Ronsonol and keep trying to wipe away the old lubricant.
I mention earlier about not needing any new lubricant inside of the shutter, but as for the helical, I recommend a very small amount of synthetic lubricant on the helical threads. This will help assure a smooth and free moving focus. If you cannot find any synthetic lubricant, white lithium grease from an auto parts store works fine too. Whatever you use, make sure not to over do it. It only requires very little to lubricate a helical.
Assuming you have everything clean and moving smoothly, its time to install the shutter back into the camera. It goes back in pretty much in the same way as it came out. Pay attention to mount the shutter in the correct orientation as it was so the KODAK logo is farthest away from the door. I once reassembled a Retina with the KODAK logo near the viewfinder, and I wondered why nothing was lining up properly.
Once everything is back together, double check your work to make sure all of the shutter speeds still work correctly and the focus is still smooth. I made a second video of the same camera after I had cleaned it to show you the difference in the shutter speeds before and after a CLA. As before, watch this video as I go through all of the speeds. Note how the slower speeds down to one second sound correct.
My Thoughts
Having prior experience with 1950s Retinas and 1930s German folding 35mm cameras, I wanted to bridge the gap and get a 1930s Retina. After all, I have a soft spot for the nickel and leather look of 1930s German cameras, so why not? The problem is that most pre-war Retinas are quite valuable. The very first model, the Type 117, often goes for several hundred dollars. I’ve seen completely unusable ones go for over $100.
As luck would have it, I spotted an auction for a Type 118 Retina that was incorrectly listed as a Retina I. The seller did not provide quality pictures of the camera and had it listed as a Make an Offer auction. I contacted him and we went back and forth a couple of times, and I eventually settled on a price of $35 + shipping for that Type 118. As I type this, sold eBay listing for Type 118 Retinas range anywhere from $53 to $125 so I felt that $35 was a good deal.
It can be very difficult to accurately price Retinas on eBay because so often, they are incorrectly listed. Many people don’t know the numbering system, so it is very likely that many more Type 118s had been sold, but the seller didn’t know what they had.
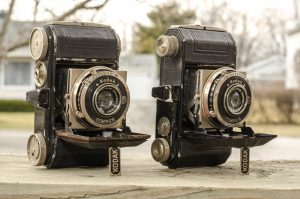
In either case, I was pretty happy with my pickup, but sadly, once it arrived I could see that the camera had a couple of serious issues. For one, the shutter was sluggish and none of the slow speeds worked. This is a relatively common issue with Compur shutters and could be resolved by a CLA that I was comfortable doing myself.
Beyond the shutter, there were two other issues that I wouldn’t be able to resolve on my own. The first was that the body had a lot of rust on it. The leather was in tact, which was a plus, but you could see it flaking away from the body in several locations. Having a Retina with missing leather dramatically decreases it’s value, so while everything was here, I was worried it would continue to fall off. Look at the picture to the left of the 118 and 119 side by side, and you can see the leather is falling off the front door on the lower left corner.
The second and more critical issue was that the front lens standard was noticeably bent. This was most likely caused by some previous owner forcing the door shut without setting the lens to infinity and bending the struts or the front standard itself. I sent an email to Chris Sherlock at retinarescue.com with some photos of my camera and asked his opinion. He quickly responded with the following email.
G’day Mike,
Thanks for your email.
The shutter problem will be caused mainly by the retard gear train being gummed-up with dust, dried grease and/or corrosion. It simply isn’t returning to the rest position, and so doesn’t retard the action as it should. Ideally, the shutter needs a proper CLA and the retard gear train would be cleaned at the same time. The alternative is to remove the gear train from the mechanism plate, clean and lubricate it and put it back in position. This is much easier to say than to achieve in practice. I always clean the gear train in situ once I have the shutter entirely apart. That way I don’t have to waste ages getting it adjusted to the correct position again. This is a much easier thing to do with later shutters, like those in the Retina IIIc and its brethren.
The other problem you mention is caused by the struts being bent. This damage to the struts will most likely have been caused by the camera either having been dropped, or by some clown attempting to close the camera without first pressing the release buttons at top and bottom of the shutter. The whole camera has to come apart to deal with that problem successfully unfortunately. In theory you might just be able to pull the front standard straight without disassembly, but most likely you’d just end up with an even worse problem. I certainly wouldn’t attempt to do it that way myself.
If you’d like me to service the camera and deal with both problems, along with all the stuff that doubtless also needs done, just let me know.
I’d charge you NZ$160 including the cost of airmailing it home once done.
Regards, Chris
On a side note, I love that the guy from the land down under actually began his email with “G’day”!
He seemed optimistic he could resolve all of the issues with the camera, and although his price of NZ$160, which translates to $114 US is fair, it wasn’t what I wanted to invest in the camera at that time.
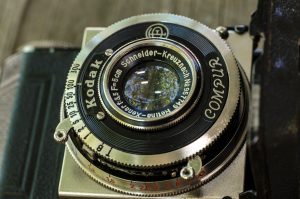
Around that same time, fate shone down upon me and I spotted an auction for a Type 119 Retina for less than $20. Once again, the seller knew nothing about the camera and took poor pictures, so I took another gamble and picked it up. When it arrived, it had the same sluggish shutter as the Type 118, but otherwise was in much better condition. Feeling pretty confident that I could clean the shutter on the 119 myself and knowing that despite the condition issues, I still thought I could get more for the 118 than I paid for it, I listed it on eBay and sold it. I only turned a profit of $5 or so, but at least I had the pleasure of being able to handle a Type 118 myself. Certainly not as cool as a Type 117, but close enough.
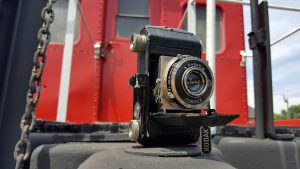
Looking at a Type 119 next to a 118, it is clear that there are differences in the top plate. I believe the 118 looks a lot nicer with the shallower and larger diameter wind knobs with engraved KODAK logo. I also prefer the look of the frame counter from the 118 over the more basic style on the 119. From a performance standpoint however, the two cameras are nearly identical. They each have the same Schneider 5cm/3.5 lens, the same Compur shutter, and have nearly identical bodies. The differences are purely cosmetic, yet the 118s are much more desirable since they so closely resemble the 117s.
Despite owning the “lesser looking” Retina, I was still happy because it worked. I do not collect cameras to display them on a shelf or to keep as a retirement investment. I want to shoot them and that’s what I wanted to do with the Retina. I loaded in a roll of FujiColor 200 film and went shooting.
My Results
This is my third Retina review I’ve written and 4th Retina over all which I have film experience with. If you were to look at random results from each of those 4 cameras and tried to tell which cameras shot which images, I don’t think anyone in the world could do it. I said something similar in my review for the Nikon N80. You could put a pile of images shot with various Nikon SLRs and you wouldn’t be able to see a difference in quality between them all because simply, they’re all wonderful cameras.
The same is true about the Retina. Retinas have a wonderful reputation because they are wonderful cameras. You actually have to try to not get a good image from them. Shooting with the Type 119, I thought perhaps this being the oldest Retina in my collection and the only pre-war model, maybe I would start to see a difference. After all, the Schneider f/3.5 lens should be “less” than the Xenar f/2 and f/2.8 of the IIa and IIc, right?
Nope. They still look great.
If I have anything meaningful to say about my experience with the Type 119 Retina, is that shooting with it is a little more frustrating than that of the 1950s IIa, IIc, and IIIc Retinas I’ve used. Of course, it is an older camera, so it makes perfect sense that the experience would be different.
For starters, when shooting with older Retinas, this is an area in which their small size somewhat works against them. The original Retinas all came with Compur shutters without top plate shutter releases. The shutter release is on the shutter itself on the side closest to the door. While not difficult to reach, it’s not in an ideal location for your finger. In one instance I accidentally tripped the shutter because I was feeling around for it with my finger and I bumped it too hard. I found it necessary to locate the shutter release with my finger before putting it against my face so that I wasn’t fumbling around for it when it came time to take the shot.
When this camera was new, there was an included accessory which screwed into the threaded cable release socket that gave an auxiliary “plunger” style cable release. Sadly, this accessory is often missing on these cameras after 80+ years but if you are lucky enough to acquire a Retina with one still in place, it might be useful as an alternate way to fire the shutter.
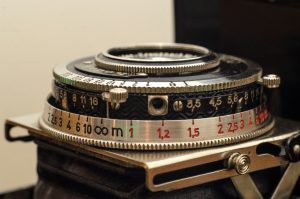
The rest of the controls aren’t exactly the easiest to change on the fly either. The aperture selector is very small and is located on what would be the bottom of the shutter when holding the camera in landscape orientation. A small plus is that when moving the aperture selector, there are two scales that show your selected aperture, one which is visible to the photographer in landscape orientation and one in portrait.
The focus knob is also very small and also on the bottom of the shutter in landscape orientation. It’s location is similar to later Retinas, but instead of a large plastic knob, its a small metal post that when in the infinity location, points towards one of the door struts, making it a bit difficult to locate on the fly. Like the aperture selector, the focus scale, which is metric, is visible both in landscape and portrait orientations.
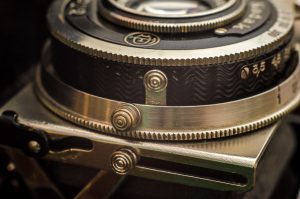
If it seems like I have a lot of complaints about the usability of the Retina, I should at least acknowledge that nothing here is out of the ordinary for the era. 35mm folding cameras in the 1930s were still very new. They were the smallest cameras you could buy, and rightfully so, the controls are small. The Retinas would slowly increase in size over the next 3 decades to a point where they would start to lose their pocketability, so for someone at the time looking for a state of the art camera with excellent optics and a size unlike anything else of the era, this was the best money could buy.

If you have an interest in vintage photography, no collection is complete without one (or many) Retinas. These prewar models absolutely deserve a spot in any collection, and as the results above should prove, they are still quite capable performers, but if you want the best the Retina line has to offer, this isn’t it. Which Retina is the best? I honestly don’t know because I haven’t shot with every single model. I really like the IIc because of it’s good looks, feature set, excellent optics, and the fact that it is still relatively compact. That model isn’t perfect though either. It has an annoying LVS (light value scale) that gets in the way of changing aperture and the viewfinder is relatively small. The “Big C”, IIC has a larger viewfinder, so maybe it’s the best Retina, I don’t know because I’ve never handled one. Click here for a link to my full review for the Retina IIc.
In any case, I do really like the 119 and even though it’s the “ugly ducking” of the prewar models, it also consistently goes for the cheapest prices on eBay. If you can find one in decent shape for a fair price, pick one up. It will most likely need some degree of cleaning, but its an excellent first Retina for someone looking to experience the best of what German technology had for 35mm cameras before the war.
My Final WordHow these ratings work |
The Kodak Retina Type 119 is as close to an “under the radar” camera as any Retina can get. On one hand, it has prewar German nickel and leather styling, but lacks the beautiful details of the Types 117 and 118 Retinas, yet it still has the same shutter, lens, and excellent build quality of those earlier models. For collectors of Retinas, no collection is complete without one. As a shooter, it is hampered by typical ergonomic issues of other cameras of it’s age. The Type 119 requires a bit more patience to use than the later 1950s Retinas, which decreases it’s ability as a candid camera. While the results I got from it were quite good, and I did enjoy using it, I never got that feeling of excitement after my first roll that makes me look forward to coming back to this camera. I don’t know if that’s necessarily a knock against the camera itself, or a credit to the entire Retina line that while this is a solid camera that holds up remarkably well after 80 years, later Retinas are simply easier to use, yet maintain that incredible build quality that all Retinas had. | ||||||
| Images | Handling | Features | Viewfinder | Feel & Beauty | History | Age | |
| 1 | 1 | 1 | 1 | 2 | 1 | 40% | |
| Bonus | none | ||||||
| Final Score | 9.8 | ||||||
Additional Resources
http://retinarescue.com/retina1type119.html
http://camerapedia.wikia.com/wiki/Kodak_Retina_I



Nice review. I really love Retinas too. I have a contemporaneous type 126.that I’ve only run one roll through, but plan to pull it out again soon. the big “con” for me on this camera is the manual film counter lever I have to remember to bump to advance the film and not get a double exposure. One extra thing to remember. I’ve also got a type 148 that advances on its own. A little less frustrating when I get my developed film back. Still, I agree, all Retinas are amazing cameras.
A great article, thank you. I have a 117 and a big 111C. They’re both great cameras. BTW, the Xenar is a four element lens whereas the Xenon is a six element lens.
Thanks Allan! I made the correction regarding the elements. I had it right in one spot, but wrong in another! 🙂
Hello Mike, very nice read – thanks for that! Got a cheap Type 118 lately (also without the seller knowing what he had). I noticed there is some haze in the removable front group. Do you know if it can be further disassembled or is it just a cemented pair? It does definitely look like ordinary haze, not lens separation. Thanks! Greetings from Germany, Thomas.
Thomas, congrats on the type 118! Sadly, the front element of every Retina I’ve seen has a cemented front pair. If there is haze between the elements, the only way to fix is to separate the elements and then reglue them together, which I’ve been told is not easy. Depending on how bad the haze is, its possible it wont even affect your image. At the worst, you’ll lose some contrast, but sometimes that makes for a vintage “dreamy” look to the images. Load in some high-contrast film like Ilford Delta and you’ll likely still get nice images from it!