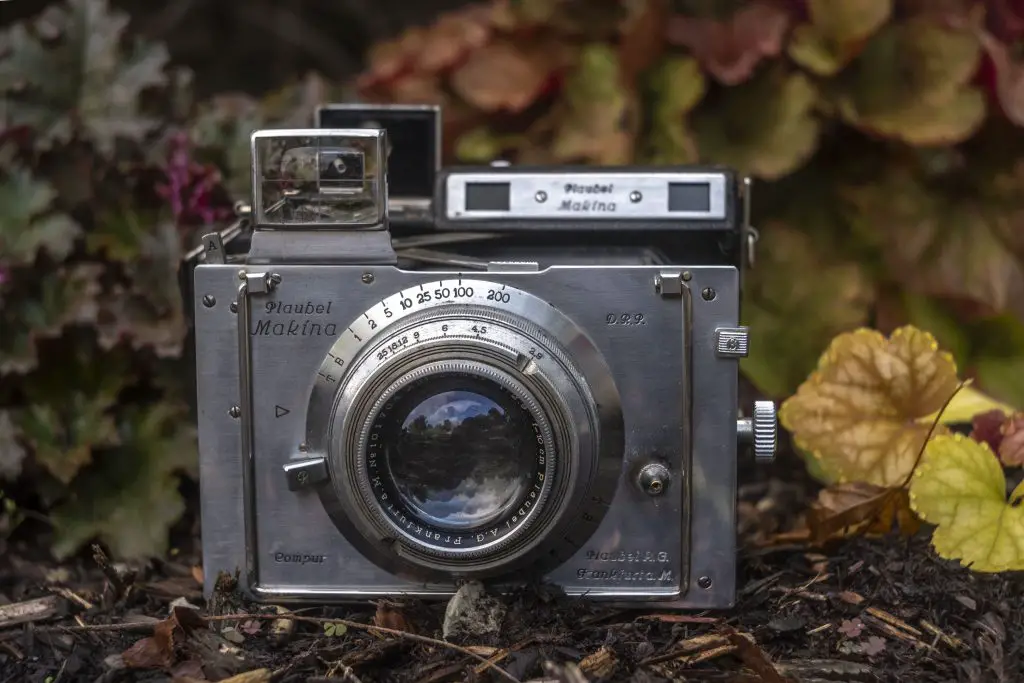
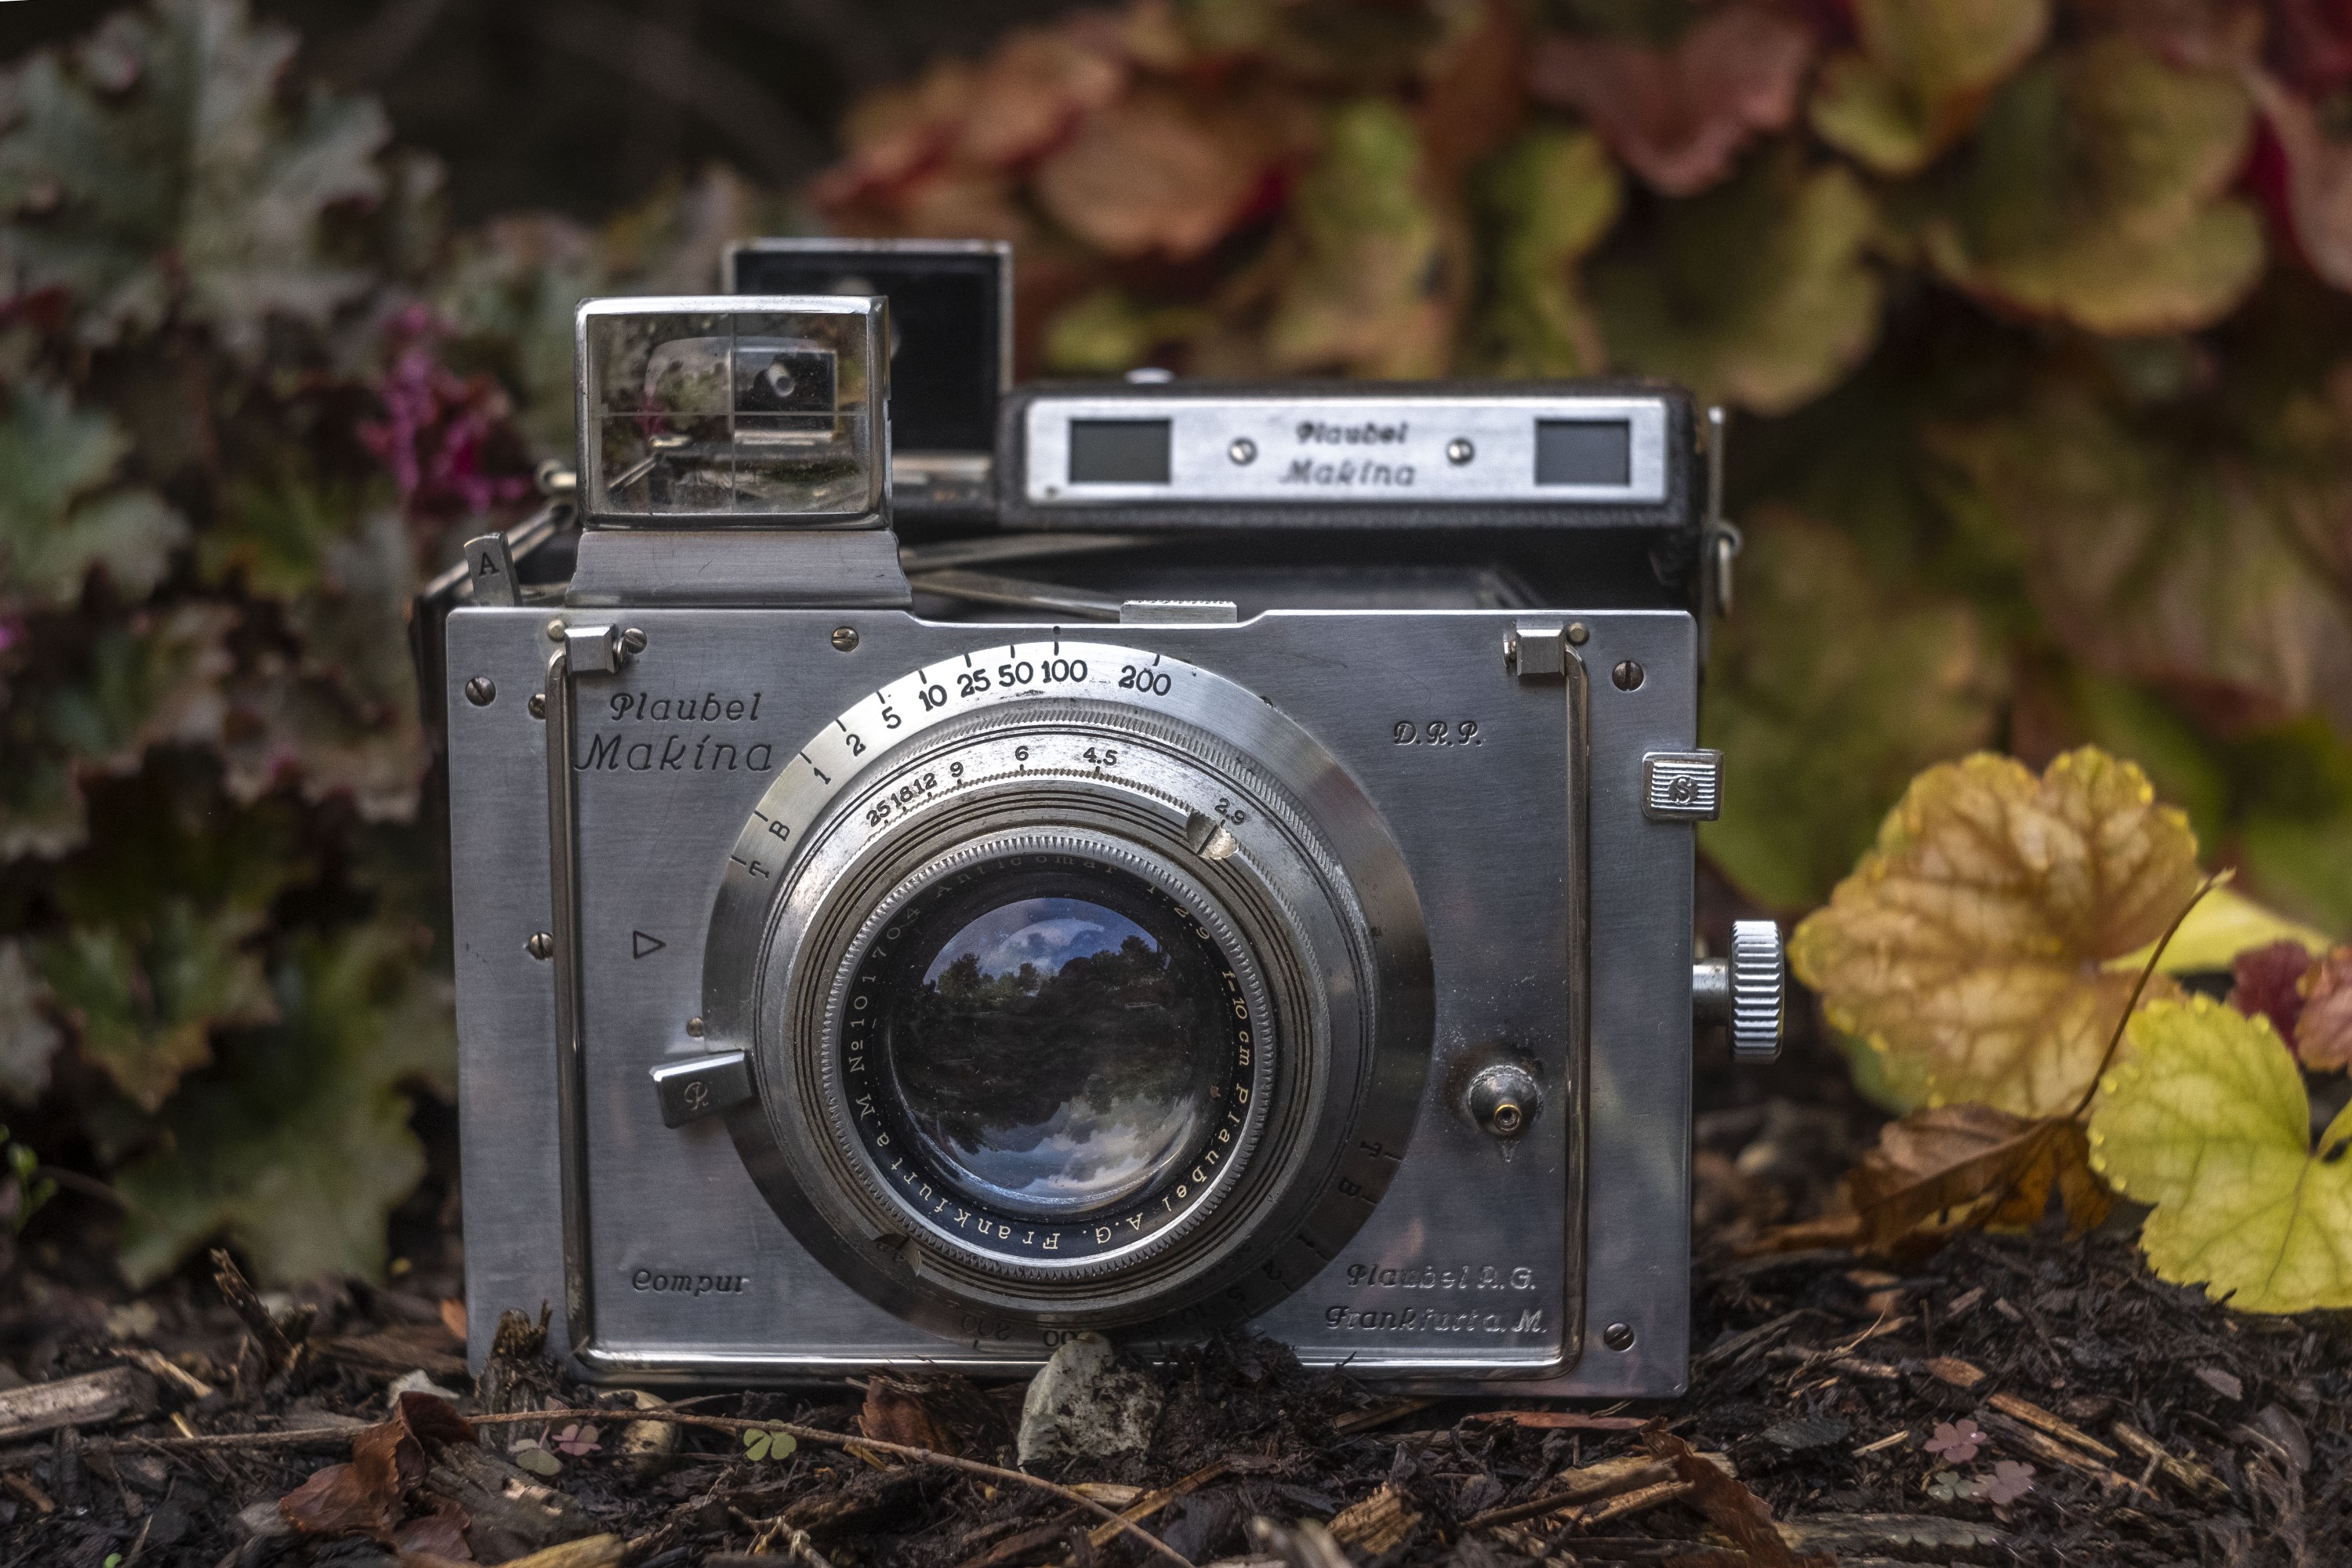
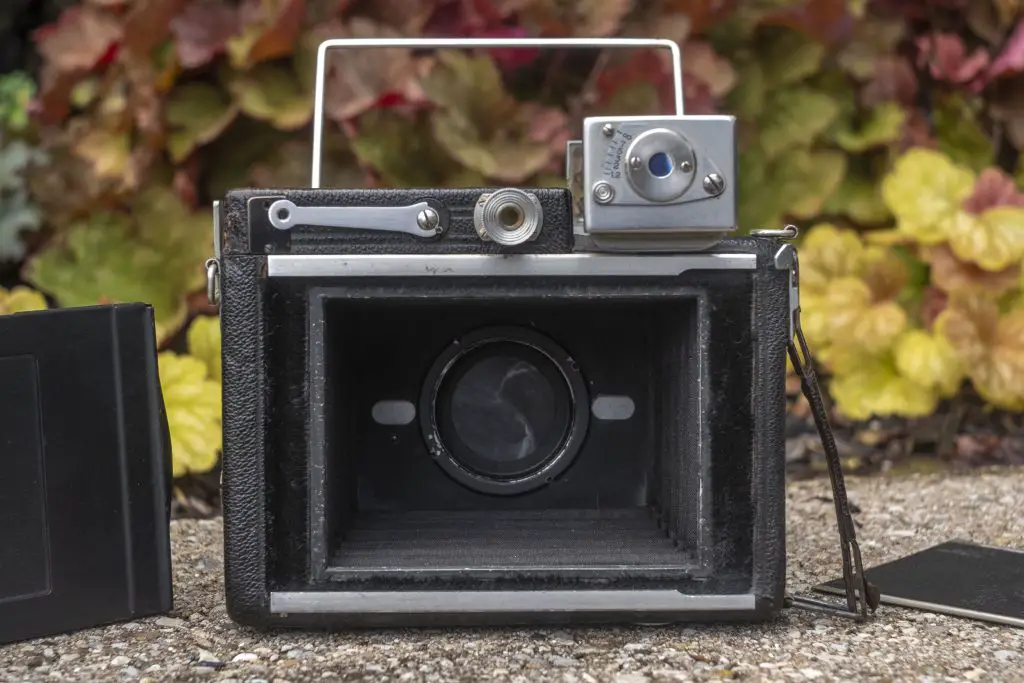
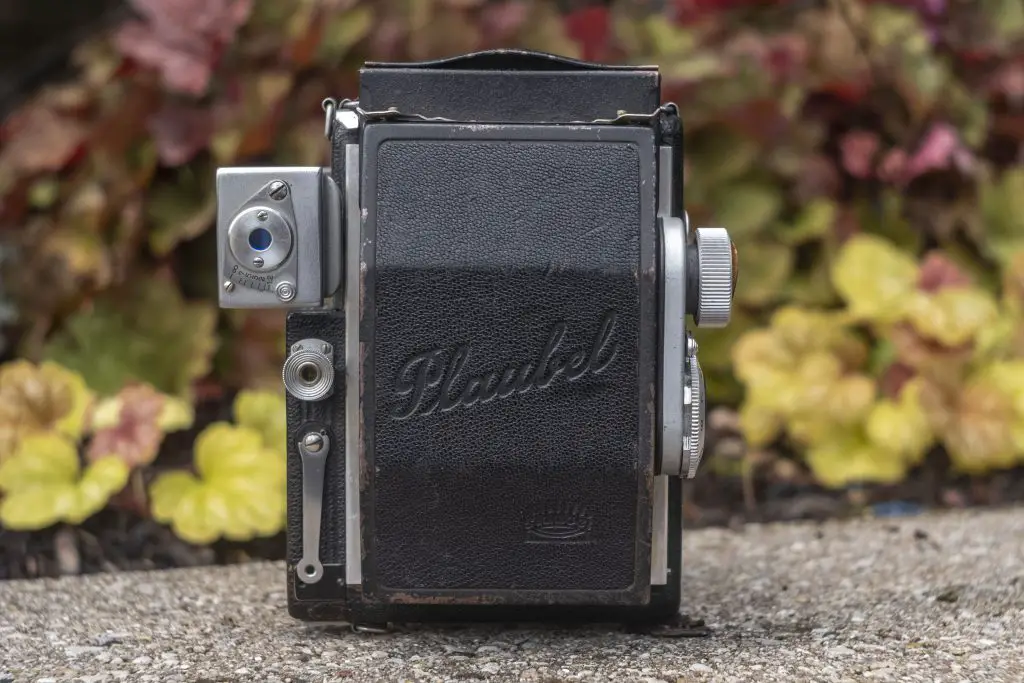
This is a Plaubel Makina IIS, a folding medium format rangefinder camera made by Plaubel Feinmechanik und Optik in Frankfurt, Germany from 1936 to 1949. The Makina name was used on a series of professional cameras that date back to 1912 and came with a huge number of features, lenses, and shutters. The IIS shot 6.5cm x 9cm plates and featured a coupled rangefinder in addition to a reverse Galilean flip up viewfinder, a behind the lens Compur leaf shutter, and had an interchangeable lens mount. Many Makinas, like this one, were fitted with a 120 roll film back for 6cm x 9cm images. Plaubel Makinas were commonly used by press photographers and inspired models made by other companies including the original Minolta camera.
 Film Type: 6.5cm x 9cm plates or 120 roll film w/ Plaubel rollfilm back (eight 6cm x 9cm exposures per roll)
Lens: 10cm f/2.9 Plaubel Anticomar uncoated 4-elements
Lens Mount: Makina Screw Mount
Focus: 1.2 meters to Infinity
Viewfinder: Reverse Galilean Flip-Up Optical Viewfinder w/ Coupled Coincident Image Rangefinder
Shutter: Compur Leaf
Speeds: T, B, 1 – 1/200 seconds
Exposure Meter: None
Battery: None
Flash Mount: PC M and X Flash Sync
Weight: 1261 grams (w/ lens and 120 back), 940 grams (lens only), 759 grams (body only)
Manual: https://www.cameramanuals.org/prof_pdf/makina.pdf
How these ratings work |
The Plaubel Makina IIS was a compact professional camera that had a variety of features that press and other professional photographers would have found beneficial when it was first made. The camera’s ability to shoot both sheet and roll film, and change lenses between a wide, standard, and telephoto meant that it could be used in a variety of situations. It’s unusual design might look strange today, but was likely not much of an issue for photographers used to large view and reflex cameras of the era. In use, the Makina is a bit intimidating for a modern photographer, but once you spend some time with it, it becomes natural to use. | ||||||
| Images | Handling | Features | Viewfinder | Feel & Beauty | History | Age | |
| 2 | 1 | 2 | 2 | 2 | 1 | 40% | |
| Bonus | none | ||||||
| Final Score | 14.0 | ||||||
History
Plaubel was a German camera maker, founded in 1902 by a former Voigtländer employee named Hugo Schrader. Schrader gained experience in camera and lens design while working there and in 1900. went to work for his father in law, Dr. Rudolf Krügener’s company making lenses and cameras for a couple of years.
In 1902, Schrader and his wife ventured out to create their own company, naming it Plaubel & Company after his wife’s brother, Karl Plaubel. There they sold a variety of photographic accessories and distributed studio cameras produced by other companies.
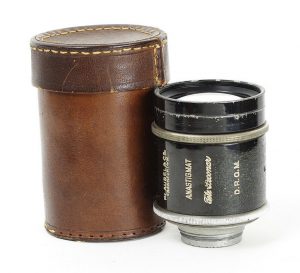
Around 1908, Plaubel began production of it’s first two lenses, the 4-element Ortar f/6 in focal lengths from 6 to 75 cm and the Peconar f/8 in 15 to 25 cm focal lengths. In 1909, Plaubel’s first camera, the Precision Peco was created. It was a studio camera that shot 10 x 15 cm or 9 x 12 cm plates.
At the same time Plaubel began transitioning into a camera and lens company, Hugo Schrader had an idea for a portable plate camera that could replace bulkier cameras that would use a scissors mechanism which offered precision focus via a wheel on the front of the camera. Using a folding scissors design, Schraders camera could be easily carried around from location to location by a photographer.
In July 1911, Schrader would release the Stereo Makina, a folding scissors camera that shot 4.5 x 10.7 cm stereoscopic plates. Stereo cameras were very popular at the time, and the choice to release a stereo camera before a more traditional camera likely helped Plaubel stand out in a crowded market of German camera makers.
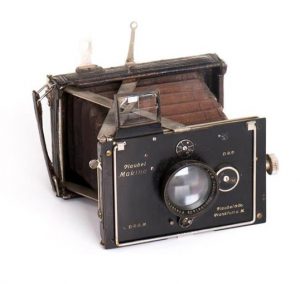
A single lens Makina would make it’s debut in 1912. As he had envisioned, the Makina was a compact scissors plate camera that shot 6.5 x 9cm images and although not quite pocket sized, the Makina could easily fold into a medium sized satchel or handbag.
The Makina saw immediate success as it was the first widely available compact camera built to high standards, and is thought to have popularized the 6.5 x 9 cm exposure size. Production of the original Makinas stopped during the first world war, but would resume in 1919 with new features and better lenses.
The Makina would receive incremental updates over the next few years including features like parallax correction, and a more logical arrangement of controls. In 1933 and then again in 1936, a new model called the Plaubel II and then IIS were introduced which added a coupled rangefinder, and a revised interchangeable lens mount. With the release of the Plaubel II also came chrome and nickel finished models, in addition to the original black painted models.
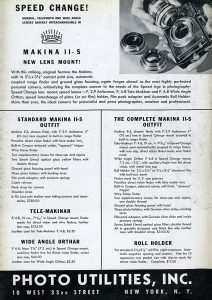
With these new features, the Plaubel Makina was a full system camera capable of what would then have been considered nearly automatic operation. The camera could be optioned with plate holders, a roll film holder, ground glass, and came with a selection of wide and telephoto lenses.
In the 1937 ad to the right from Photo Utilities Inc in New York, the Makina IIS sold in an outfit with the 10cm f/2.9 Anticomar lens, several filters, a ground glass attachment, three plate holders, film pack holder, a couple straps, and a leather carrying case for $280. The 120 roll film holder and wide angle Orthar and Tele-Makinar lenses were an additional $11, $60, and $125 respectively, or you could just buy it all in a single complete Makina kit including a specially designed leather case for $540. Each of these prices, when adjusted for inflation, compare to $4985, $195, $1070, $2225, and $9615 today!
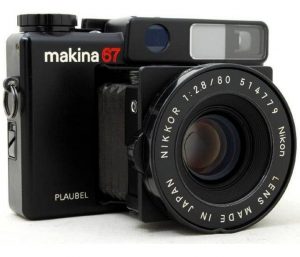
After the war, Makinas continued to be updated, with more features and more lenses. The last new model was the Makina IIIR released in 1953 that was produced until the late 1950s. Plaubel had a few other camera designs around this time but never evolved into a major played in Germany’s optics industry. The company was eventually sold to a Japanese firm in 1975 at which time the Makina name was resurrected in an unrelated lineup of semi-professional 6×7 cameras.
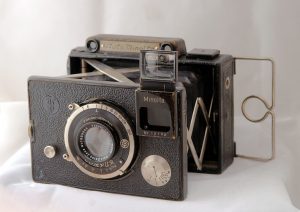
Like many successful German cameras, the Plaubel Makina inspired models made by other companies who would copy many of it’s features. In 1933, a small Japanese company called Molta Gōshi-gaisha would create a camera that was heavily inspired by the Makina called the Minolta and later the Auto Minolta. The Minolta was not a direct copy of the Makina, but shared many of the same design cues, such as the 6.5×9 folding plate design, flip up viewfinder, leaf shutter, and coupled rangefinder. The company that made these original Minolta cameras would later reorganize into a new company called Chiyoda Kodaku Seiko, later renaming itself to the Minolta Corporation.
Today, Plaubel cameras are sought after by collectors due to their high quality, excellent performance, and history. With the design of the Makina, high quality professional photographs were no longer tied to studios. You could buy a Makina and carry it with you to create large enough negatives that would still look good as contact prints, or further enlarged to make bigger prints. For people looking for a vintage camera experience with a lot of flexibility, you could do a lot worse than an early Makina.
Repairs
This Plaubel Makina IIS worked perfectly the entire time I had it. There was no need to repair anything, but in my research for this article, I found an excellent write up on how to do some basic servicing yourself on a page by Jo Lommen, so I thought it was worth mentioning it here.
My Thoughts
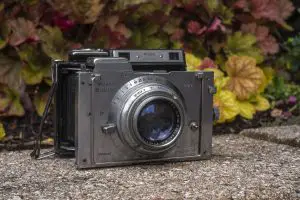
This Plaubel Makina IIS belongs to collector Paul Rybolt and came out of a conversation Paul and I had one day after visiting him at the Ohio Camera Swap meet in West Chester, Ohio last fall. I had no experience with Plaubels or any folding press camera like this, but it had a 120 roll film back so I figured why not.
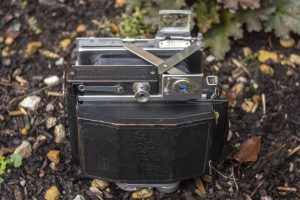
The Makina is a combination of a very simple folding scissors camera but with the complexity of the best medium format German cameras of the era. The body is all metal, covered only on the sides with leather, and with an exposed brushed aluminum front plate. The earliest models had a black painted front, instead of the bare aluminum.
On the front plate is an interchangeable screw mount and medium format Compur shutter and on the back, depending on how you have the camera configured, is the holder for 6.5cm by 9cm sheet film holders, ground glass, or a Plaubel 120 roll film back. With the roll film back, the camera weights a portly 1261 grams (2.8 lbs) and without a good way to hold it while walking around, you’ll never forget you have it with you.
There is an impressive amount of hardware on the camera that takes a little bit of explanation before it can be used so you’ll definitely want to spend some time familiarizing yourself with the manual, or just read this article for more information.
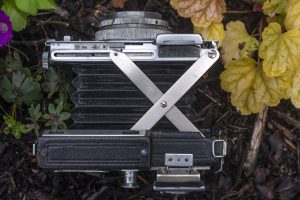
The top of the camera is where you’ll find the large flip up reverse Galilean viewfinder and dual focusing scales for wide angle and standard lenses. The scale on the left has the letters “WW” is to be used only when using the wide angle 7.3cm f/6.8 Orthar lens.
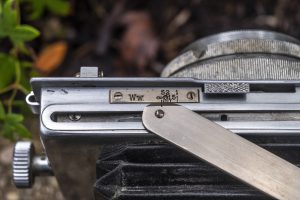
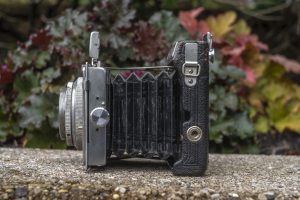
There is no trick to open the camera, you simply pull on the front standard and it will begin to open. When doing this, the front standard will naturally stop about halfway open. In this position, the camera looks like the image to the right. Notice that the metal strut arm has a black notch that lines up with the infinity symbol on the WW scale. If you had the wide angle lens mounted to the camera, you would leave the camera like this and control focus with the knob on the left side.
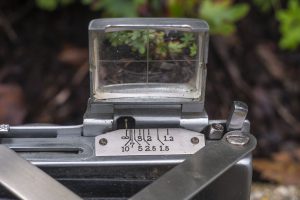
For the standard 10cm f/2.9 Anticomar like I have mounted, you need to continue to press down on the two textured rectangular buttons, one of which is to the right of the WW scale and the other opposite this position on the bottom of the camera, and pull out the lens standard the rest of the way. In the images above, you can see that inside of the sliding track that the hinge of the struts slide through, there are two holes. The first of which is where the lens standard stops for wide angle, and the second is for the 10cm lens. In the standard lens position, you’ll see a white line beneath the front viewfinder glass that will line up with the focusing scale on the right. This scale is only for the 10cm lens. You must pay attention to these scales and make sure that one of the marks either on the strut or beneath the viewfinder window is pointing to the appropriate scale for whichever lens you have installed.
There was a third lens, a 19cm f/4.8 Tele-Makinar available for the Makina IIS that mounts the same as the 10cm Anticomar, but uses a different focusing scale on the lens itself.
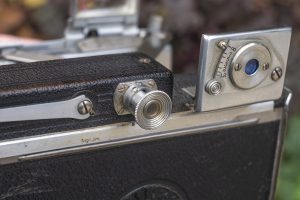
The Makina IIS uses a coupled rangefinder that works with both the 10cm Anticomar and 19cm Tele-Makinar lenses. The left eye piece is for the rangefinder and has a telescoping feature that doesn’t seem to do anything. I thought that perhaps it would function like a diopter, but pulling it out or rotating it did not seem to have any effect on the rangefinder image. The rangefinder was surprisingly bright and accurate on this camera, especially considering it’s age.
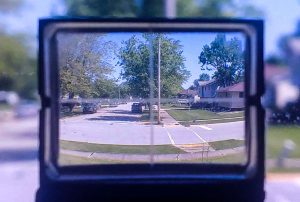
The primary viewfinder window on the right is tinted blue which likely helps to improve contrast. Etched into the forward glass of the viewfinder is a cross hair which is useful for leveling the camera on the horizon. I’ve seen pictures of other Makina IIS’s, where instead of the cross hair, there is a “tic-tac-toe” style grid. I am unsure why some have this design and others that one. The viewfinder is cleverly designed so that with the camera extended all the way, the viewfinder represents the image with the 10cm lens, but at half way, you get a wide angle image.
To the left of the rear eyepiece is a sliding knob which tilts the viewfinder window to adjust for parallax when shooting closeups. There were also available a few auxiliary closeup lenses that could work with the Makina’s lenses allowing for shots as close as 20.5cm (~8 inches).
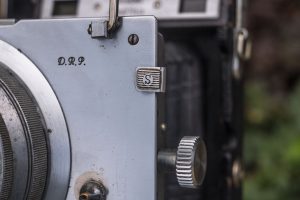
Once you have the camera erected in the correct position for whichever lens you have installed, fine focus is controlled by this wheel on the camera’s left side. Focus movement is smooth and precise, but requires six full rotations to go from minimum to infinity focus. This is great for precision focus, but not so much for speed. Immediately above the focus wheel is the shutter cocking lever, indicated with the letter ‘S’.
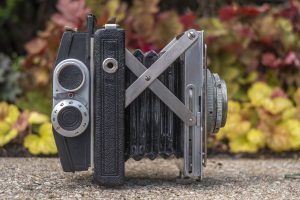
There’s not much to see on the bottom of the camera itself, other than a 3/8″ tripod socket and a second release button opposite the one on the top of the camera for erecting the camera into one of the two wide angle and standard lens positions.
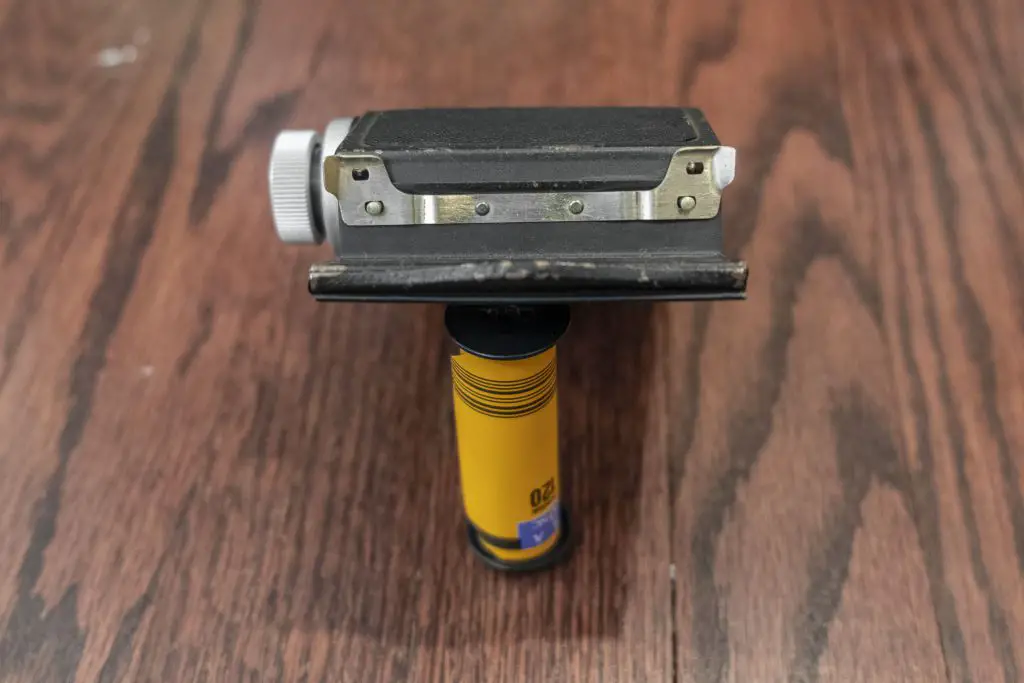
If you have the Plaubel 120 roll film holder installed like in the image to the left, you can see the exposure counter and film advance knob, but I’ll explain that more in detail later.
The Makina IIS, like any other sheet film camera has a sliding back that can be configured a number of different ways depending on your needs.
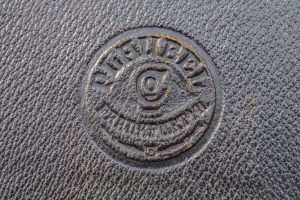
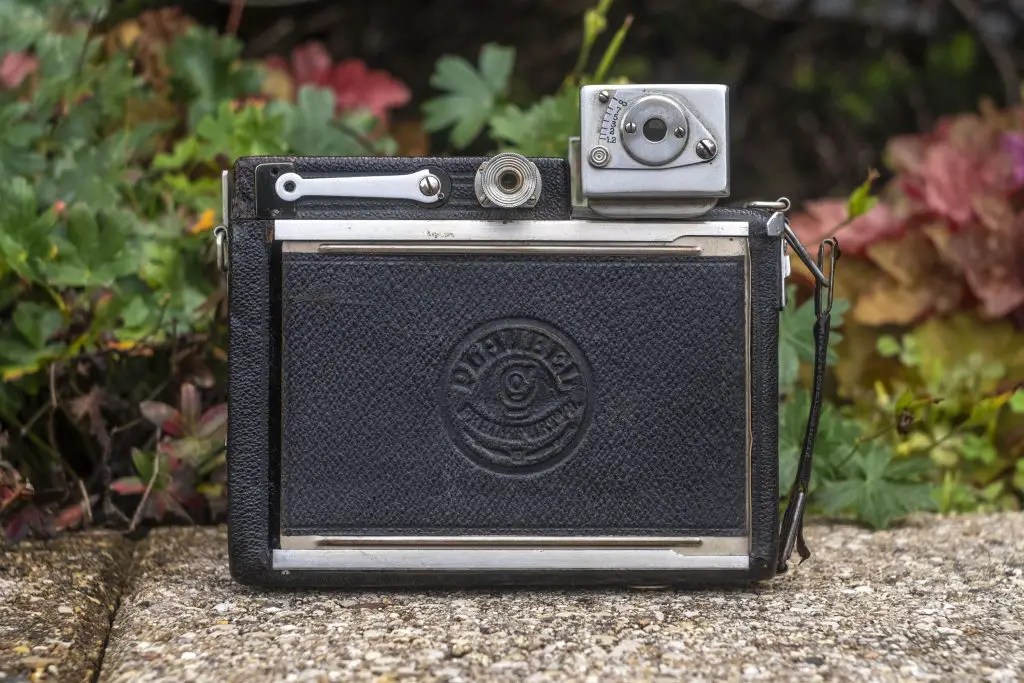
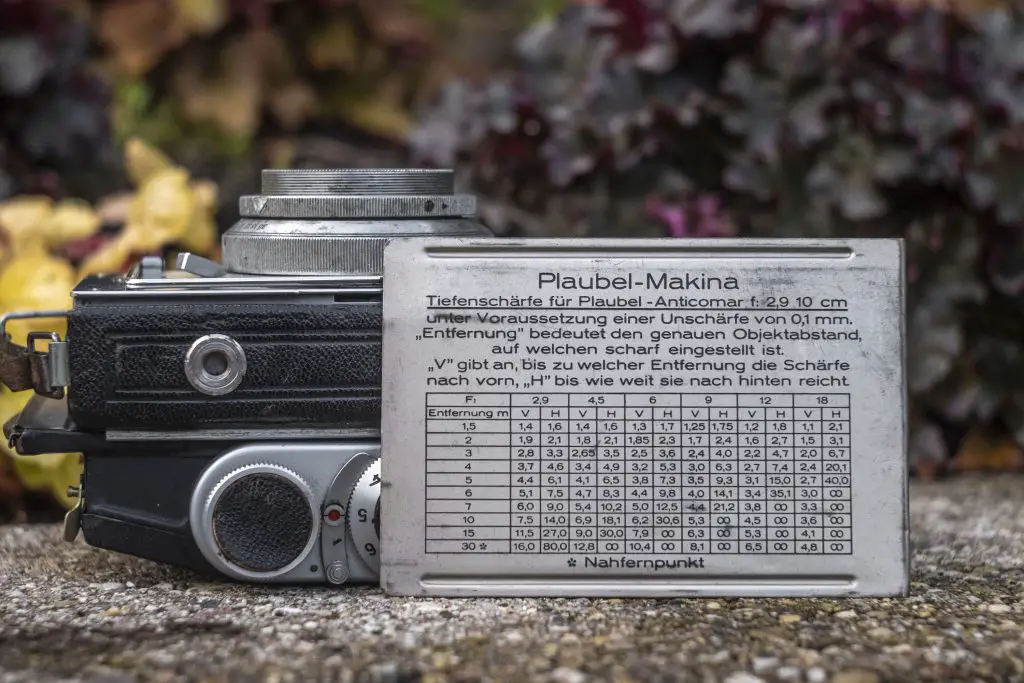
The Makina is natively a 6.5cm x 9cm sheet or plate film camera. If you are lucky enough to still have the original metal back for the camera you’ll see an ornate Plaubel logo embossed into the leather on one side and an elaborate depth of field chart for the 10cm Anticomar lens on the other. Focus distances in meters are on the left side of the chart and f/stops across the top. The letters “V” and “H” mean minimum and maximum distances the lens will be sharp at that f/stop and distance.
The back of the camera slides off to the right and allows you to mount sheet holders, ground glass, or the roll film attachment. It looks like on this model there should be some kind of lock in the upper left corner to securely hold the roll film back on, but it was either broken or had a missing part on this one as the back never fully locked into position.
Loading film into the roll film back is much like other roll film backs for sheet film cameras like the Graflex Graphic series or other universal backs like the Rada or Rollex, but if you’ve never done it before, it could use some explaining.
Loading the Plaubel 120 Film Holder
The Plaubel Makina manual that I found online does not have loading instructions for the roll film holder, and while it’s not impossible to figure out on your own, having some instructions ahead of you will help eliminate any wasted film. I found a walk through showing a slightly different variant of film holder than the one I have, but it seemed to work fine on mine. Since the original one only had a few pictures, I thought I would create my own to show each and every step for anyone wanting to do this same thing.
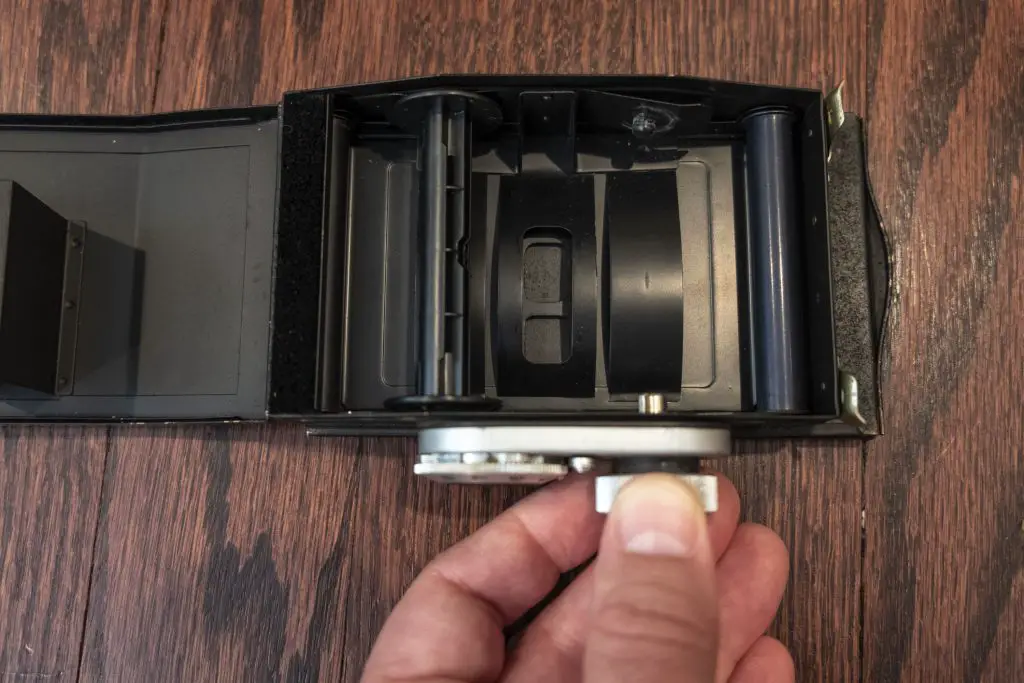
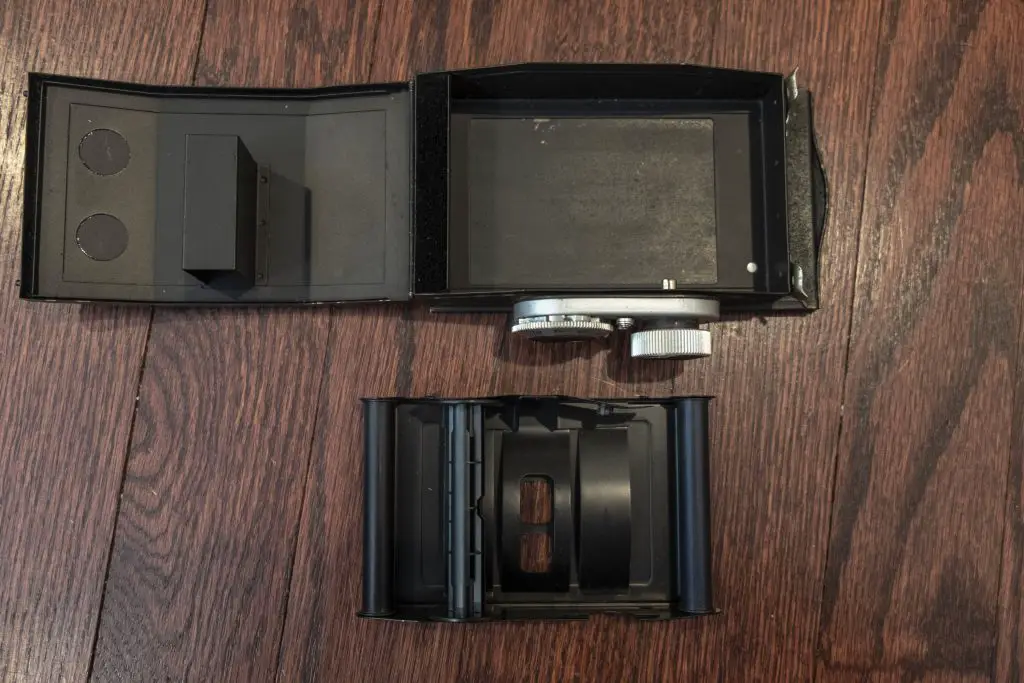
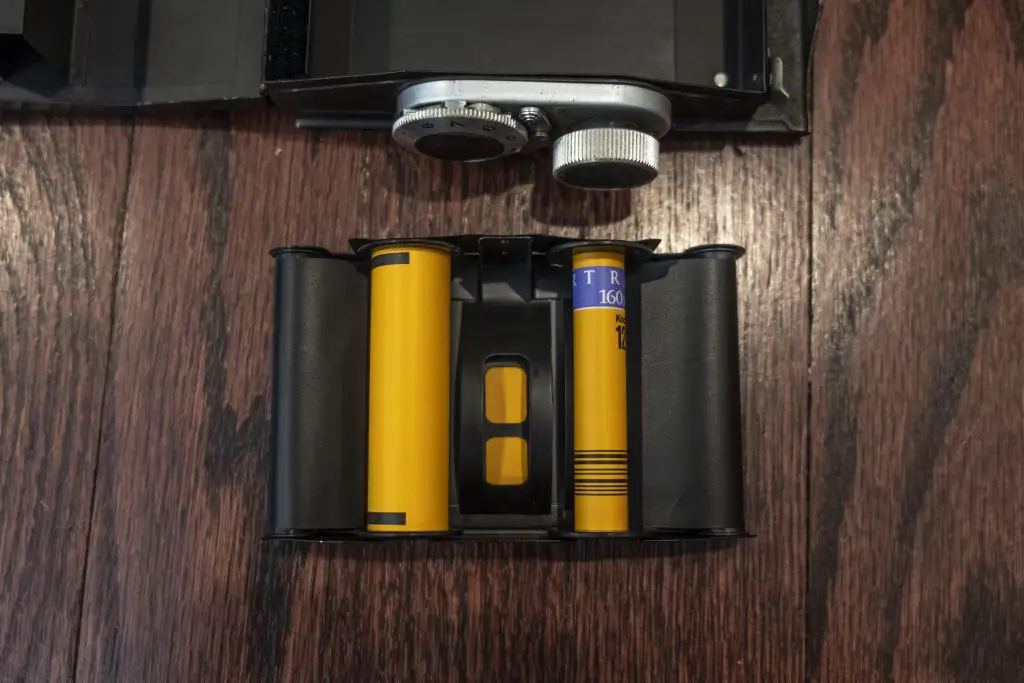
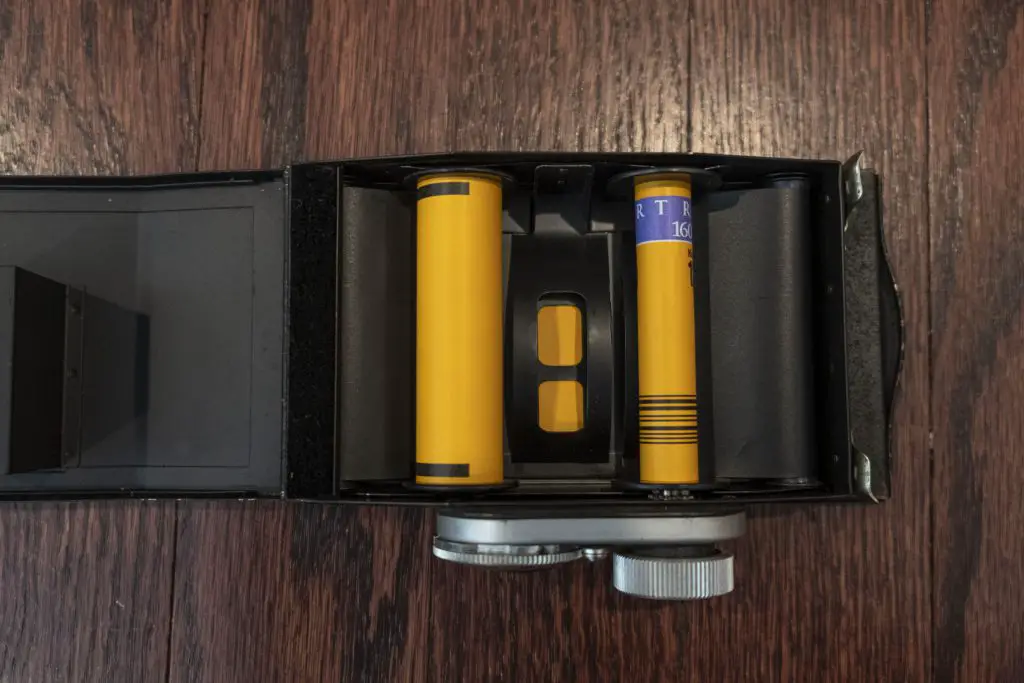
The first step in loading in a new roll of film into the Plaubel back is to open it up and take the film holder out. This is done by first releasing the two spring clips on the side and opening the rear door. The film holder rests inside of the back and needs to come out, but before you can so that, you must pull down on the film advance knob. With it out as far as it can go, the film holder can be removed.
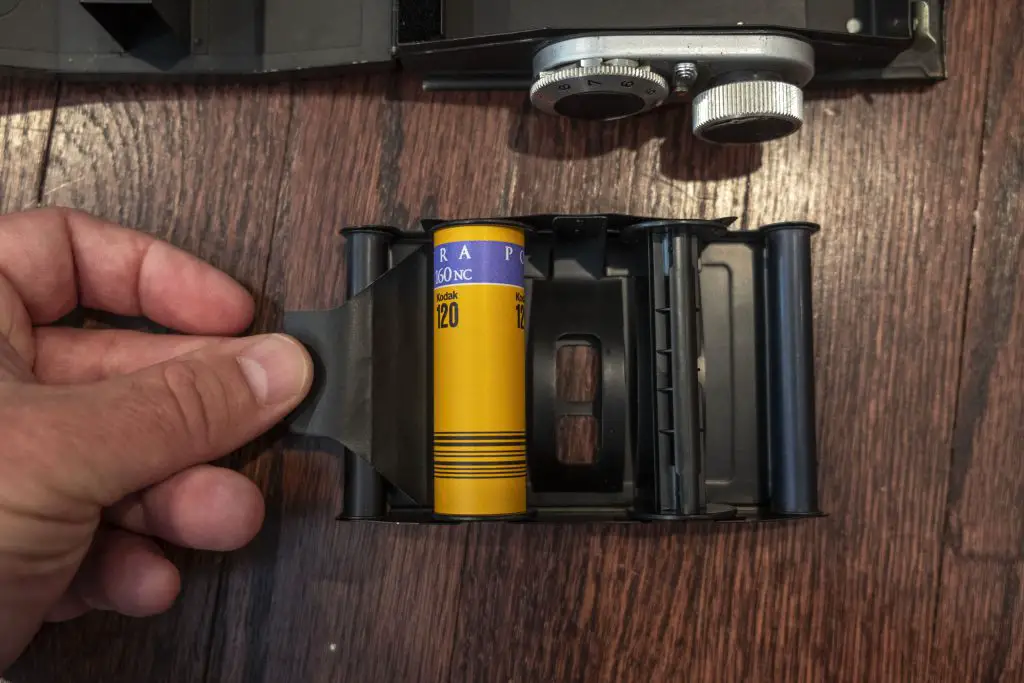
If there is an empty spool on the supply side, move it over to the take up side and install a fresh roll of film on the supply side. In the above images, the supply side is on the left and take up on the right.
With a fresh roll of film locked into place, pull the paper leader and wrap it around the back side of the film holder with the black side of the paper facing out and wrap it around the other side and onto the take up spool. Make sure the film is installed so that it looks like the images above otherwise you won’t get any images.
Once you are sure the film is securely attached to the take up spool and is loaded correctly, pull down on the film advance knob once again and insert the film holder into the back and close the lid.
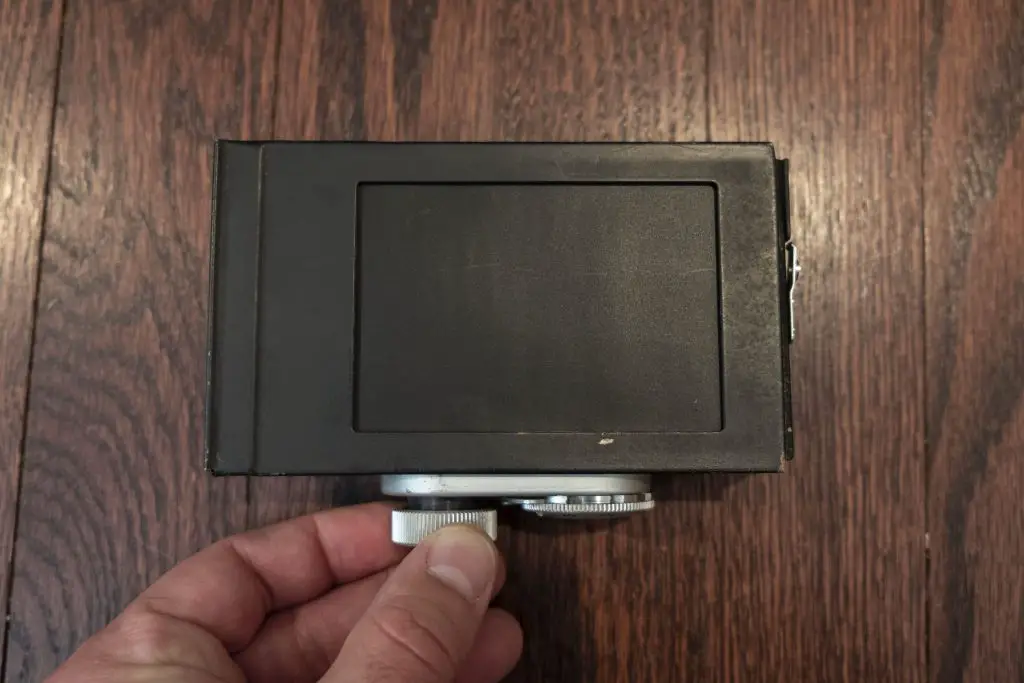
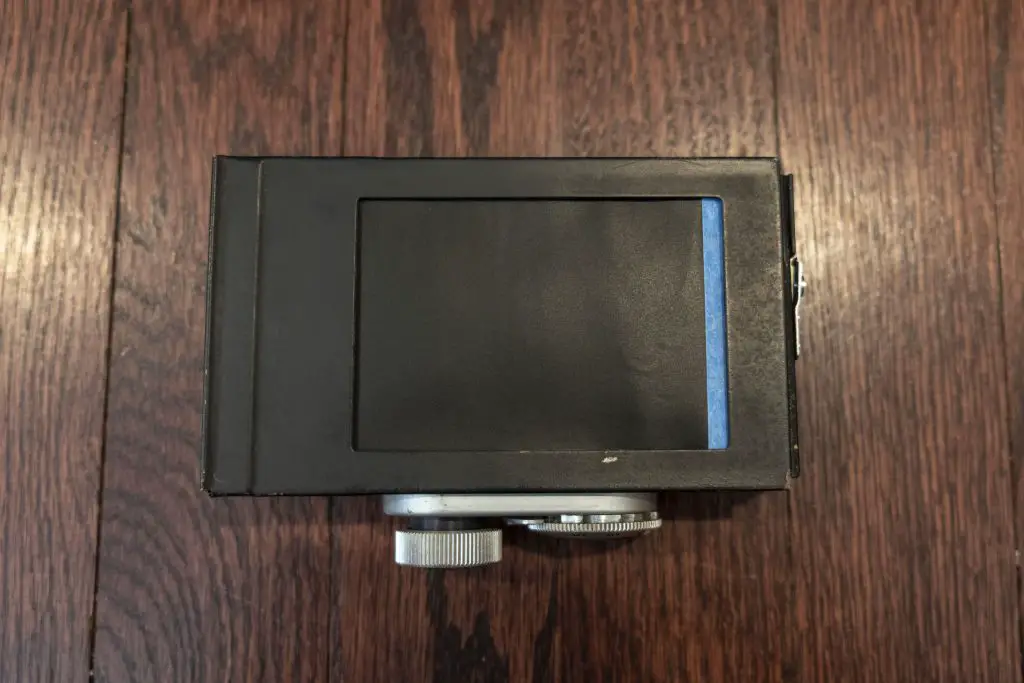
With the film in the back, flip it over and remove the dark slide. You should see the black backing of the paper leader. If you see colored paper with markings on it, you have the film in backwards! Stop here and repeat the above steps.
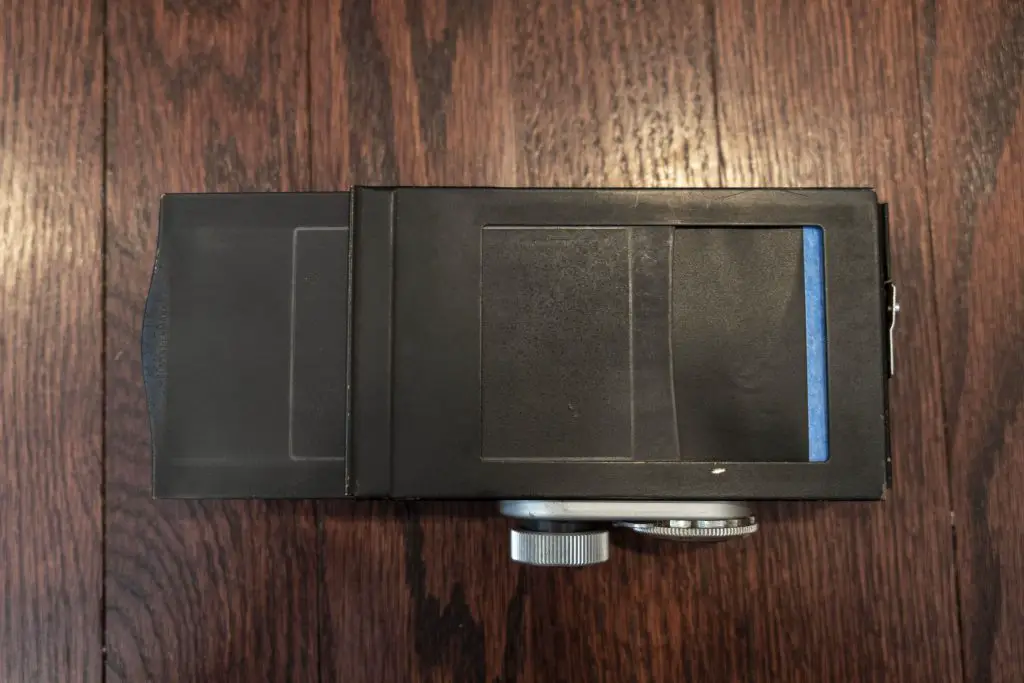
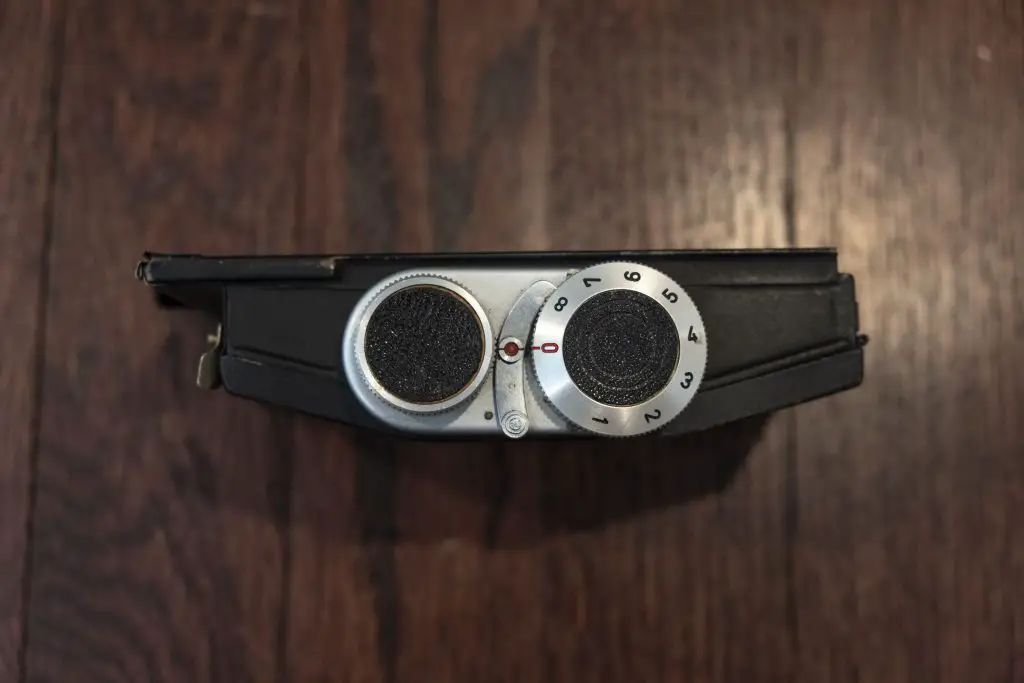
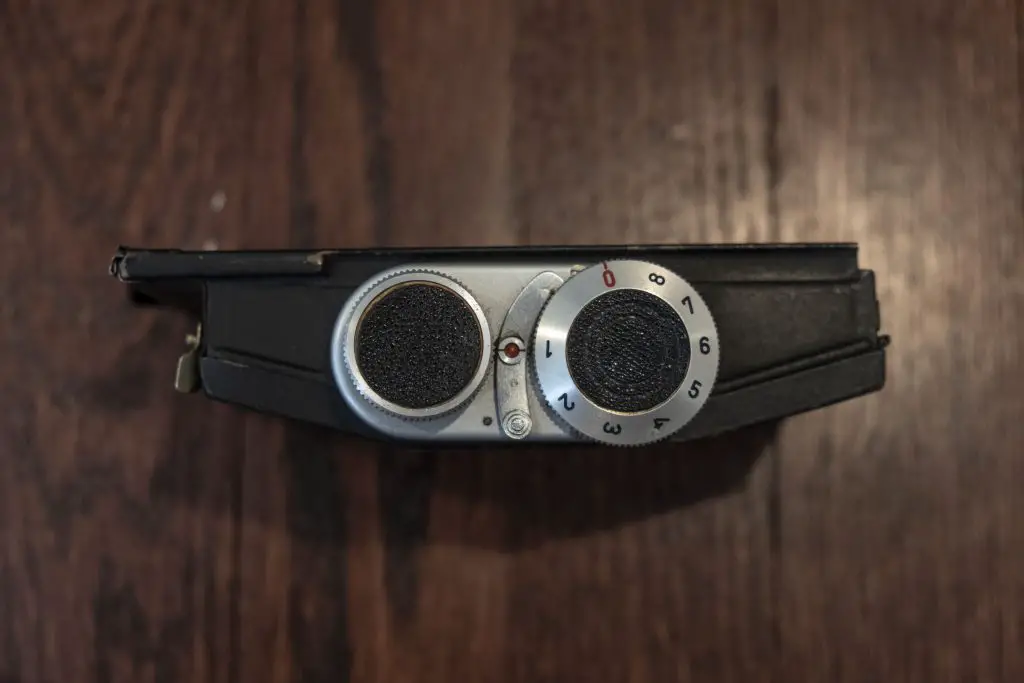
Assuming everything is okay, start to rotate the film advance knob. It will only rotate in one direction, and may become locked as it encounters each of the 8 exposure numbers on the counter. When this happens, you’ll need to pull back on the hinged hook that acts as a stop at each exposure number so that you can continue turning the knob.
As you turn the knob, you’ll see the paper traveling across the film gate. Go slowly and be on the look out for a piece of tape that is holding the film emulsion to the backing paper. All 120 film has this tape, but it may not be blue like in the above images. When you see the first sign of the tape, stop turning the film advance knob. Do not go too far otherwise you risk ruining your first exposure. Once you see the tape, insert the dark slide back into position.
With the dark slide back into position, the exposure counter must be reset to ‘0’. If it is not at ‘0’, you’ll need to pull up on the exposure counter dial and rotate it until the number ‘0’ is opposite of the red dot.
With the number ‘0’ into position, rotate the film advance knob until the number ‘1’ is opposite of the dot at which point the advance knob should become locked. The film is now in position for your first exposure.
My Results
I shot two rolls of film in the Plaubel. The first was an expired roll of Tri-X I had laying around. I loaded it up and took it out with me in early 2020 to shoot “stuff”. The reason I put “stuff” in quotes is because I never saw any of those images because as I was unloading the film from the camera, I realized that throughout the entire roll, I never once remembered to remove the dark slide! Not a single exposure made it to the film so I had to start over again.
By the time I got a second chance to shoot the camera, the dreary shades of winter had started to fade, so I decided to try some color film instead, this time going with some slightly expired Kodak Portra 160. I made absolute certain that I wouldn’t forget to pull out the dark slide and went shooting.
Depending on your style of photography, my choice of expired Portra color film with the Makina’s uncoated lens is either really cool or unfortunate. If you like strange color shifts, the greenish/yellow tint on all the photos is right up your alley, but I think that had I stuck with black and white film, we could have seen images more consistent with how the camera was likely used in the 1930s.
Also of note are the various light leaks that were on every image. Before shooting, I did a quick flashlight test of the bellows and did not see any noticeable pinholes, but that doesn’t mean there still weren’t some there as sometimes light leaks only present themselves in certain circumstances. I also noticed what appeared to be some sort of lock on the side of the Plaubel roll film holder that was missing, suggesting the holder could have moved around slightly while I was shooting it.

Even with the light leaks however, there is still enough of the images to see that they are quite nice, with edge to edge sharpness and contrast as good as anything of the era. The image to the right is a 1:1 crop of the clock in the courthouse picture from the gallery above. Despite only being a fraction of the original image, this crop has nearly as much detail as a standard 35mm exposure might have.
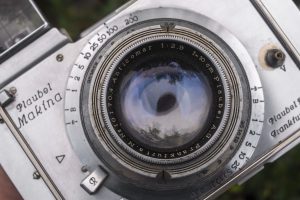
In addition to making excellent cameras, Plaubel was an experienced optics company and their skill shows in these images from the 10cm Anticomar lens.
The ease of which you can shoot high quality 6×9 images on 120 roll film is quite good. The position of the shutter release naturally falls where your right index finger rests, and the bright and contrasty rangefinder was not only easy to use, but also accurate. Considering this is a camera with roots dating back to 1912, I found it very easy to make excellent shots.
I’ve used roll film backs on plate cameras before and found the Plaubel’s to be pretty nice. Loading film requires all the steps covered earlier in this article, but I liked the design of the locking frame counter which positively stops where you need to be to get exactly 8 exposures from your roll. Some other roll film backs are a little more vague about the frame spacing, so I really appreciated this one.
My biggest complaint is in holding the camera. With the roll film back attached and the camera extended to the correct length for the 10cm lens, the thickness of the camera front to back is almost the same as it’s width. Also, with the exposed bellows taking up a large part of the depth of the camera, you have to be very careful not to poke them. Although featuring a handle on the camera’s right side, it’s really not useful for stabilizing your grip on the camera. Considering the Makina was meant to be portable, I found it to be stressful to walk around with the camera casually shooting it like I might a Kodak Medalist or some other type of 6×9 camera.
That little complaint aside, using the Makina was a joy, and something that had this camera not had the light leaks (and actually belonged to me), would have inspired me to take it out again and again. This is a camera that I would encourage any collector to seek out as it is not only a very well built camera and can deliver excellent images, it’s shooting experience is unlike that of most other cameras out there.
Related Posts You Might Enjoy
External Links
http://camera-wiki.org/wiki/Plaubel_Makina
https://lommen9.home.xs4all.nl/plaubel/index.html
https://www.youtube.com/watch?v=qaBEWFEk5Ps



Mike, that seems to be an incredible lens, and easily showing a performance standard way beyond 35mm, even today’s lenses. Can you recall what apertures you were using?
Displaying at 4,000mpx wide certainly helps. This is one aspect of your site and reviews – the high res images often around 3200 to 3300mpx enabling us to better appreciate a lens performance, especially when the image is then magnified. Too many sites disply relative low res making assessment of a lens very difficult, even impossible.
Having a RF back available certainly increases the usability of an old camera designed for odd-sized plates/cut film no longer available today.
I was very impressed with the lens. I wish the light leaks could have been avoided, but there’s enough in the images to see what it’s capable of.
I am glad you appreciate my super hi-res images as I include those for this very reason, for people to be able to see a high resolution sample. A funny story is that about 6 months ago, WordPress introduced a feature limiting the size of uploaded images to help speed things up as large images can slow down a web server. This makes sense for most general purpose websites as there’s no reason to have such large images, but when you do a photography site, I wanted to retain the super large files, and that required some research and custom code to undo that new “feature”!
Since posting, I’ve been doing a little “digging” into this camera and discovered that up to 1932 the f2.9 10cm Anticomar was a triplet, but was then redesigned as a four element lens. Going by the quality of your images I’m sure you had the later lens as the quality seems to me to be too good for a triplet. Do you, or your contact, have any way to date the lenses from their s/n?
Nice review! I believe that the little rangefinder eyepiece telescopes rearward so that it will reach your eye when using the camera with the 120 roll holder. It’s not necessary if your are using plate film holder.
You could be right. I had the roll film back on the camera though, and extending that eyepiece didn’t really seem to make a difference. I was able to use it without it being extended, but perhaps it helps some people.
Hi Mike, greetings from the UK. I very much appreciate your excellent and valuable post regarding the Plaubel Makina. As a now retired ex professional photographer and historian, I sometimes stumble upon things photo- related that catch my attention. Recently I acquired a Makina from circa 1936, which upon further investigation appears to possibly have previously been owned by the notable Czech wartime photographer Erich Auerbach. The camera and roll film back are in good condition for their age, but the shutter and internal release linkage are damaged. I would be interested in whether you might have any additional sources of information, particularly regarding access to repairs and/or available parts for the pre war Makinas.
Best regards Mark D Brader BA, LRPS
Hi Mark, thanks for your feedback! What a cool camera to have with some historical provenance. Sadly, as much as I’d love to help you, I have no experience taking apart any Plaubel cameras. While typical prewar German cameras were usually simple, the Makina is rather complex so I wouldn’t want to even try to guess how to service it. As I am located in the US, I do not have any experience with UK based repair people, but I have to imagine there is someone out there. Perhaps checking one of the Facebook Collector groups or the Lean Camera Repair group on Facebook might be of some help. Here is the link: https://www.facebook.com/groups/360490091319202/
This camera is similar to an old Paubel Makina I bought in great condition. I would be interested to know if my Paubel Makina is the earlier model to yours. Your camera front is similar to mine but mine does not have the S. Less winders.