

 What is it?
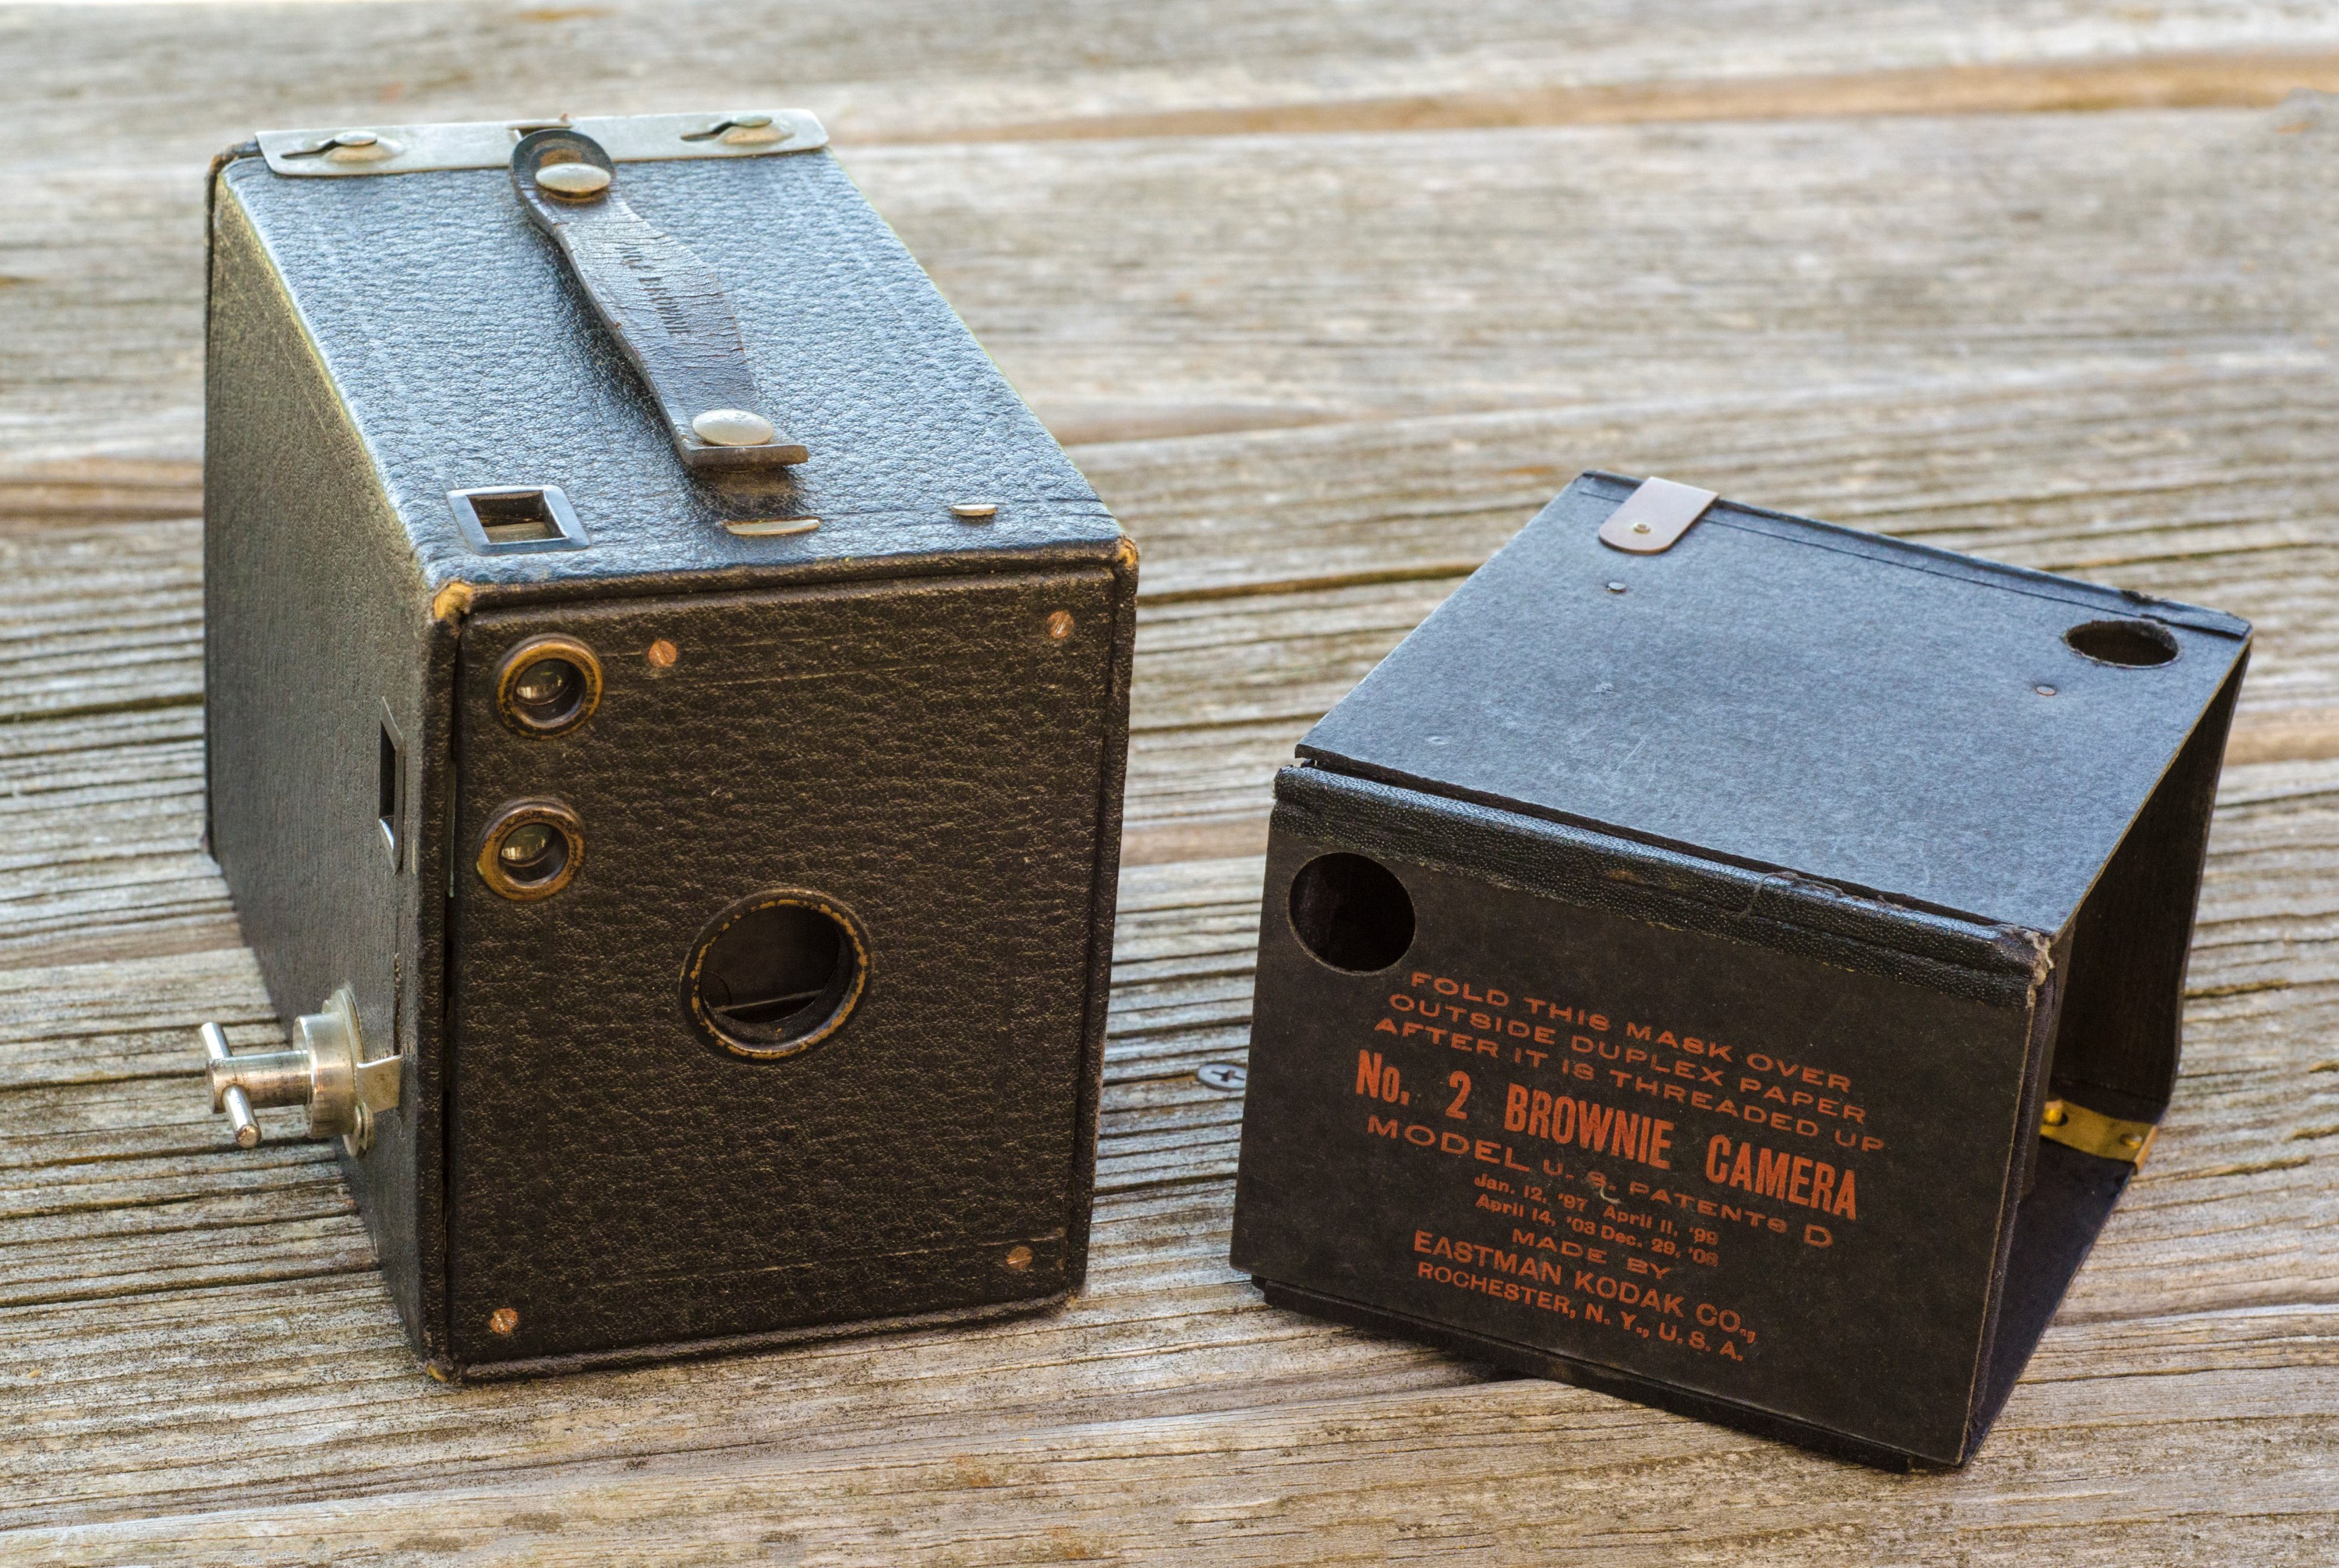
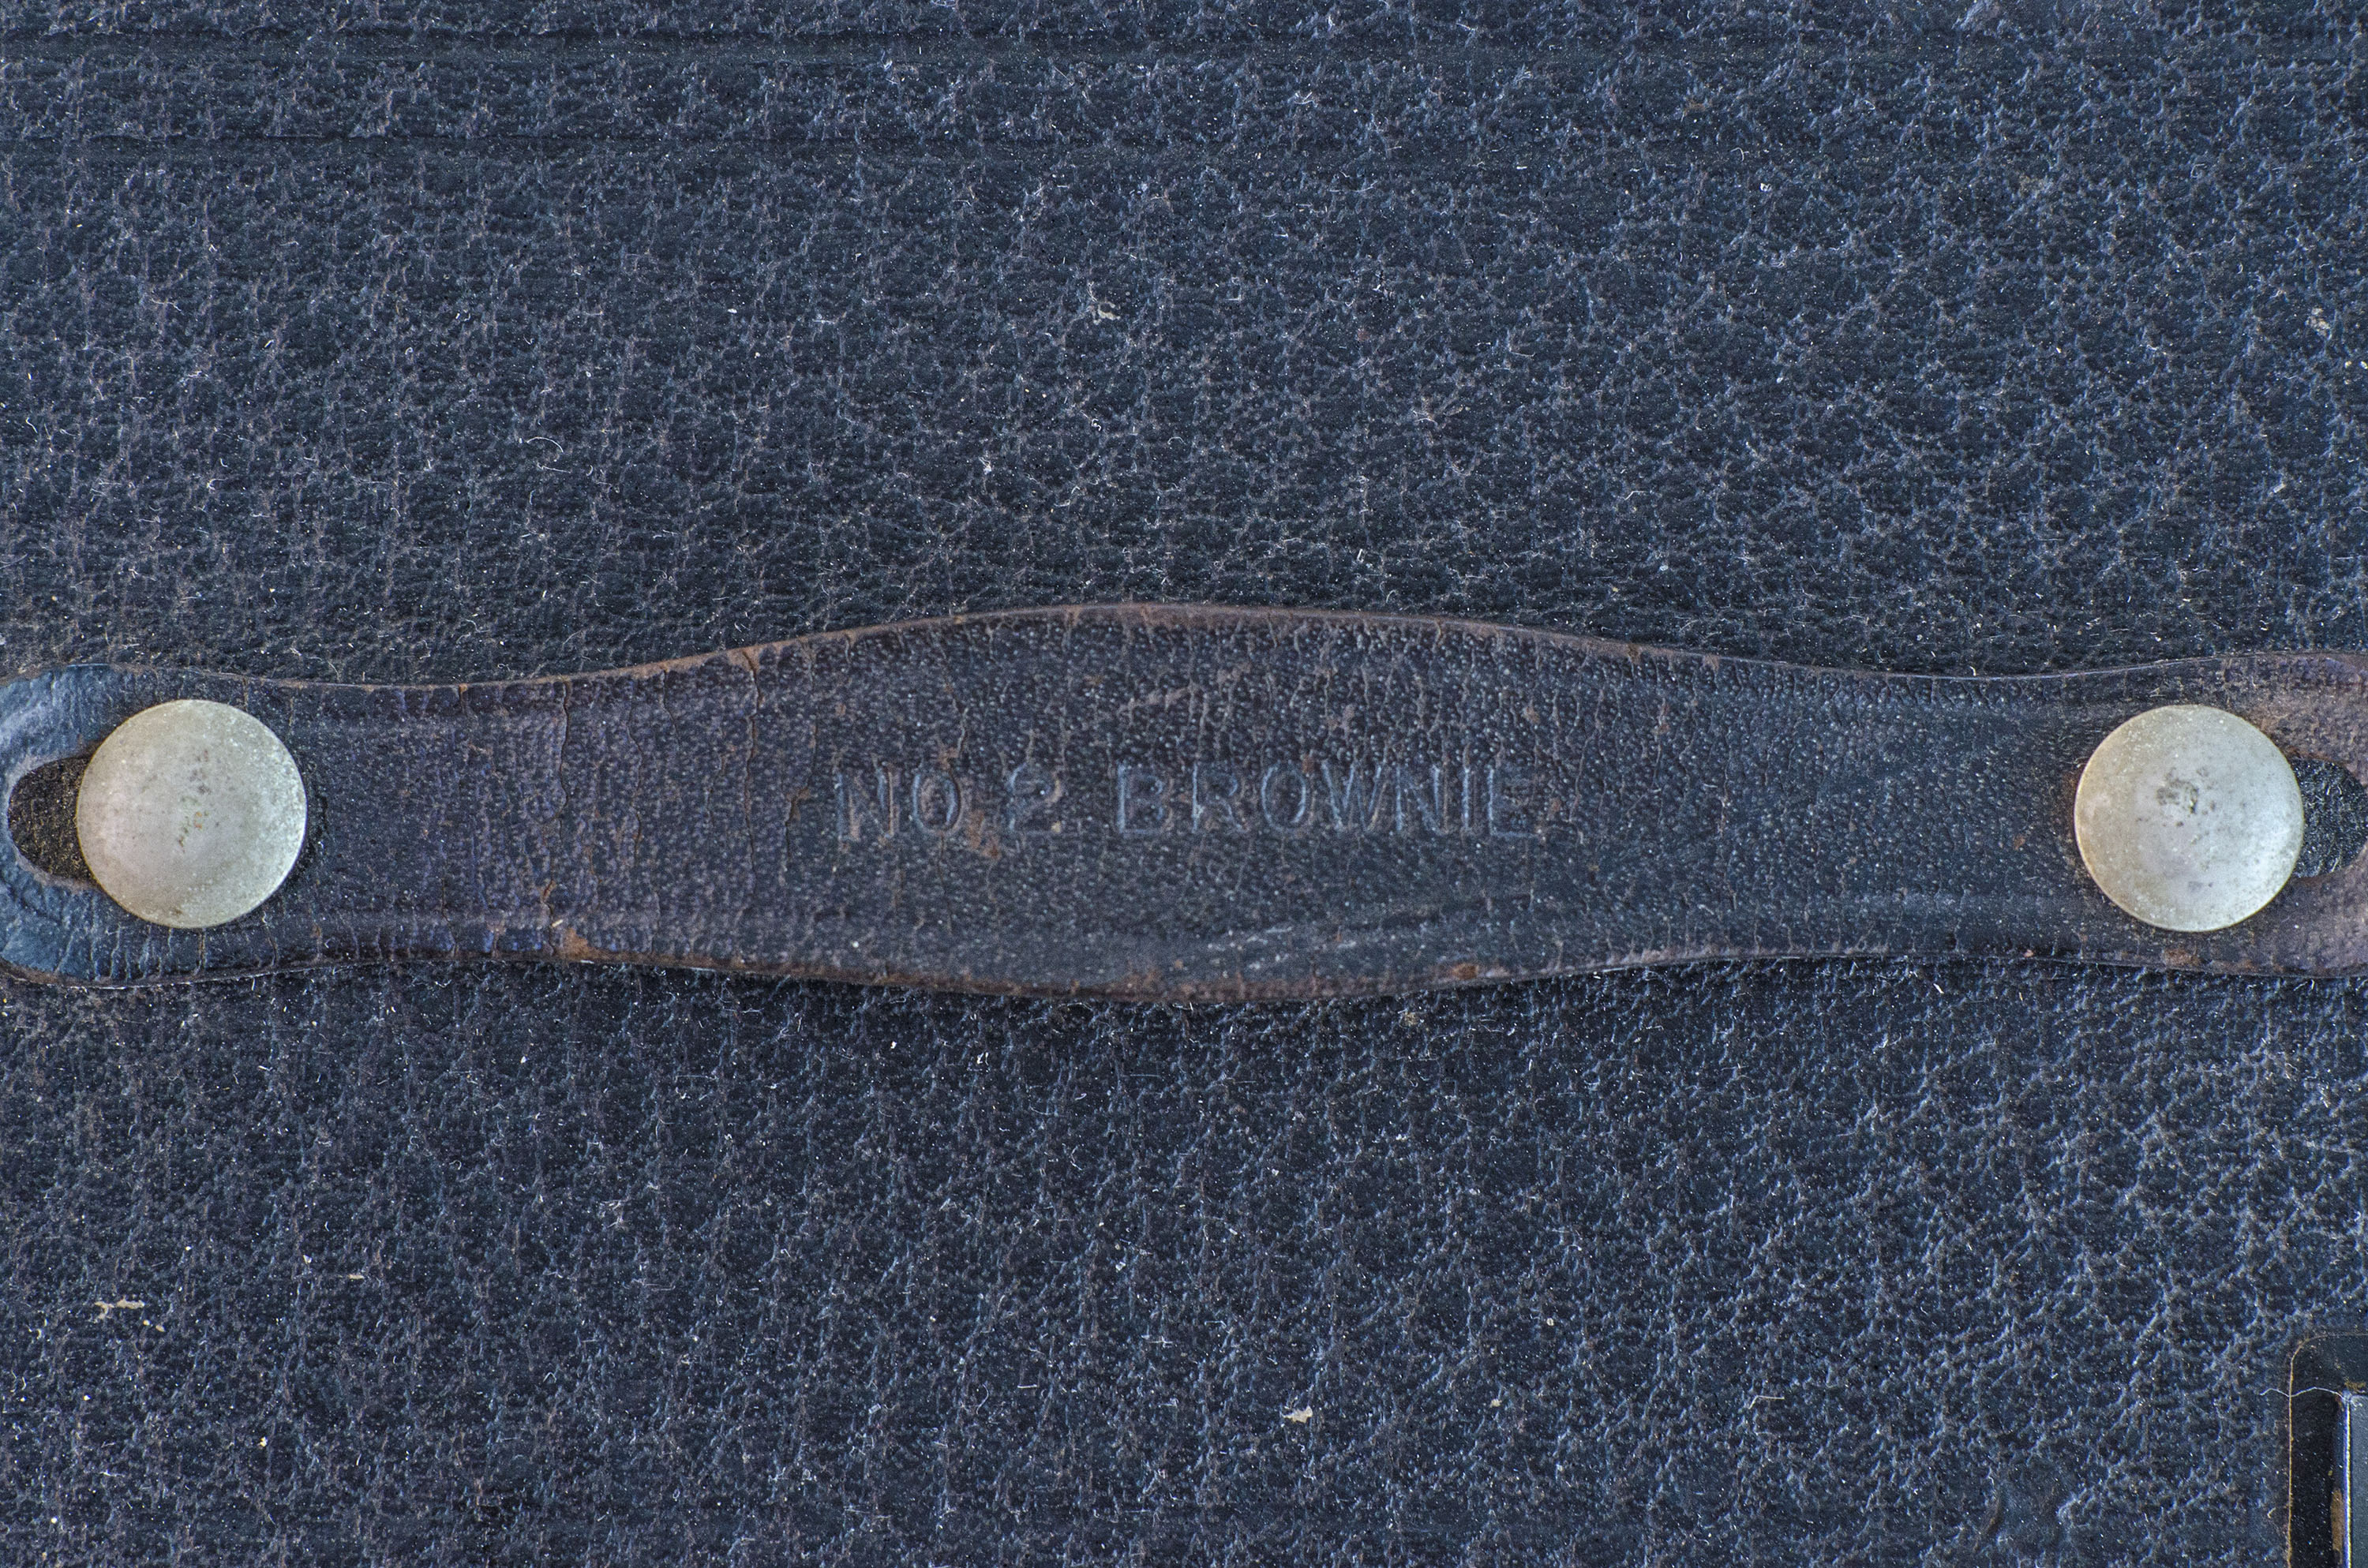
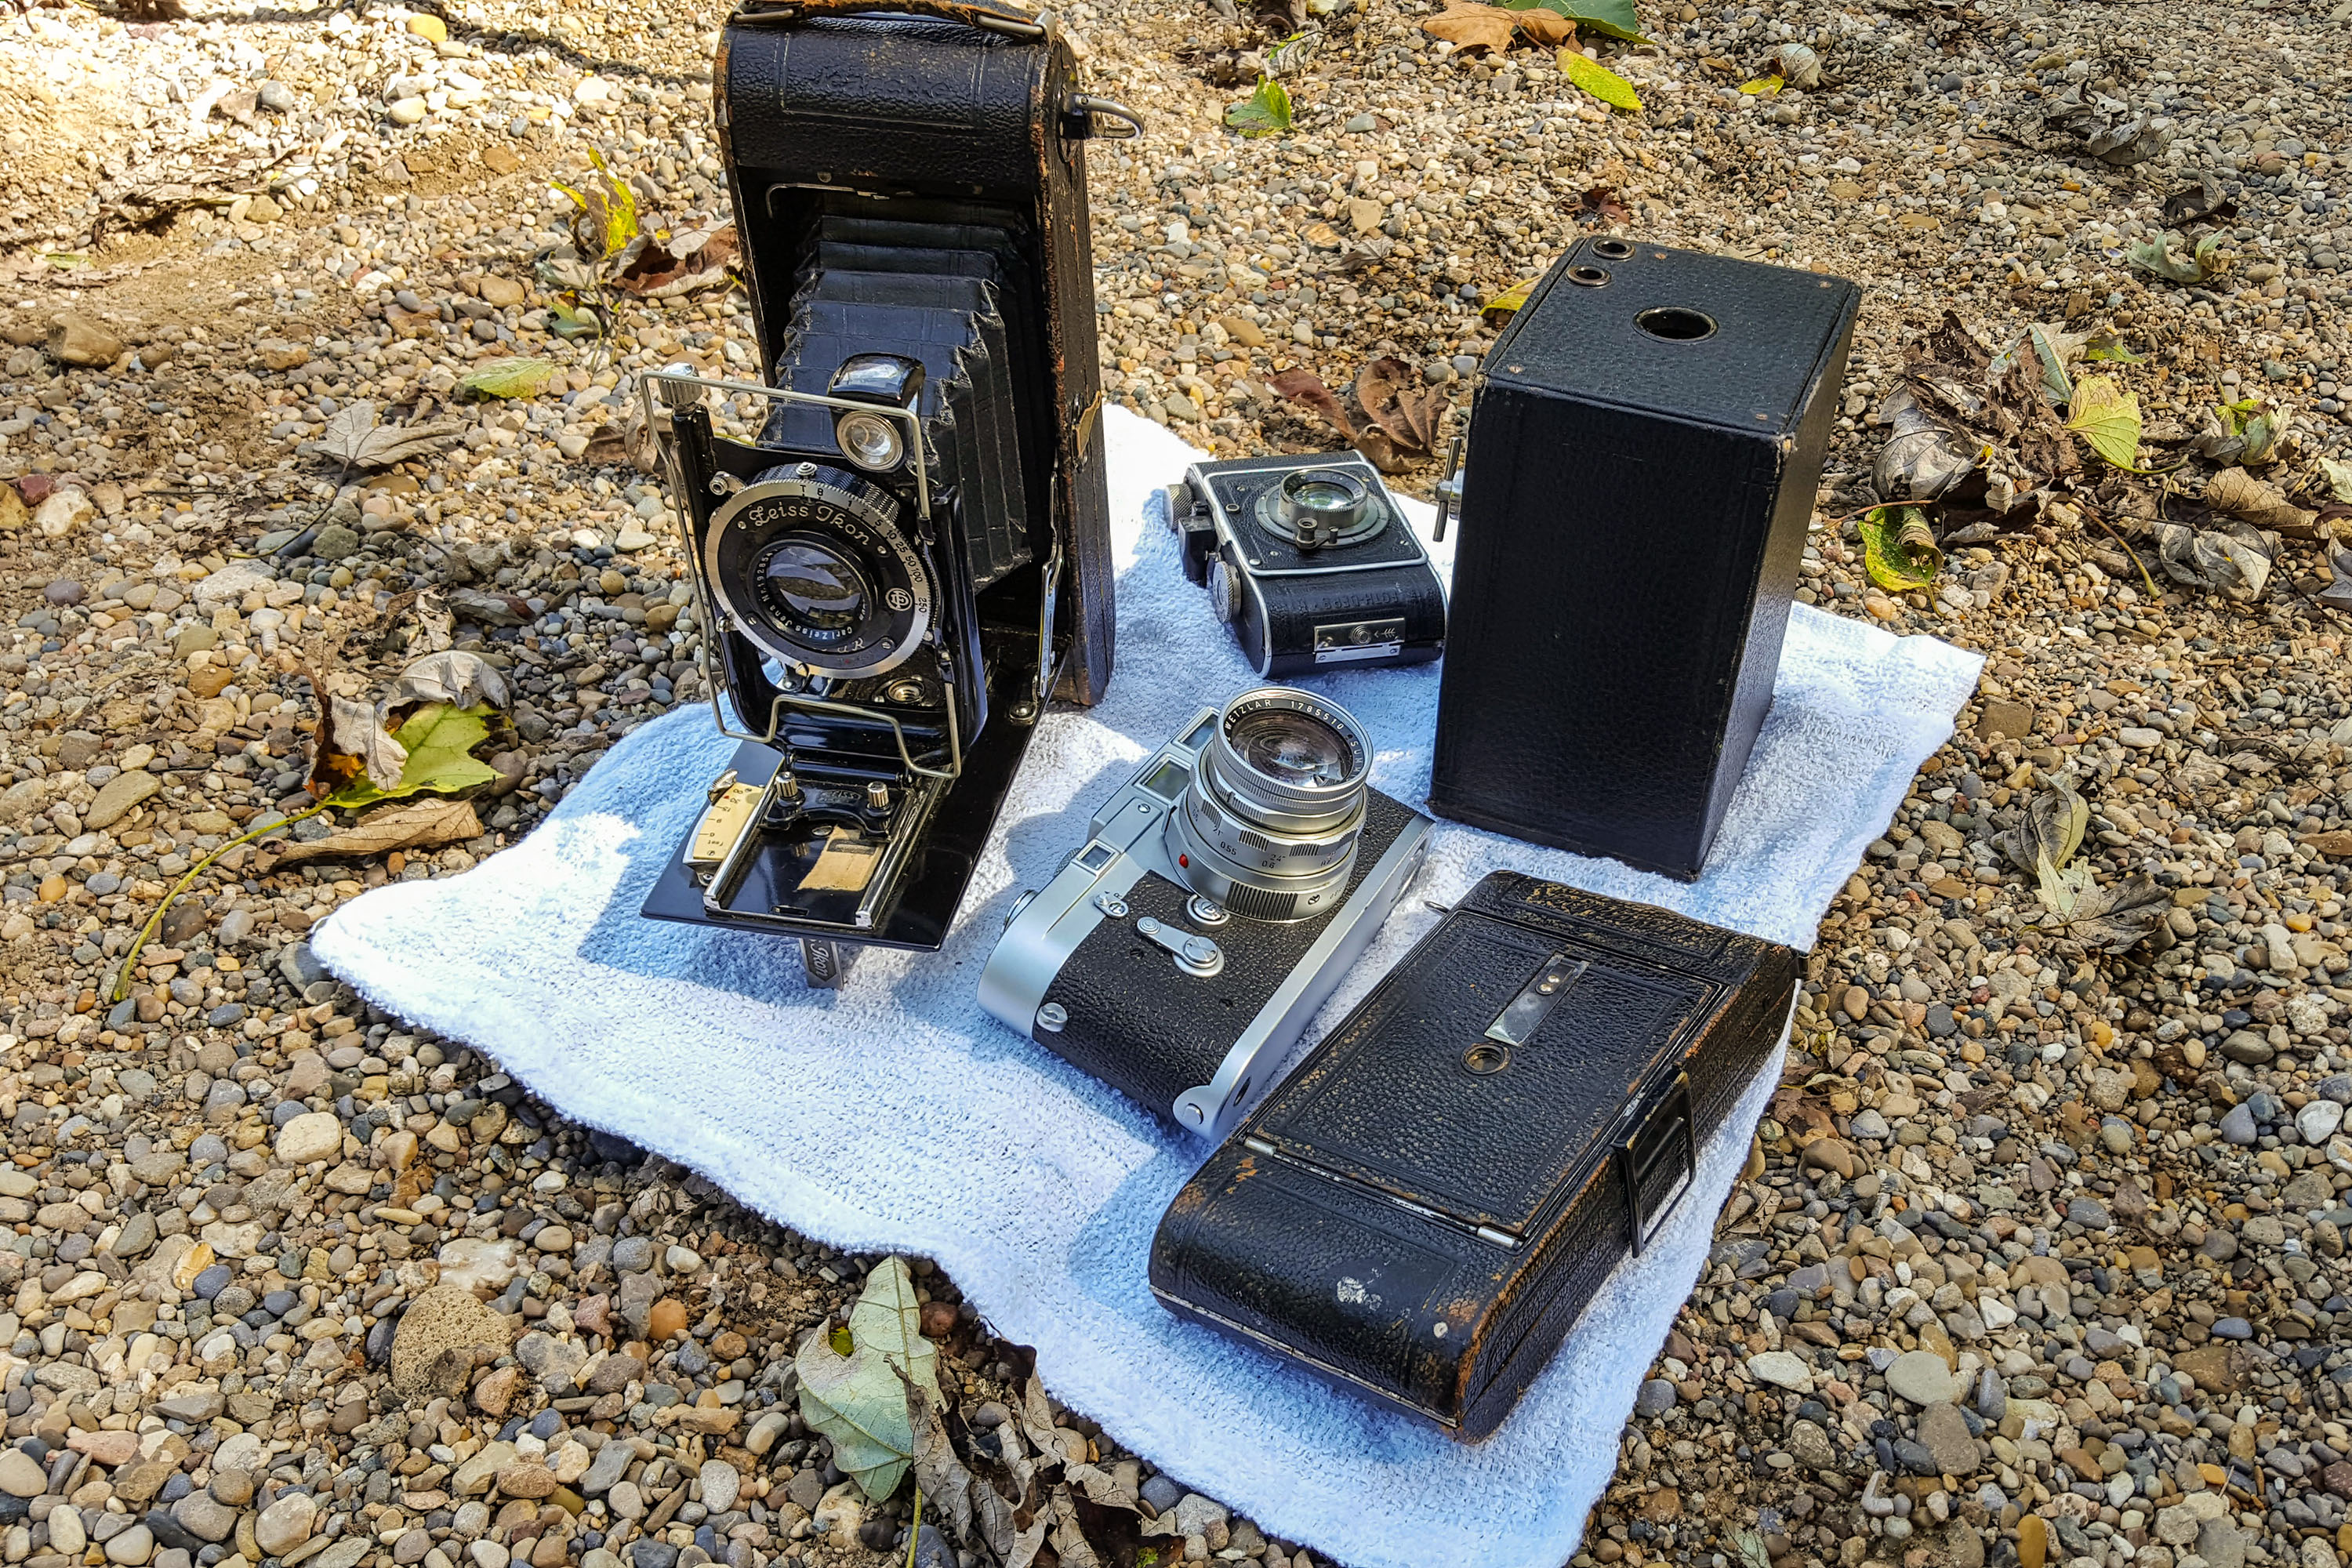
This is a No. 2 Brownie Model D box camera, made by the Eastman-Kodak company around 1914. The name “Brownie” has been used by Kodak on a huge variety of inexpensive cameras starting with the very first model in 1900, all the way to Bakelite bodied cameras of the 1960s. The enduring theme of a Brownie camera was that it should be sold cheaply to people who would be repeat customers by spending money on Kodak film. This particular model was the third revision of the original model which when released in 1902, was the very first camera designed for 120 film. The Model D was made out of leatherette covered cardboard with a wooden film compartment inside. It had two brilliant viewfinders for landscapes and portraits, a single element meniscus lens, a single speed shutter capable of Instant or Timed exposures, and a sliding aperture plate capable of 3 aperture sizes. Despite these modest specs, the No. 2 Brownie was capable of good images, and sold very well throughout it’s 32 year production run.
Film Type: 120 roll film (eight 2¼” x 3¼” exposures)
Lens: Unknown focal length (probably ~75mm) Meniscus uncoated single element
Focus: 8 feet to Infinity at smallest aperture (probably f/16), 10 feet to Infinity at medium and largest apertures (probably f/22 and f/32)
Shutter: Rotary Metal Blade
Speeds: Timed and Instantaneous (probably ~1/50 sec)
Exposure Meter: None
Battery: None
Manual: http://www.brownie-camera.com/manuals/no2andno2ab.pdf
History
We tend to think of cameras as these advanced electronic devices that can “see” the world using scientifically designed optics, a high tech shutter, lots of tiny precision made metal parts, and with carefully calibrated lenses. They can imprint an image on a piece of film or a digital sensor to be viewed later.
And while sure, most modern cameras fit the above description fairly accurately, the basic act of capturing an image can be accomplished on something far less advanced.
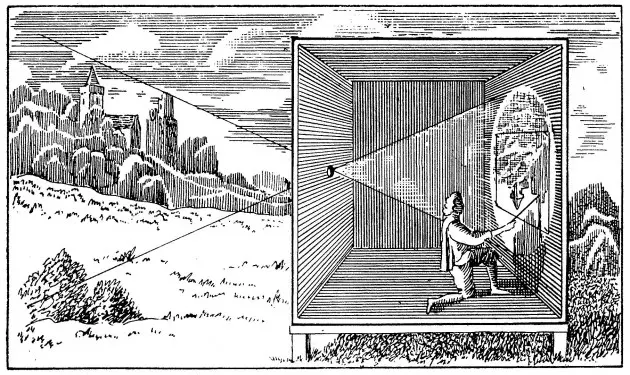
If the most basic definition of a camera is a device that can capture an image, you don’t even need things like shutters, glass lenses, or even film. The earliest “cameras” were known as the camera obscura or ‘cubiculum obscurum’ in Latin. These devices were dark rooms, or chambers with a pinhole on one end, and a flat surface like a wall opposite the pinhole. As light entered the pinhole, an upside down image would form on the opposite wall. An artist would sit in the darkened chamber and would trace over the projected image onto a canvas or paper to “capture” the image.
The earliest camera obscuras are thought to have been in use as far back as 30,000 BC as a means of religious inspiration and documentation. The earliest written evidence of the technology comes from an ancient Chinese philosopher named Mozi around 470 BC. Although he couldn’t prove why, many of Mozi’s original theories about the physics of light turned out to be surprisingly accurate.
Around 350 BC, Greek philosopher Aristotle touched upon the science behind light rays and helped advance our understanding of light as well as many other philosophers and scientists over the next several hundred years.
In the centuries that followed, the camera obscura, or the theories about how light worked would be a recurring theme by many scholars. Wikipedia has a rather detailed account of the history, and rather than repeat it here, I’ll just include a link to the article if you want to learn more.
The actual term “camera obscura” didn’t come into use until around the early 17th century when the practice of capturing hand drawn images traced over a projected image became common.
In the early 1800s, the first use of light sensitive plates were used to capture the actual light rays projected via a lens onto a flat surface. Glass and metal plates still exist to this day from these early days of photography as daguerreotypes, ambrotypes, and tintypes. All of these early forms of photography required the use of “wet” plates which meant the light sensitive chemicals had to be applied immediately before the image was captured, and developed shortly after.
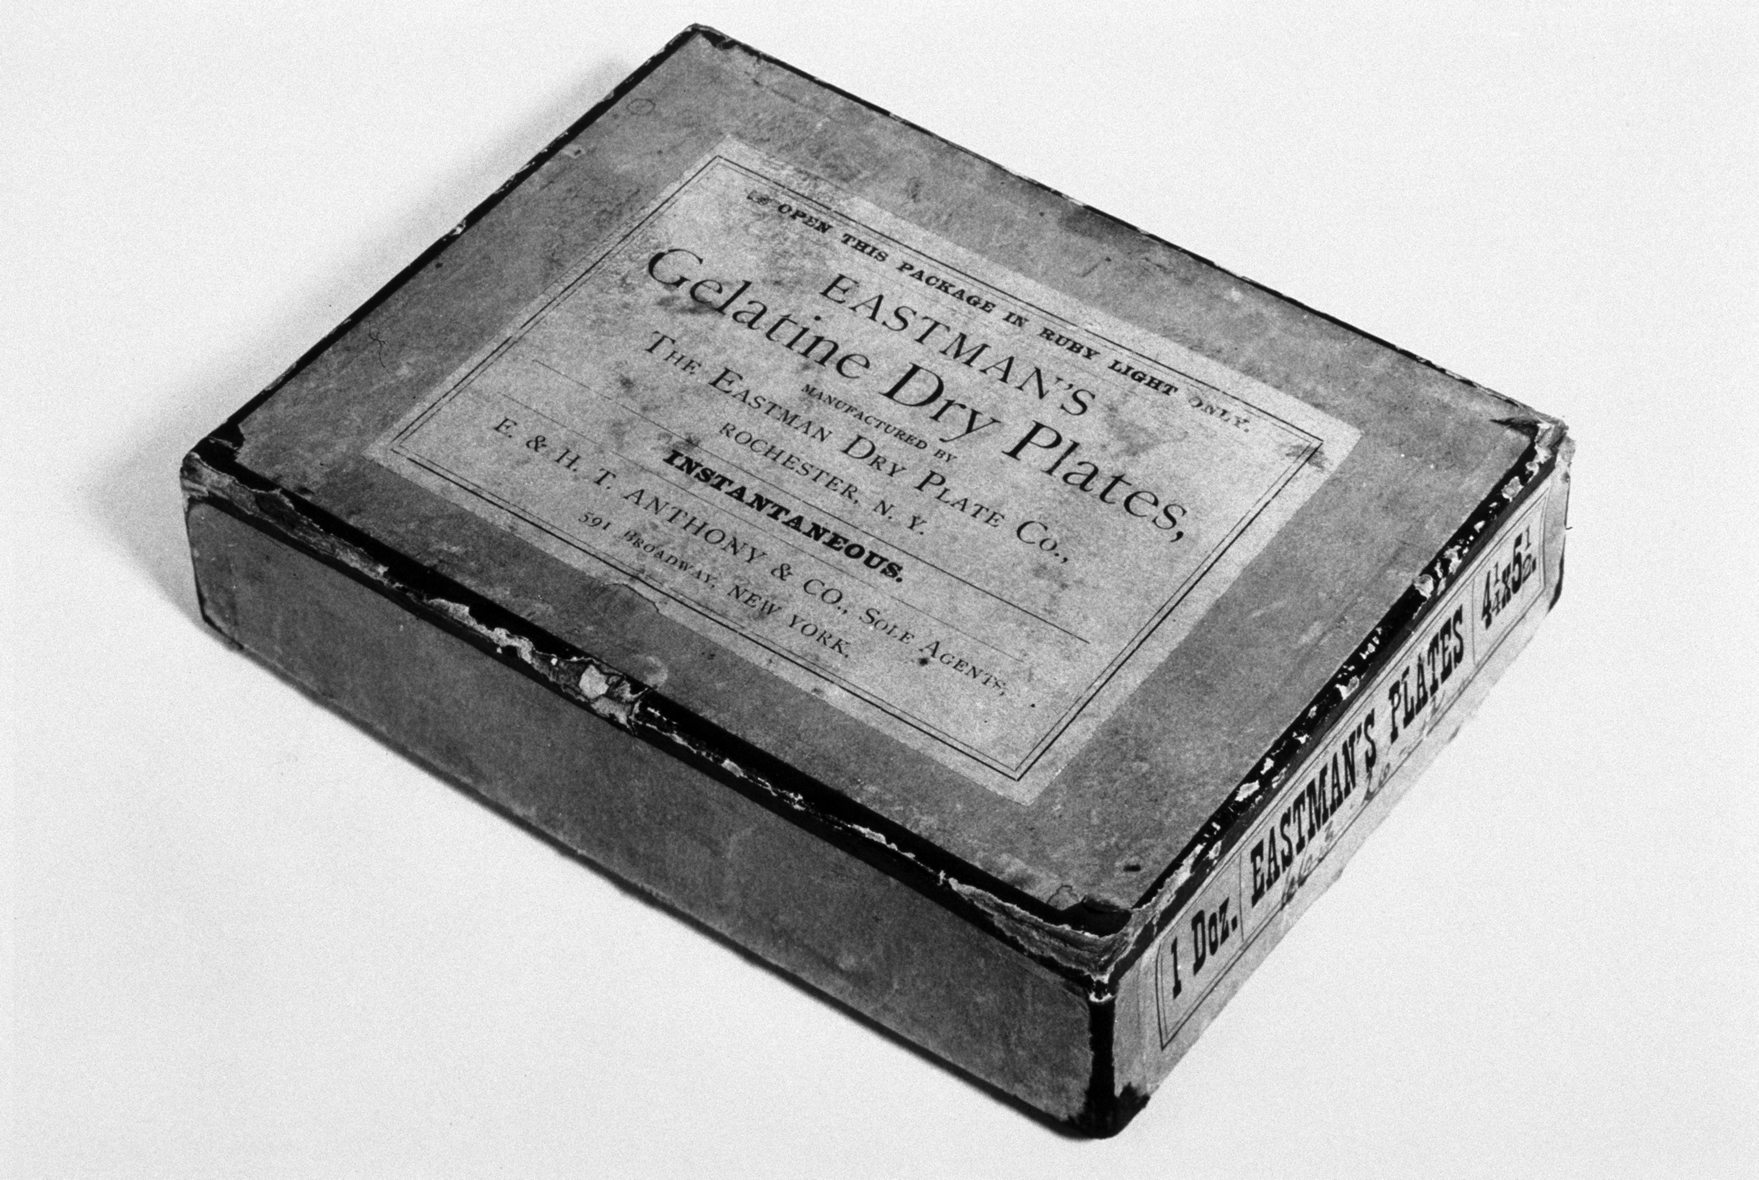
In the late 1870s, the first gelatin based dry plates came available which allowed a photographer to shoot and develop his or her images at his convenience. Although not the first to come up with the idea, in 1878, George Eastman patented the first film, known as the Eastman Dry Plate.
In 1885, Eastman took the idea of a gelatin based plate and introduced the first modern use of transparent roll film. Three years later, Eastman released his first camera, a box camera known simply as “The Kodak”.
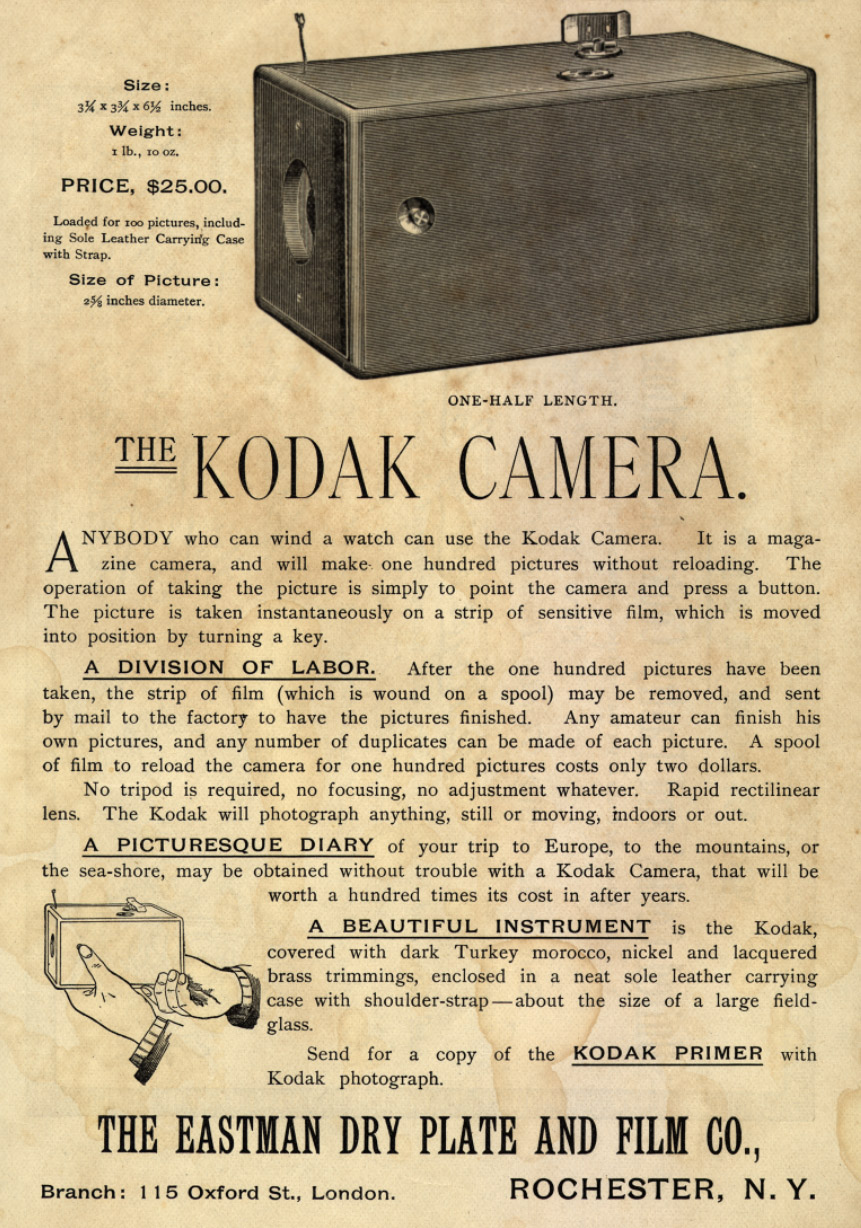
A simple box camera with a 4-element Rapid Rectilinear lens, the Kodak camera came preloaded with a spool of film inside that could capture 100 circular images. The camera was not designed to be reloadable by the end user. The camera would be sold with the film already installed. The user would shoot the entire roll of 100 images and then send off the entire camera back to Kodak, where it would be developed, and reloaded with a new roll and sent back to the user.
Although more advanced camera technology already existed at the time, Eastman knew that the selling point of the Kodak wasn’t in it’s lens, shutter, or any other piece of it’s technology, but rather the film that was inside it. The slogan for the Kodak was “You press the button, we do the rest”.
The simplicity of the box camera and its film caused the Kodak camera to sell very well, and almost immediately after it’s release, many other competitors would follow with their own designs. Over the next decade, a blitzkrieg of new cameras and film types were released making photography available for the very first time, to the novice user.
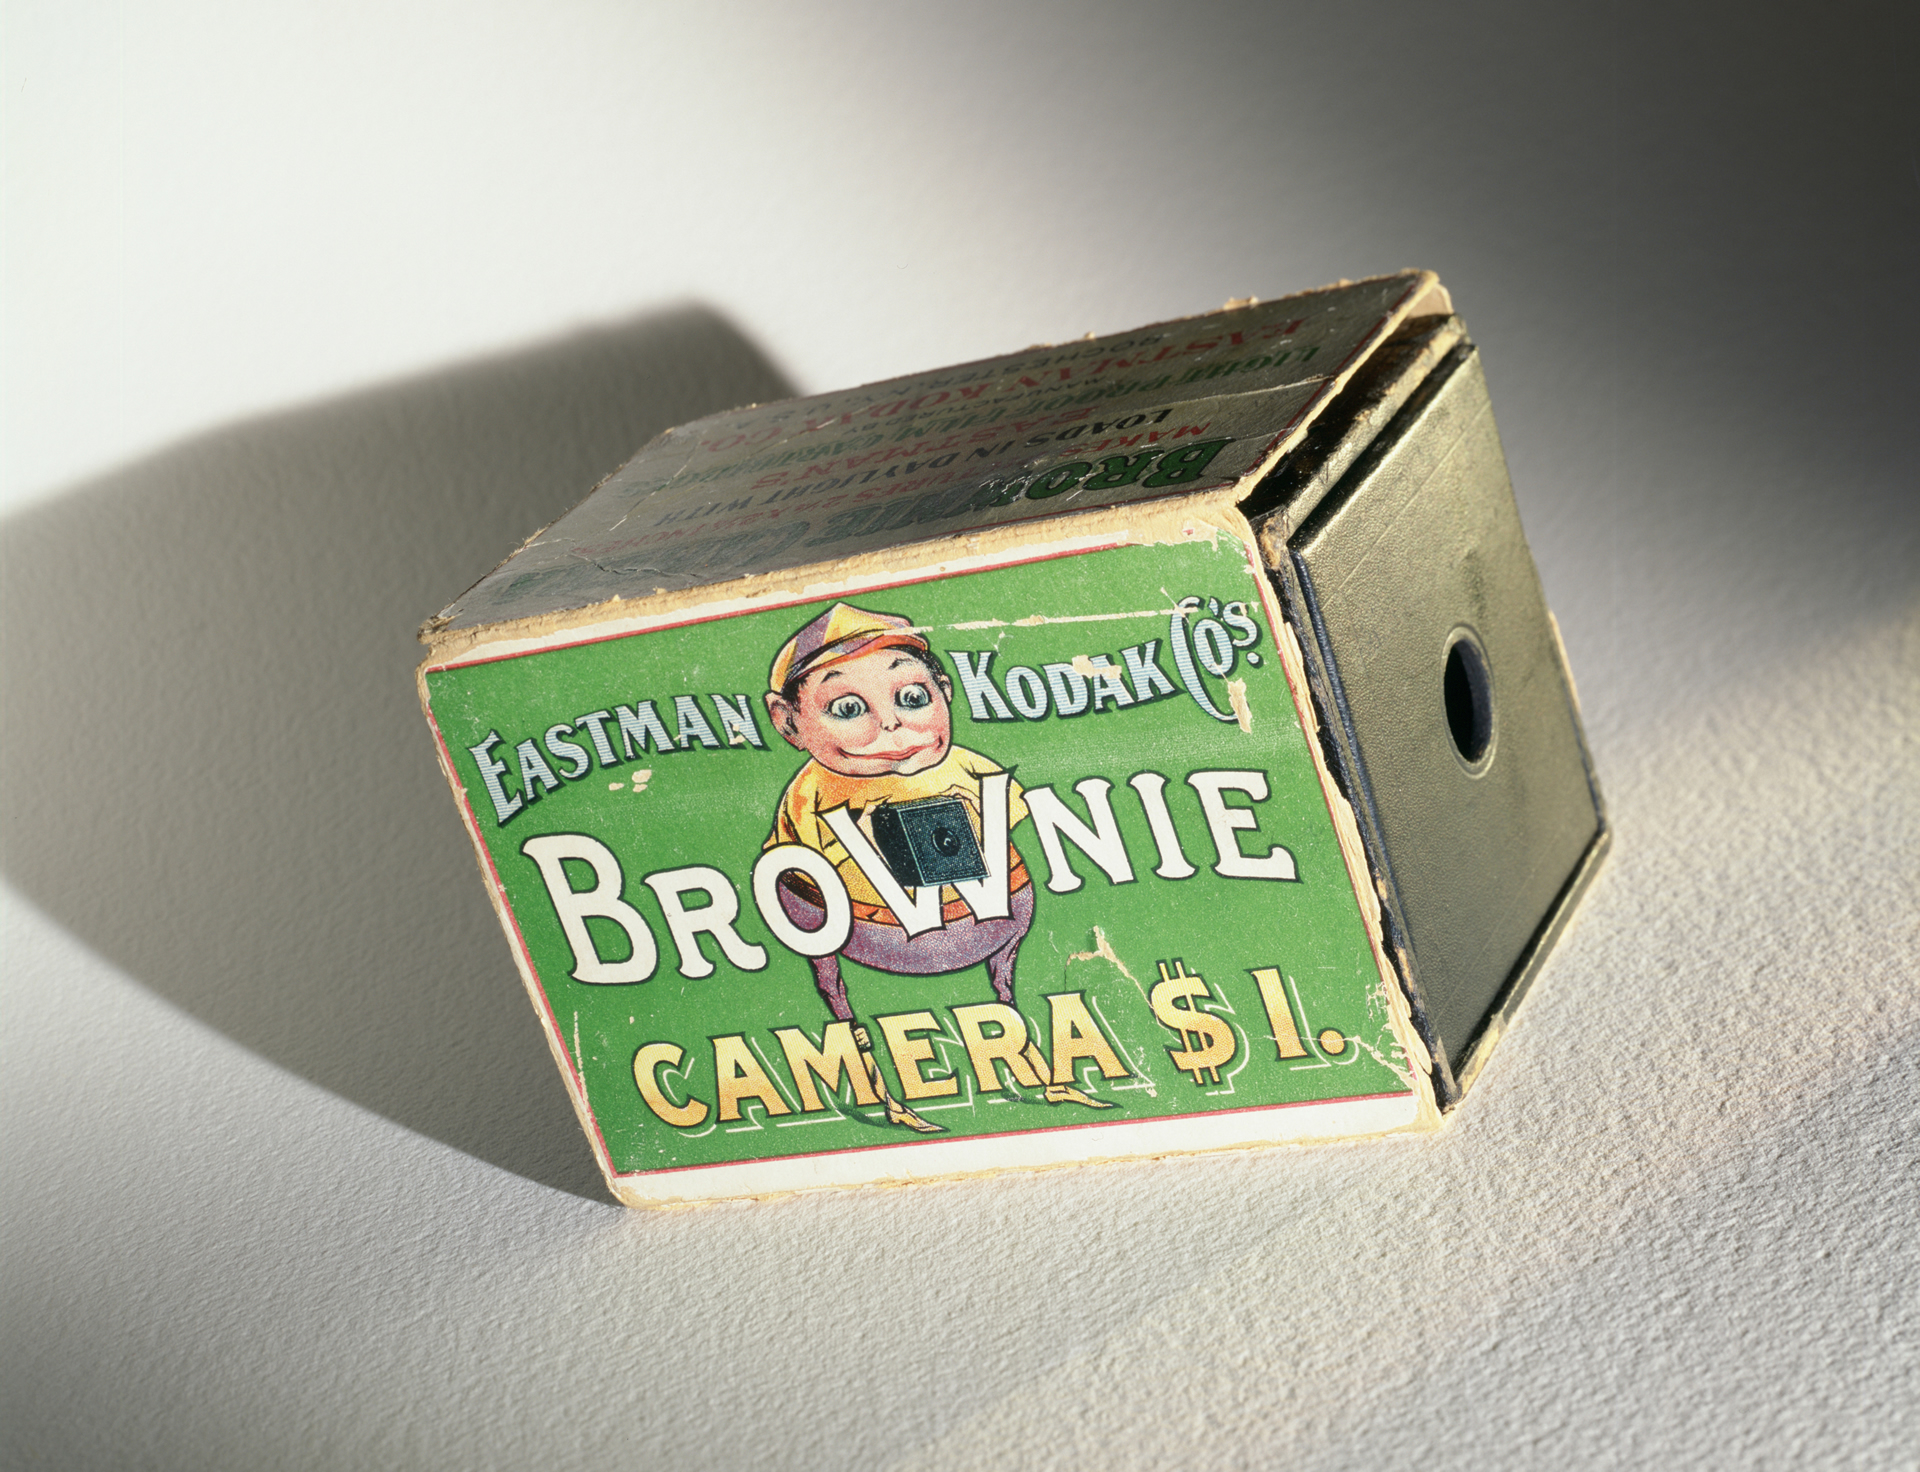
By the turn of the 20th century, Kodak became the world’s leader in both camera and film, and many European models would be designed to use Kodak’s film. Despite great sales, George Eastman knew there were more people out there who might buy his film if the price became cheap enough, so in 1900, Eastman released the first “Brownie”. Named after cartoon characters known as “Brownies” designed by artist and author Palmer Cox, the Brownie was a cardboard camera so cheap to make, that it would sell for one dollar and would take rolls of Kodak film that would sell for 15 cents each.
The Brownie was an immediate success selling nearly a quarter of a million units in its first year of production. Even though the original Kodak brought photography to the masses, its price of $25 was quite a bit of money in 1888 and still out of reach of working class families. At $1, the Brownie opened the door for virtually anyone to buy a camera and make photographs. As a result, many people consider this first Brownie to be the most significant camera ever made.
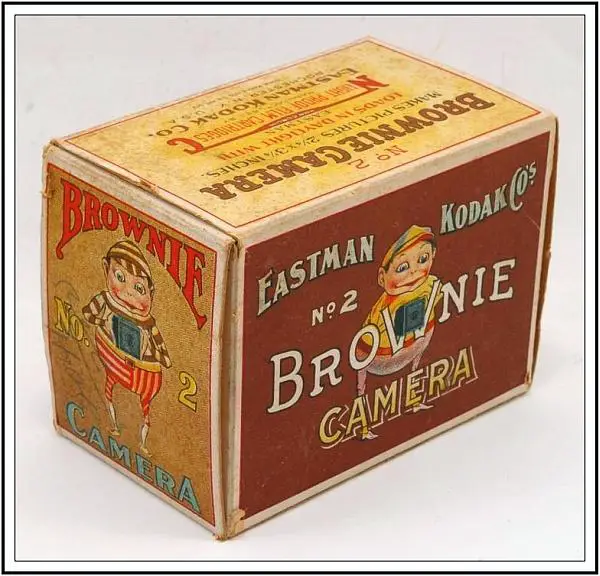
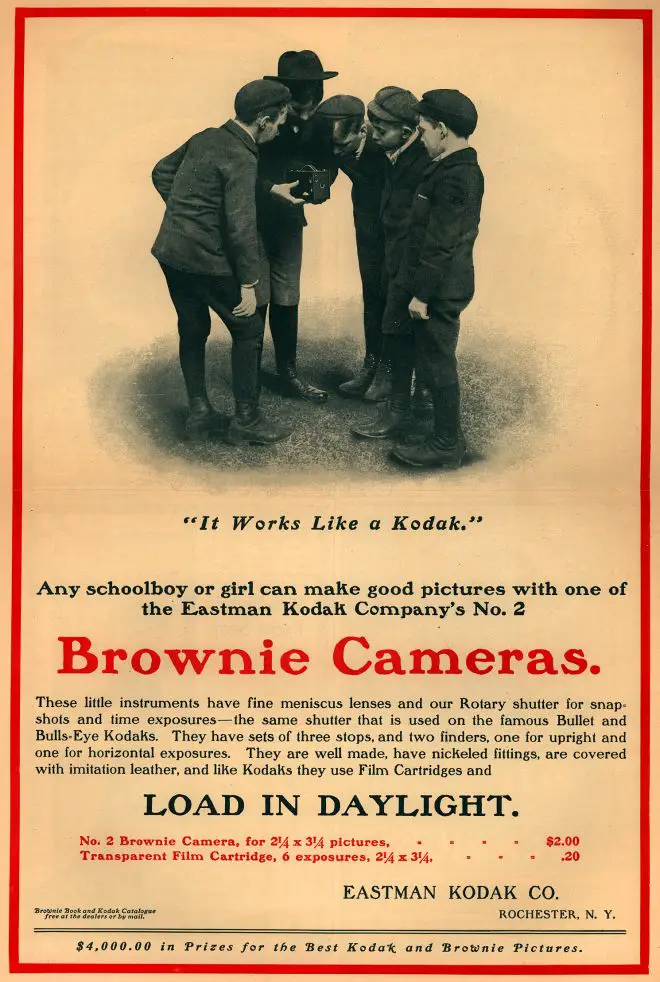
In the years that followed, many different variants and upgrades to that original Brownie would be released. In late 1901, the No. 2 Brownie would be released that used an all new type of film known as 120. 120 film allowed for larger 2¼” x 3¼” exposures to be made, which proved to be extremely successful. The No. 2 Brownie would stay in production until 1935.
I won’t go into the various different types of Brownies, but if you are interested, I highly recommend you check out Chuck Baker’s excellent Brownie Camera page, or the amazingly complete collection of Brownies at www.brownie.camera.
The model being reviewed here is called the No. 2 Brownie Model D. During it’s production, the No. 2 Brownie would see several revisions to it’s design, but they would all retain the same basic shape, meniscus lens, and 120 film size. The Model D was first sold in 1914, and was available until sometime in 1919. Mine is likely an earlier Model D as it lacks the spring loaded latch which wasn’t seen until around 1915. Later versions of the No. 2 Brownie upgraded the cardboard body to aluminum, making them much more sturdy. It’s worth noting that in 1933, a No. 2 Brownie Special was released that upgraded the meniscus lens to a Kodak Doublet lens. These cameras are very rare.
An estimated 2.5 million No. 2 Brownies were sold during their 30+ year life cycle, making it one of the best selling Brownie cameras. Kodak would continue to use the name “Brownie” on a huge variety of cameras throughout the rest of the 20th century. I don’t know that anyone has ever tried to come up with a total number of all Brownie models ever sold, but it has to be in the tens of millions.
Today, because of the massive amount made, it can be hard to pinpoint which Brownies are the most valuable. The No. 2 is certainly desirable because despite their cheap construction, there’s almost nothing to break. When found in anything close to good condition, they often work fine nearly 100 years after they were made. But also, unlike many other early 20th century Brownies, they use 120 roll film which is still easily available. Starting in the early 30s, all roll-film Kodak cameras would use either 620 or 616 film which is no longer made, making the No. 2 Brownie the only model that can easily be used without modification.
My Thoughts
For as prevalent as box cameras have been in the history of photography, they’re not the most interesting type of camera to shoot, yet you’ll find at least a couple in most camera collector’s collections.
I picked up this camera well over a year ago along with several other cameras, and although I was aware it used 120 film, I didn’t have any interest in using it. It sat on a shelf in my office at work and became a display piece.
Then in September of this year, I had planned a trip to one of my favorite state parks, and had a goal of shooting as many different kinds of cameras as possible, and I figured, might as well give this Brownie a shot. After all, it was in pretty good condition and the shutter seemed to work fine.
I gave the camera a gentle wipe down to get the surface dust off, and I dipped a Q-tip in some glass cleaner and cleaned the lens as best as I could. Both the horizontal and vertical viewfinders were in pretty poor shape due to desilvering of the mirror, but since I couldn’t see any easy way to take them apart, I just left them be.
Now, if you’ve ever shot with a box camera before, the process is pretty much the same for all of them. If you are not a fan of box cameras, the No. 2 Brownie will do nothing to change your mind. If, however, you have a curiosity for old technology and are intrigued at the amazingly simple construction of them, shooting with a box camera can be a fascinating experience.
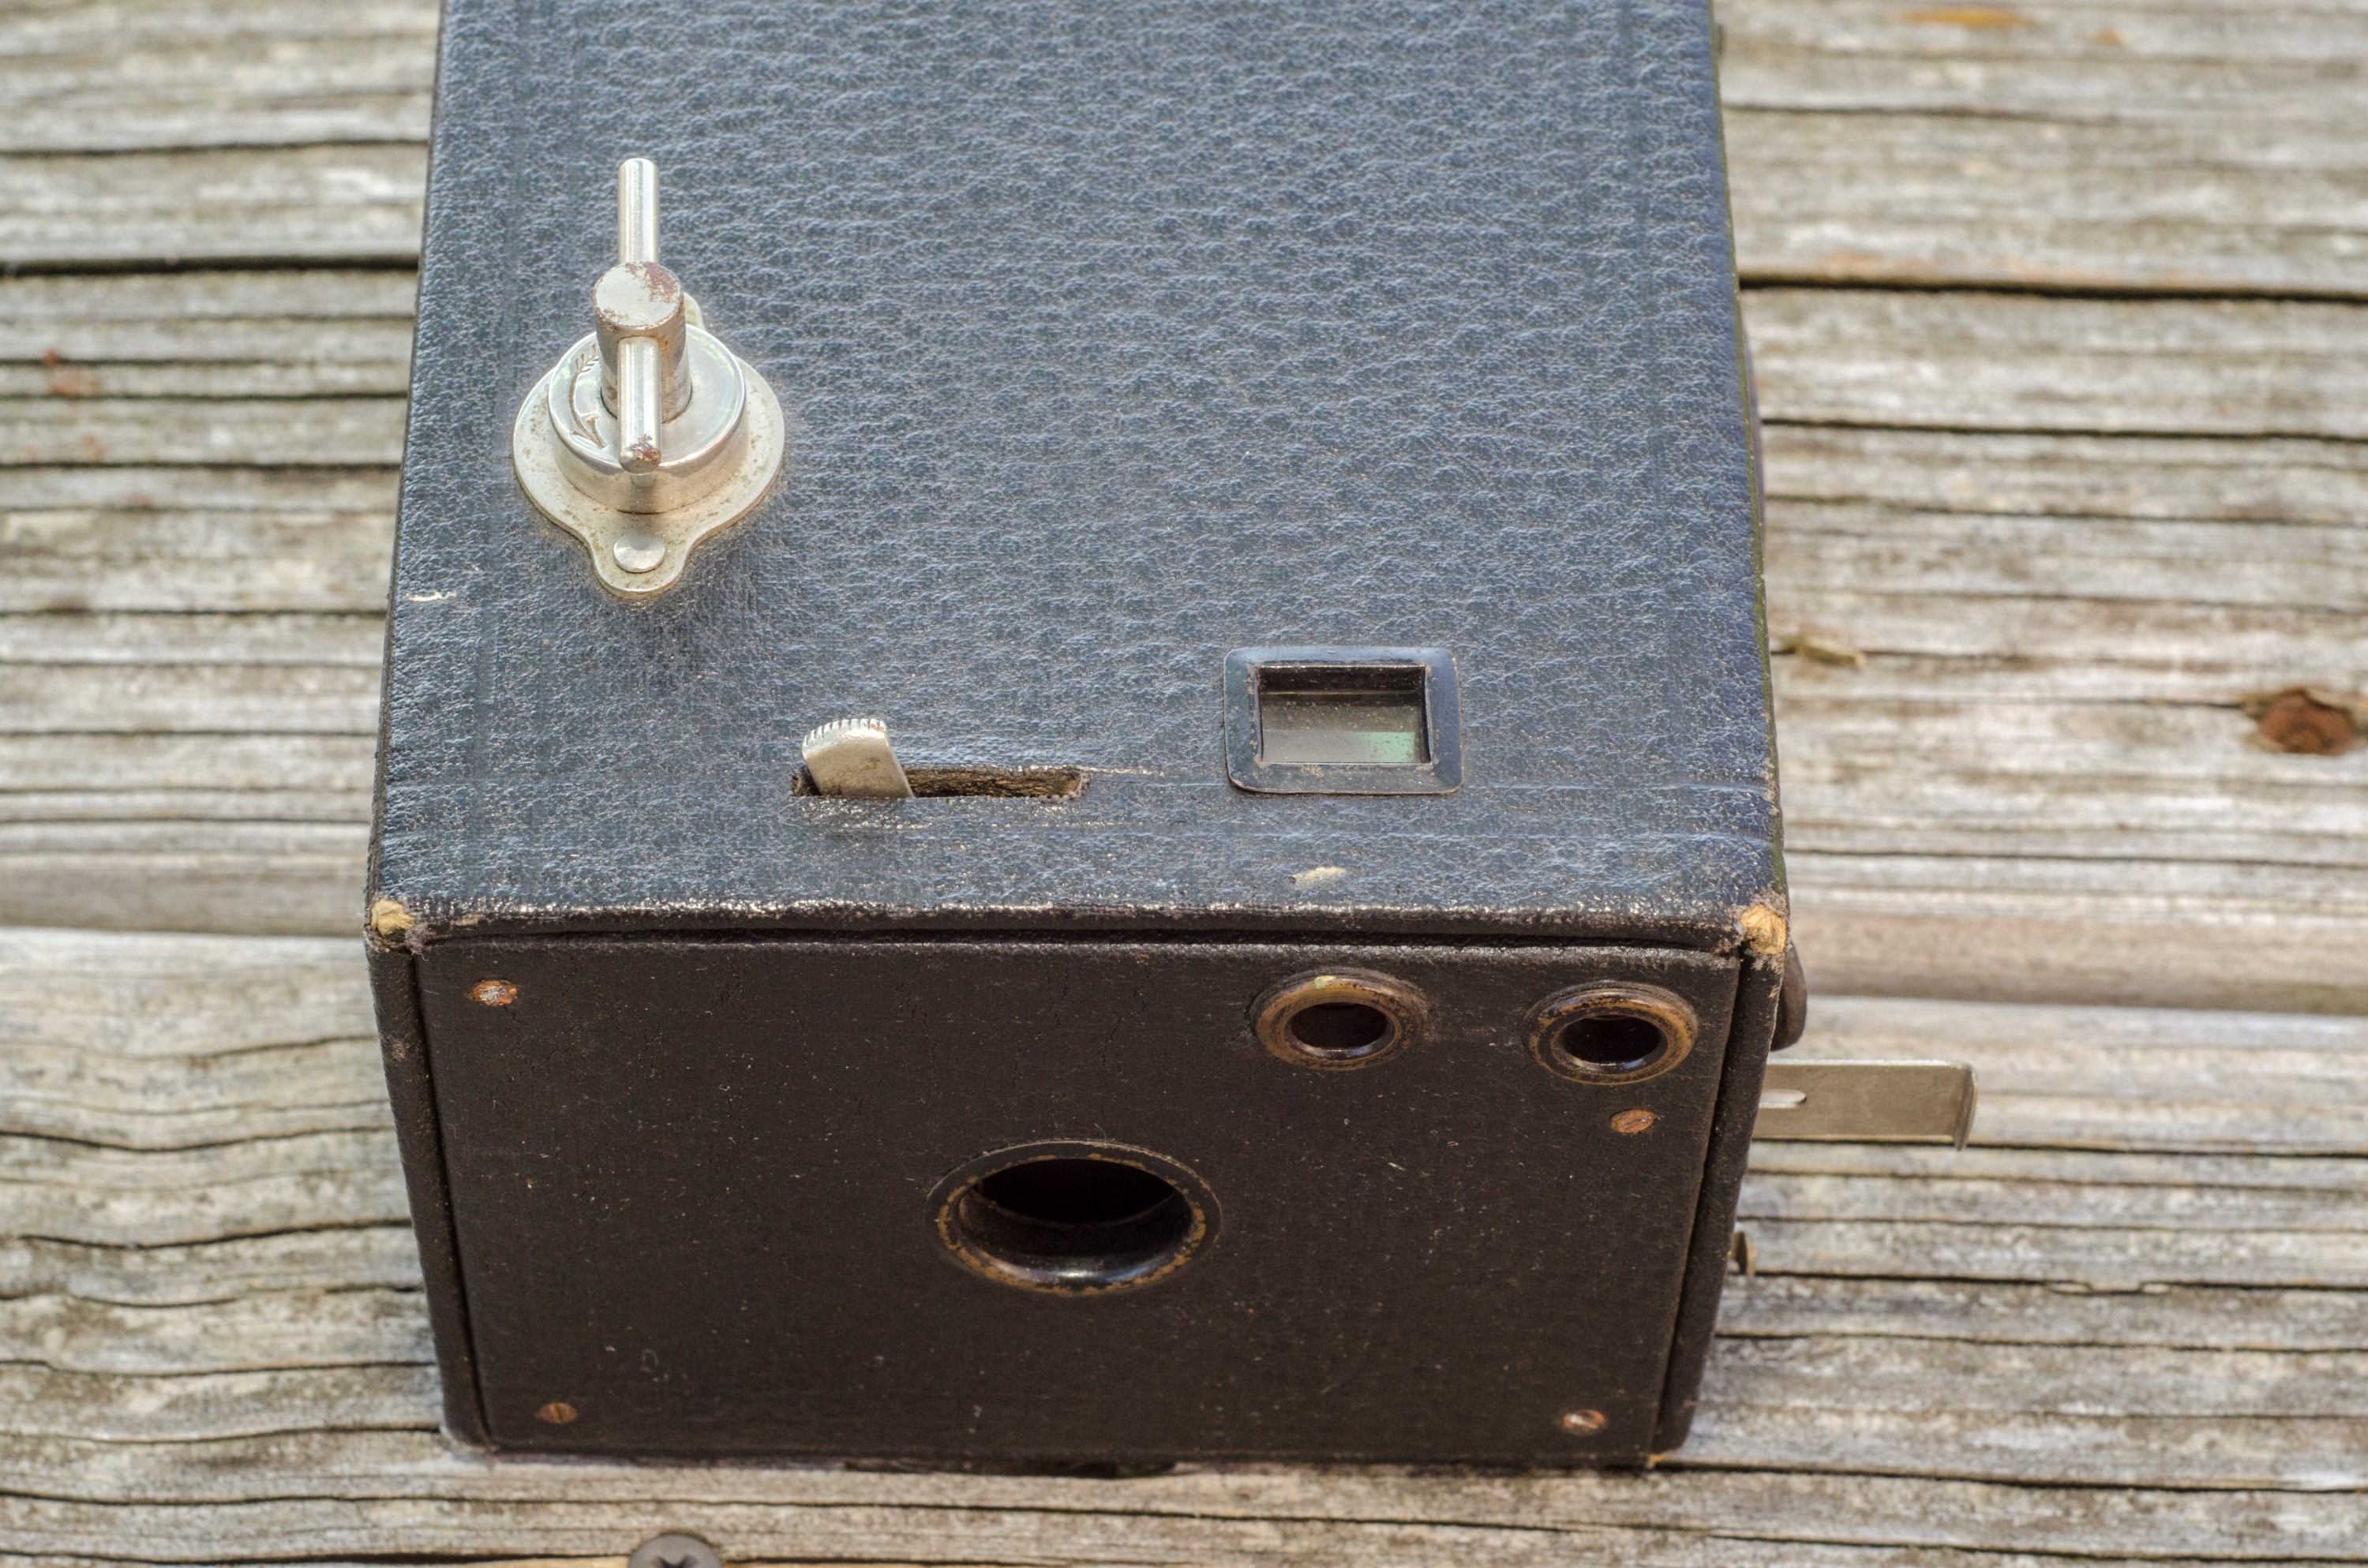
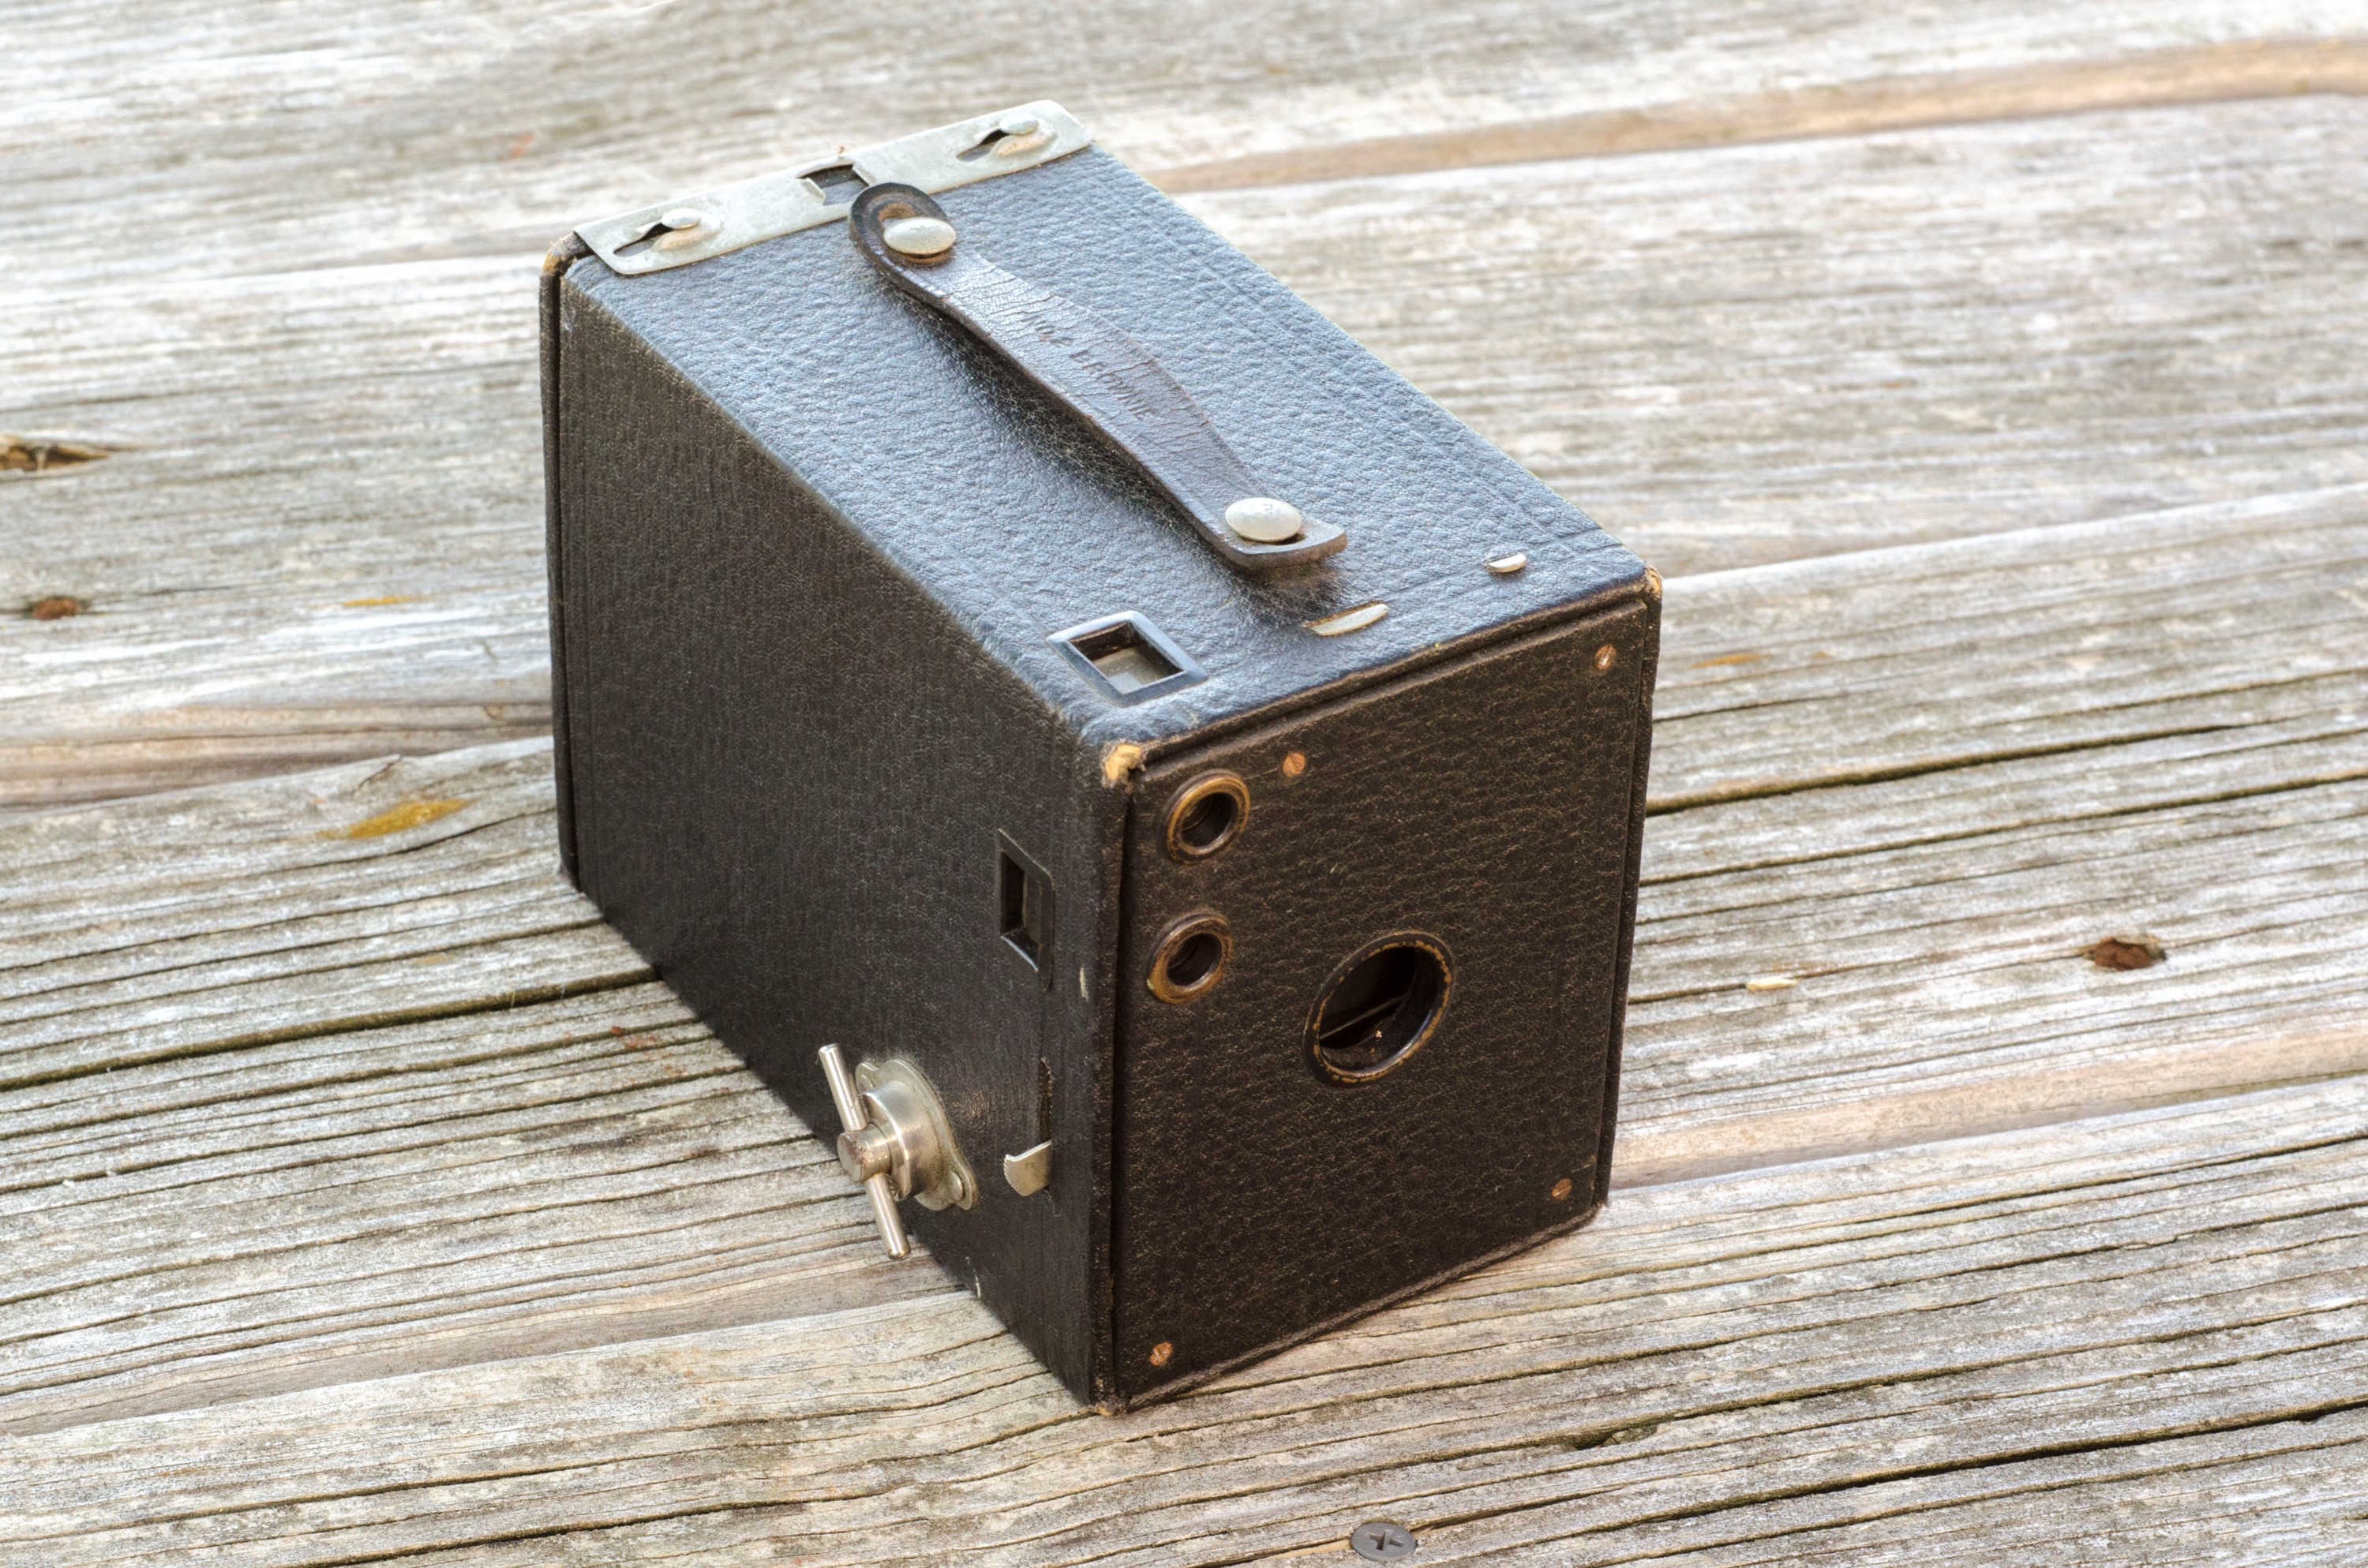
Although a rudimentary camera, the No. 2 Brownie has a few features which increase it’s capabilities. On top of the camera, in front of the handle, are two metal tabs that slide up and down. The image to the right shows both of these tabs in their full “up” positions. The larger tab in the middle allows you to change the aperture of the lens. Unlike more advanced cameras that use an iris made out of multiple moving blades, the aperture on this camera is simply a flat piece of metal with 3 different size holes in it.
When this tab is in the full “down” position, you are shooting the camera “wide open” at maximum aperture. Although Kodak never made any claim to the sizes of the three aperture settings, this discussion on photo.net suggests that the three openings are approximately f/16, f/22, and f/32. While I would have guessed the most wide open aperture would have been closer to f/8 or f/11, two different people in that discussion measured the exact size and calculated it to be closer to f/16.
The smaller tab to the right of the larger tab switches the shutter from “Instant” mode to “Timed” mode. Like aperture, there is no official documentation of how fast the instant speed is, but my best guess would be 1/50th of a second. The presence of a “Timed” mode is a surprisingly useful feature which would allow for the Brownie to be used indoors, or in low light situations, leaving the shutter open for extended periods of time. The Brownie has no provision for a shutter release cable, so in order to use it in Timed mode, you have to be very careful to stabilize the camera so that it does not move while the shutter is open. Also, since it’s a Timed mode, you have to activate the shutter twice, once to open it, and another to close it.
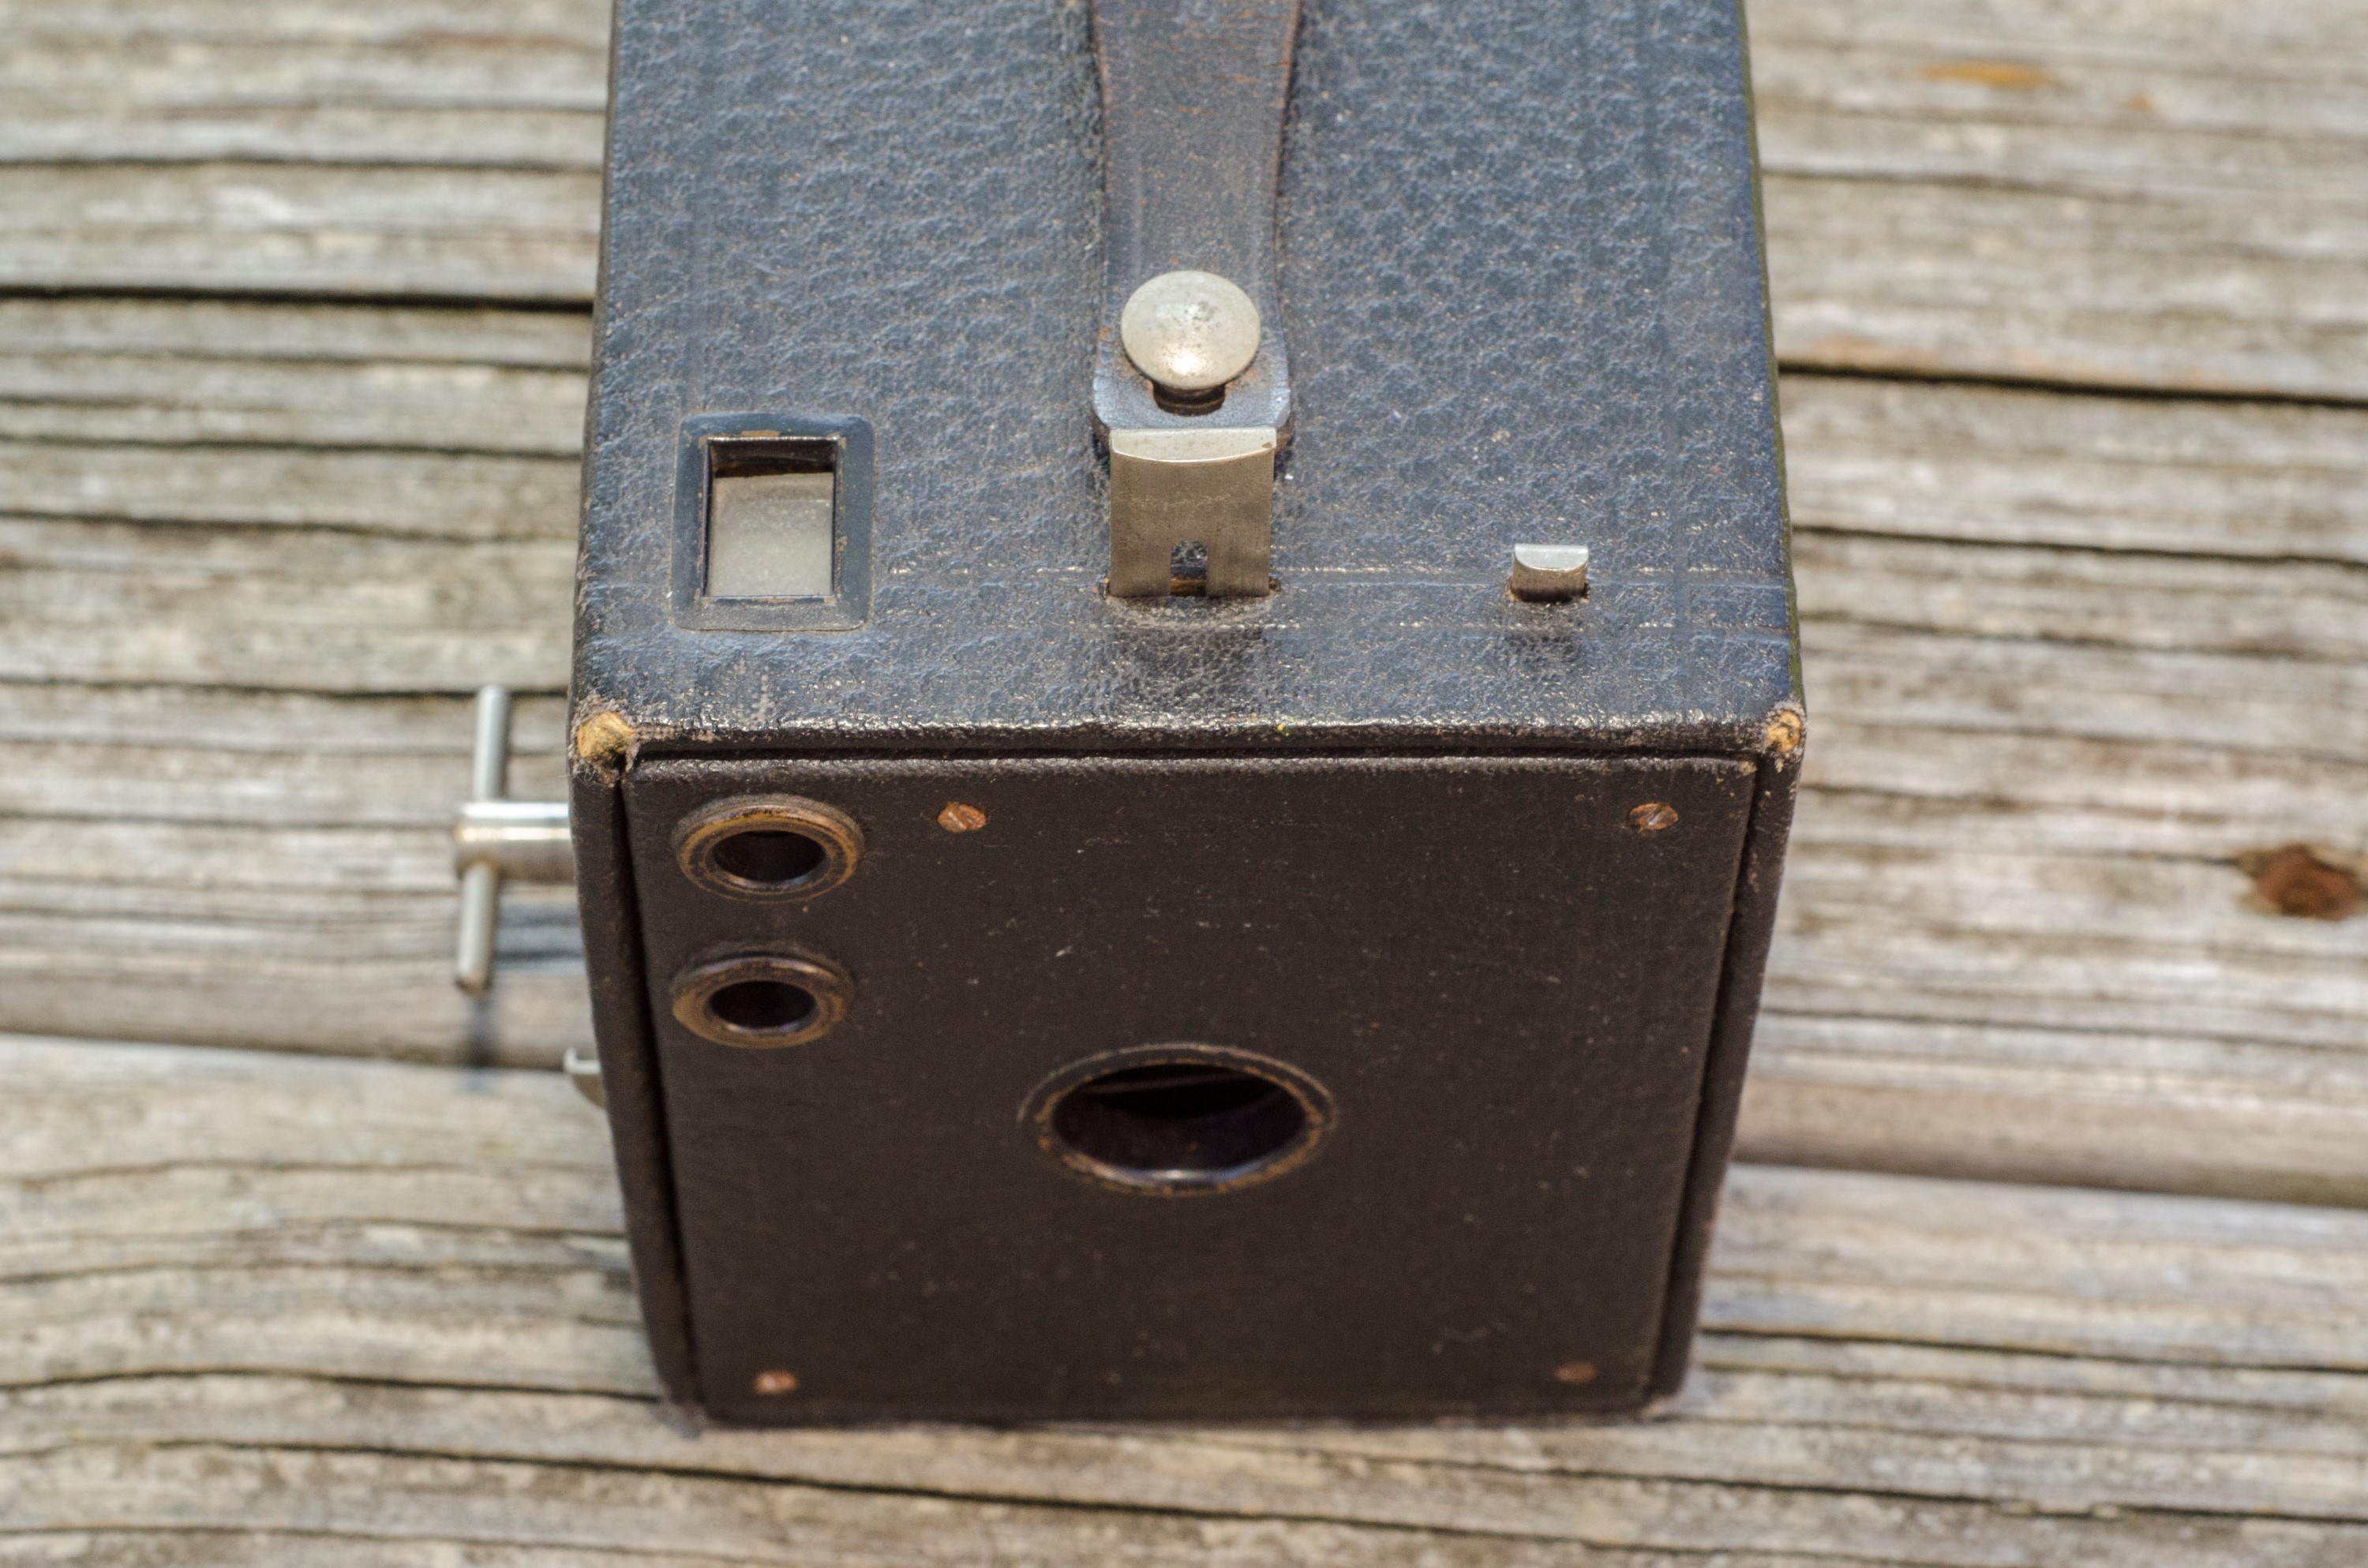
The side of the camera with the wind knob has both the landscape viewfinder, and the shutter rocker. To fire the shutter, you move the rocker in either up or down position. The shutter fires regardless of the original orientation of this rocker.
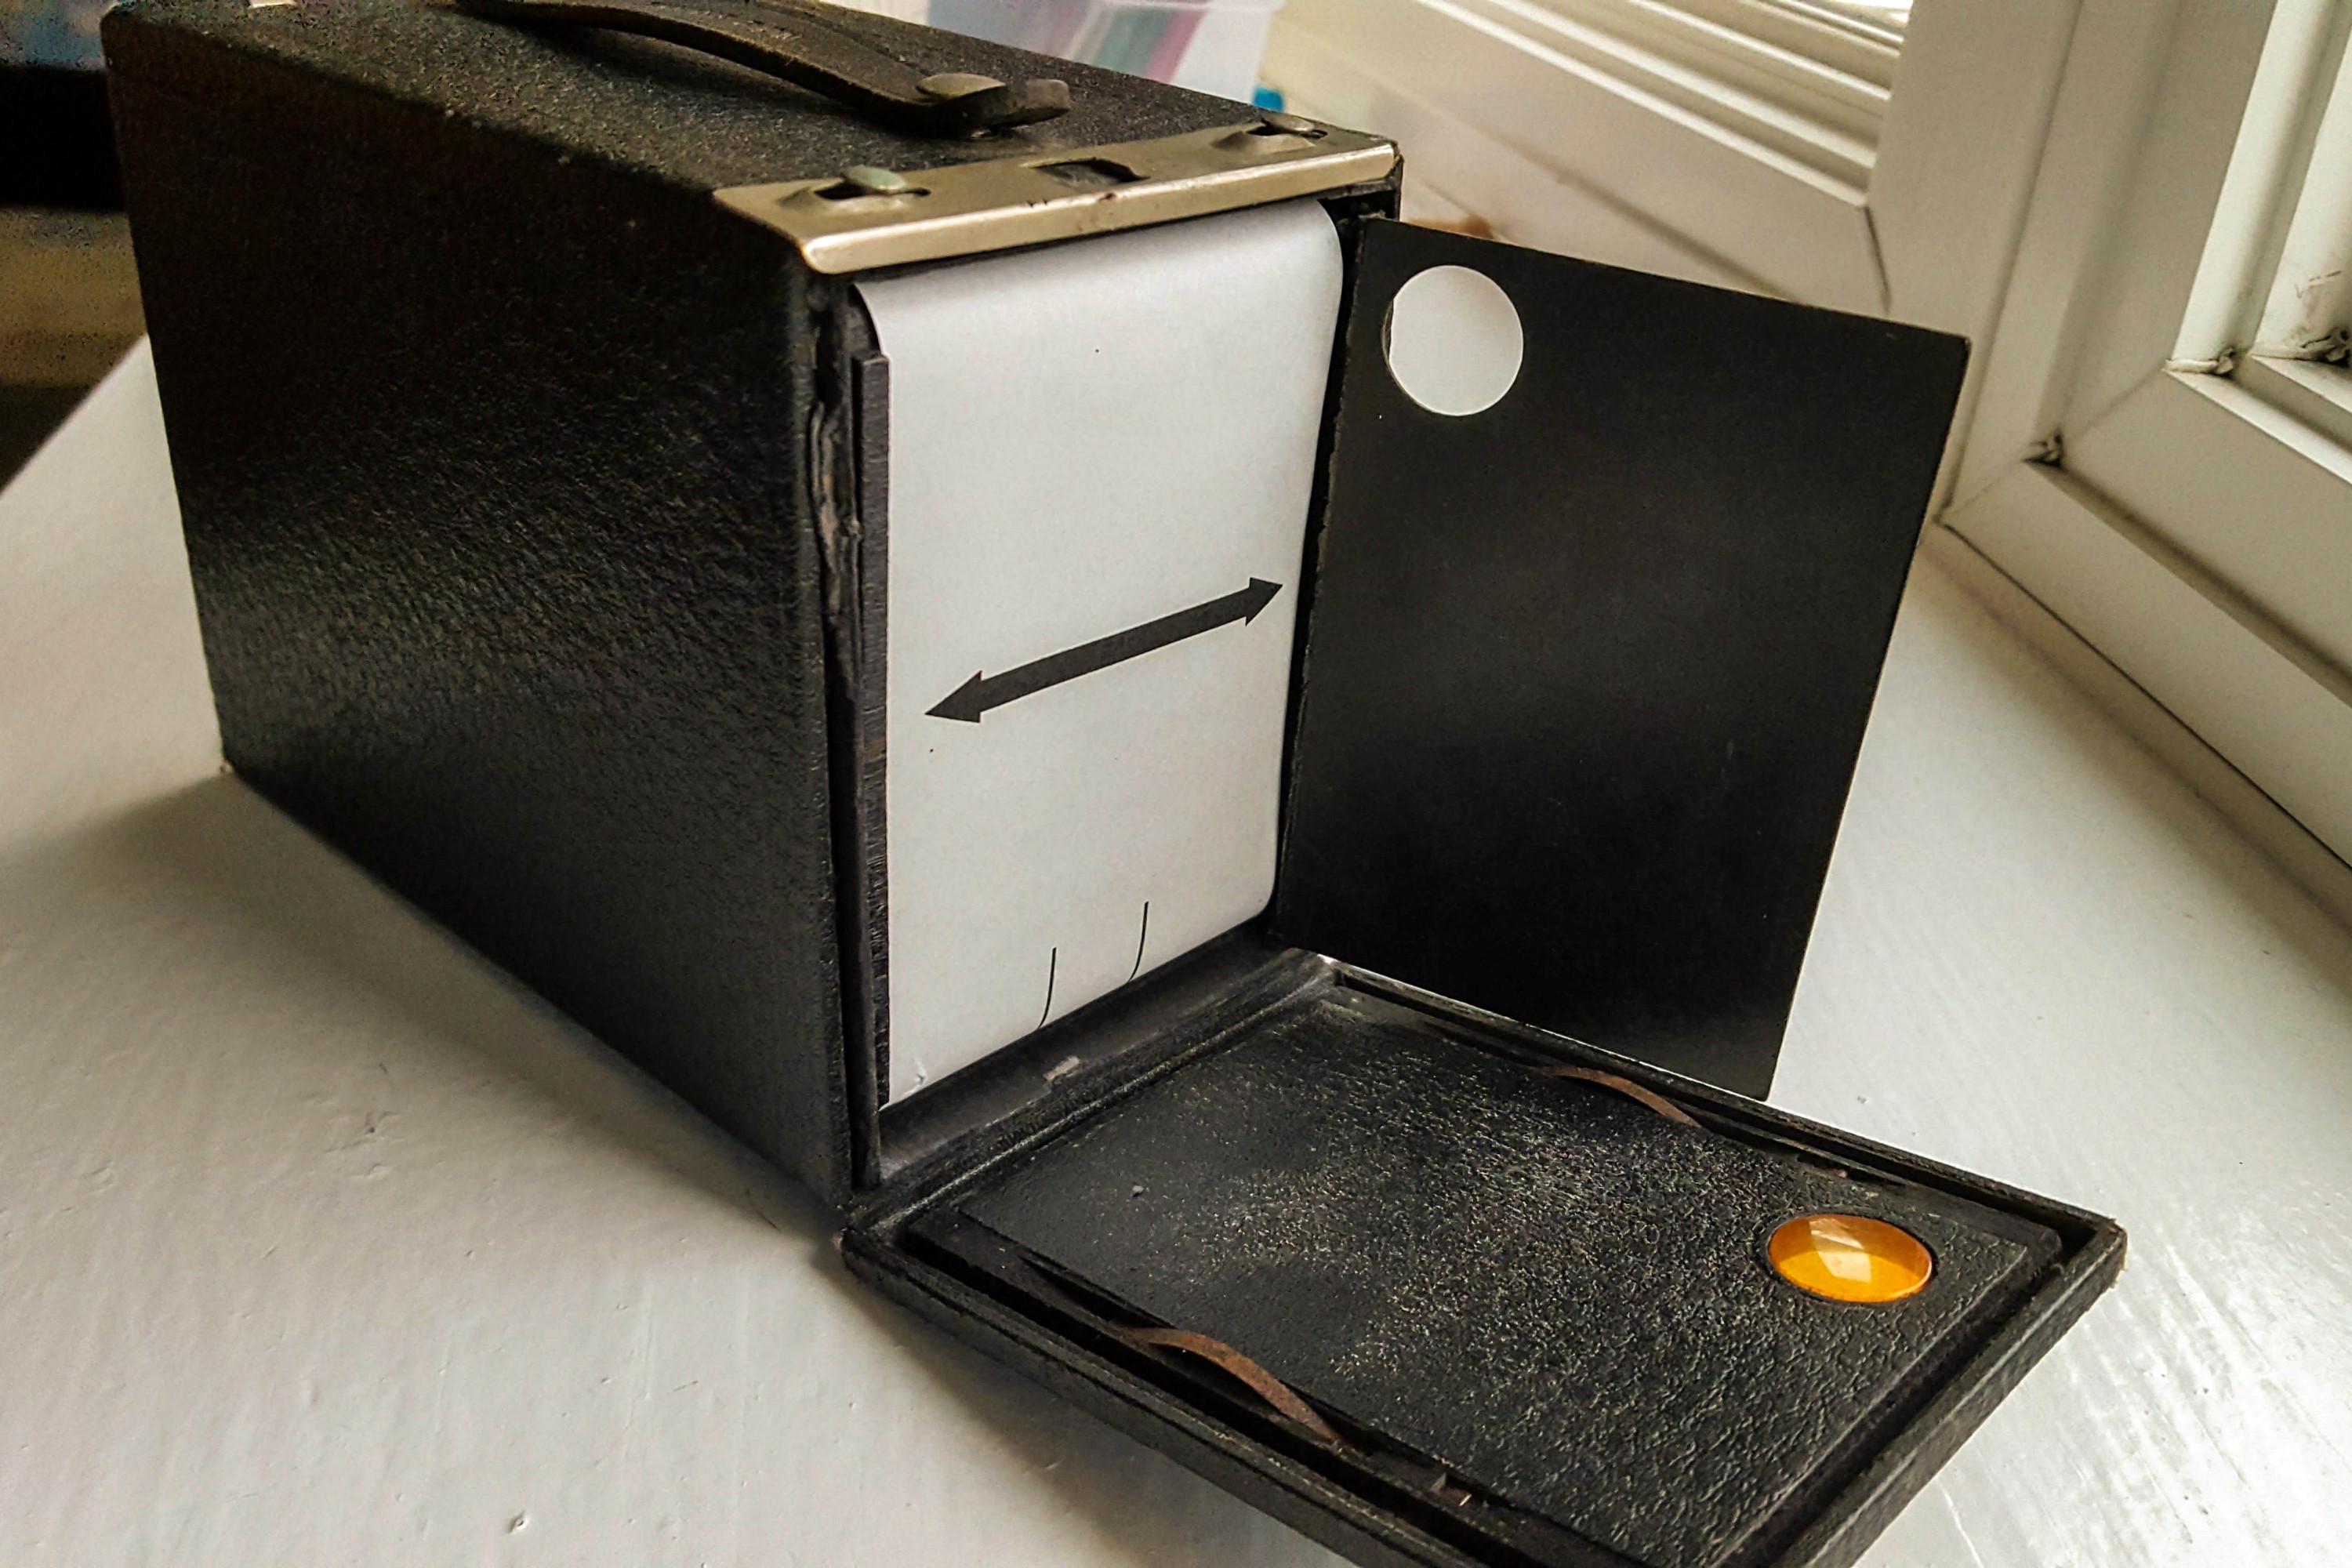
To load film into the camera, you must first pull the wind knob out while simultaneously turning it clockwise. Pulling the wind knob out releases the shaft on the takeup spool. If you forget this step when trying to open the camera, the film compartment will appear to be stuck in the camera.
The next step in opening the camera is to release the sliding “lock” on the back of the top of the camera. Later revisions to the No. 2 Brownie had a different design of lock, but whether you have the kind seen here, or the later kind, you need to unlock the back of the camera in order to open it.
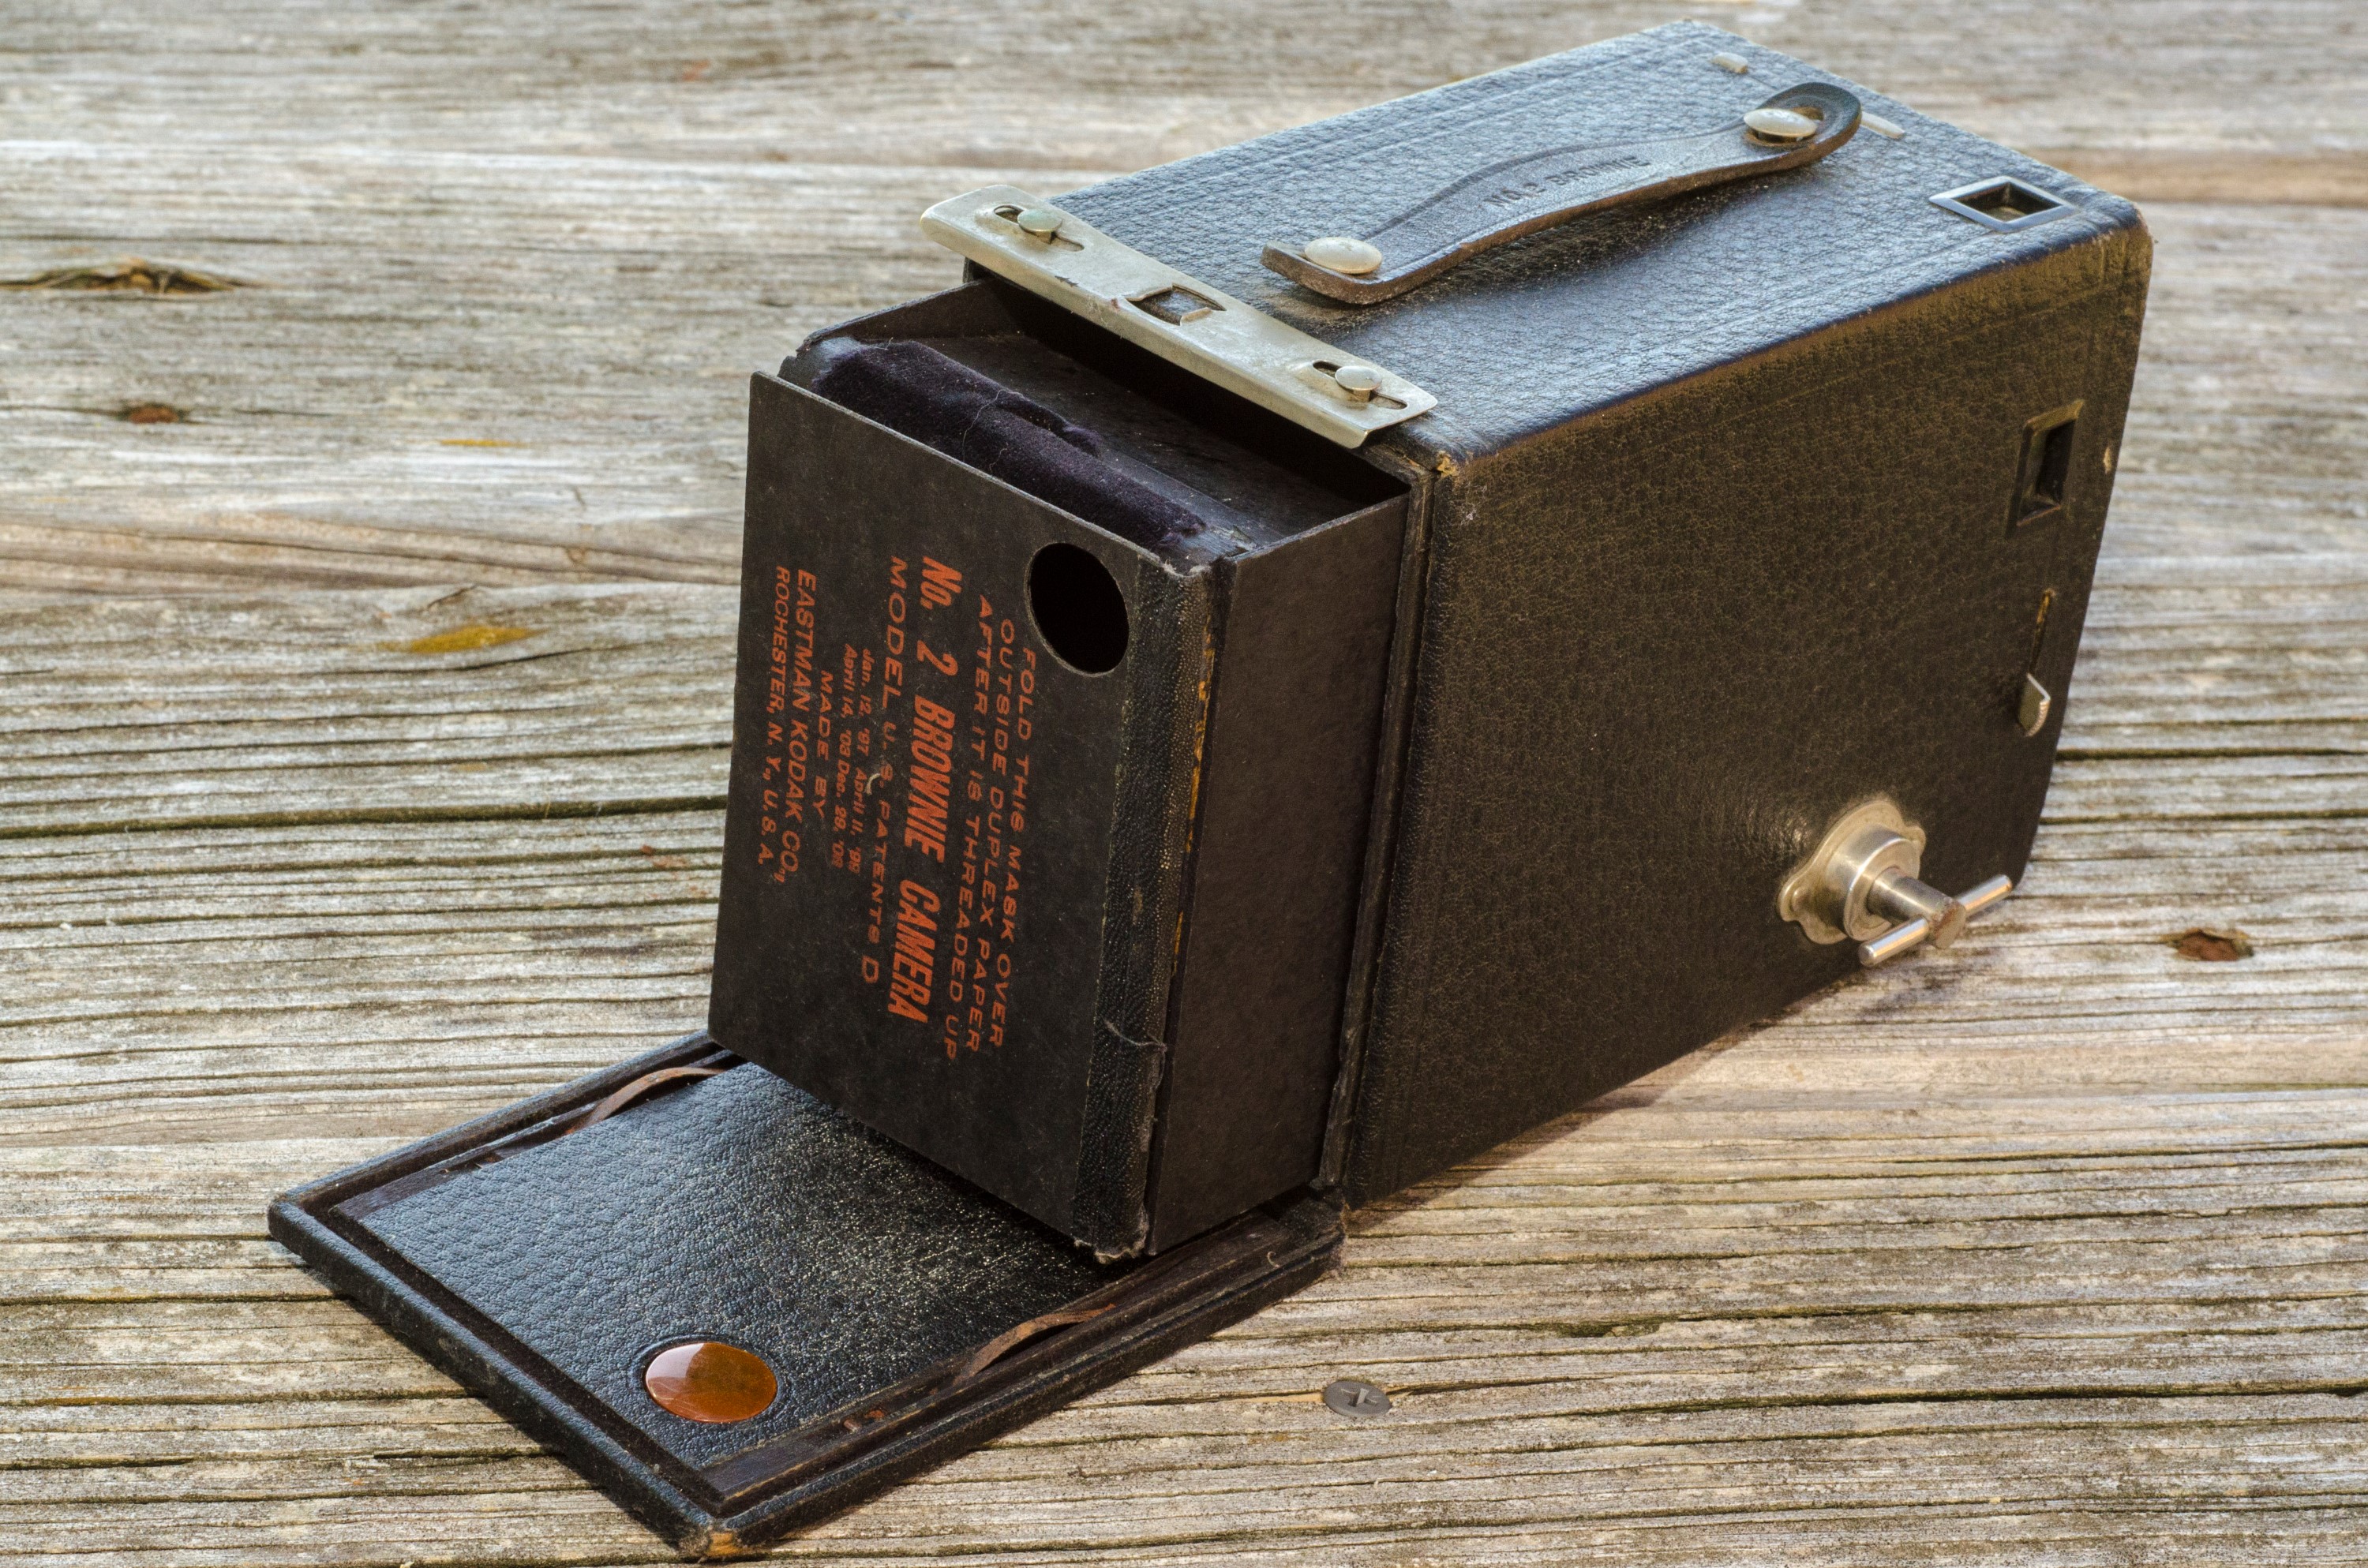
With the knob in it’s out position, and the rear door unlocked, you should be able to fold down the rear door exposing the film compartment. This version of the No.2 Brownie had a cardboard flap over the film compartment to help block out additional light, but I read that later versions of this camera omit this flap. Simply slide the entire film compartment out of the camera, taking care not to damage or tear the cardboard flap as they can be very fragile after 100+ years.
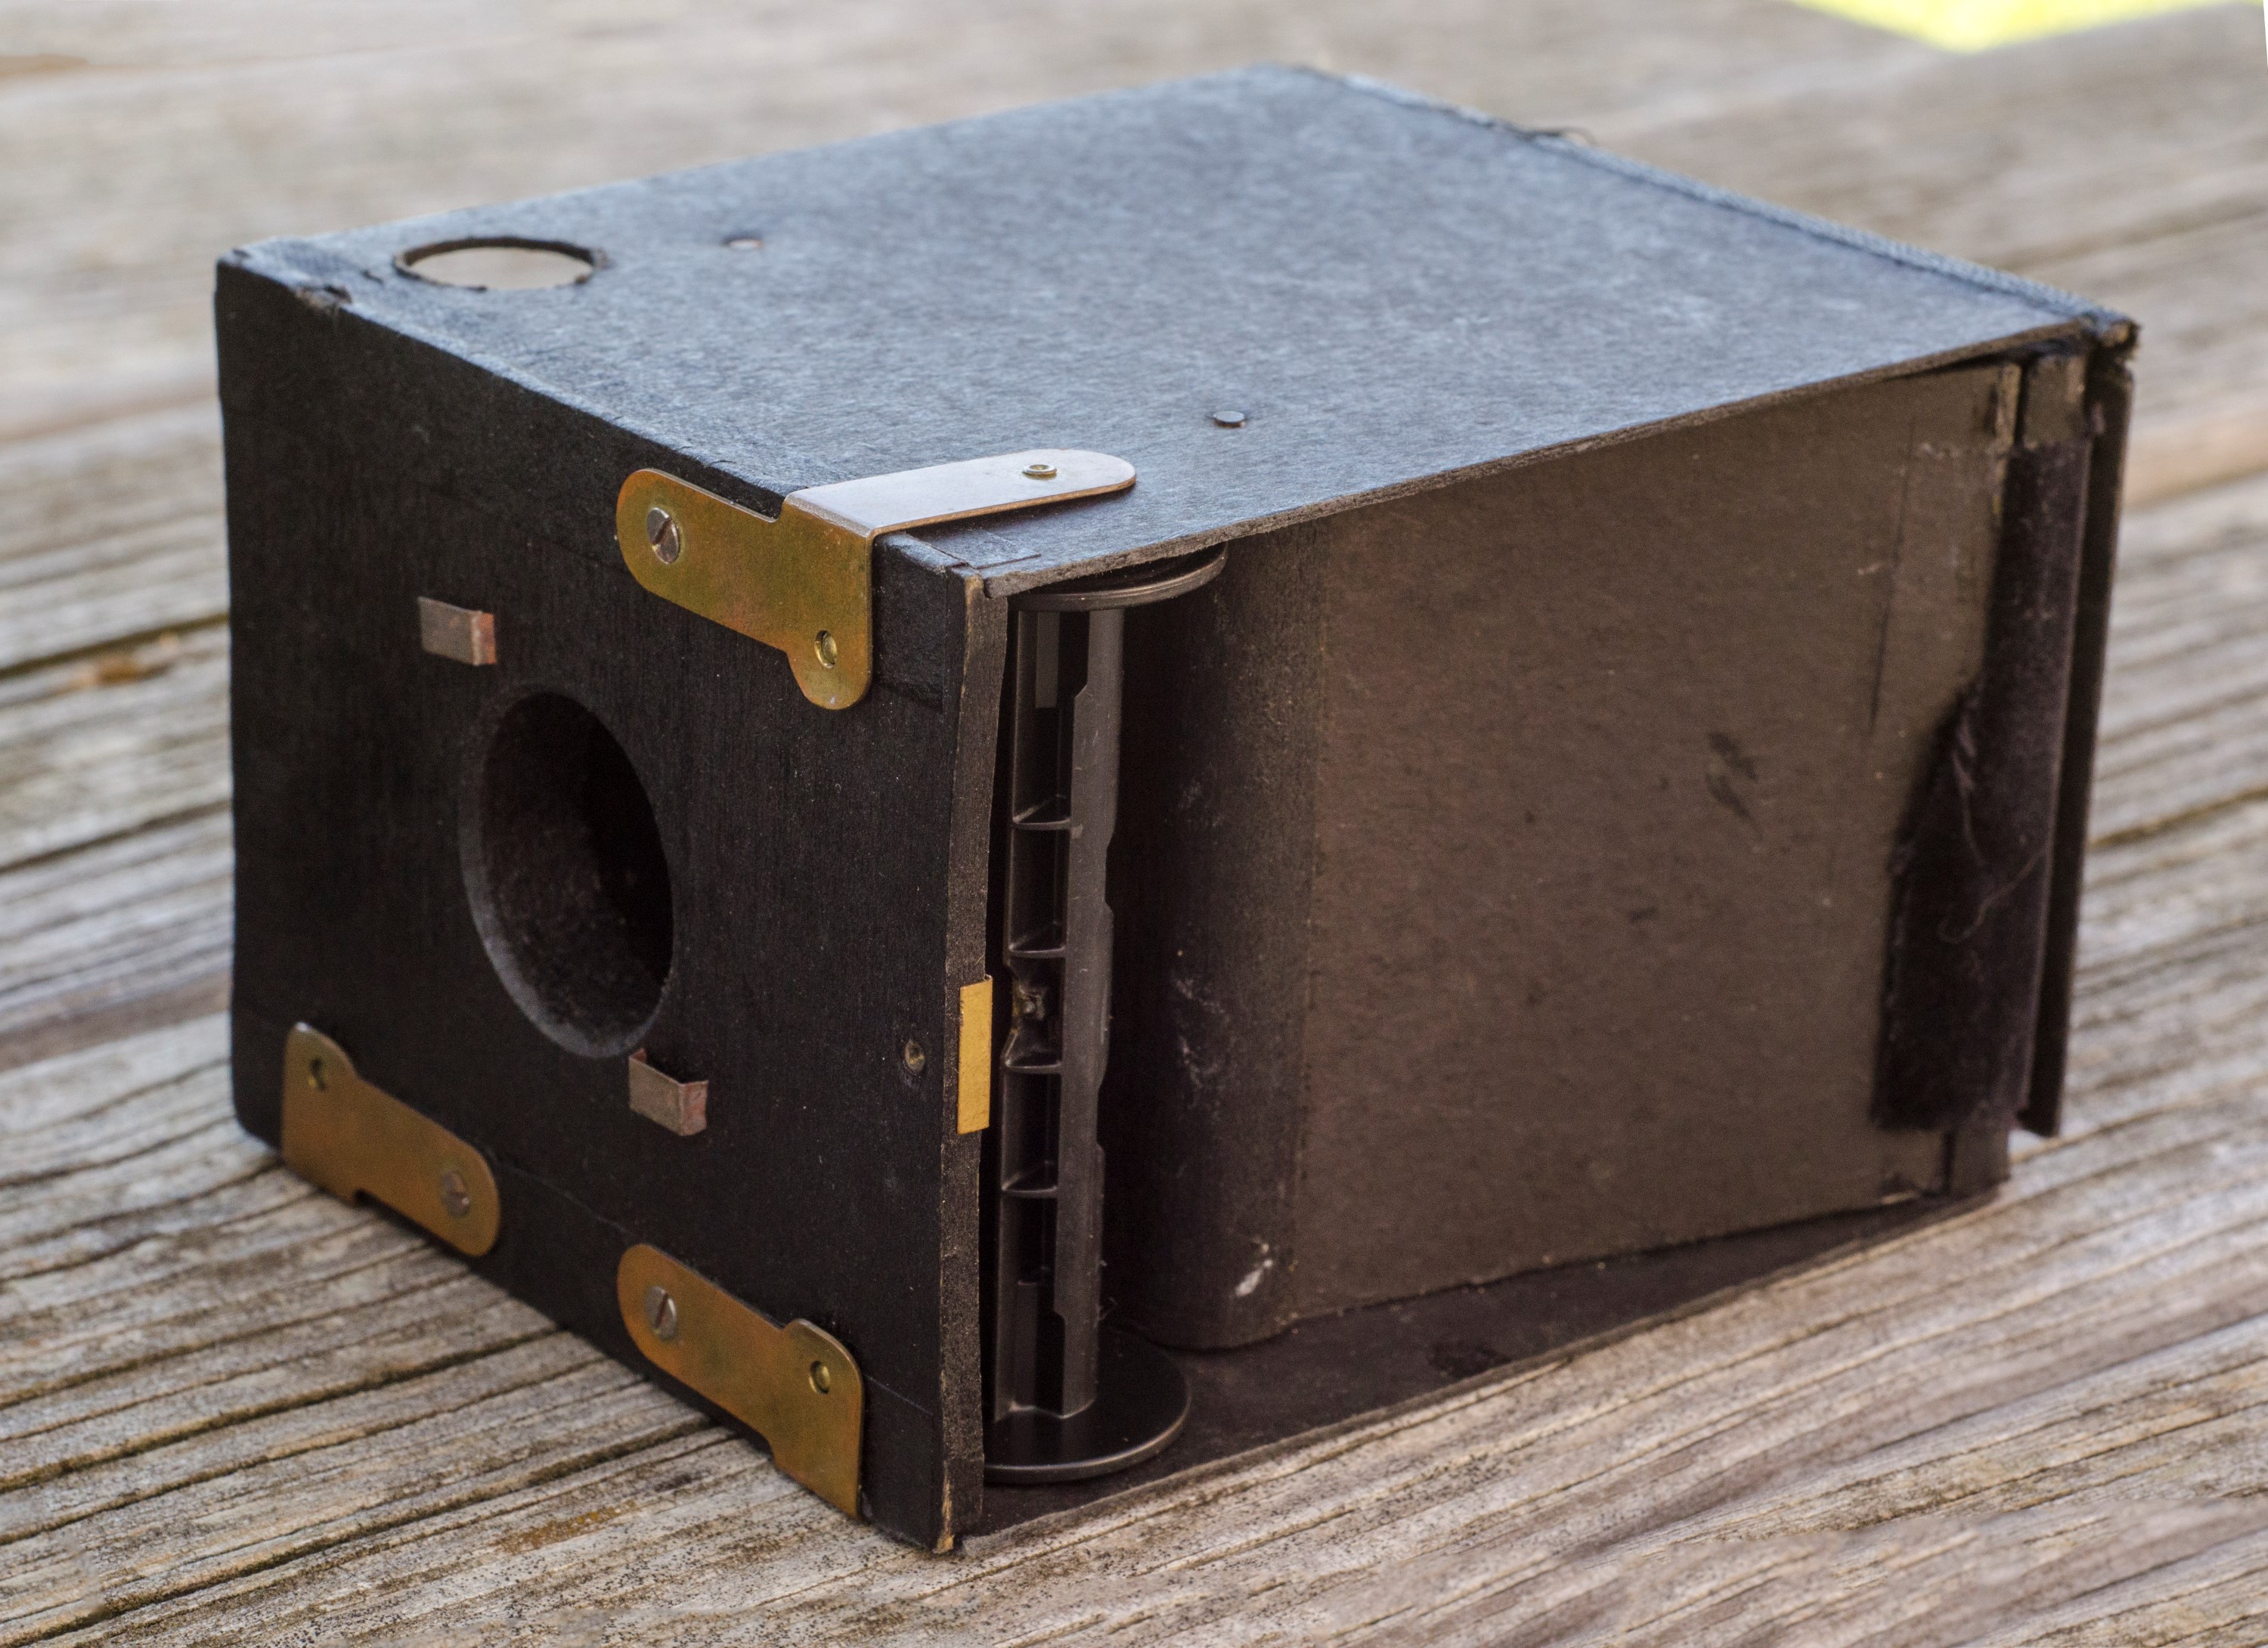
The image to the left shows the film compartment completely removed from the camera. In this image, the compartment is laying on it’s side. The spool in the image is an empty supply spool. Like all other roll film cameras, before loading in a fresh roll of film, you must first move the empty supply spool to the takeup side.
There are two round holes visible. The larger one allows light from the lens and shutter to enter the film compartment to expose the film. The smaller hole on the side is where the wind knob engages the takeup spool. You have to pull the wind knob out before you can remove the film compartment as it needs to go through this hole.
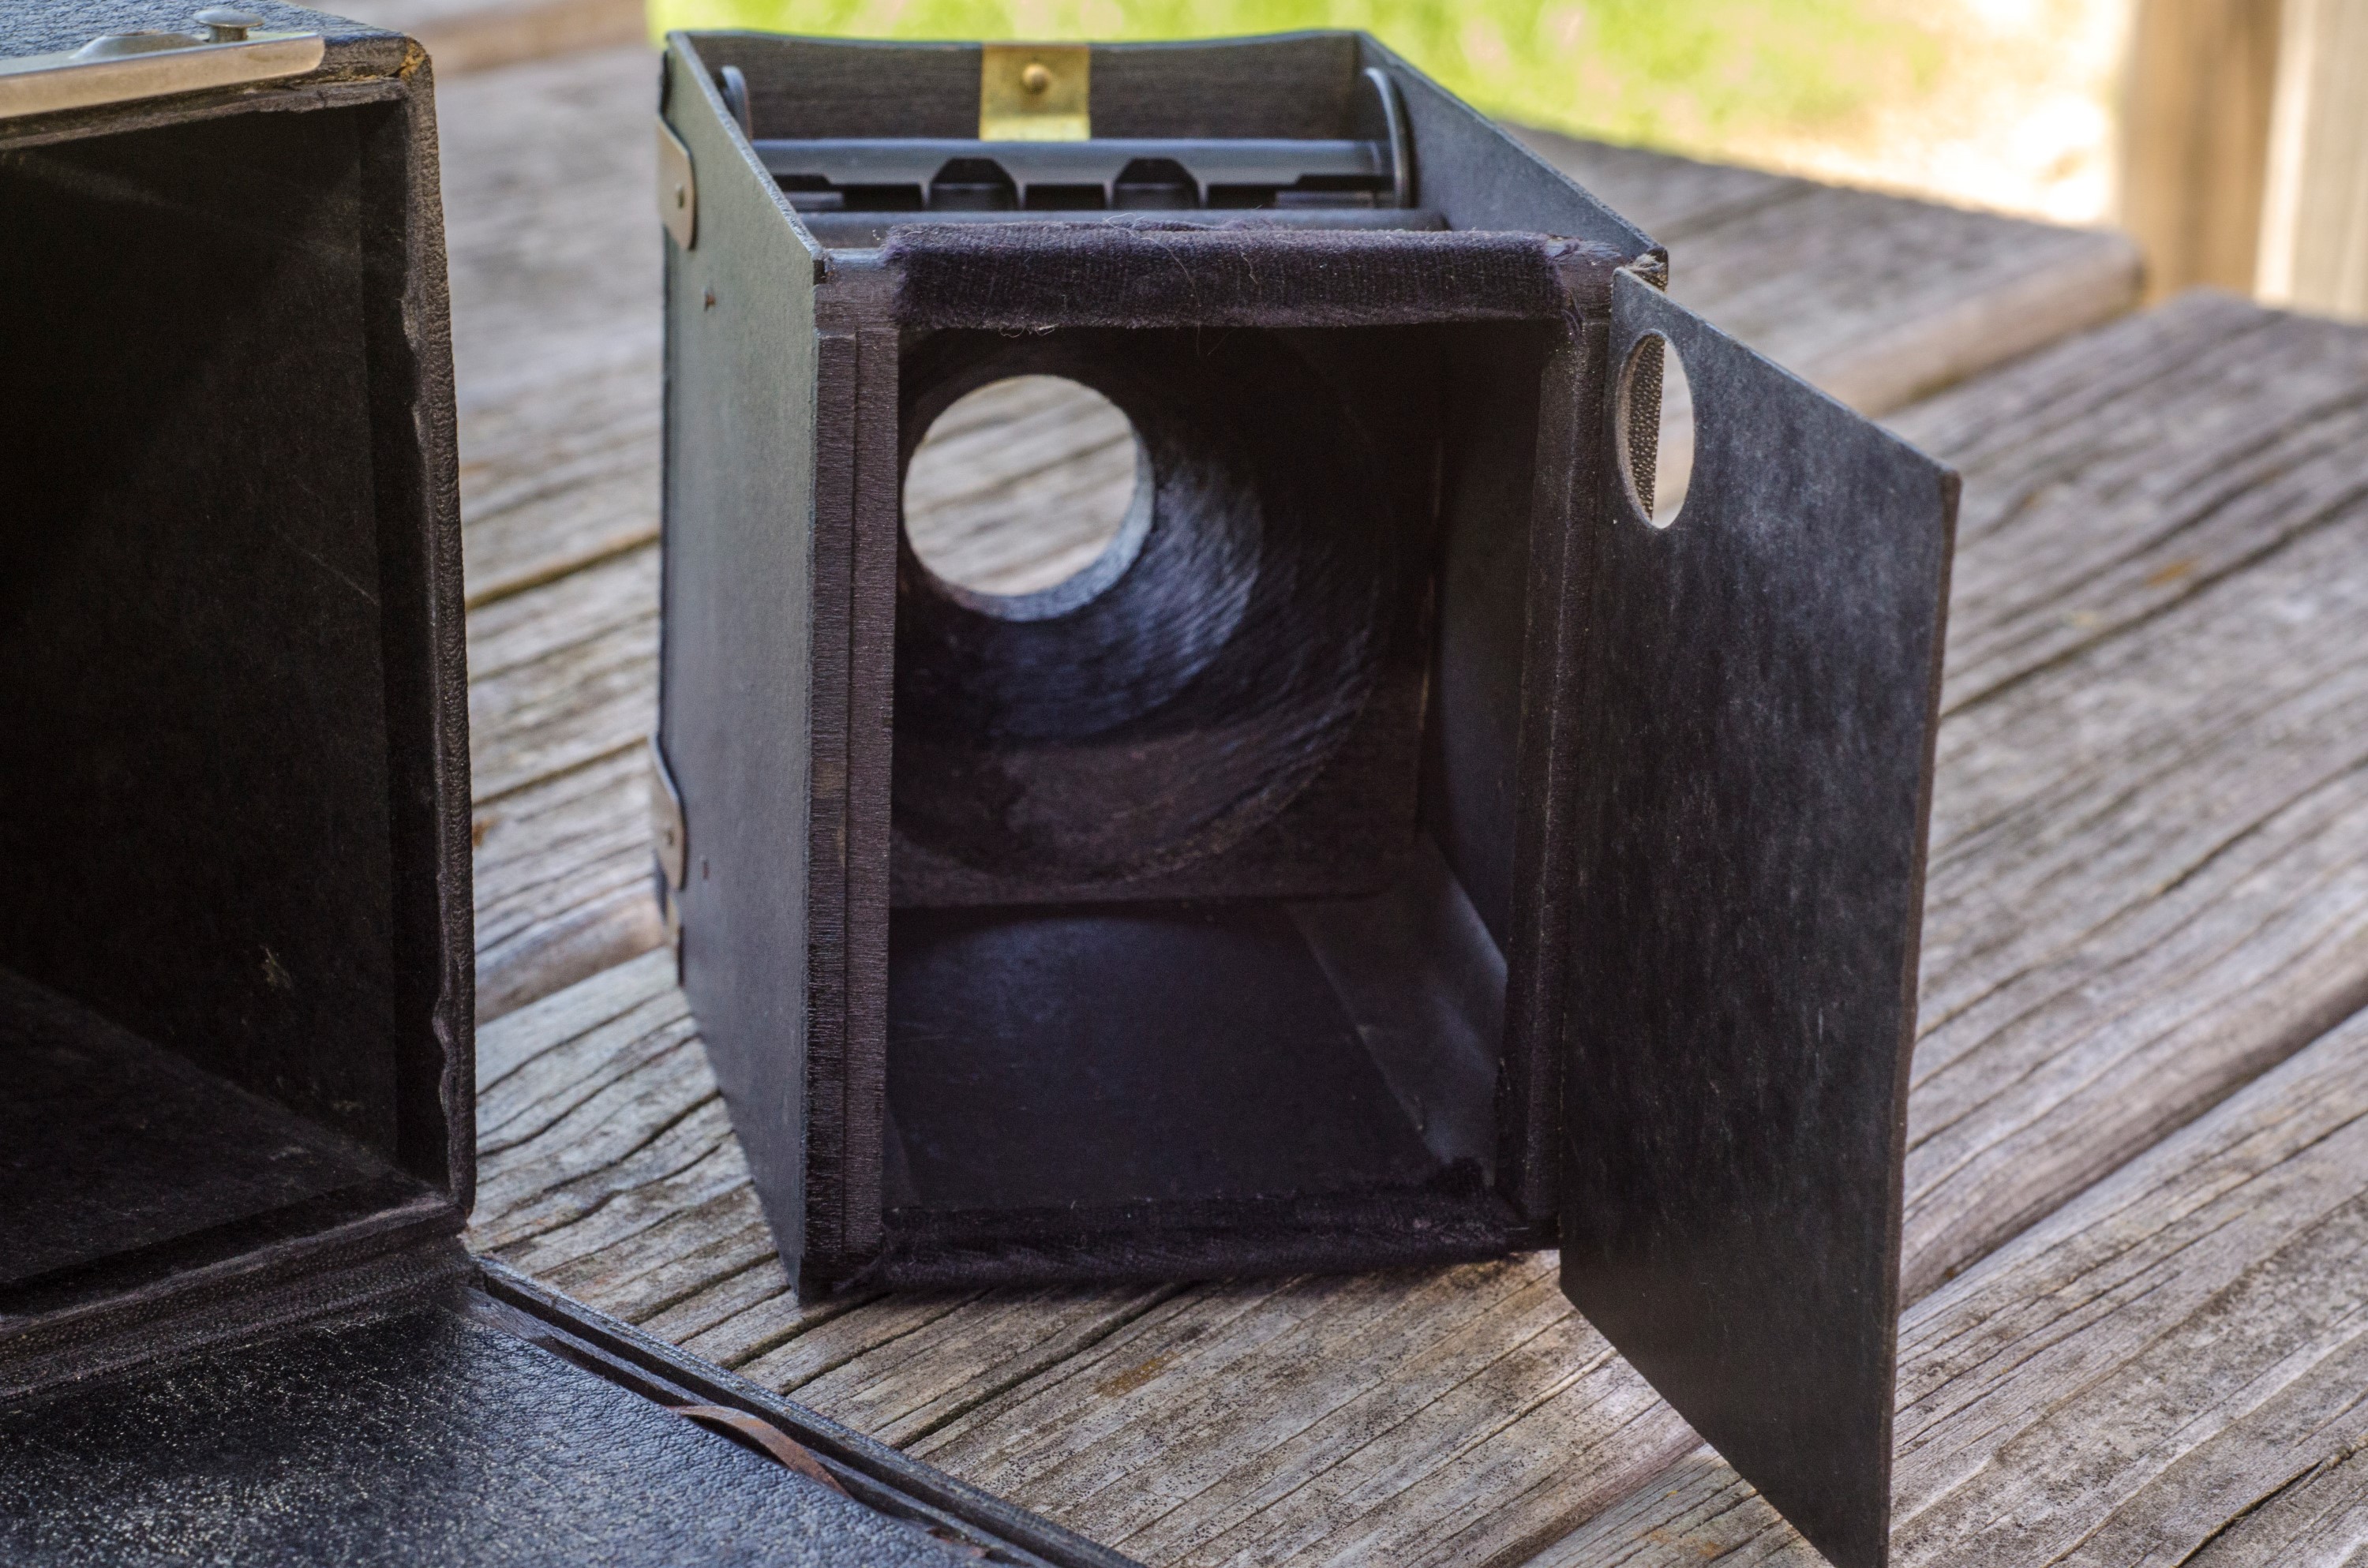
The image to the right shows the film compartment from the back looking towards the opening where the lens would be. Although a large part of the No. 2 Brownie is made of cardboard, the insides of the film compartment are wood.
Loading film into the Brownie is pretty straightforward. Since this camera is designed for 120 film which is still readily available today, there are no special steps to make the film work. It’s pretty amazing that something designed well over a century ago not only still works, but you can buy film for it at any photo store and shoot it exactly how people would have at the turn of the last century.
The only potential “gotcha” you might run into is that cardboard door on the back of the film compartment. Make sure you thread the film under the compartment, not over it. Once the film is loaded into the film compartment, slide the entire thing back into the box. Make sure you have the takeup spool on the bottom, so that it will connect to the winding knob when everything is put back together.
Once film is installed into the camera, it’s time to shoot it. I said in the History section above that we tend to think of cameras as these complex devices with precision optics and intricate workings of gears and levers, but the Brownie is the complete opposite of that. Even though I have a solid understanding of how cameras work, walking around with this paper box still amazes me. Comparing a Brownie box camera to a modern Nikon SLR, the Nikon is so complex and advanced, that you expect it to make great images, but this lightweight paper box defies logic that it might too also be capable of great images.
The first thing you notice when handling this camera is how little it weighs. I weighed the camera on a kitchen scale and it registered 388 grams without any film installed. To put that into perspective, a 12 ounce can of Coca-Cola weighs 367 grams. Although the camera does have a handle, you don’t need it to handle the camera. In fact, if you encounter a Brownie with the handle still in tact, it is likely very brittle, so I do not recommend trying to use it at all for fear of it tearing.
There are two viewfinders, one each for vertical composition and one for horizontal. Merely rotate the camera so the chosen viewfinder is facing up in order to compose an image at each of these orientation. Both viewfinders on my Brownie were badly desilvered and dirty, so composing with them was difficult. I was at least able to get a vague idea of what I was pointing the camera at. Earlier Brownies wouldn’t have a viewfinder at all, so instead Kodak would imprint a “V” in the leatherette to represent the field of view that the camera could “see”. The lack of a usable viewfinder on a box camera isn’t as crippling as you might think.
Most box cameras are focus free cameras, which means there is no way to control the focus of your shot. The small aperture and meniscus lens are designed in such a way that everything about 8 feet away to infinity will be in focus. A range of 8 feet or more isn’t exactly ideal for portraits or closeup work, so the need to have an accurate viewfinder is less of an issue when shooting objects far away. For my first roll of film through the camera, I limited it to landscapes and far away objects. As long as you have the camera level and pointed in the general direction of your subject, the lack of a viewfinder was not a big issue for me.
It’s this simplicity that makes shooting with a box camera a ‘freeing’ experience. Although I did not use mine this way, a Brownie box camera would make for excellent street photography where a photographer relies on discreet zone focus shots. This tiny little box is very unassuming and having it pointed at a busy street, you could capture quite a few candid shots of people going about their business not realizing they are being photographed.
Since you have no control over shutter speed, and your aperture options are limited, I recommend choosing scenes with predictable lighting. Although the Brownie does have a timed exposure mode for low light photography, I would not recommend trying it out until you have some experience with your box camera. In fact, I would say that once you have film loaded in your camera, you go through the entire roll shooting entirely in similar lighting.
Here is where your film choice makes or breaks the entire roll. Keep in mind that this camera was designed back when films were much slower than they are today, so when choosing film I highly recommend something with a large amount of latitude, like Ilford HP5 for B&W, or Kodak Portra for color. I chose Kodak Portra 160 as it’s speed and latitude meant I should be able to shoot it safely on a hiking trip outdoors where I would encounter sunlit and shady scenes. You can even put higher speed films like 200 and 400 into the camera if you want to shoot in lower light scenes. I’ve talked in many reviews on this site where I say that cameras today could actually be better now than they were when they were first created, because our availability of fast film allows the Brownie to be used in scenes that otherwise wouldn’t have been possible back when the fastest speeds were ASA 50 and below.
Aside from selecting the right film, and finding ideal lighting to shoot with the Brownie, getting through the whole roll is actually quite fun. It is very easy to go through an entire roll quickly. I loaded the Brownie up with a roll of Kodak Portra 160 and took the camera with me on a hiking trip around Turkey Run State Park, near Marshall, IN.
My Results
I mention earlier that shooting with the Brownie is a freeing experience because once you have the film selected and loaded into the camera, it is very easy to fire off all 8 shots. It’s this freedom that is the Brownie’s biggest strength. A decaying cardboard box sitting on a shelf isn’t a lot of fun, but when you actually start to use it, you realize how fun it can be.
I enjoyed my time with the Brownie while hiking, but took it safe on most shots as I didn’t know what to expect. Most of the shots are of well lit objects very far away. I didn’t dare try to shoot something at the camera’s minimum focus of around 8 feet.


I am pleased to show that of the 8 shots from that first roll, 6 of them came out great (mostly). The fifth image above was actually the first shot on the roll, and I must not have advanced the film properly to the first frame because the edge of it was cut off, hence the square aspect ratio.
Of the rest, they all came out quite nice. The single element meniscus lens produces shots with surprisingly sharp centers. While I do not have a thorough understanding of the science of optics, from my limited knowledge, single element lenses typically do have really great center sharpness because of the simplicity of the lens. There’s very little glass to distort or soften the center.
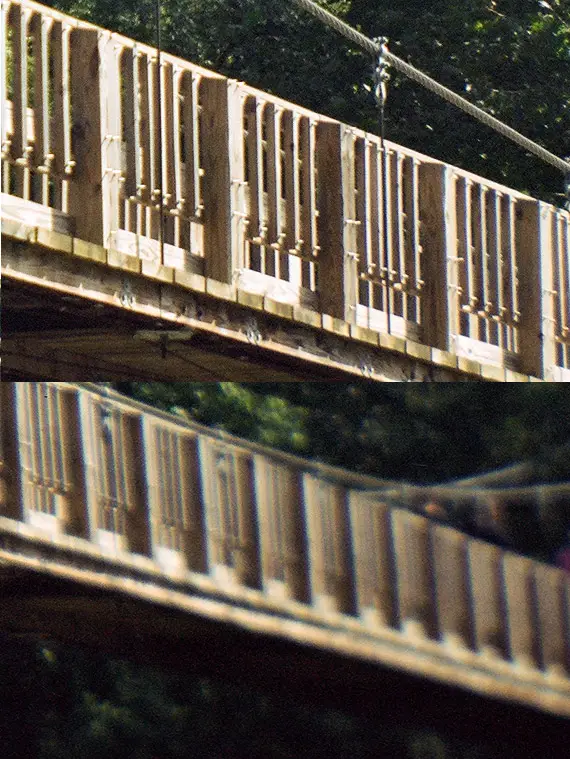
Where meniscus lenses falter are at or near the edges, where vignetting, chromatic aberration, and softness become very apparent. Take a look at the image to the right of the suspension bridge photo. I made 1:1 crops of the center and bottom right corner of the bridge. Notice the significant loss of detail and sharpness near the edges. While some level of degradation is common with most lenses, meniscus lenses show a significant amount.
What impressed me the most about these images is that other than the soft edges, there is really no tell tale sign that a ~100 year old cardboard box made them. Kodak marketed the Brownie cameras to children and those who had absolutely no photographic experience. To think that people would spend the equivalent of thousands of dollars in the early 1900s to shoot a single picture, but then George Eastman throws together some paper and wood and this is what it was capable of is amazing to me, and one of the absolute reasons I love collecting and shooting old cameras so much.
Is this a camera I see myself coming back to often? Maybe not often, but I’ll definitely shoot it again. The biggest con I can say to using this camera is how fragile it is. We’re talking about a 100 year old cardboard box. It is amazing that it’s even is as good of condition as it is. If I really wanted to shoot a lot of box camera photos, I might consider a different variant of this camera like the Model F that was made of metal. At least that one could handle some level of abuse without me having to worry about it crumbling away in my hands!
My Final WordHow these ratings work |
The Kodak No.2 Brownie was an extremely popular camera that was in production for more than 3 decades. It introduced the world to 120 film, and as a result is one of the few box cameras that can use film still being made today. This camera is so easy to use that when originally made, was often marketed to children. The single element meniscus lens is capable of surprisingly good shots and has pretty good center sharpness. If you were looking to try shooting your first box camera, there really isn’t a better choice than this. They’re readily available, easy to use, and inexpensive. Highly recommended! | ||||||
| Images | Handling | Features | Viewfinder | Feel & Beauty | History | Age | |
| 1 | 1 | 0 | 0 | 1 | 2 | 40% | |
| Bonus | +1 for its historical significance as both an inexpensive camera that brought photography to the masses, plus it was the very first camera ever to use 120 film | ||||||
| Final Score | 9.0 | ||||||
Additional Resources
http://www.brownie-camera.com/56.shtml
https://blog.jimgrey.net/2014/08/18/kodak-no-2-brownie-model-d/
https://en.wikipedia.org/wiki/Brownie_(camera)
http://www.earlyphotography.co.uk/site/entry_X35.html
I have a Brownie No. 2 Model F (with the “upgraded” aluminum body and no cardboard flap). It’s a fun “whip-out” camera for me to use, and I like to shoot it and compare what I get with it versus my Medalist II. (I like to call it “A Study of Extremes”.) In the modern era where DSLRs, Mirrorless Digitals, and Smartphones are everywhere, having the Brownie is great for just walking into scenes, taking a picture, and walking on. Nobody in 2020 suspects it of anything other than a “funny little box”, unless someone is a photographer.
I agree with your sentiment of using Portra 160. I like Portra 160 in color film, and FP4 125 in Black and White for my Brownie No. 2. There’s a lot of latitude for shooting on a nice day (even if your pictures become overexposed by 1 or 2 stops), and both films are very forgiving of slight overexposure. I do feel though that in a way, advancements in film have helped the Brownie’s ability to be sharp in the middle. Because of advancements in motion picture film (Portra I believe is based on the Motion3 technology), grain structure (T-Grain, for example, for sharpness), and even the ability to have smaller grains with higher sensitivity, the limited ability of the Brownie’s meniscus lens is somewhat improved versus using a roll of 1920s-correct film and shooting the same scenes. Now… where can we get in 2020, some 1920s correct films to test this theory out……
Keep up the great reviews!