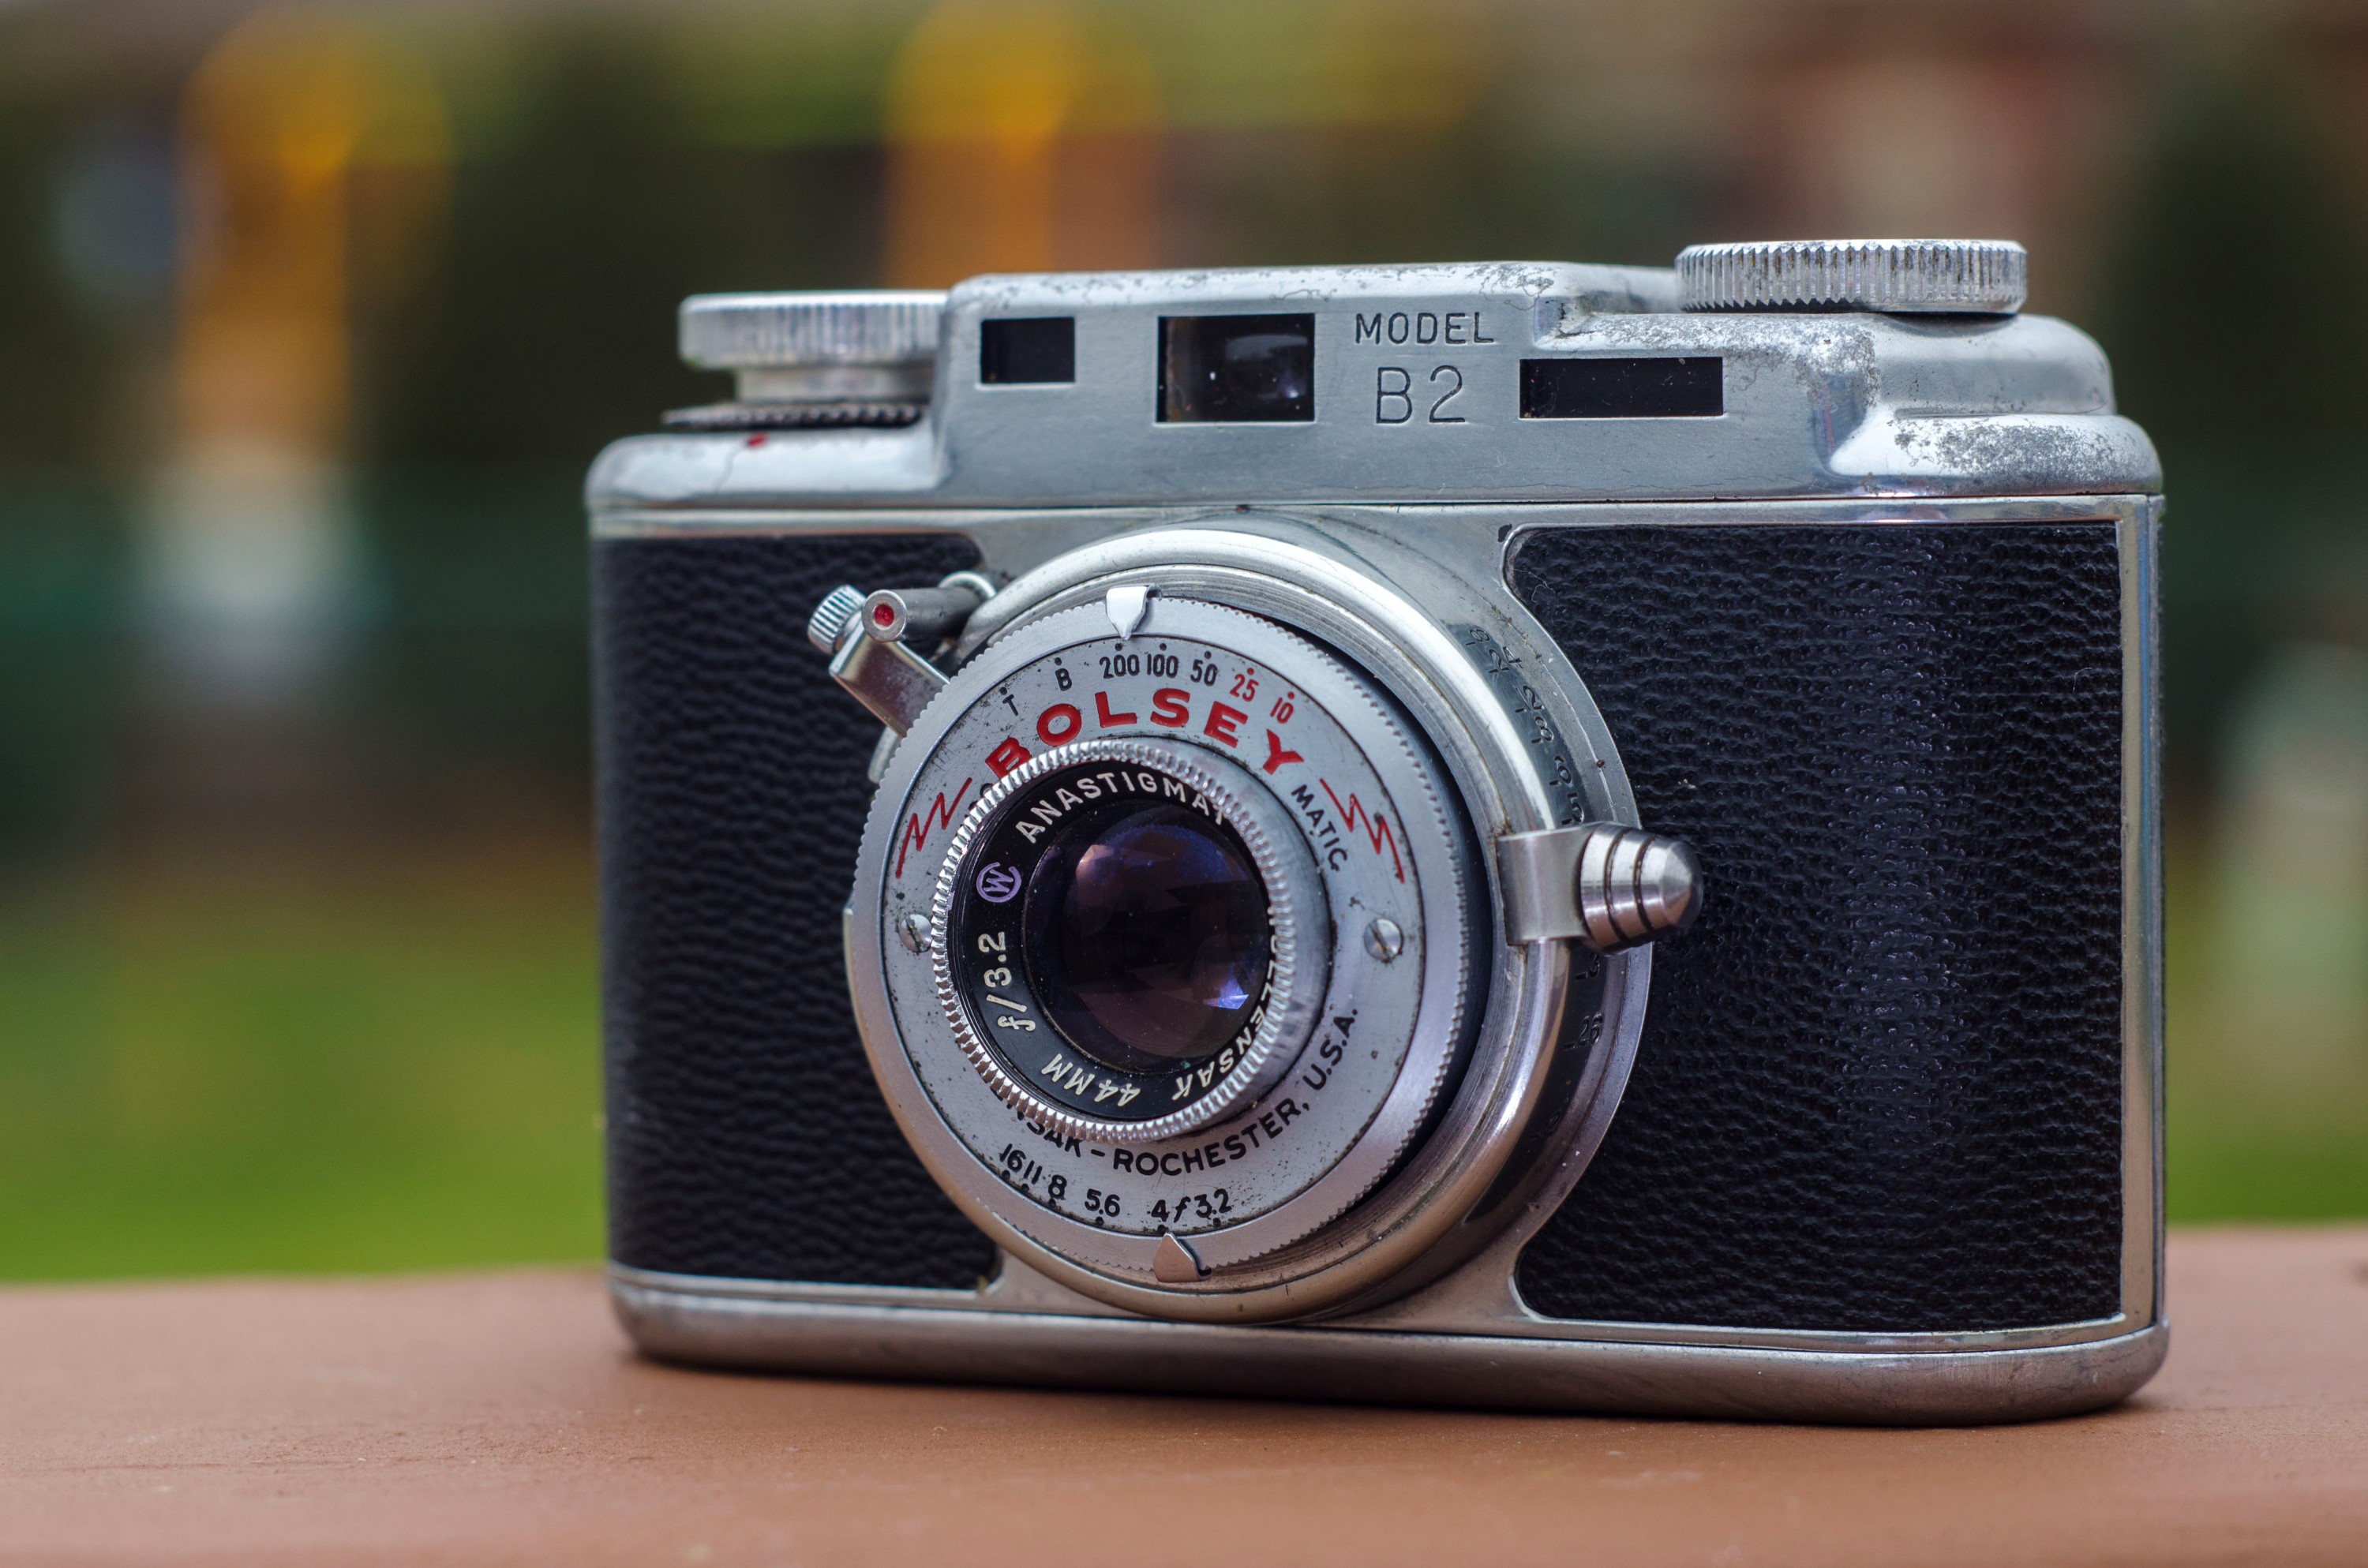
This is a Bolsey B2 35mm fixed lens rangefinder camera made by the Bolsey Corporation of America between the years of 1949 – 1956. The B2 is a very compact and lightweight die-cast aluminum bodied camera that features a lens and shutter both made by Wollensak, out of Rochester, NY. It was a fairly popular model and sold well over it’s 7 year production run. Despite it’s small size and modest price, it featured an internally synced shutter for flash photography, double exposure prevention, a self energizing shutter, a helical focus mount, and an easy to use rangefinder for accurate focus. Although the Bolsey Corporation would go bankrupt in the late 50s, the B2 remains it’s most successful model.
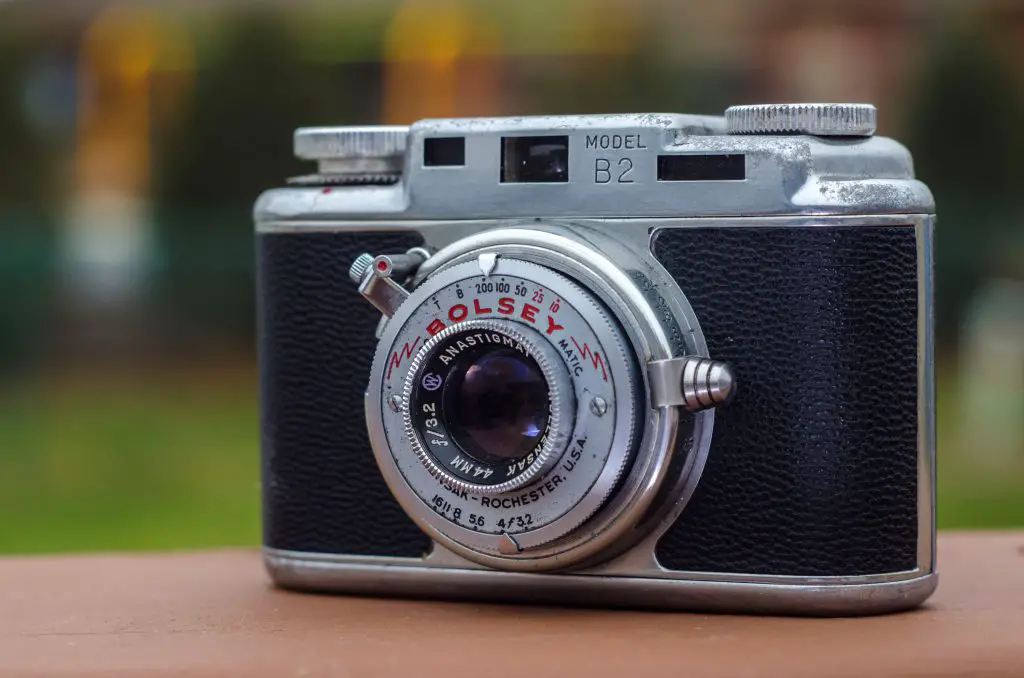 Film Type: 135 (35mm)
Lens: Wollensak 44mm f/3.2 coated 3 elements
Focus: 2 feet to Infinity
Type: Coupled Rangefinder
Shutter: Wollensak Synchromatix (Alphax) Leaf
Speeds: T, B, 1/10 – 1/200 seconds
Exposure Meter: none
Battery: none
Flash Mount: Bolsey Flashgun Sync
Manual: http://www.cameramanuals.org/pdf_files/bolsey_b2.pdf
My Final WordHow these ratings work |
The Bolsey B2 was a very popular and well made compact 35mm rangefinder made in the USA in the mid 20th century. It was designed to give a photographer the most value for his or her money. This was a feature packed camera that fit many modern conveniences into as small of a package as possible. The camera was sturdy, reliable, light weight, easy to use, and made great photographs. Many of them are still available today on the used market for very little money. I absolutely enjoyed my time shooting with the Bolsey and recommend that the next time you come across one, you pick it up and give it a try! | ||||||
| Images | Handling | Features | Viewfinder | Feel & Beauty | History | Age | |
| 1 | 2 | 2 | 0 | 2 | 1 | 30% | |
| Bonus | none | ||||||
| Final Score | 10.4 | ||||||
History
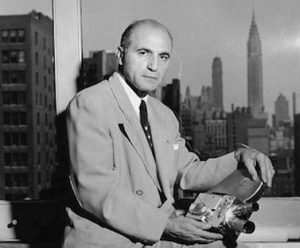
The history of the Bolsey camera can be traced to a man named Yakov Bogopolsky, a Russian Jew born in Kiev in December 1895. Not much is known about Bogopolksy’s younger years, but we do know that he moved around a lot, and with each new location, he changed his name more than once.
At some point in his youth, he relocated to Switzerland and by 1914, had enrolled in college in Geneva to study medicine. Now known as Jacques Bolsky, he would eventually change his field of study to mechanical engineering and would show an interest in photography, namely motion picture cameras.
By 1923, Bolsky had designed his first 35mm cine camera, known as the “Bol Cinegraphe” which made it’s debut at the Swiss National Exhibition of Photography. The Bol Cinegraphe was unique in that it could be used both as a motion picture camera, but also a projector. The camera attracted enough attention that Bolsky had received financial backing from some bankers and a man named Charles Haccius, and formed his own company, simply known as Bol S.A.
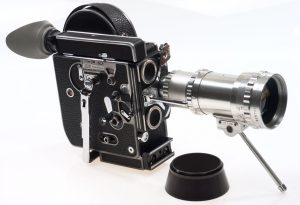
Over the course of the next several years, Bolsky and Haccius would design a variety of cinema film cameras. Earlier models used 35mm film, but due to the rise in popularity of smaller film stocks, they would primarily create 16mm film cameras. One of the company’s first successes was the Bolex, a feature rich 16mm motion picture camera that had interchangeable lenses using the cine C-mount.
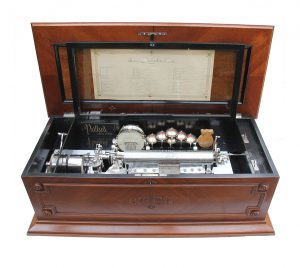
The Bolex was quite popular and sold well, and as a result would become the name of the company at some point in the 1920s. Bolex would design a variety of different 16mm and eventually 8mm variants of the Bolex, but would run into financial trouble around 1929. At this time, Bolsky would reach an agreement to merge with the Swiss company Ernest Paillard & Cie who made a variety of products like gramophones, typewriters, and music boxes. On September 30, 1930, Jacques Bolsky would sell a majority of his assets and patents to Paillard who would continue manufacturing Bolex cameras under the name Paillard-Bolex.
Bolsky would continue working as a chief designer for Paillard until around 1935 at which time he ventured out on his own. For a short while, he was employed by another Swiss watchmaker named Pignons S.A. and would once again design a new camera. This time, it would be a 35mm still picture camera which would eventually be known as the Alpa-Reflex.
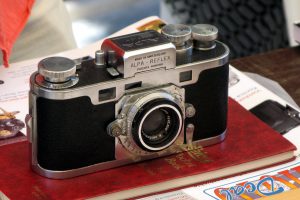
The Alpa-Reflex was a hand made all metal single lens reflex camera that was aimed at the high end of the market to compete with top tier German marques like Leica and Contax. Alpa-Reflex cameras were hand made by technicians which resulted in very low production numbers. Alpa-Reflex cameras were expensive and rare back in the 1940s, and even more so today. On the used market an original Alpa-Reflex camera in good condition can fetch prices over several thousands of dollars.
Bolsky did not stick around with Pignons long, and in 1939, perhaps to flee anti-Jewish sentiment from nearby Nazi controlled Germany, Bolsky would relocate to the United States and once again change his name to Jacques Bolsey.
In 1941, Bolsey would form his first American company, Bolsey Laboratories, Inc. and would export Alpa models designed during his time working for Pignons, but would also design some of his own 16mm and 8mm motion picture cameras. Bolsey would primarily work in cooperation with the US military, designing a variety of fixed lens rangefinder cameras and motion picture cameras both for civilian and military use.
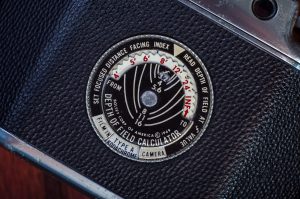
In 1947, Bolsey Laboratories, Inc. would reorganize and become the Bolsey Corporation of America. The first new model released under the new Bolsey name was called the Bolsey B. It was a metal bodied compact 35mm rangefinder camera that used a Wollensak Alphax shutter and a 44mm f/3.2 lens. The 44mm focal length was chosen both to widen the exposed image, but also to maximize depth of field. A 44mm focal length means the camera can “fit” a little more in frame indoors or in tight quarters. It also increases depth of field when shooting moving objects. Compared to a regular 50mm lens which at f/8 has everything from 7 feet to 18 feet in focus, the Wollensak 44mm lens at f/8 has everything from 6 feet to 24 feet in focus. This improves the camera’s chance of capturing a fast moving object in focus without having to rely entirely on the rangefinder.
The Bolsey B also came equipped with a helical focus mount. Helical focus mounts were preferred by photographers compared to front element or screw mount focus because none of the lens elements rotate during focus. This is better because as a lens element rotates, it’s optical characteristics change. Very few lenses were designed in a manner which would maintain proper optical performance at any position. With a helical lens mount, the lens merely moves forward and backward without rotating, thus preserving ideal optical performance. In addition, this allows for the use of rectangular lens shades or polarized filters to be attached to the lens without having them rotate as the camera changes focus. The Bolsey B was one of the smallest and least expensive cameras to have a helical focus mount.
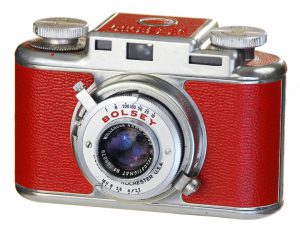
The Bolsey B was a unique looking camera and was one of the smallest solid bodied 35mm rangefinder cameras ever made. Although normally equipped with black leatherette, there were some Bolsey Bs that came with red leatherette covering like in the image to the right. There was also a model called the Bolsey B Special which had a removable lens and shutter assembly that allowed a proprietary lens extension ring to be used for closeups. These extension rings could be stacked to allow for extreme closeups. Stacking 3 extension rings allow the Bolsey to focus on something 3.75 inches away! Both the red Bolsey B and the Bolsey B Special were made in very limited numbers, so they do not show up for sale often.
The Bolsey B would be the foundation for an entire B-series of cameras. The next model, and most successful, would be released in 1949 and would be known as the B2. The B2 is very easy to differentiate from the original B because it literally says “Bolsey B2” stamped in the metal fascia on the front of the camera.
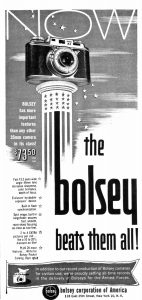
The B2 would become the company’s best selling and most successful model, staying in production until 1956. Originally selling with a list price of $73.50, it was advertised as having the most features of any compact 35mm camera. Bolsey made every attempt to pack useful features like flash synchronization, double exposure prevention, a split image rangefinder, and a quality f/3.2 coated lens into a compact and light weight body. The advertisement to the left claims that the Bolsey B2 has more than 20 features, but you’d need to write Bolsey to learn more. Unless they list “black leatherette”, viewfinder, shutter, and knobs as features, I think claiming to have that many features is a stretch, but I give them credit for trying. $73.50 when adjusted for inflation, is equal to $745 today, so it certainly wasn’t an inexpensive camera, but it’s balance of compact size and excellent feature set likely made it appealing to a variety of people.
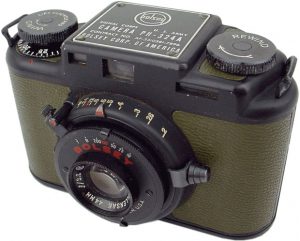
There were a couple variants of the B2 made for the US Military. The most common was made for the US Army Signal Corps and came in black and olive drab. Near the end of the B2’s production, a variant known as the B22 (Set-O-Matic) was released which added some type of coupling arm which controlled the aperture size when using the flash. Otherwise the B22 is identical to the regular B2.
In 1956, the Bolsey company’s assets and patents would be sold to (you guessed it) another watchmaker named Wittnauer. After being sold by Wittnauer, the B2 would continue to be made except it would be rebranded as the Bolsey Jubilee. The Jubilee would replace the Wollensak lens and shutter with ones made by Steinheil and Gauthier respectively. The shutter release would also be moved to the top plate of the camera.
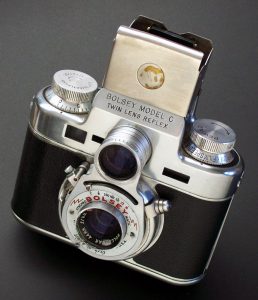
Another variant was the Bolsey C, a strange looking hybrid TLR that had a top down viewfinder on top of the camera. The Bolsey C used a reflex mirror and ground glass with an optional magnifying glass for critical focus. What makes the Bolsey C really unique is that it retained the same split image rangefinder that was on the Bolsey B. The Bolsey C is likely the only TLR ever made with an integrated split image rangefinder. Later versions of the Bolsey C got the “Set-O-Matic” feature like the B22, and was accordingly called the C22.
There was even a Bolsey A that was planned which lacked a rangefinder and had a Bakelite body instead of metal, but it was never produced under the Bolsey name. Instead, the design was sold to a different company and sold under the name “La Belle Pal”.
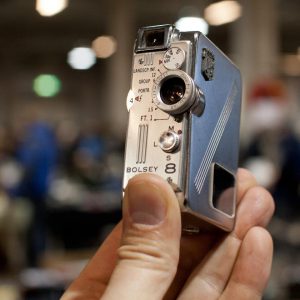
One of the last new cameras designed by Bolsey before the company’s sale to Wittnauer was the Bolsey 8 motion picture camera. It was the smallest motion picture camera ever made up to that point, with an overall size smaller than a pack of cigarettes. It used regular 8mm film rolled on specially designed 7 meter spools. The camera was well built, but emphasized it’s small form factor over high spec features like earlier Bolex models.
I could not find a whole lot of information about what Jacques Bolsey did after the sale of his company to Wittnauer in 1956, or even why he did it, but it seems that he was still involved in cinema camera design as recently as 1960 although I don’t believe he had his own company anymore. Maybe he worked as a freelance designer for other companies. The only conclusive information I can find about him is that he would pass away in December 1961, at the age of 66.
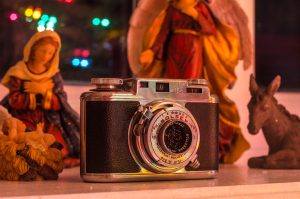
Today, Bolsey cameras are still pretty common on the used market so their value is low. Perhaps due to their unique look and design, they are still pretty popular with collectors. While I don’t think there are many people who will pay a high sum for one, in my time talking to other collectors, it seems that everyone has or has had at least one in their collection at some point. You can find them pretty easily on eBay. As of this writing, a quick search for “Bolsey” on eBay returned 57 auctions, with several models in nice looking shape starting between $10 – $20.
Repairs
I was given this Bolsey in a box of “junk” from a co-worker and when I first looked at it, the shutter was completely seized and it had an extremely stiff focus ring. Since I had some experience with Wollensak shutters in my Ciro Flex and Argoflex TLRs I figured it should be mostly the same, just smaller. The issue was time. It took me nearly a year to find the time to repair this camera, but when I did, I found the process to be mostly uneventful. The Bolsey B2 isn’t an uncommon model, and it is likely that many others out there have stuck or sluggish shutters, so I’ll go through what’s needed to be done to restore proper operation to the shutter.
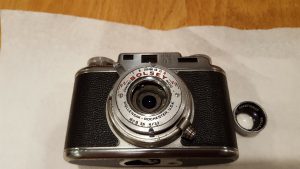
Unscrew the front element. It came off by hand, no special tools were required. If yours doesn’t seem to budge, some type of grippy tool would likely help.
Remove the two flat head screws in the front plate and put them somewhere safe. Lift off the front plate using a flat head screwdriver or by turning the camera upside down and shaking.
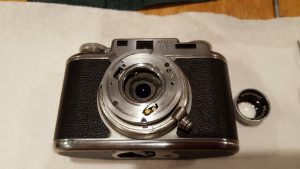
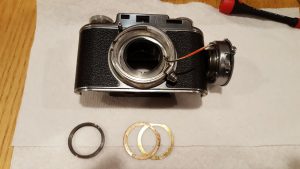
Remove the film compartment door, and look inside of the opening to the back of the shutter. There is a notched lock ring holding the shutter in place. I didn’t get a good picture of this ring as it appears inside of the camera, but you can see it in the next picture. Using a lens spanner, break loose this ring. You don’t have a lot of room to move the spanner, but you don’t need much. All you need to do is break loose the ring and you should be able to unscrew it the rest of the way by hand or with the aide of a screwdriver. Once this ring is removed, the shutter will separate from the body, be careful not to let it fall.
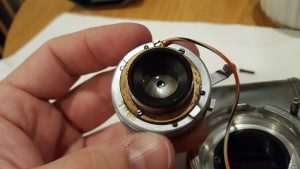
The picture to the right shows the black lock ring that you were unscrewing in the previous step, along with two very thin brass shims that were behind the shutter. Notice that the shims have a flat side which assures that they get reinstalled in the correct orientation. There is also a single wire for the flash sync. It runs to a small flat head screw on the back of the shutter which you can see in the picture below for Step 9. Loosen this screw and disconnect the wire. With the shutter detached from the camera, you can now unscrew the rear lens element off the back of the shutter. There are no notches for a spanner, but you shouldn’t need it. I was able to unscrew the rear element by hand, just like the front one.
Step 4b (optional):
If the focus is stiff on your Bolsey like mine was, at this point you can squirt some naphtha oil into the focus helical to loosen it up. You can easily see the helical threads when moving the focus arm. You shouldn’t have to separate the helical, but a liberal soaking while repeatedly moving the focus arm back and forth several dozen times should be sufficient. Don’t be afraid to use a lot of fluid. I just buy a big can of naphtha oil from the hardware store for about $7 and it lasts me quite a while. There’s no need to fully remove all of the old lubricant or re-lubricate the helical. A liberal dousing of oil should be all you need.
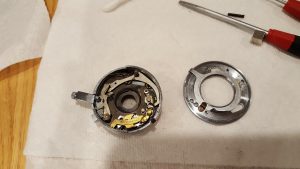
Now that the shutter is out of the camera, you need to remove the shutter’s top plate. Look back up at the picture in Step 2, and you’ll see two long black screws one each in the 2 and 8 o’clock positions. Remove these screws and the shutter’s top plate will lift off. You will likely have to wiggle this plate as you remove it because the shutter speed and aperture sliders will somewhat hold it into position.
Step 6:
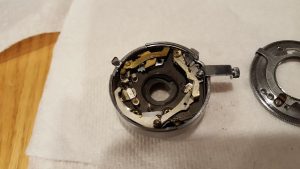
I often say this is in my repair guides, but it is always a good idea to take pictures with a smartphone of each step of disassembly. Even with my pictures, you may see something in yours I don’t. When I first took the shutter apart on my Bolsey a small spring from around the 1 o’clock position in the image to the right popped off. Here is the shutter with all of the springs in their correct positions. You should carefully examine where everything goes, just in case something pops out of yours too. The Wollensak shutter is a lot more basic than Compur or Prontor shutters, but they also have a lot more springs that can fall out of position, so just be careful and go slow.
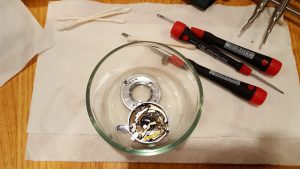
You are now ready to soak the shutter in naphtha oil, or some kind of lighter fluid like Ronsonol. I typically do the same procedure every time I clean a shutter. Pour a healthy dose of naphtha over the shutter and swirl it around in the dish. Fire the shutter a couple dozen times while wet, then drain out the excess fluid, and leave overnight to dry. Then I repeat this process the next two nights in a row for a total of 3 cycles of flushing, firing, draining, and drying. Don’t be fooled when the shutter seems to act fine after the first flush. A wet shutter will almost always start working, but it will likely start to stick after it dries. After the third cycle, I’ll use Q-tips soaked in naphtha and gently wipe the shutter and aperture blades to make sure any lingering debris has been removed. Once I am sure the shutter is firing correctly dry, it’s time to put it back together.
I don’t have a good picture of how you put the front plate back onto the shutter. There is a specific way it has to go on. The bad news is that it’s trial and error, but the good news is you’ll know it when you got it. To the right is the same image as Step 2 and you’ll see two oval shaped openings in the top plate, one each at the 5 and 10 o’clock positions. Looking through both openings, you should see a single pin in the 5 o’clock opening and 2 in the 10 o’clock opening. As long as yours looks like the image to the right, you did it correctly. You’ll want to fire the shutter a couple of times while changing the shutter speeds to make sure it is working correctly. A side note is that often these old Wollensak shutters have trouble with T and B modes. I’ve witnessed this on all 3 Alphax shutters I’ve taken apart. The good news is that this should have no impact on the 1/10 – 1/200 sec speeds. Once you are sure the plate is installed correctly, put the long black screws you removed in step 5 back into position to secure the plate.
Clean the rear lens element as needed and screw it back onto the shutter and make sure it is hand tight. Reconnect the flash sync wire to the screw on the back of the shutter. Before placing the shutter back into the camera, make sure you install both of the thin brass shims that are seen in Step 4 above. Make sure the flash sync wire is not protruding out of the front of the camera.
Step 10:
Once you are sure the shutter is correctly installed into the camera, the flash sync wire is secured and not flopping around, and both shims are in place, turn the camera upside down again and put the black locking ring into the film compartment. It will be a challenge to get the ring started on the threads, but just be patient and keep working on it until it starts to screw in. Resist the urge to use your spanner or a screw driver when starting the lock ring onto it’s threads as you don’t want to risk scratching the rear lens element. Once you are sure the lock ring is threaded correctly, tighten it as much as you can by hand and then use your spanner to tighten it the rest of the way.
Step 11:
Put the front plate back onto the shutter and secure it with the two screws you removed in Step 2. Clean the front lens element as needed and then screw it back on. At this point, you should double check the shutter again and make sure it still fires at all speeds, make sure the aperture opens and closes, and make sure the focus movement is smooth.
Cleaning the Viewfinder and Rangefinder (optional):
Depending on the condition of your Bolsey, you may want to try and get inside the top plate of the camera to clean the viewfinder and rangefinder. I attempted to do this on mine, but was unsuccessful at getting either of the wind or rewind knobs off.
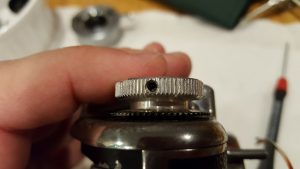 Each knob has a set screw like the image to the right.
 From what I’ve read online, you just need to back off these set screws and the entire knob should lift right off the camera. Try as I might, I could not get either of my knobs to budge. I nearly bent my screwdriver trying to pry it off. It’s plausible that it just might be on very, very tight as what little info I could find online suggested that these set screws are the only thing keeping it on.
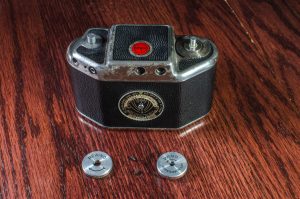
Edit 4/2/2017: Thanks to “Greg” who posted a comment below, I was able to get the knobs off. As it turns out, there is a second screw behind the set screw that is actually holding the knob on. I have never seen a camera with two screws inside of the same hole. You must completely remove the outer set screw, and then you’ll see a second one behind it that just needs to be backed off a turn or two, and then the knobs easily lift off. I was able to get mine off, but resisted taking the camera apart again since the viewfinders aren’t too bad. But if you ever encounter a Bolsey B2 with really dirty windows, or a rangefinder out of adjustment, this is how you get the top plate off.
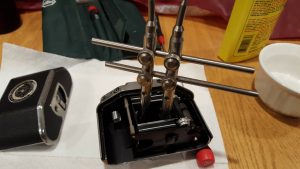
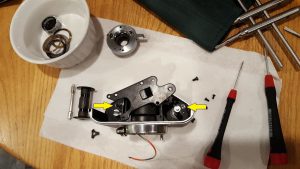 If you do manage to get both knobs off, you’ll need to remove two more screws from inside of the film compartment to lift the top off the rest of the way. In the image to the left, the two screws are indicated by the yellow arrows. It is not necessary to disassemble the camera to the degree I did in the image. I did it to give everything a good cleaning.
Since I was unsuccessful at getting the top plate off during my initial servicing of the B2, I do not have an image to show you of what it looks like under there, but based on the reputation and general simplicity of the entire camera, I can’t imagine there’s much under there to give you trouble. There is no beamsplitter on the B2 so you don’t need to worry about that. Just clean everything as best as you can and put it back together.
My Thoughts
There comes a time in every collector’s journey where people start to know you as “the guy (or gal) who likes old cameras”. As exciting as the thought of free old camera stuff might seem, in reality, these “free” cameras often turn out to be some cheap point and shoot camera from the 80s or 90s, or if you’re lucky, it’s a run of the mill K1000 or AE1 that you’ve seen a zillion times.
Sometimes though, you do get something interesting, and in the case of this Bolsey B2, it was in a box of other miscellaneous odds and ends that I initially dismissed as junk. As is what happens with any hobby, life gets in the way, and in this case, my life involved moving my family into a new home. During the move, a bunch of my random possessions got put into random boxes, and in one of those random boxes, sat a Bolsey B2.
Then in June, fellow collector Adam Paul from Quirky Guy with a Camera posted his review of a Bolsey B2. Remembering that I had one floating around somewhere, I eagerly read his review expecting him to gush over it’s quirky design, small size, and excellent Wollensak lens. As I browsed through his sample shots that he took while walking about colonial New England, I detected a sense that Adam was underwhelmed with the results from his first roll.
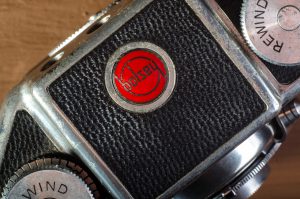
Many of his shots lacked sharpness and color depth and had a tendency to overexpose, and in one case he double exposed an image. Adam’s closing thoughts said that while the Bolsey B2 had some strengths, that it wasn’t quite as versatile as other small cameras he had used before. He said that he’d likely use the camera again, but that it wouldn’t be a priority for him.
Reading Adam’s review, I related to his feelings as I have had similar experiences with a number of cameras in my collection. Sometimes you pick up a camera and get an inexplicable level of joy from an otherwise unspectacular camera, but then the opposite happens and for one reason or another, you are left with a very “ho-hum” experience on a camera that you had higher hopes for.
Still, I was intrigued. As we all know when shooting old cameras, tolerances can be out of adjustment, or anomalies in the lens could have a negative impact on the camera that might not be present on another specimen. I wanted to see what I could get out of my Bolsey and see if my impressions would be consistent with Adam’s. After all, I had done a full CLA on mine, the shutter was clean and snappy, and the optics were excellent. If, by chance, I came away feeling better about the camera, maybe that might inspire Adam to give his another go. I know that if our positions were reversed and he got better results from a model that I wasn’t feeling too great about, I would want that motivation to revisit my camera again.
When shooting a Bolsey B2, the first thing that likely comes to anyone’s mind is it’s compact size. This is a small and light weight camera. I don’t know exactly what kind of metal the body is made from, but it feels like some kind of aluminum alloy. Had this camera been made of iron, brass, or even Bakelite, it would have been much heavier. My Bolsey B2 tips the scale at 426 grams. It feels like a feather compared to the Bolsey’s most logical American made 35mm competitor – the Argus C3, which weighs a whopping 766 grams. Even the slightly up-scale Kodak Signet 35 with it’s all aluminum body weighs 495 grams.
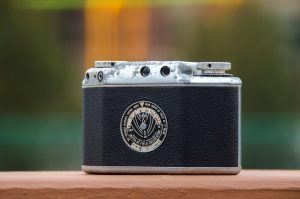
The Bolsey B2 has twin viewfinders just like many early rangefinder cameras from the 1930s and 40s like the Leica II/III and Argus C3 where you measure focus using a separate rangefinder window, and then move your eye to a viewfinder window to compose your image. The rangefinder window shows a split image that is magnified in the center of the frame. The increased magnification helps you “see” focus by getting you closer to your subject, but it only represents the very center of the frame, so it can sometimes take a second or two to measure focus on your subject if it is not directly in front of you. Once focus is achieved, you move your eye to the viewfinder window which correctly shows the entire 44mm frame. Also like the Leica and Argus, both windows are quite small, but still are usable with prescription glasses. I had no problems measuring focus with my Bolsey. I have found the tiny “turret” viewfinders like on early Retinas to be much more difficult to use.
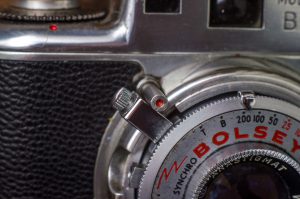
The Wollensak Alphax shutter has a “single action” design in which the shutter is automatically cocked and released each time you fire it. This means that there is no need to separately cock the shutter prior to taking an image. The drawback to this is that these kinds of shutters are easy to accidentally double or triple expose the same frame of film. Thankfully, the B2 is equipped with a clever double image prevention feature. How it works is that after each time the shutter is tripped, a metal post pops out and gets in the way of the shutter release lever, effectively blocking it from moving into position to fire the shutter a second time. When you advance the film by lifting the wind knob and rotating it until it stops, this post will automatically retract into the body of the camera, allowing you to fire the shutter again. It is a pretty simple system that works well, and is easy to defeat if you intentionally want to double expose an image.
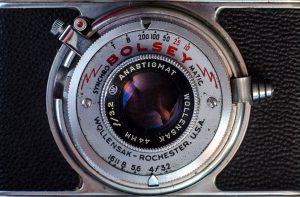
The Bolsey B2 is the third camera in my collection with an Alphax shutter and it exhibits the same annoyance that is present on both of my other cameras with this same shutter, which is a very long movement of the single action shutter release. Adam mentioned in his review that it required a bit too much in the way of forward momentum to smoothly fire the shutter. He felt as though he had to make a lurching motion in order to fire the shutter and as a result caused him difficulty in keeping the camera steady while taking pictures. The location and movement of the shutter release was also mentioned by Samuel Fass in the August 1951 issue of Modern Photography who said the location of the shutter release was awkward for him and required the use of a shutter release cable to get smooth shots from his Bolsey. My experience with the Bolsey was the same as Adam’s and Samuel’s in that I could never get used to the unusually long shutter release movement.
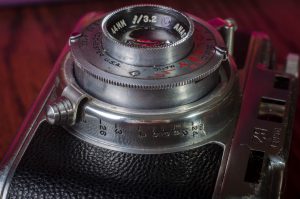
The rest of the camera is pretty standard fare for a mechanical 35mm camera from the period. The aperture and shutter speed settings are on the front of the shutter. There is an easy to reach post on the photographer’s left side of the shutter that allows for easy control of the focus. The helical focus is smooth and precise (especially after a CLA).
The B2’s minimum focus distance is 2 feet which is unusual compared to most cameras of the day who can’t get any closer than 3 – 3.5 feet. Of course at this very close distance, you have to manually take into account parallax correction which is a feature the camera does not offer. The camera does have flash sync capability, but only using Bosley’s proprietary flash system. There is no hot shoe or any other type of standardized port for a non-Bolsey flash. Finally, there is a threaded socket on the photographer’s right side of the shutter to attach a shutter release cable.
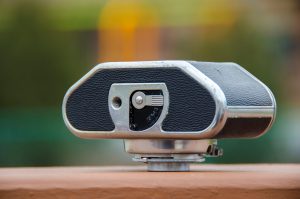
Loading film into the Bolsey was slightly more difficult than it is on other cameras. This is mainly due to the small film compartment in the back of the camera, but I also struggled to get the leader successfully attached to the take up spool. Referring back once again to the review of the Bolsey B2 from the August 1951 issue of Modern Photography, the article states this was done intentionally to allow more shots per roll of film. The take up spool has a metal clip that is there to hold the end of the film leader firmly, while using as little film as possible. It helps that the entire back of the camera comes off, giving you quite a bit of room to work, but I still struggled to get my first roll loaded. Perhaps with more practice, I would get better at it.
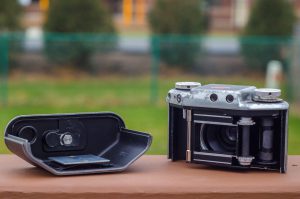
An interesting side effect of the cramped film compartment means that there is less wasted film at the beginning and ending of a roll of film. Bolsey even advertised this as a feature claiming that you could get anywhere from 2 to 4 extra exposures per roll of film, which they claim was like getting a 10 – 20% discount on your film. While technically the Bolsey doesn’t do anything different from any other 35mm camera, it is plausible that you could fit an extra exposure or two on the leader of film since the film has to travel a shorter distance to the take up spool. Whether or not you could get 4 extra exposures on a roll and save 20% on your film is a bit of a stretch in my mind, but I give Bolsey’s marketing department credit for finding a creative way to promote this “feature”.
My Results
I don’t often test new cameras in the winter months due to less than ideal lighting, color, and a general lack of motivation, but the Bolsey B2 was that rare example where I ventured out into the cold wilderness of northwest Indiana. To give me an extra stop of exposure, I loaded in a roll of fresh Fuji Superia X-TRA 400 film and shot my first roll.
Knowing full well that I wouldn’t have the benefit of brightly lit, colorful nature rich scenes, I attempted to find opportunities during the drab color months of November and December to use the Bolsey to it’s strengths.
I didn’t know what to expect with this Bolsey. I knew that despite it’s vast feature set, this was still a relatively low spec camera. It’s primary competition would have been the Argus C3 or other inexpensive American made cameras. Although Wollensak was known for being a capable optics company, their lenses would not compare to the likes of a Kodak Ektar or any number of German made lenses like the Xenar or Tessar. This was a “bang for your buck” type camera so even in perfect working condition, realistic expectations needed to be kept in check.
Upon seeing the scans from the first roll, I couldn’t have been happier. Was every shot perfect? No. Did I screw up a few? Yes. But in the overall scheme of things, I was very pleased with these images. Keep in mind that these were all shot in December during winter months. Not a single one of the outdoor shots were done in sunshine, and I tempted fate by shooting a couple indoors.
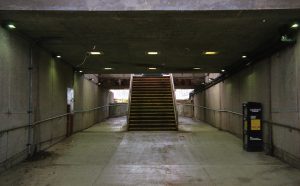
 Lets start with the good. The Wollensak triplet is clearly capable of nicely rendered shots that are respectable today, but would have been very good in the 40s and 50s when this camera was new. Vignetting is evident in many of the outdoor shots, but only in a way that adds to the vintage film like look of the pictures. No one will mistake these as digital images and for someone looking for this type of effect, the Bolsey delivers in spades. Color rendition was very good considering the circumstances. The graffiti of the train looks excellent and makes me wonder what this lens could do during spring time with some color floral scenes.
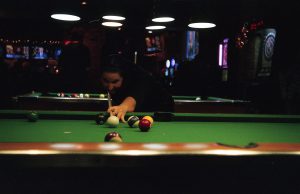
I can’t finish talking about what I like about these images without commenting on the two interior shots. I took a risk with the picture of the girl playing pool and the one of the boy eating, but wow, they both came out very nice. The images aren’t as sharp as the others as they were both shot wide open where you’d expect to get some softness, but the images are very usable in my opinion. Color accuracy was surprisingly good. The Wollensak lens is coated, so that likely helped a bit compared to what I might have gotten with a prewar model with an uncoated lens.
 While I agreed with Adam and Samuel’s comments about the long throw of the shutter release on the Alphax shutter, it clearly did not induce any motion blur in any of the images. I actually discovered a trick where if you move the shutter release slowly, you can feel the point where the double exposure prevention engages slightly before the shutter fires. If you do it slow enough, you can “feel” a tiny click right before a second click of the shutter, which helps you detect that exact moment when the shutter will fire. I do not know if all Bolsey’s exhibit the “double-click” of the double exposure pin immediately followed by the shutter release, but it really helped me “feel” where the shutter release needed to be before capturing an image.
Of course these shots aren’t perfect. While sharpness was excellent in many of the shots where I could stop down the lens, they are a bit soft in the darker scenes, especially around the edges. I also noticed that in a couple of images, I struggled to properly frame my shots. It’s most noticeable in the image of the transit sign. I remember composing this shot and I had wanted the entire sign to be captured, but as you can see, I cut off the bottom. I scanned these images myself, so I am sure they were not cropped. The original negative is cut off too, which means that the composition was clearly my fault. I had a few other exposures on the roll which I am not sharing where I can see my composition was a bit off. The small viewfinder and the fact that I wear prescription glasses most likely were the biggest factors to this. I did not attempt any true closeups at minimum focus, so I don’t know if this is normal parallax error, or that I just didn’t do a good job.
Regardless of the reason, for any future rolls I’ll have to remind myself to compensate for closeups. Although I never attempted anything at the Bolsey’s minimum 2 feet close focus range, if I had, the parallax effect would have likely been more severe.
Reflecting back on my time with the Bolsey B2, I struggle with whether I would classify this as a well featured mid to upper end camera, or a budget model with some cool features. On one hand, you have the helical focus mount, the unique film transport system that can get you an extra exposure or two out of every roll, and the clever double exposure prevention. But on the other hand, you had separate viewfinder and rangefinder windows, a lift to set film advance knob, and a proprietary flash system that was incompatible with synced flash systems of the era.
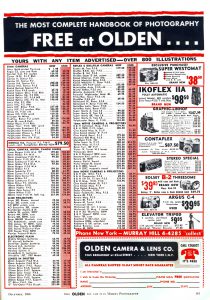
I guess you could say the Bolsey is somewhere in between. To it’s credit, when it was first released in 1949, things like a coincident image rangefinder, M/X PC flash sync, and lever wind were not common features. The original price of the B2 reflected it’s stance in the market when it was released, but as it aged, it’s price came down. The image to the left is an advertisement for Olden Camera from December 1956 showing the price for a new B2 with case and flash had dropped to $39.95. That’s a pretty steep drop from the camera’s original $73.50 price without a case and flash. For under $40, that seemed like a pretty good deal even in 1956.
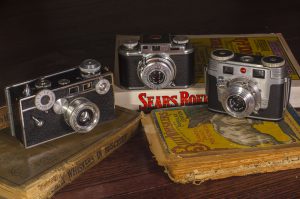
I have always found American made 35mm cameras like the Argus C3, Kodak Signet 35, and Clarus MS-35 to be models worthy of inclusion in any collection. They may not have had the top notch precision engineering or advanced optics of their German and Japanese competitors, but they were well made cameras that often offered unique and innovative features in a package that was not only compact and easy to use, but at a price that was affordable to a much wider range of people. These cameras would have been the bread and butter models for American families in the middle of the 20th century. Most of the time they will work just as good as they day they were made, but in the event something goes wrong, they’re all pretty easy to repair. An Argus C3 was the first camera I ever tore down, and while I only recently completed the repair of this Bolsey, I can say with confidence that reading my repair section above, doing a full CLA of a Bolsey B2 is within the capability of anyone.
Does the Bolsey B2 compare to a Leica or a Nikon? Of course not, but it’s not trying to. This is a very well built camera with a unique look and design that is easy and fun to use and makes images that have a vintage look to them. It’s small size means you could carry it in your pocket or a small purse and fire off a few snapshots of your kids at the zoo. This is a piece of American history and is absolutely deserving of the praise I’ve showered it with here. I cannot wait for spring to arrive so I can shoot another roll of film in more ideal lighting conditions. And Adam, I know you’re reading this, go and get your Bolsey and give it another chance. I think given different circumstances, you’ll find it to be quite a “Bolsey Move”! 🙂
Related Posts You Might Enjoy
External Links
This first link is to a scan of an article from the August 1951 issue of Modern Photography. It gives a lot of information and insight to the entire Bolsey product lineup of the early 1950.
https://www.flickr.com/photos/38552878@N02/sets/72157671827695706/with/28445344180/
http://camerapedia.wikia.com/wiki/Bolsey_B
http://quirkyguywithacamera.blogspot.com/2016/06/a-bolsey-move-b2-rangefinder.html
http://www.photoethnography.com/ClassicCameras/BolseyB2.html
http://lensgarden.com/discover/the-american-camera-bolsey/
http://web.archive.org/web/20140726140203/http://www.web4homes.com/cameras/bolsey.htm
http://photo.net/classic-cameras-forum/00cpFw
http://www.movie-camera.it/bolseyi.html (In Italian, use Google Translate)






FYI for the knob removals. I had the same problem you did. The knobs have TWO screws, the first one locks the 2nd on in place. Remove the first screw. Then back off the second screw and the knobs come right off. Thank you for your website, it is a valuable resource to me! Enjoy.
Greg! You were absolutely right! What a strange design?! At first, I was looking for a second screw hole on the knob, but the two screws are directly in front of one another! I will edit the post with this new information!
Thank you very much!
Bought a Bolsey B2 back in 1952 or so. Just graduated from college,got drafted, Took the Bolsey with me. It’s small size avoided thieves and army officers who didn’t approve of anything.
Once out of the military, replaced by a Minolta A5, and then an early Pentax SLR. Shot Kodachrome in all three and til this day I cannot tell the difference as to which camera was used for a given slide.
The only other 35mm TLR that I know of is the Agfa Optima Reflex (1961-1966). It has a direct viewfinder (thanks to a pentaprism) with a split image rangefinder. What is does not have is a waist level view finder. Butkus has a manual.
My first “serious” camera was a Bolsey B2, presented (used) to me by my dad about 1957 (as a 10th or 11th birthday gift). I learned the basics of correct exposure while shooting Kodachrome and Plus-X with that little gem, funky double-exposure prevention plunger and all. About 15 years ago when I discovered the eBay Time Machine, I began a search for good used B2s, Jubilees, and Cs. I quickly learned that the chrome finish as applied by the Bolsey in their US plant has not aged gracefully: Many examples you see these days have severe pitting and loss of plating in areas of high finger contact. It’s not uncommon to find the rotating latch for the removable back corroded in place, as aluminum does indeed “rust”. Patience has paid off, and I’ve got several Bolseys in as-new condition. The Wollensak shutter has proven very durable and reliable; I take a B2 out and shoot b&w occasionally just for old time’s sake. There is a detailed history of the Bolsey cameras in “Glass Brass and Chrome, The American 35mm Miniature Camera” by Lahue and Bailey. The authors also discuss Clarus, Universal, Perfex, Ansco, early Kodaks, and other marques. A recommended read for the collector.
Thanks for the info – great write up.
A great documentary has been made about Jacques Bolsey, the inventor of the Bolsey cameras …
https://beyondthebolex.com/
The deep second screw in the knob! 🙂 I also learned it a few years ago while repairing. It’s something that almost impossible to know without kind sharing on internet.
Yeah, that one was a mystery to me too, until I figured it out!
According to Daniel Mitchell’s Camera Collecting and Restoration site, which has a section on servicing Alphax shutters: “You should not submerge the entire shutter or flood it with solvent. The shutter blades are not made of metal and can swell if they get wet.”
https://pheugo.com/cameras/index.php?page=alphax
Was the Bolsey film opening 24 X 36 mm? In my younger years, WAY BACK, I thought, I read it was smaller? Not full framed! Never owned one. Argus A-2 and C-3, then an Exakta VX1000, or two! WLT
I’ve shot on-and-off with Bolseys since about 1960. The image size is the standard 24×36. Perhaps you are thinking of the original Nikon rangefinder, which made 24×34 images?
I agree with Roger, this shoots normal size 24×36 size exposures.