
 What is it?
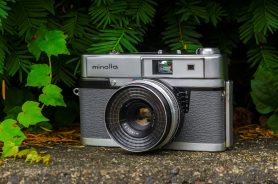
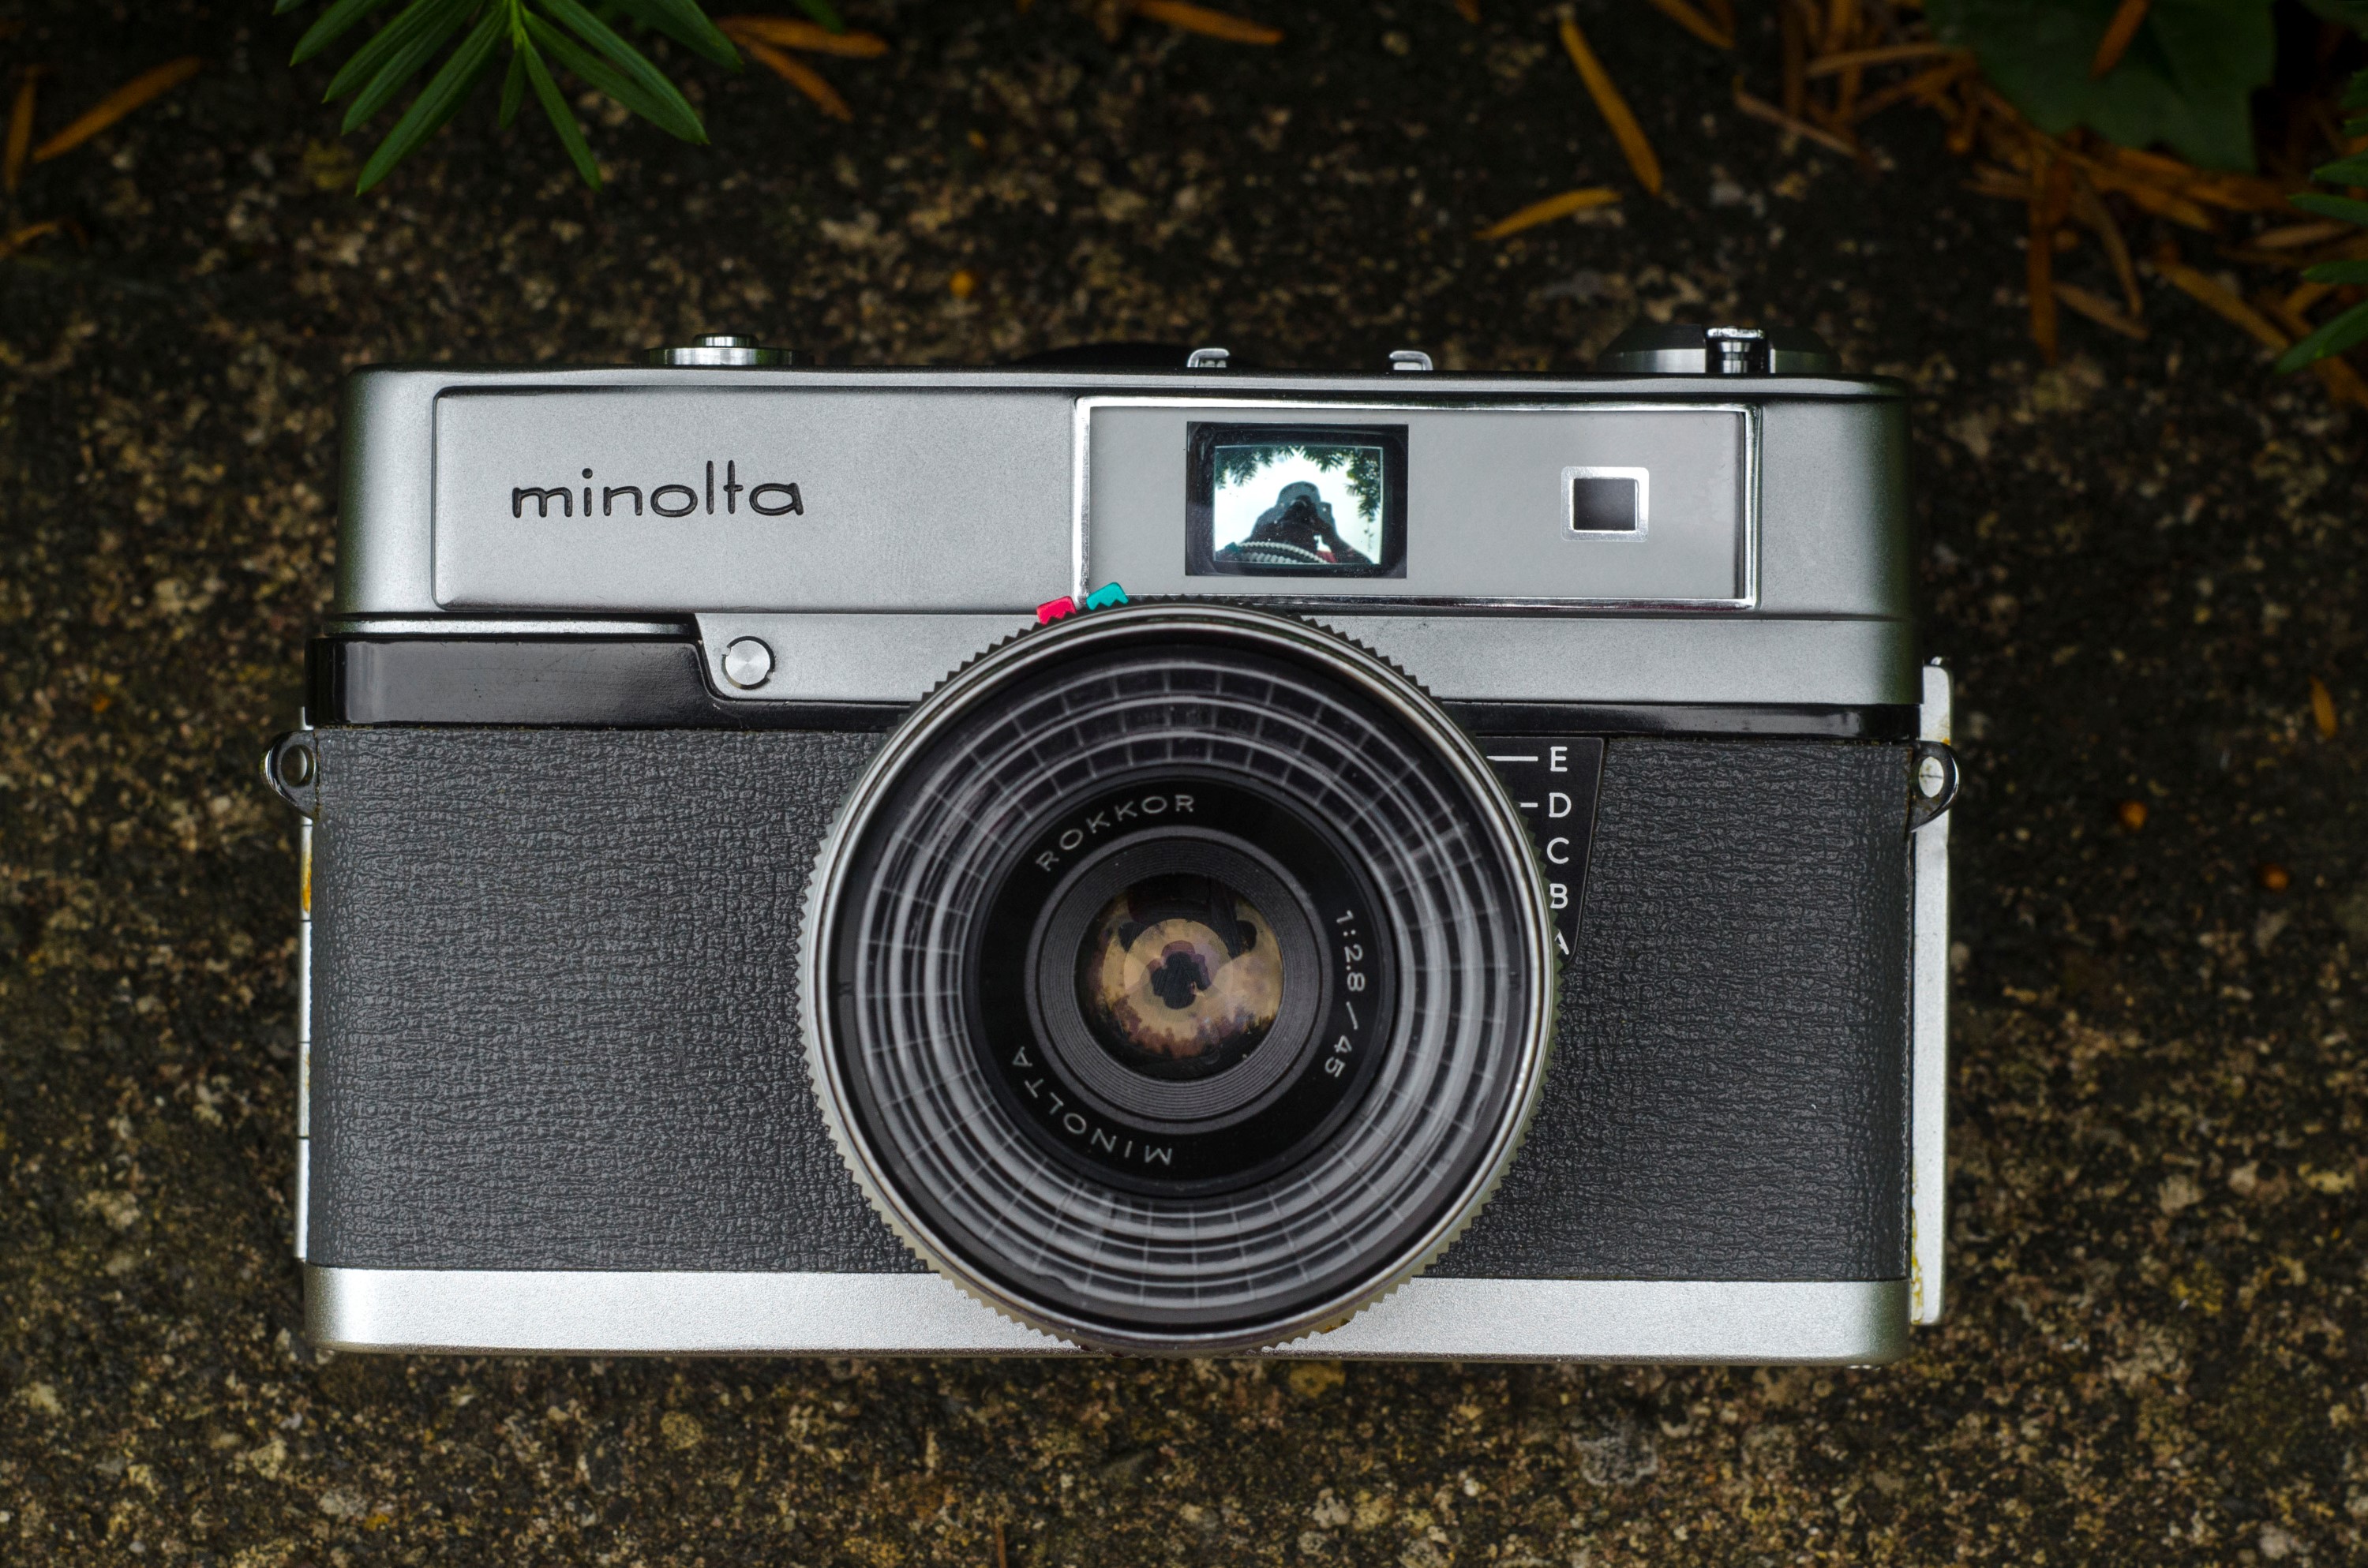
This is a Minolta Uniomat III 35mm rangefinder camera made by the Minolta Camera Company between the years 1963 – 1965. It is the third model in Minolta’s Uniomat series which was also sold in the US as the Ansco Anscoset. The Uniomat series is an early example of a point-and-shoot camera and was a marketed toward the novice who might not have had an understanding of shutter speeds or aperture f-stops. It had a selenium cell exposure meter that used a match needle visible in the top plate. The camera displayed no shutter speeds or aperture settings of any kind, instead showing only EV numbers. Despite it’s simple feature set, the camera had a very good 4-element Rokkor lens and a unique Seiko shutter capable of 1/1000 seconds, something that was not common by more advanced leaf shutter cameras of the era. The Uniomat’s combination of a great lens, flexible shutter, coincident image rangefinder, and easy to use match needle exposure system makes for a surprisingly capable camera.
Film Type: 135 (35mm)
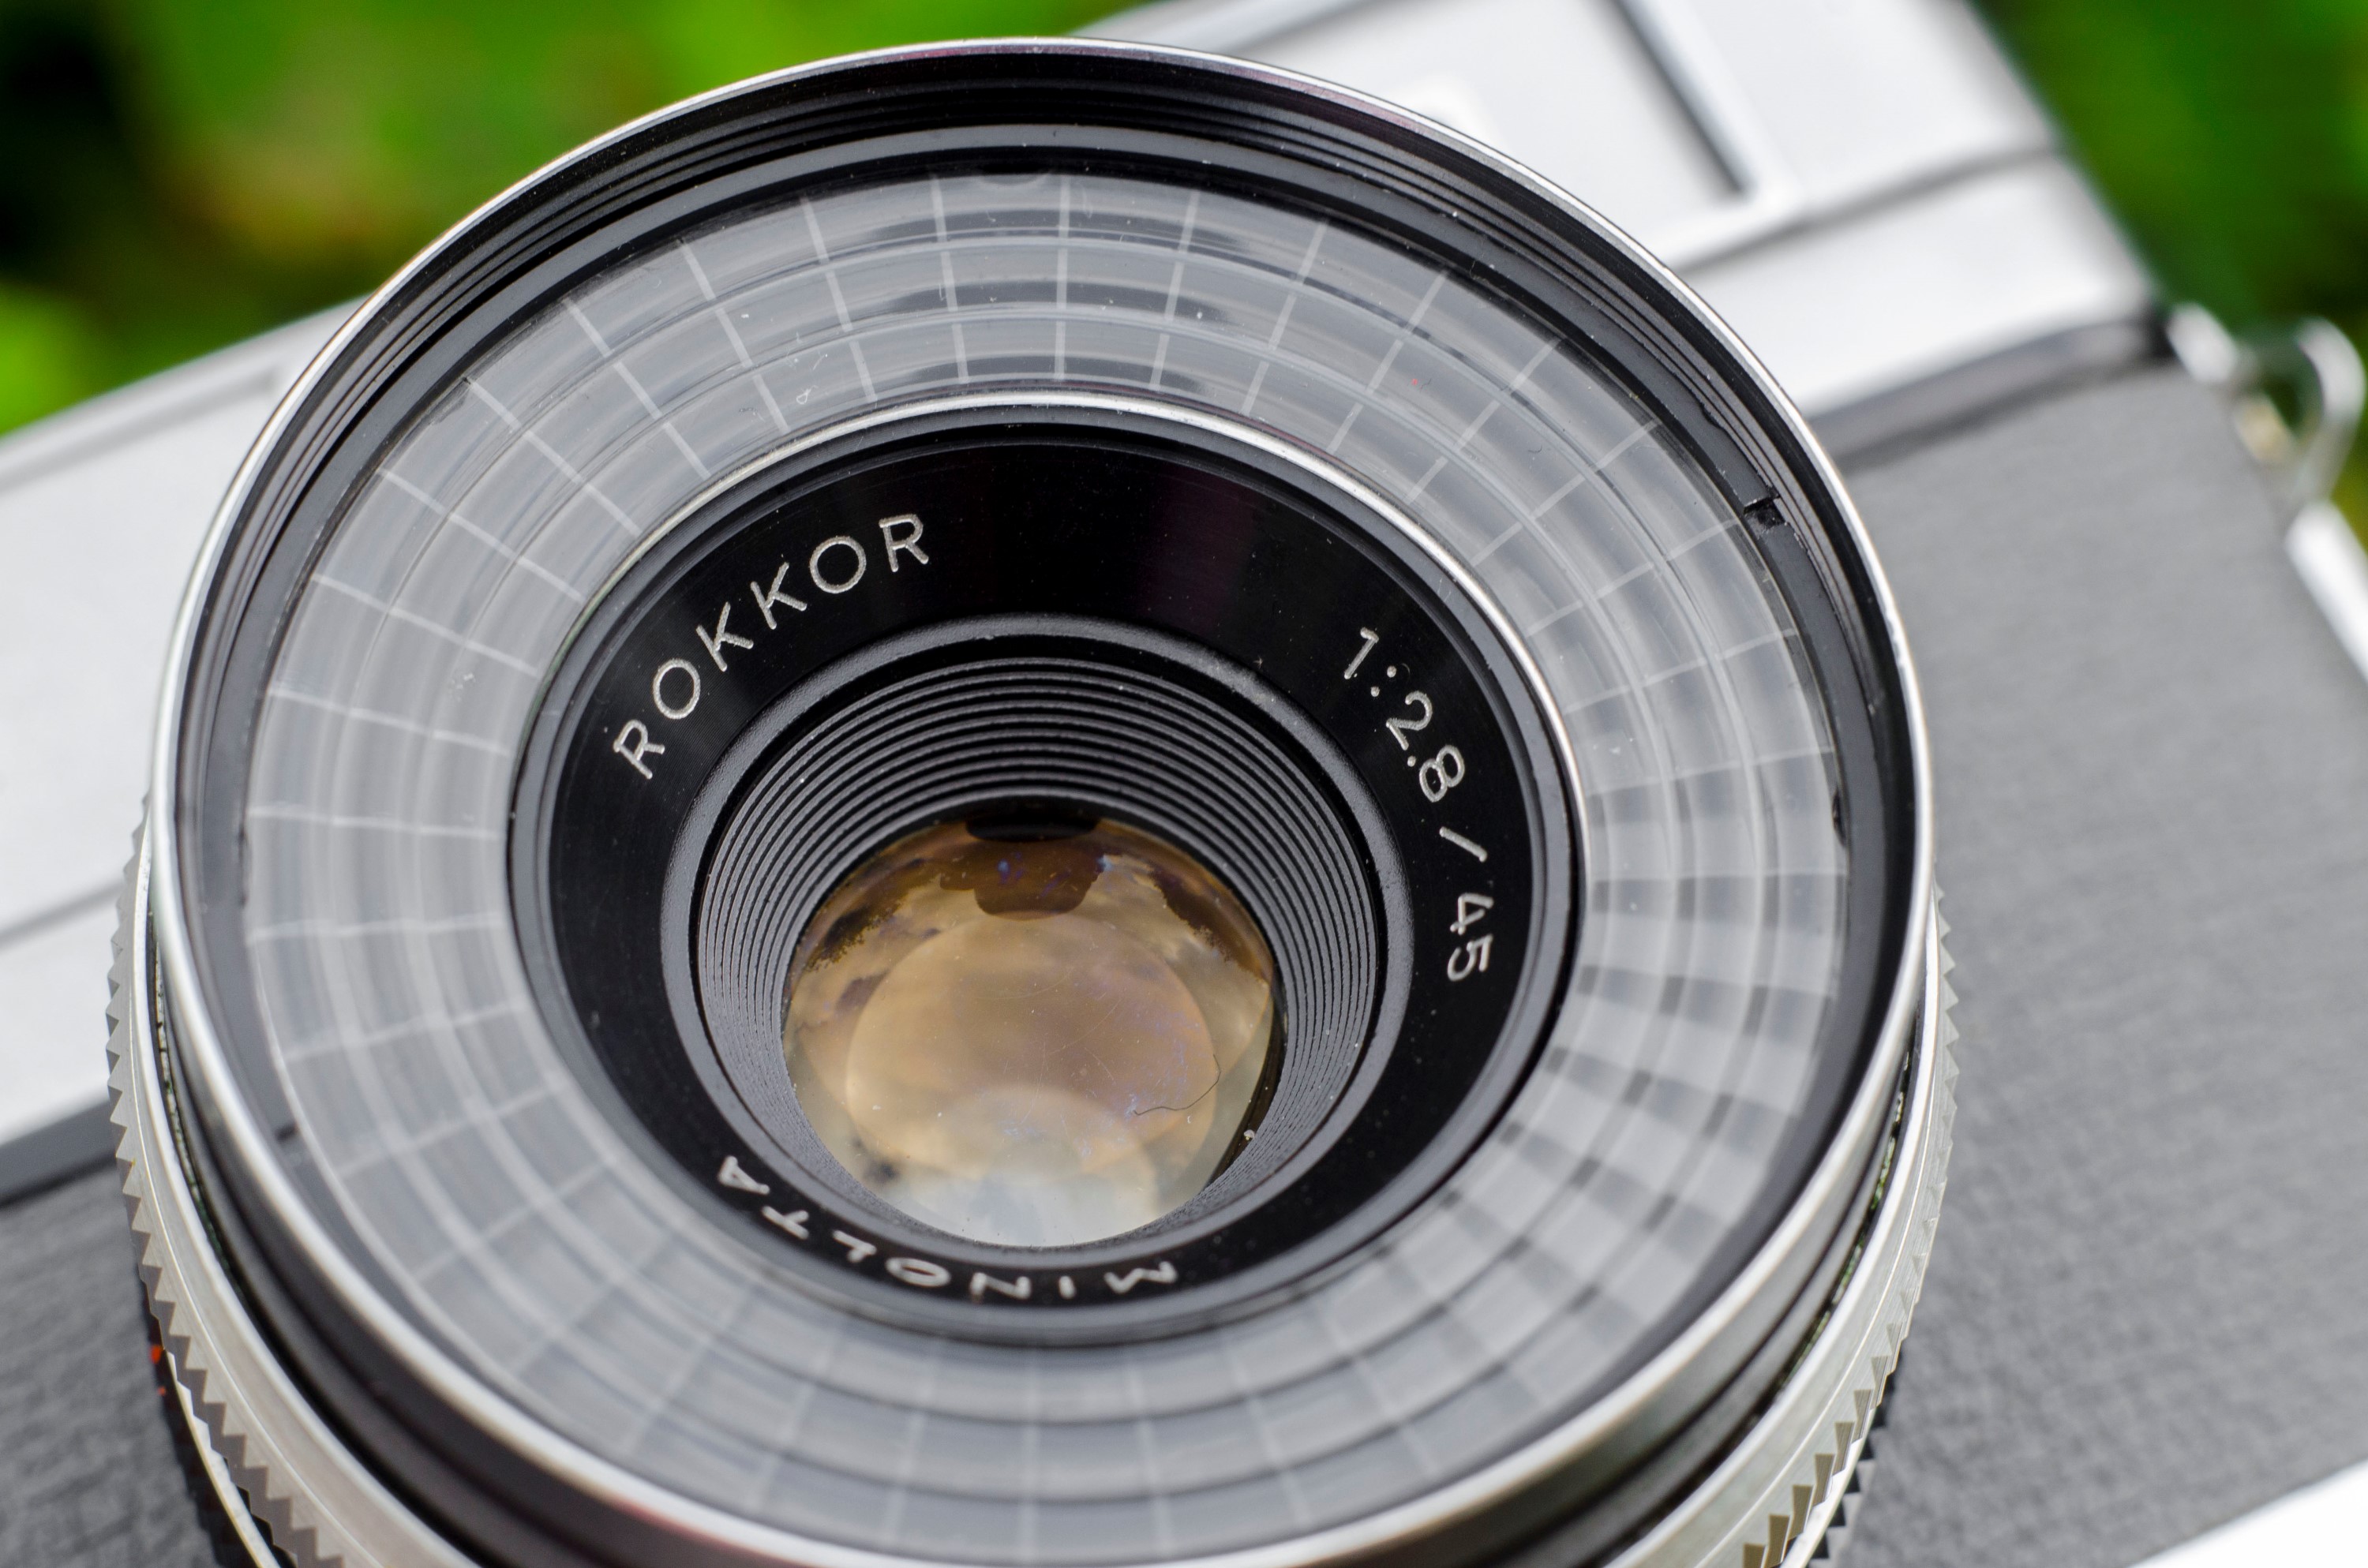
Lens: 45mm f/2.8 Minolta Rokkor coated 4-elements
Focus: 3 feet to Infinity
Viewfinder: Coupled Coincident Image Rangefinder w/ 45mm Projected Brightlines
Shutter: Seiko Leaf
Speeds: B, 1/8 – 1/1000 seconds
Exposure Meter: Coupled Selenium Cell w/ top plate match needle
Battery: None
Flash Mount: Coldshoe and M and X Flash Sync
Manual (similar model #1): http://www.cameramanuals.org/agfa_ansco/ansco_anscoset_ii.pdf
Manual (similar model #2): http://www.cjs-classic-cameras.co.uk/manuals/uniomat.html
History
In the 1950s, photography became more and more accessible to amateur and inexperienced photographers. Sure, simple box and folding cameras had been around since the late 1800s, but those cameras were very limited in what they could do, and weren’t exactly easily portable. In the first 10 years after the end of WWII, the world focused on returning to a normal every day life. The baby boomer generation began, people started moving out of big cities into suburbs and starting families. With these new families, the need for easy to use cameras that were still capable of good images became a priority.
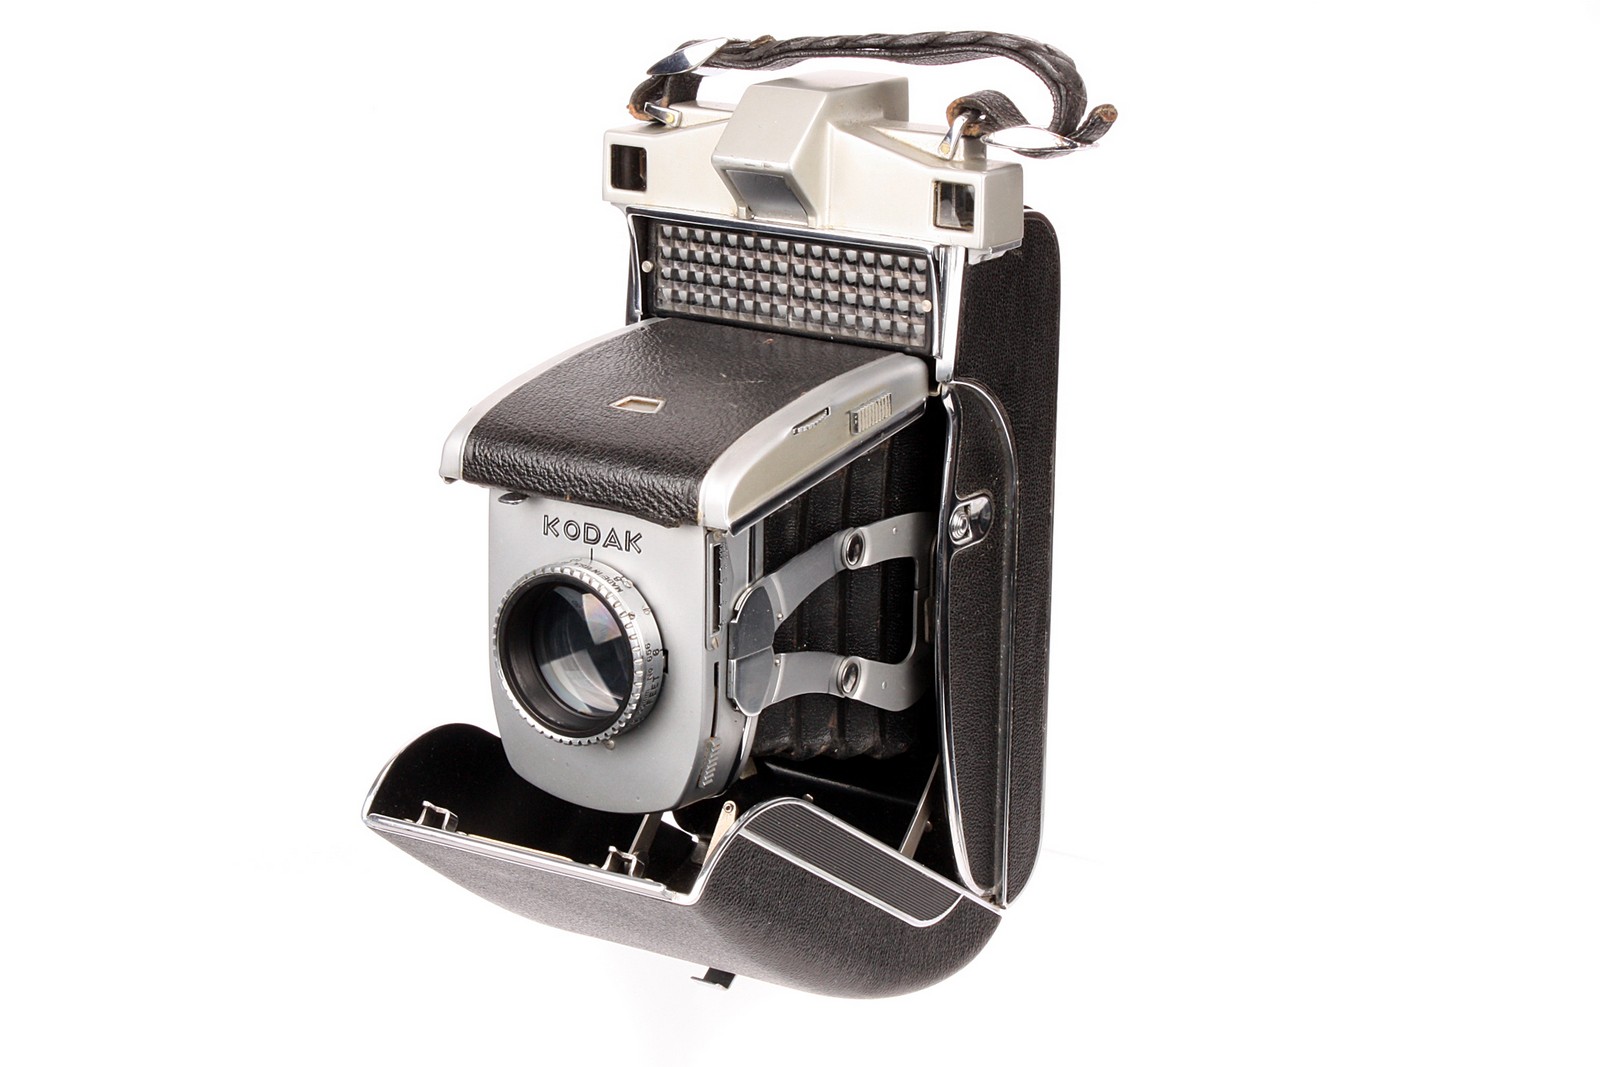
There were a large number of simple rangefinders in the early 1950s like the Argus C3, but many of these models were based off pre-war designs and required some kind of understanding of exposure calculation to work. The first camera with true automatic exposure was the Kodak Special Six-20 from 1938, but it was a very expensive camera that was made in limited numbers. It wouldn’t be until the late 1950s that real advancements in AE started to hit the market.
A large number of auto exposure cameras debuted in 1959 in what has been nicknamed the “AE Class of 1959”. Companies like Bell & Howell, Revere, Kodak, and AGFA developed simple AE cameras with little to no manual control. These cameras certainly accomplished the task of making a picture without having any knowledge of exposure, but no one had yet made a camera for the people who wanted an auto exposure camera with a full range of focus, shutter speeds, and aperture f/stops.
In 1960, Chiyoda Kōgaku Seikō K.K. (the company didn’t officially become known as Minolta until 1962) released a unique new model called the Uniomat, that was a sort of “bridge” camera between a fully functional 35mm rangefinder, and an actual auto exposure camera. On the surface, the Uniomat looks like just another Japanese rangefinder, but a closer look reveals something unique.
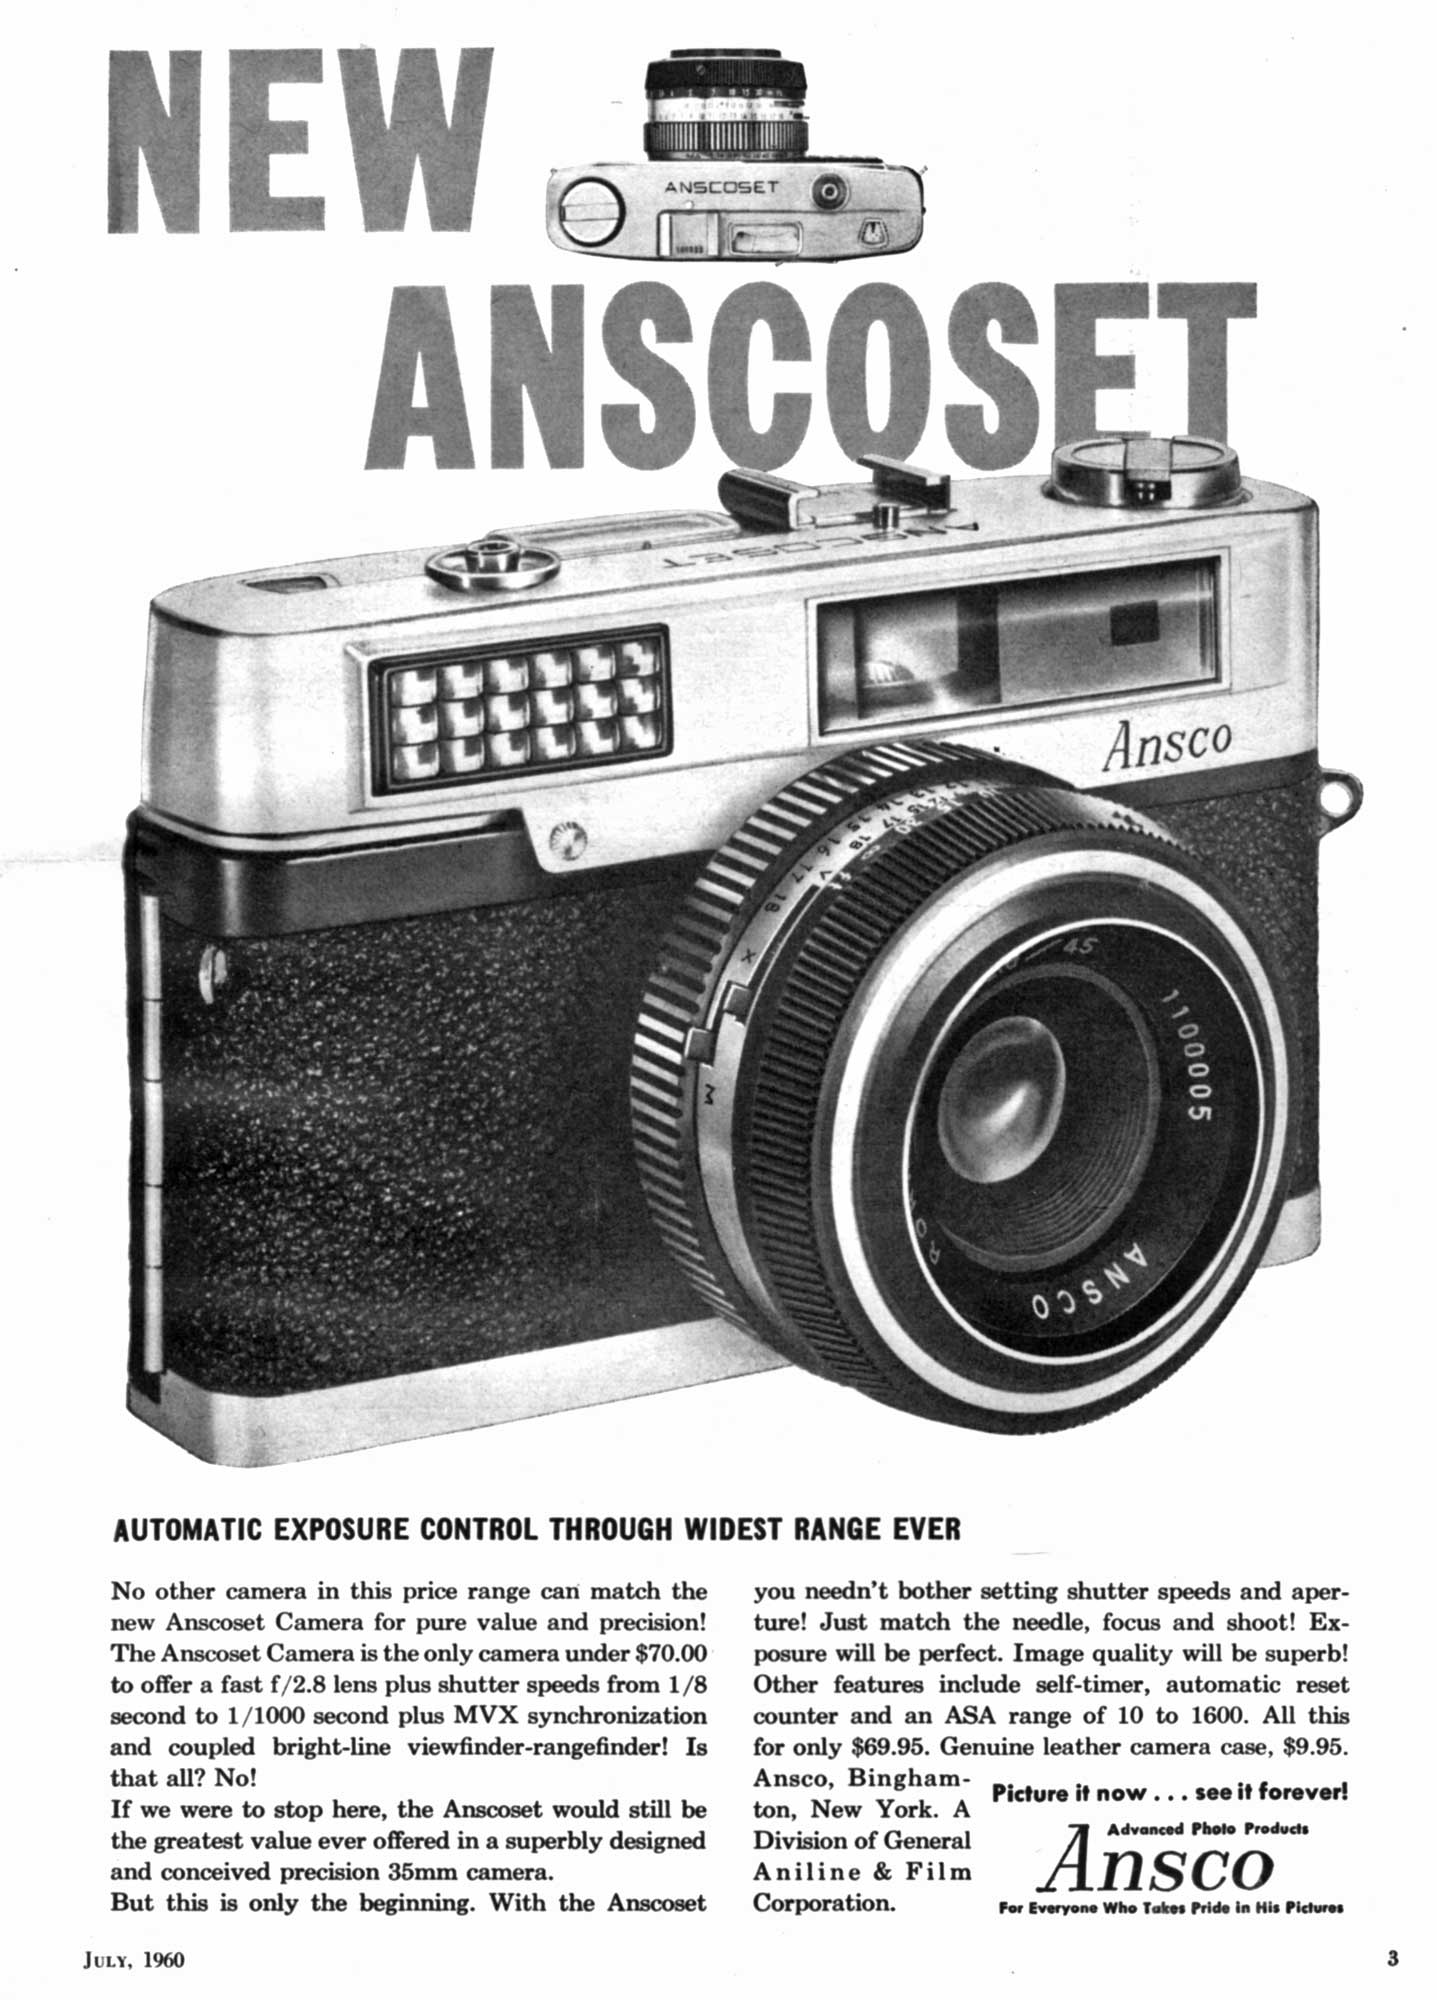
The Uniomat was sold all over the world except in North America where it was rebranded as the ANSCO Anscoset. It was a bit more advanced than the simplistic scale focus auto exposure cameras by other companies, as it had a fully integrated coincident image rangefinder, a quality Rokkor lens, and a clever new Seiko shutter which had a top speed of 1/1000 seconds, compared to every other leaf shutter camera that topped out at 1/500. It was positioned in Minolta’s lineup below the Minolta AL-S which also had a selenium cell light meter but full manual control. Since it was not sold in the US, I can’t say for sure how the camera was marketed or how much it cost, but the ANSCO version, the Anscoset sold in 1960 for $69.95, which when adjusted for inflation, is comparable to $583 today.
Chiyoda was able to accomplish such a fast shutter speed by combining the aperture iris and the shutter into one unit, and only offering specific combinations of shutter speeds and aperture settings. When the Seiko shutter was fired, it would also act as the aperture iris and open only as far as needed to let the right amount of light in. The top speed of 1/1000 was only possible with the lens opened to f/16. Since the shutter blades themselves controlled how much light would pass through to the film compartment, there was no need for a separate aperture iris.
Of course the Uniomat had to be easy to use, so Chiyoda designed the camera to be in a sort of “Program” mode where both shutter speeds and aperture sizes could not be directly controlled. Instead, the system used EV numbers printed around the collar of the lens. There would be a single “EV” selector ring that was coupled to a match needle system visible in the top plate of the camera. The selenium cell meter would control an exposure needle that would move depending on the amount of light detected, and the photographer would merely have to rotate the EV ring to match the exposure needle. When the two needles were lined up, the correct combination of shutter speeds and aperture sizes would be used.
On paper, this might sound confusing, but in practice it was incredibly easy to use. While not a true auto exposure system, it worked surprisingly well. With film loaded in the camera, the photographer only had to rotate the EV ring on the lens to match whatever the meter was telling them and they would know that proper exposure would always be used. A photographer still had manual control over the EV ring, so he or she could always over or underexposure their shots however much they wished.
Since neither shutter speeds or aperture sizes are displayed anywhere on the camera, the chart below was printed in the Uniomat’s user manual giving an approximation of the actual settings used at each EV number.
| EV | Speed | Aperture |
| B | Bulb | 2.8 |
| 6 | 1/8 | 2.8 |
| 7 | 1/16 | 2.8 |
| 8 | 1/32 | 2.8 |
| 9 | 1/64 | 2.8 |
| 10 | 1/120 | 3 |
| 11 | 1/170 | 3.5 |
| 12 | 1/220 | 4 |
| 13 | 1/300 | 5 |
| 14 | 1/380 | 6.3 |
| 15 | 1/480 | 8 |
| 16 | 1/600 | 10 |
| 17 | 1/770 | 13 |
| 18 | 1/1000 | 16 |
The Uniomat series had a total of 3 models and would remain in production until 1965. I was never able to find any indication of production numbers, but I have to imagine they weren’t very high. Although well built and using a reliable and clever exposure measuring system, it wouldn’t have appealed to professional or advanced amateur photographers, and the quickly growing selection of fully automatic cameras made available by other companies likely ate into the sales of the Uniomat. Plus, in 1962, Chiyoda (now officially known as Minolta Camera Company) would release the Hi-Matic which had full automatic exposure.
Of the 3 Uniomat models, models I and II show up for sale regularly, but the Uniomat III being reviewed here is uncommon. It is the only one in which the selenium meter is located around the circumference of the lens. As a write this review, a quick eBay search for “Uniomat” produces 11 cameras for sale, all of which are either models I or II. There were no IIIs available.
Today, Minolta Uniomat cameras are rarely discussed in vintage camera collector groups, yet they are a curious chapter in the history of the 35mm rangefinder. Those who are familiar with them, or remember them when they were new, remember them as well built and handsome cameras that accomplished their goal of being easy to use cameras without sacrificing quality. Many times, these cameras show up for sale and go for rock bottom prices, primarily because no one knows anything about them. Although they do not show up for sale often, and because selenium meters can often be dead after 50+ years of use, when one does show up for sale with a working meter, they represent a good bargain for someone wanting a compact and easy to use rangefinder. I am happy to have this camera in my collection and would recommend anyone reading this review to pick one up, if the opportunity ever presents itself.
Repairs
I acquired this Uniomat III well over a year ago and when it first arrived, the shutter wouldn’t fire. When collecting old cameras, sticky or stuck shutters is just part of the game and it’s something you get used to. Thankfully, cleaning a stuck shutter is usually pretty easy. Take off a front or rear lens element to get to the shutter, and put some lighter fluid or naphtha oil on it, and let it soak up the old goo, and it should be good to go.
I began the tear down of the Uniomat in the hopes of a quick fix. Sadly, the camera gods were not in my favor this particular time and the camera quickly turned into a disaster.
 Making matters worse, I did not follow my own advice and take lots of good photos of the camera while disassembling it. This proved to be a big issue because of the way the front element sits in the camera. The focus of the camera depends on rotating the front element, but behind the selenium meter. There are two stops inside of the lens that control maximum and infinity focus, and in order to get the lens element out, you have to remove these stops. In doing so, you have absolutely no idea in how to orient the front element when putting it back together to assure the lens is correctly collimated.
Since I don’t have any good photos to show you of the process, I won’t go into much detail into how I had to clean this camera, but I got to the point where I felt I had gone beyond the point of no return and gave up. I put the Uniomat and all of it’s parts into a Zip-Loc bag and stored it in my “camera graveyard” in the basement.
 Then, in March 2017, as I was preparing my third Cameras of the Dead series, I thought the Uniomat would make for a good inclusion into that article. The camera was in pieces, but it’s unique feature set and good looks would make for a pretty good review.
As I took the parts out of the bag, I thought, why not give this camera another shot. A couple of nights later, while sitting at my kitchen table, I started to make some progress. I was able to get the shutter cleaned and working properly. Amazingly, the selenium meter was still working, and I figured if both the shutter and meter were working, I had to get it back together.
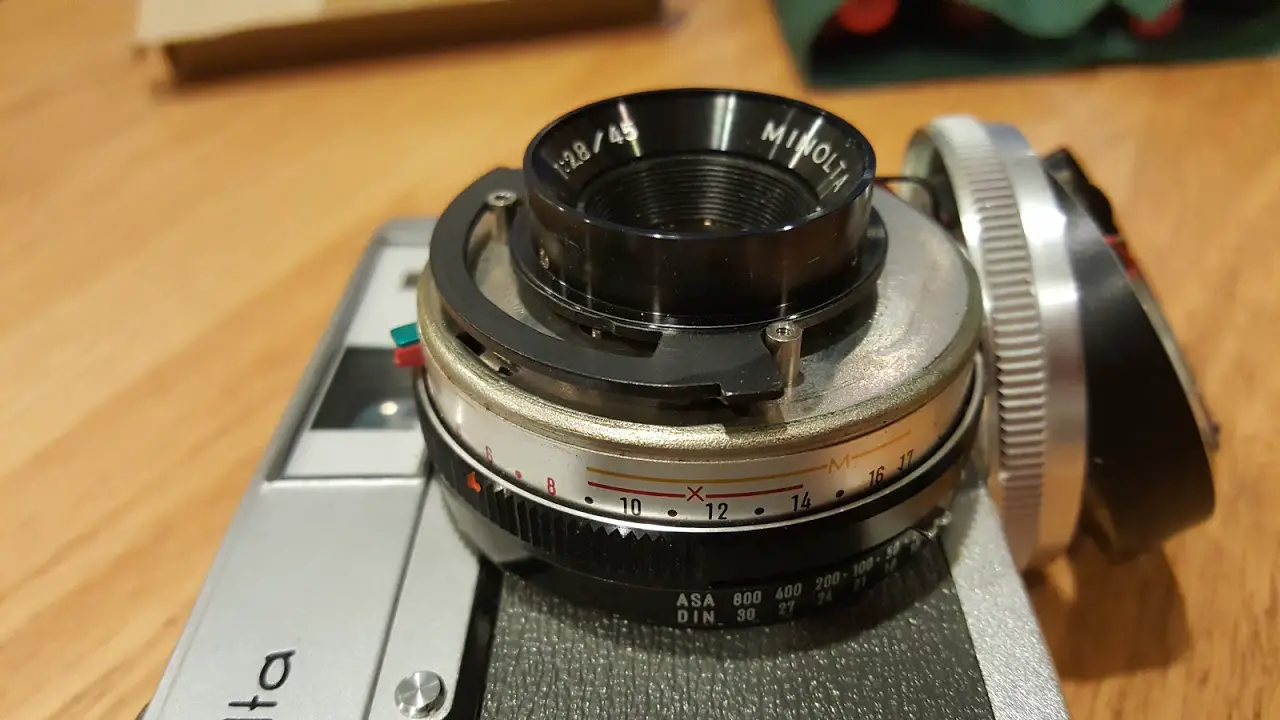
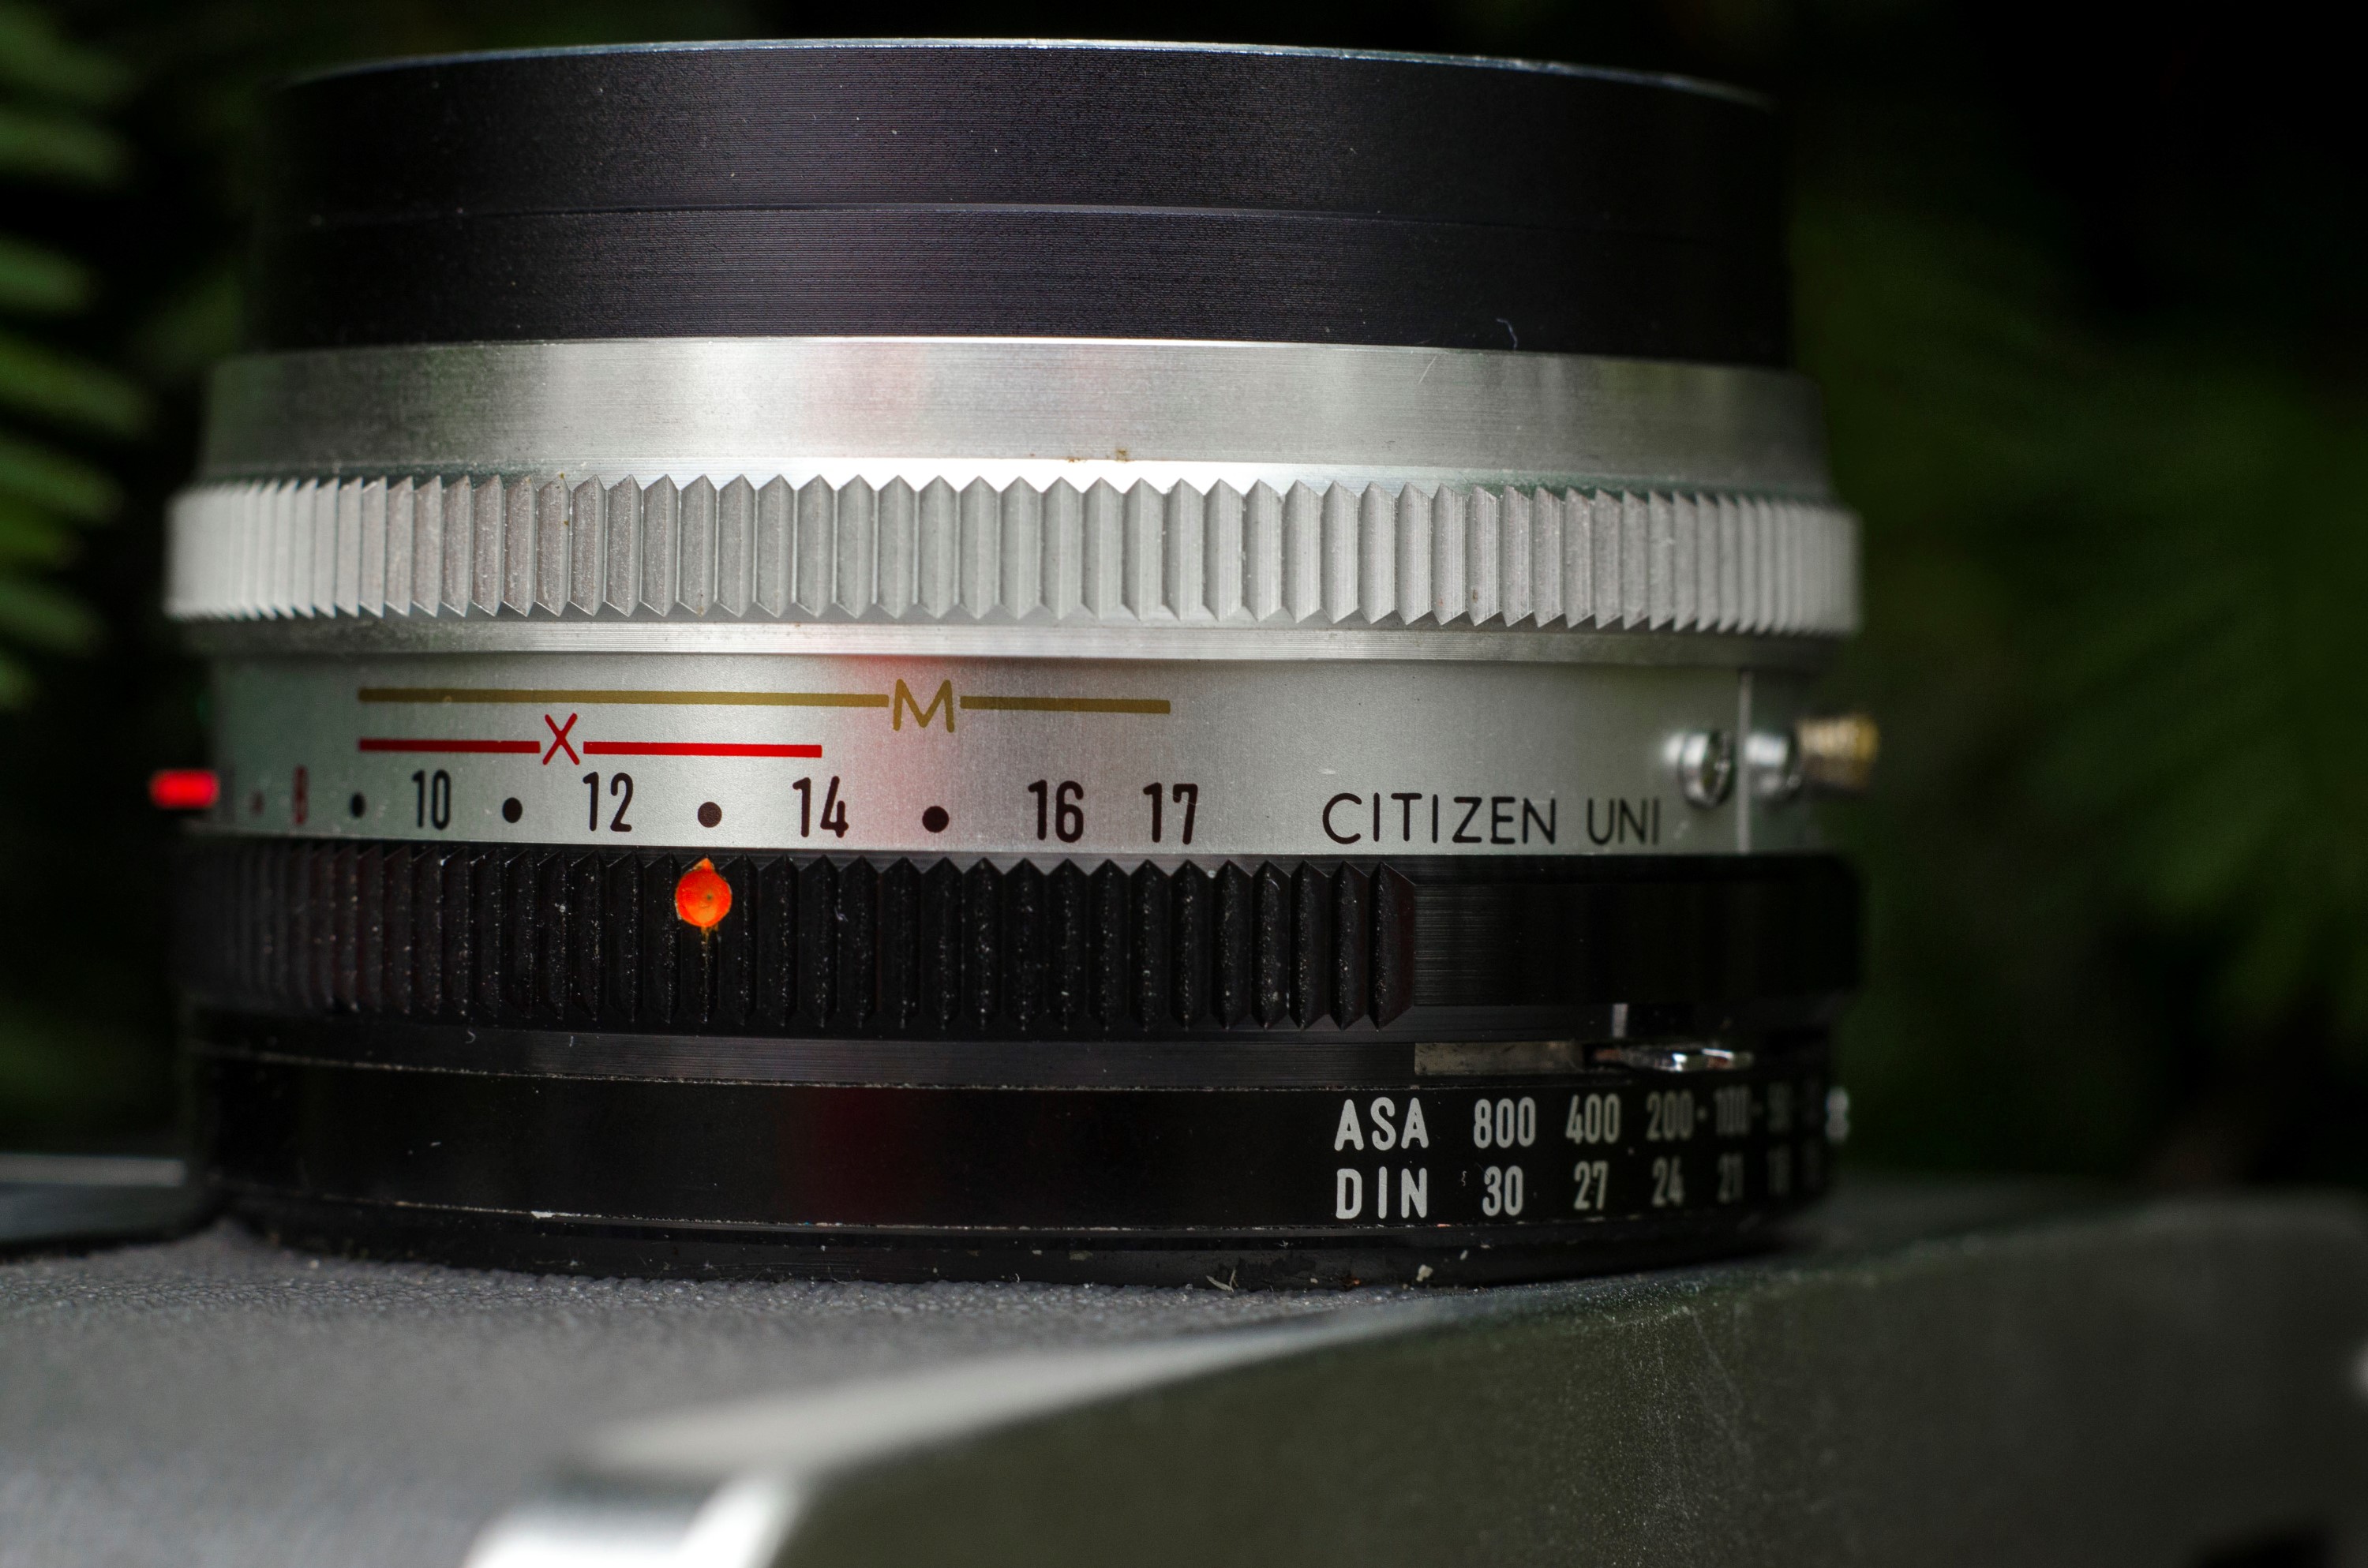
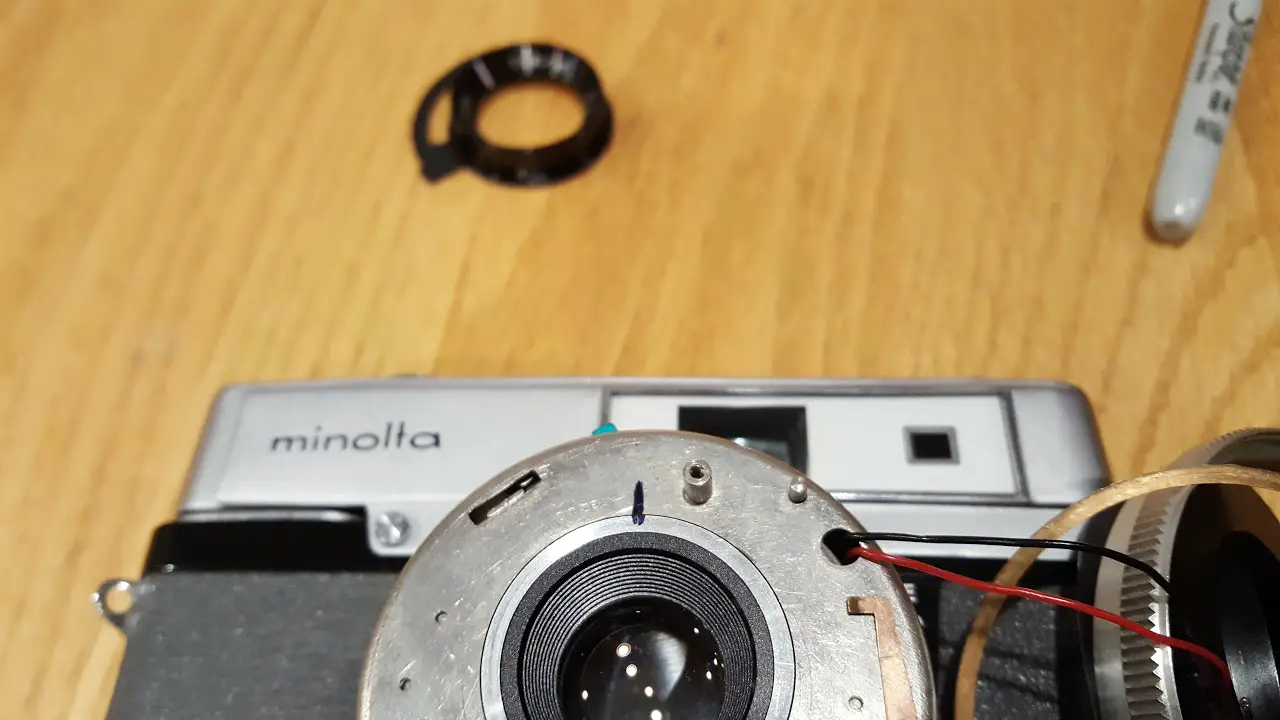 The hardest part was assuring that my focus was correct. The biggest problem is that you have to set the focus correctly to infinity before putting the lens back together, and any tiny bump will throw off your focus. A partial solution was for me to take a black sharpie and make a black line crossing the front lens element’s rim, and continuing to the front plate of the shutter, when the lens was at infinity. The image to the left shows my black line properly lined up. As I would put things back together, I would check that this line stayed lined up to make sure the lens stayed correctly at infinity.
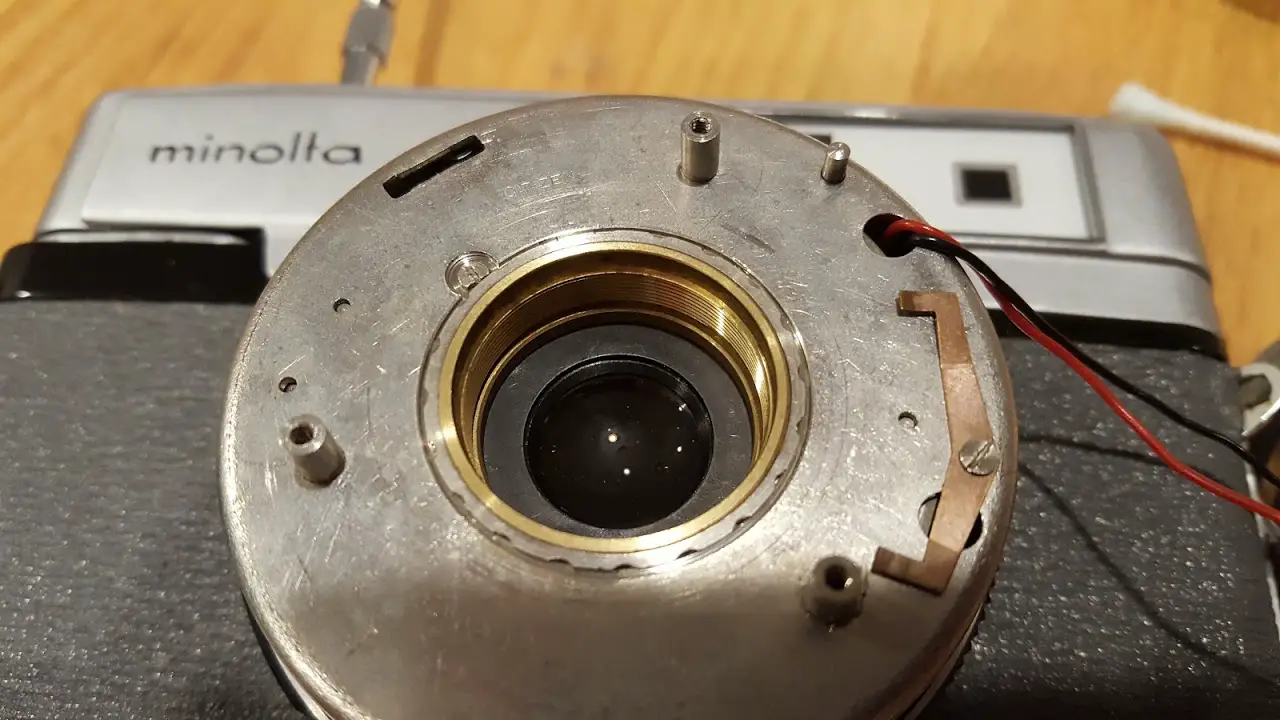
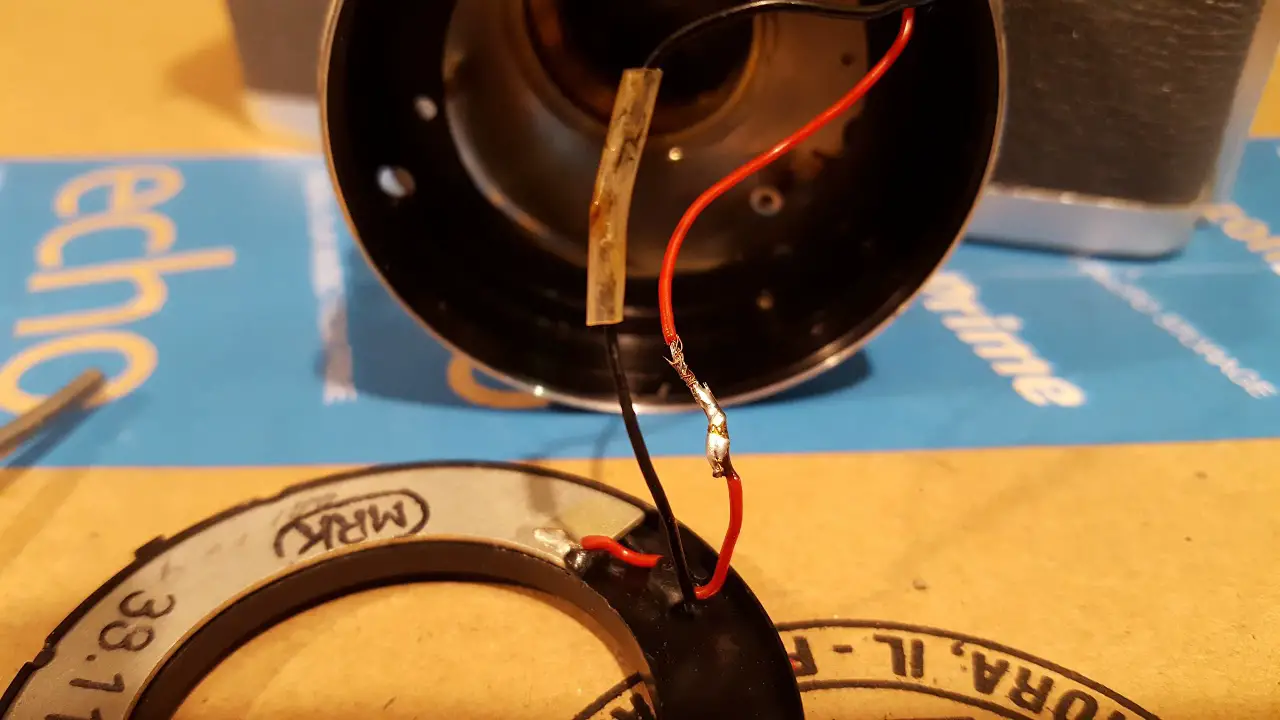 Another challenge with working on the camera is that there is no easy way to disconnect the red and black wires that run from the meter to the inside of the camera. I had to leave these wires connected, running through various shutter parts the entire time. During the various trial and error sessions, I managed to break the solder joints not once, not twice, but three times! Thankfully, I have just barely enough soldering skills to get it back together.
 With the camera back together, I checked focus one more time and confirmed that not only was focus correct, but the shutter was still working, and the meter was registering light. Pretty impressive for a 54 year old camera that doesn’t need any batteries to work!
I am far from a master camera technician. There are many far more skilled guys and gals out there who could have done what I did with this camera in their sleep, but for some hobbyist such as myself who likes to tinker, and can very easily get in over his head, I can say that the Uniomat was the most “far gone” camera I’ve ever brought back to life. Getting things back together correctly was not easy, and I spent many hours on what should have been a pretty straightforward shutter flush. If anyone reading this article has a Uniomat and is thinking about cleaning it, I wish I had better advice for you, other than just be careful and take your time!
My Thoughts
With the camera back together, I loaded in a roll of trusty Fuji 200 and went shooting. The Uniomat isn’t exactly an automatic camera, as it does nothing for you, but it’s simplified exposure system makes it comparable to an early “point and shoot” camera. You don’t need to know anything about shutter speeds or f/stops in order to properly set exposure.
Advanced photographers or people who have a hard time giving up control would likely hate this camera as you have no way of knowing what your shutter speed or aperture setting will be. Sure, there’s the chart I typed earlier in this review, but that’s hardly anything you’re going to want to memorize when shooting with a Uniomat.
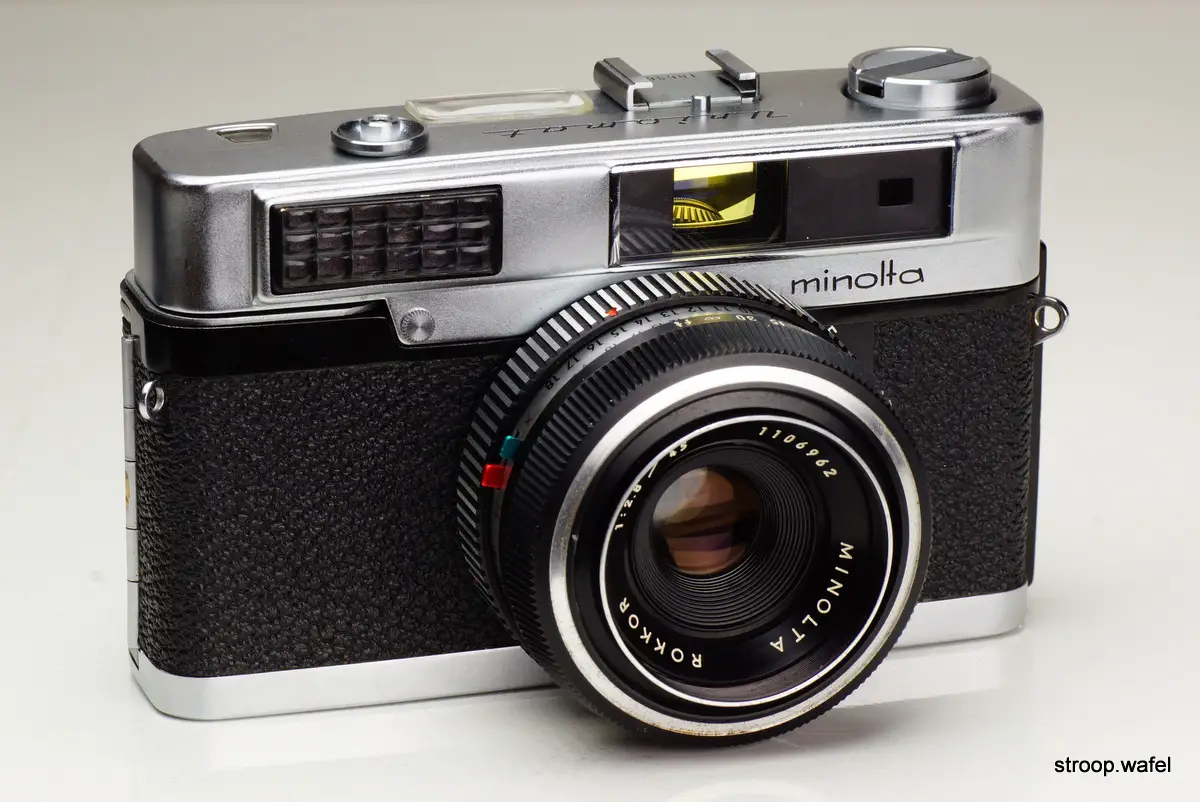
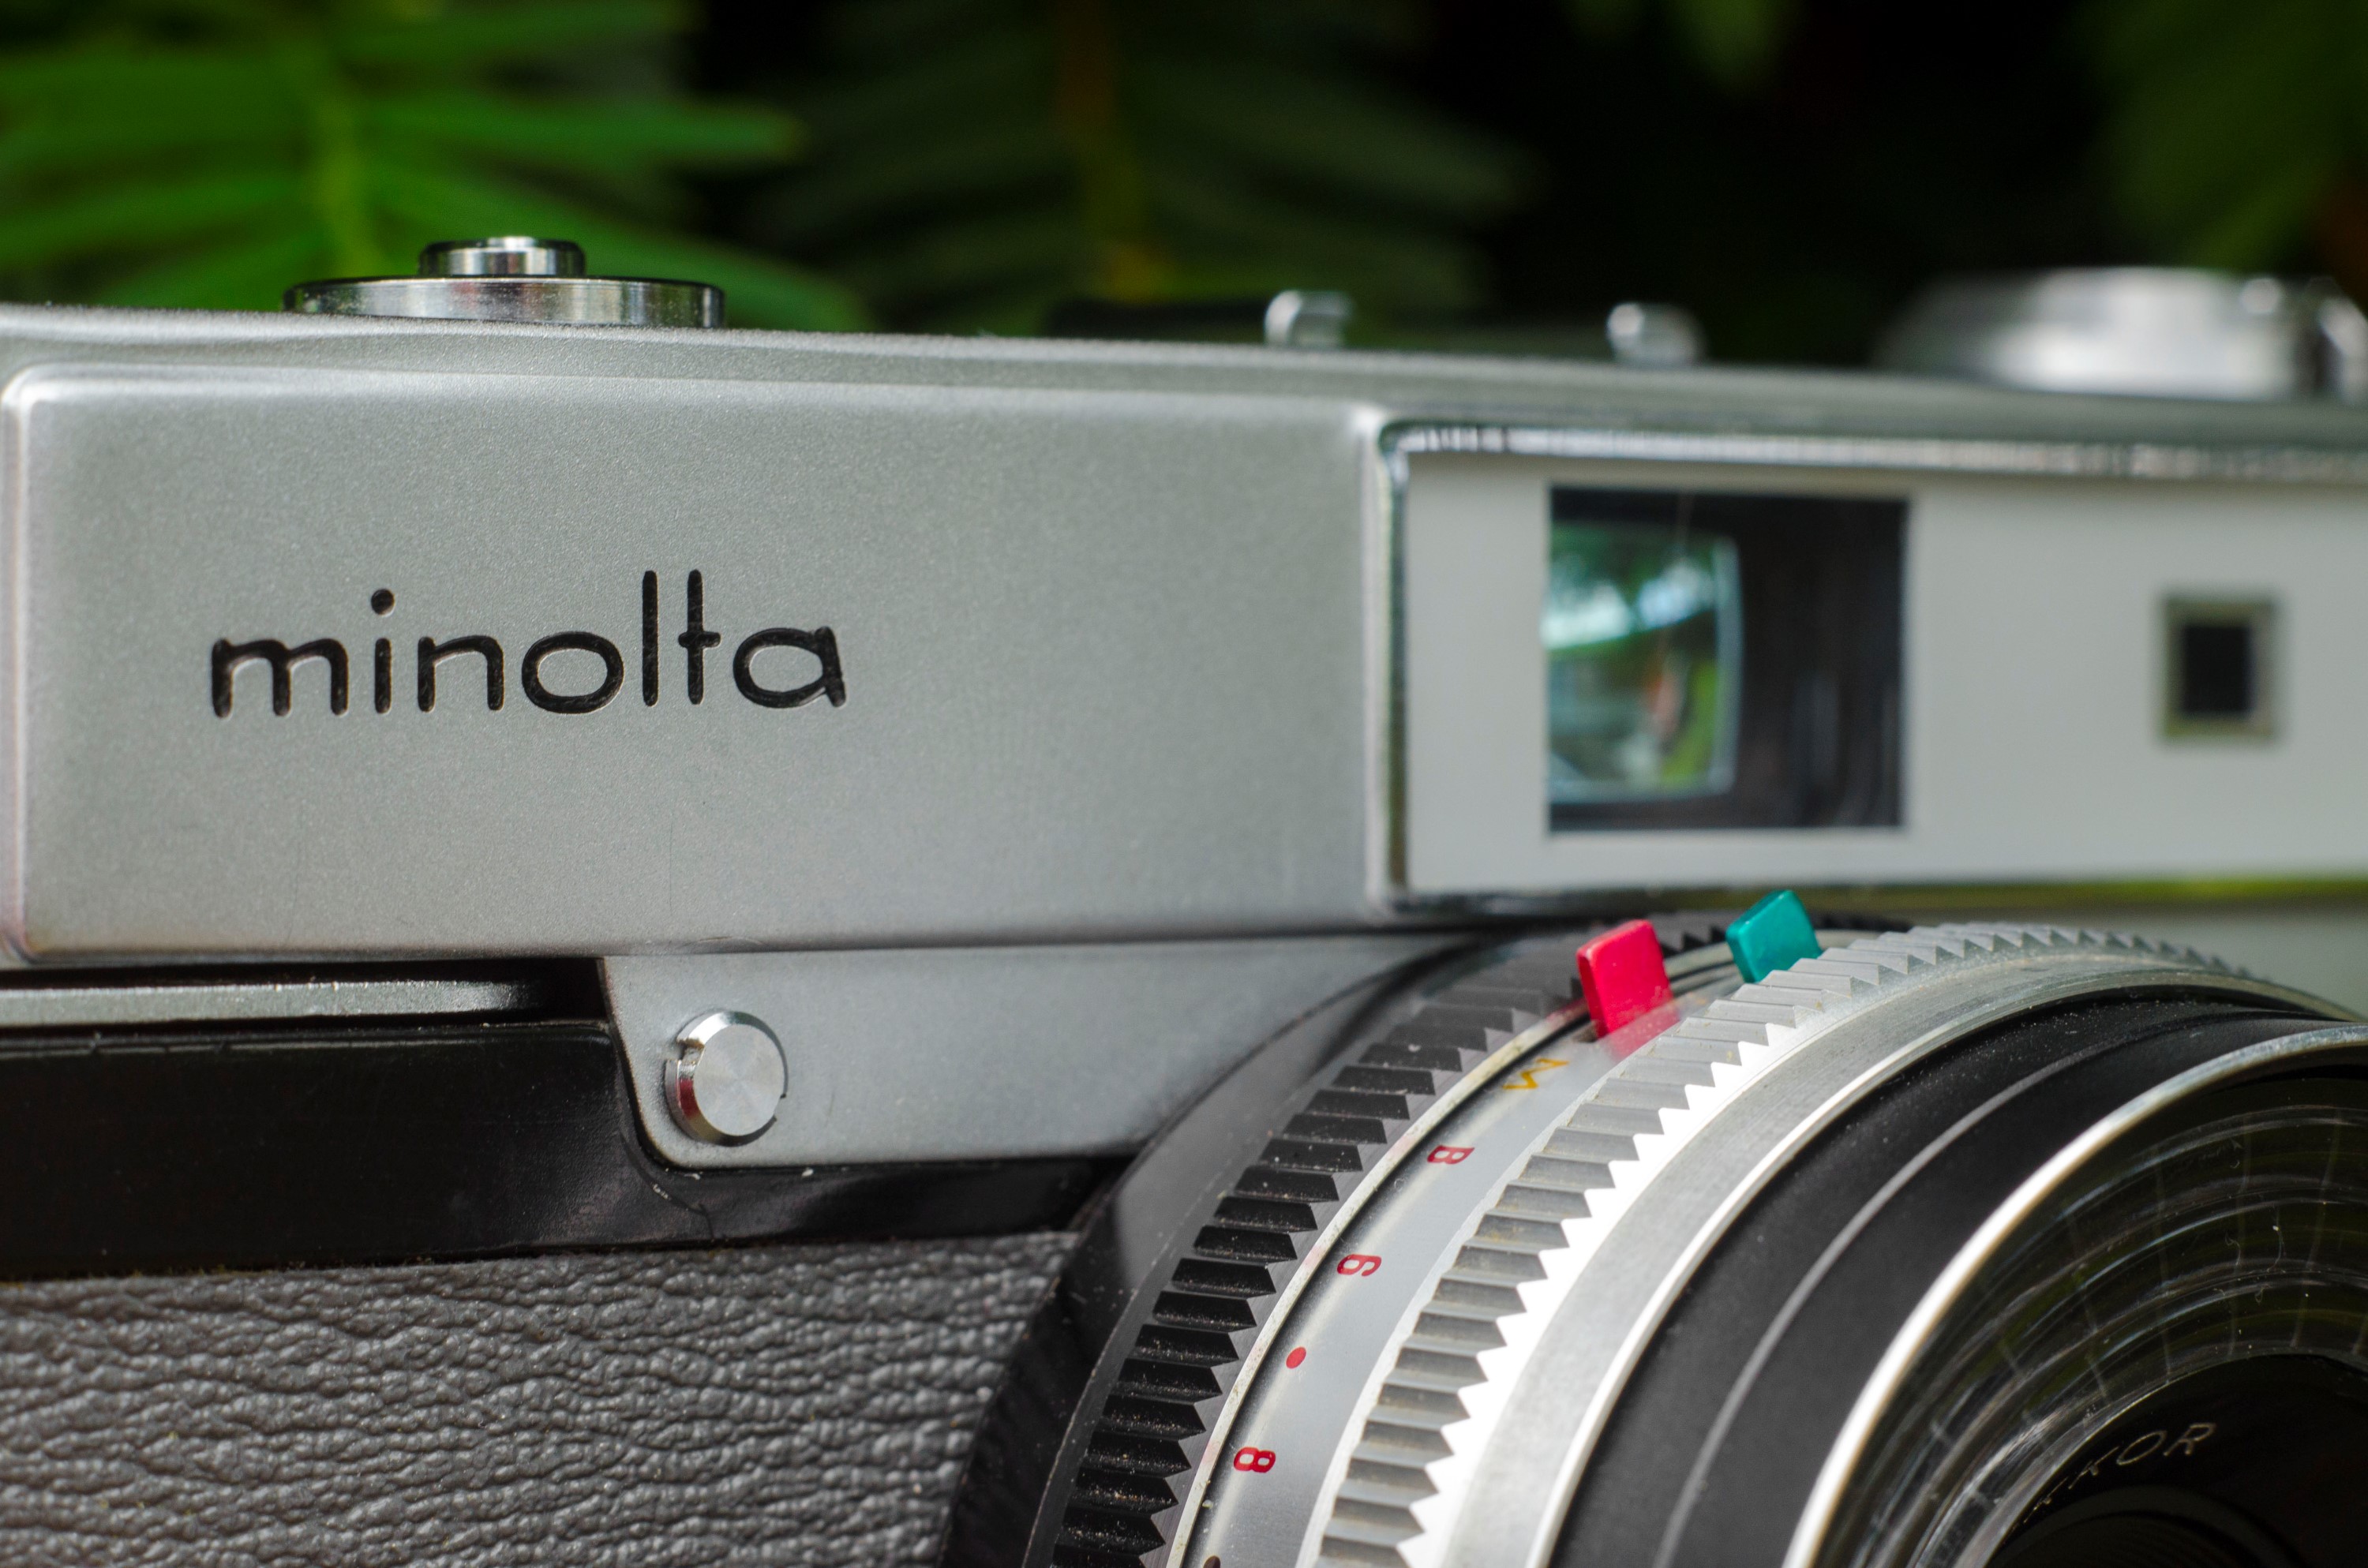
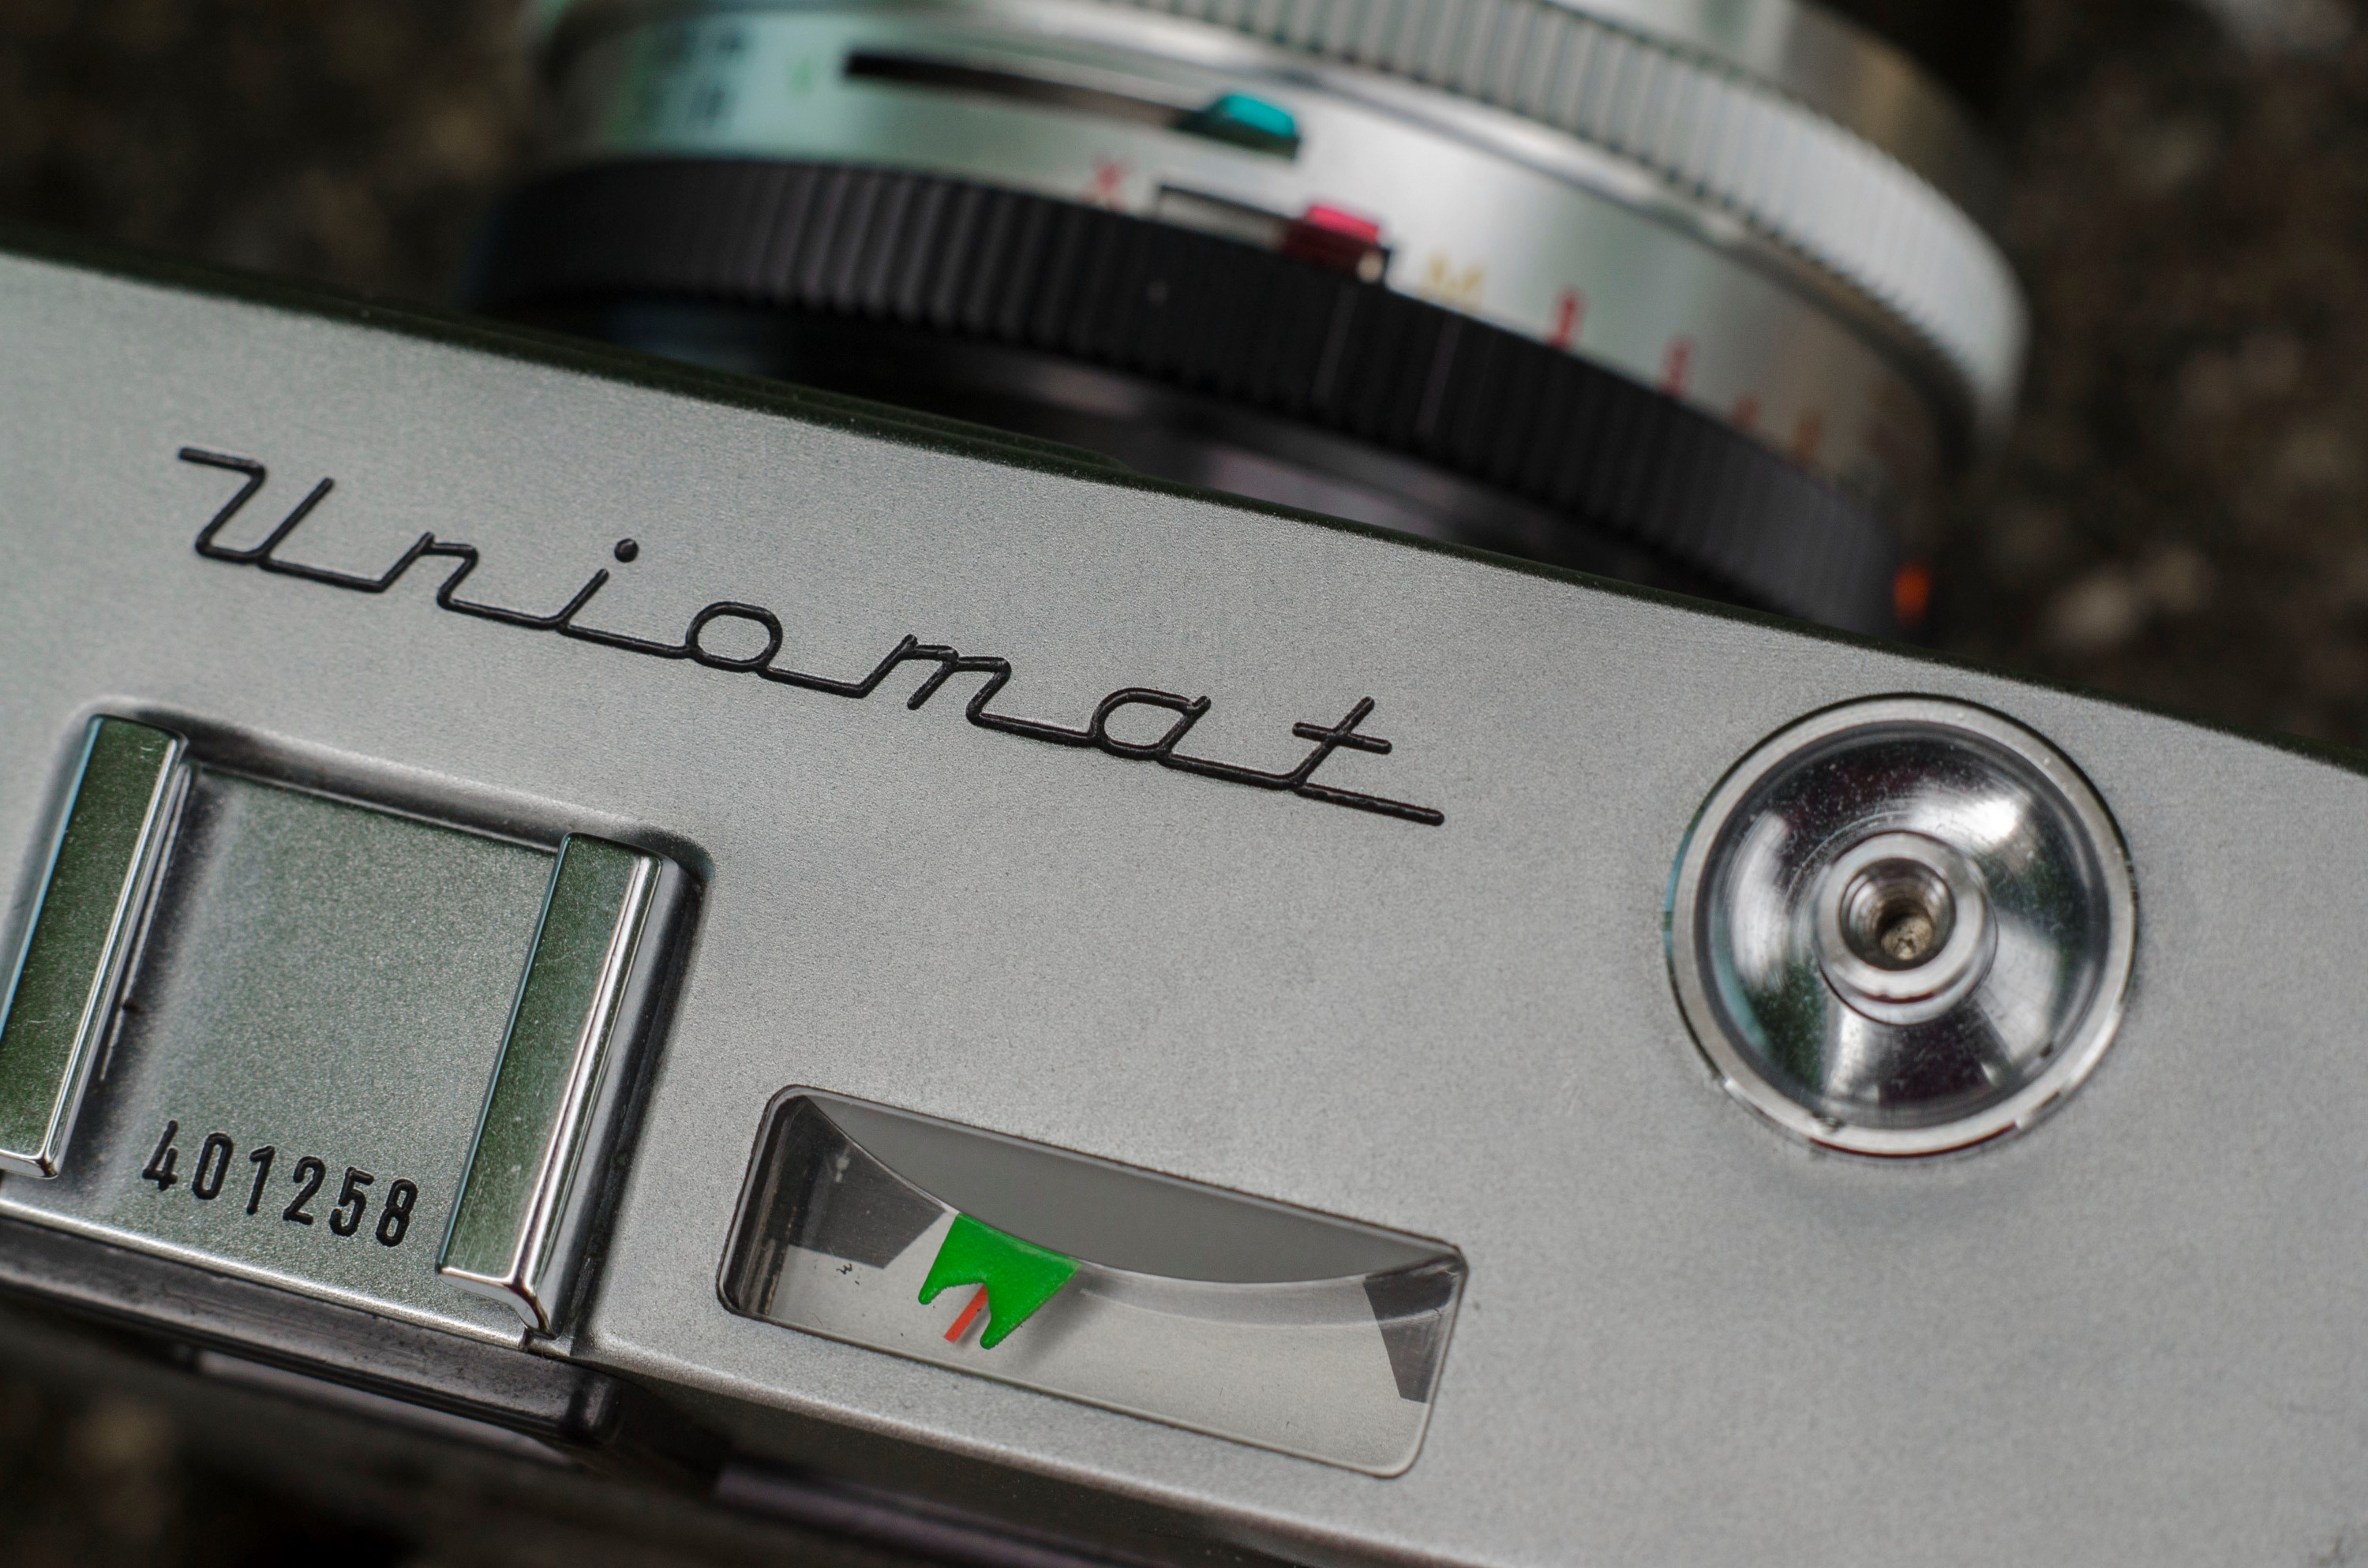
The Uniomat is a very handsome and relatively light weight camera. The camera has clean lines, an uncluttered top plate, a gray leatherette covering, and the logo is written in an gorgeous “retro” font that is reminiscent of those appearing on the trunk lids of 50s and 60s American automobiles.
Weighing 577 grams without film loaded, it weighs less than most rangefinders of the era. It is nearly identical in weight to a Canonet G-III QL17 and marginally heavier than a Kodak Retina IIa. Despite it’s weight, it is larger than the Canonet and more closer in size to a Yashica Electro. I did not find either the size or the weight to be an issue, however. While not exactly pocket size, it wouldn’t be a problem to carry this around all day around your neck on a family trip to the zoo, which conveniently is where a camera like this would be most useful.
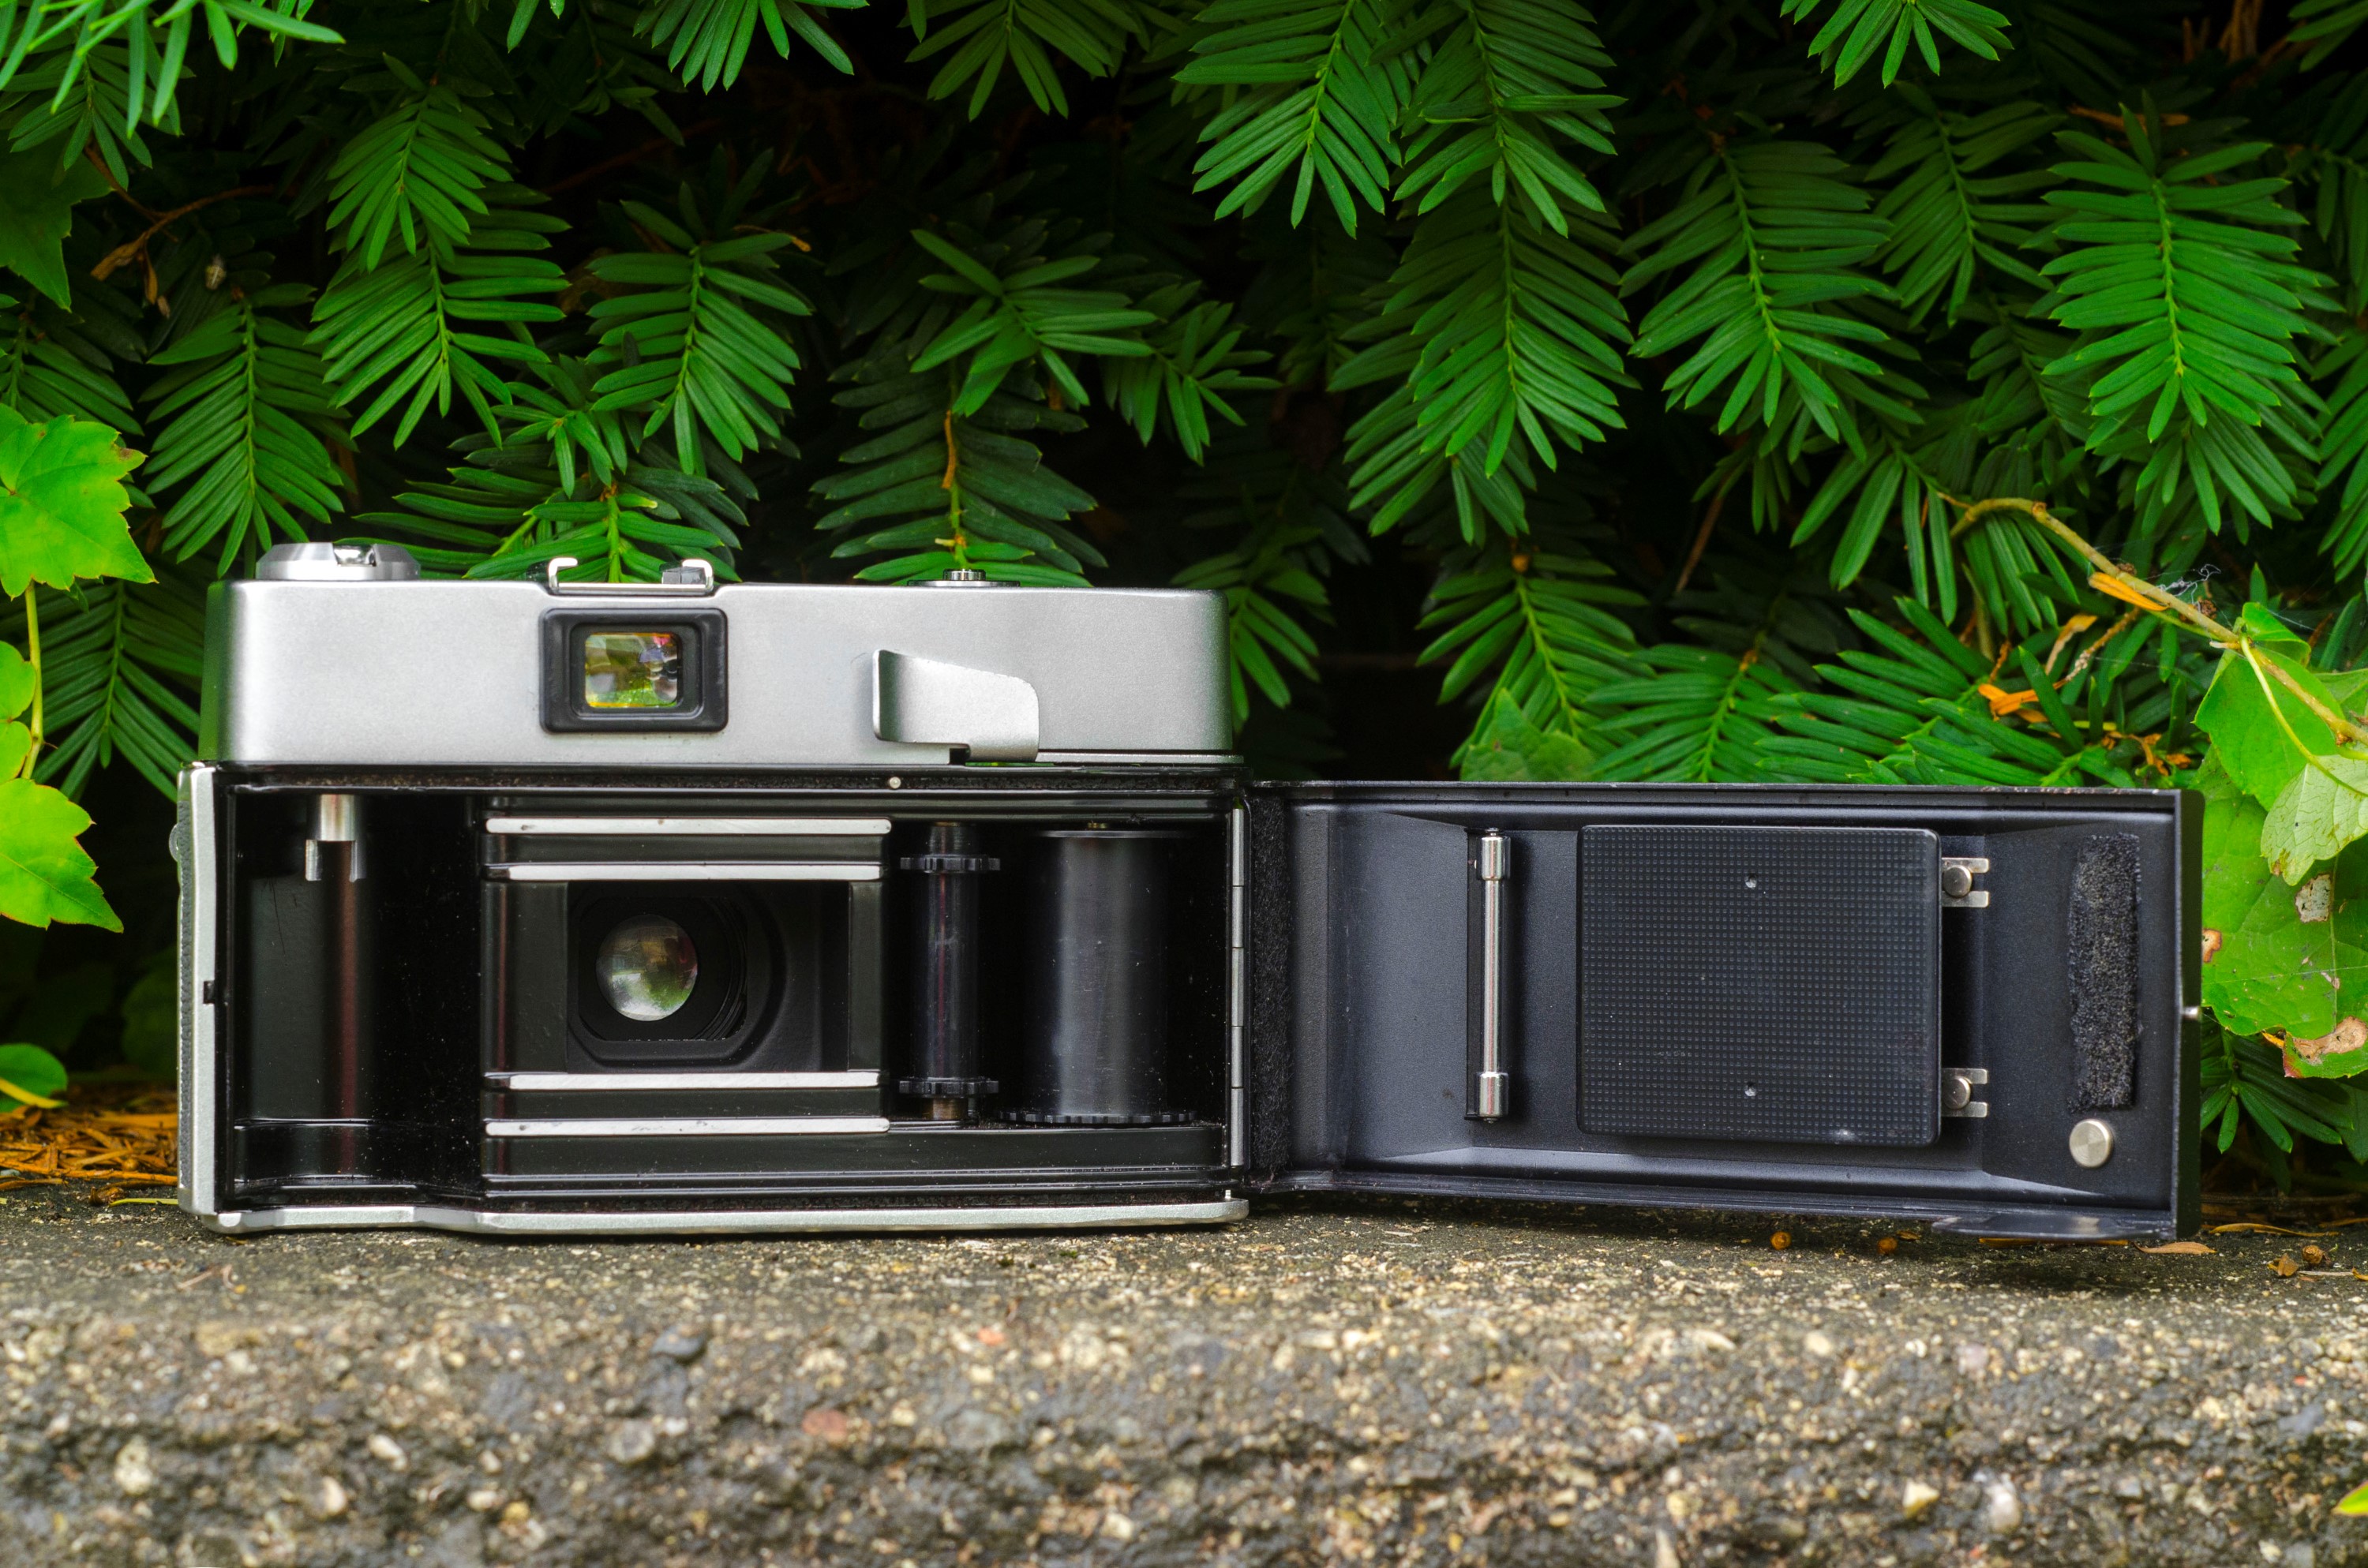
Loading film into the Uniomat is a straightforward affair. A latch on the left side of the camera releases the right-hinged door, revealing a very familiar film compartment. A new 35mm cassette is loaded on the left and threaded onto a fixed takeup spool on the right. The Uniomat came with foam light seals, so if you have acquired one and plan on using it, be sure to replace the seals!
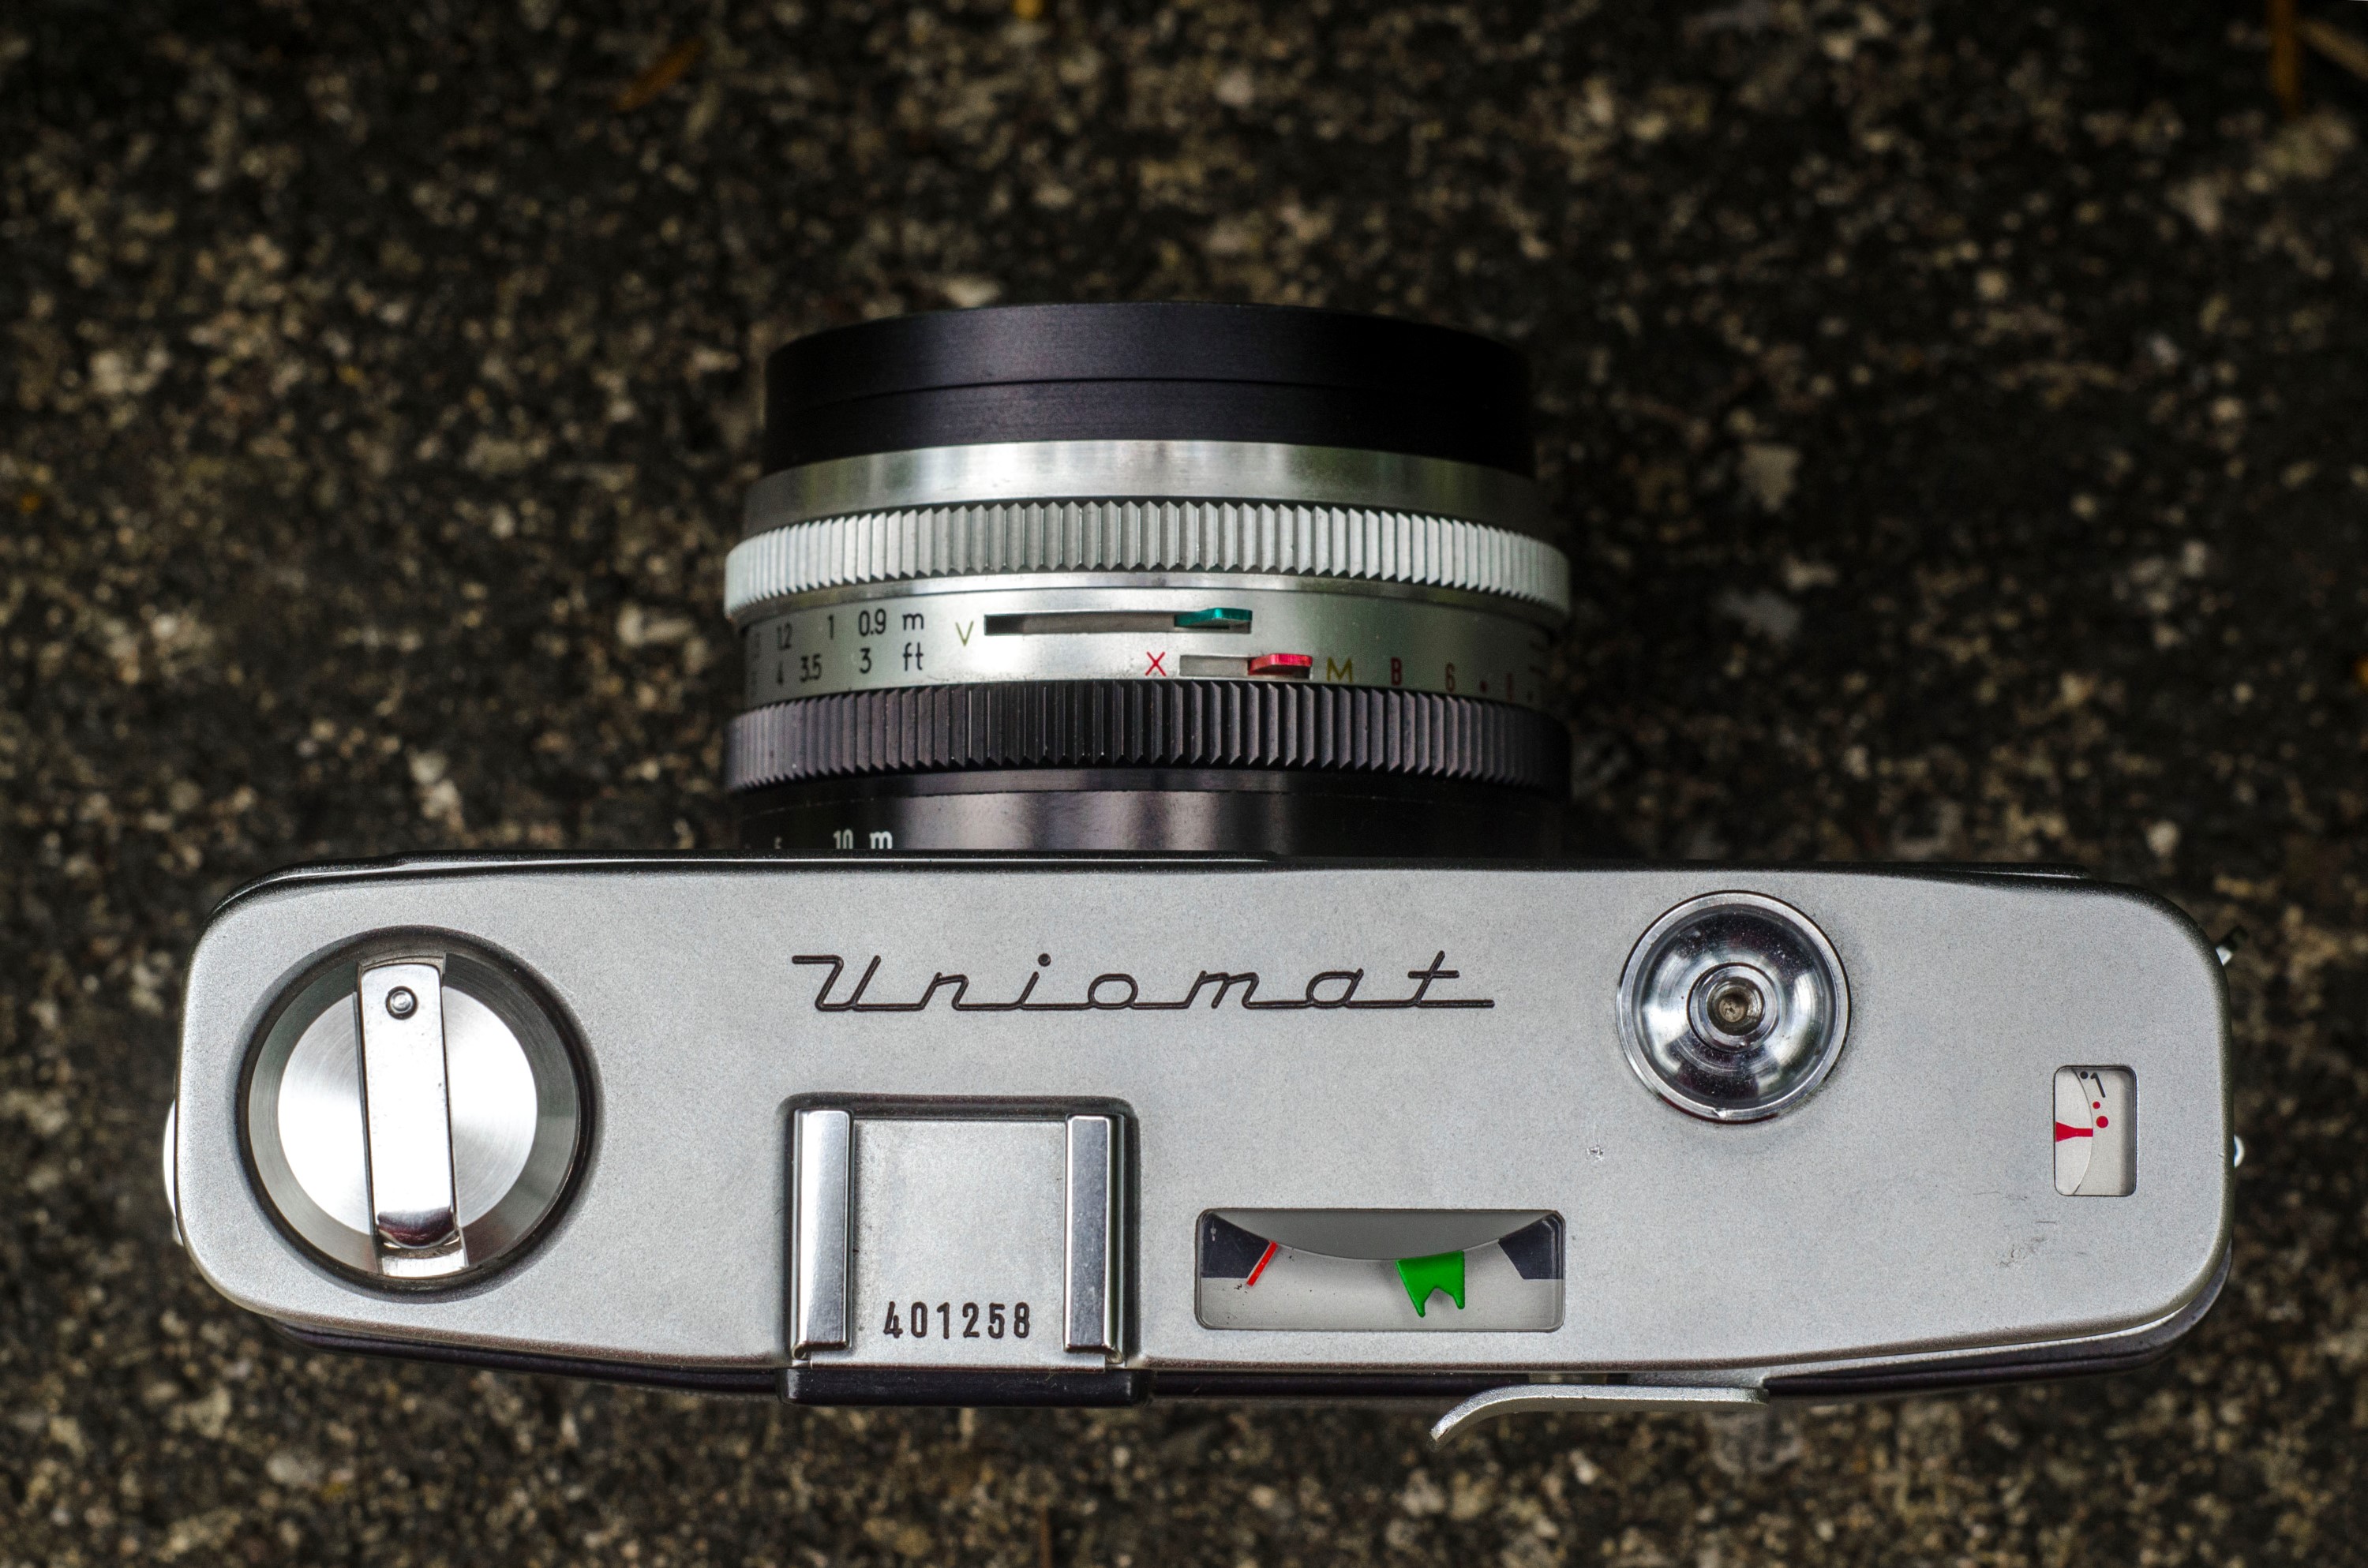
The exposure meter is only visible on the top plate of the camera which is consistent with most metered cameras from the early 1960s. This means you cannot see any exposure readouts in the viewfinder. You have to lower the camera to your chest and look at the meter to see where you are at. The meter itself is very basic, consisting of a red needle, and a two pronged green arm that is coupled to the exposure ring around the lens. There are no numbers or any information of any kind visible in the meter. The light meter moves the red needle, you move the green arm, and once they’re lined up, you are good to go.
Despite the simplistic feature set of the camera, one area in which the Uniomat absolutely shines is in it’s viewfinder. The viewfinder uses a coincident image rangefinder where a second, smaller image is in the center of the main viewfinder window, but where this camera differs is that there are actually two “patches” visible in the viewfinder.
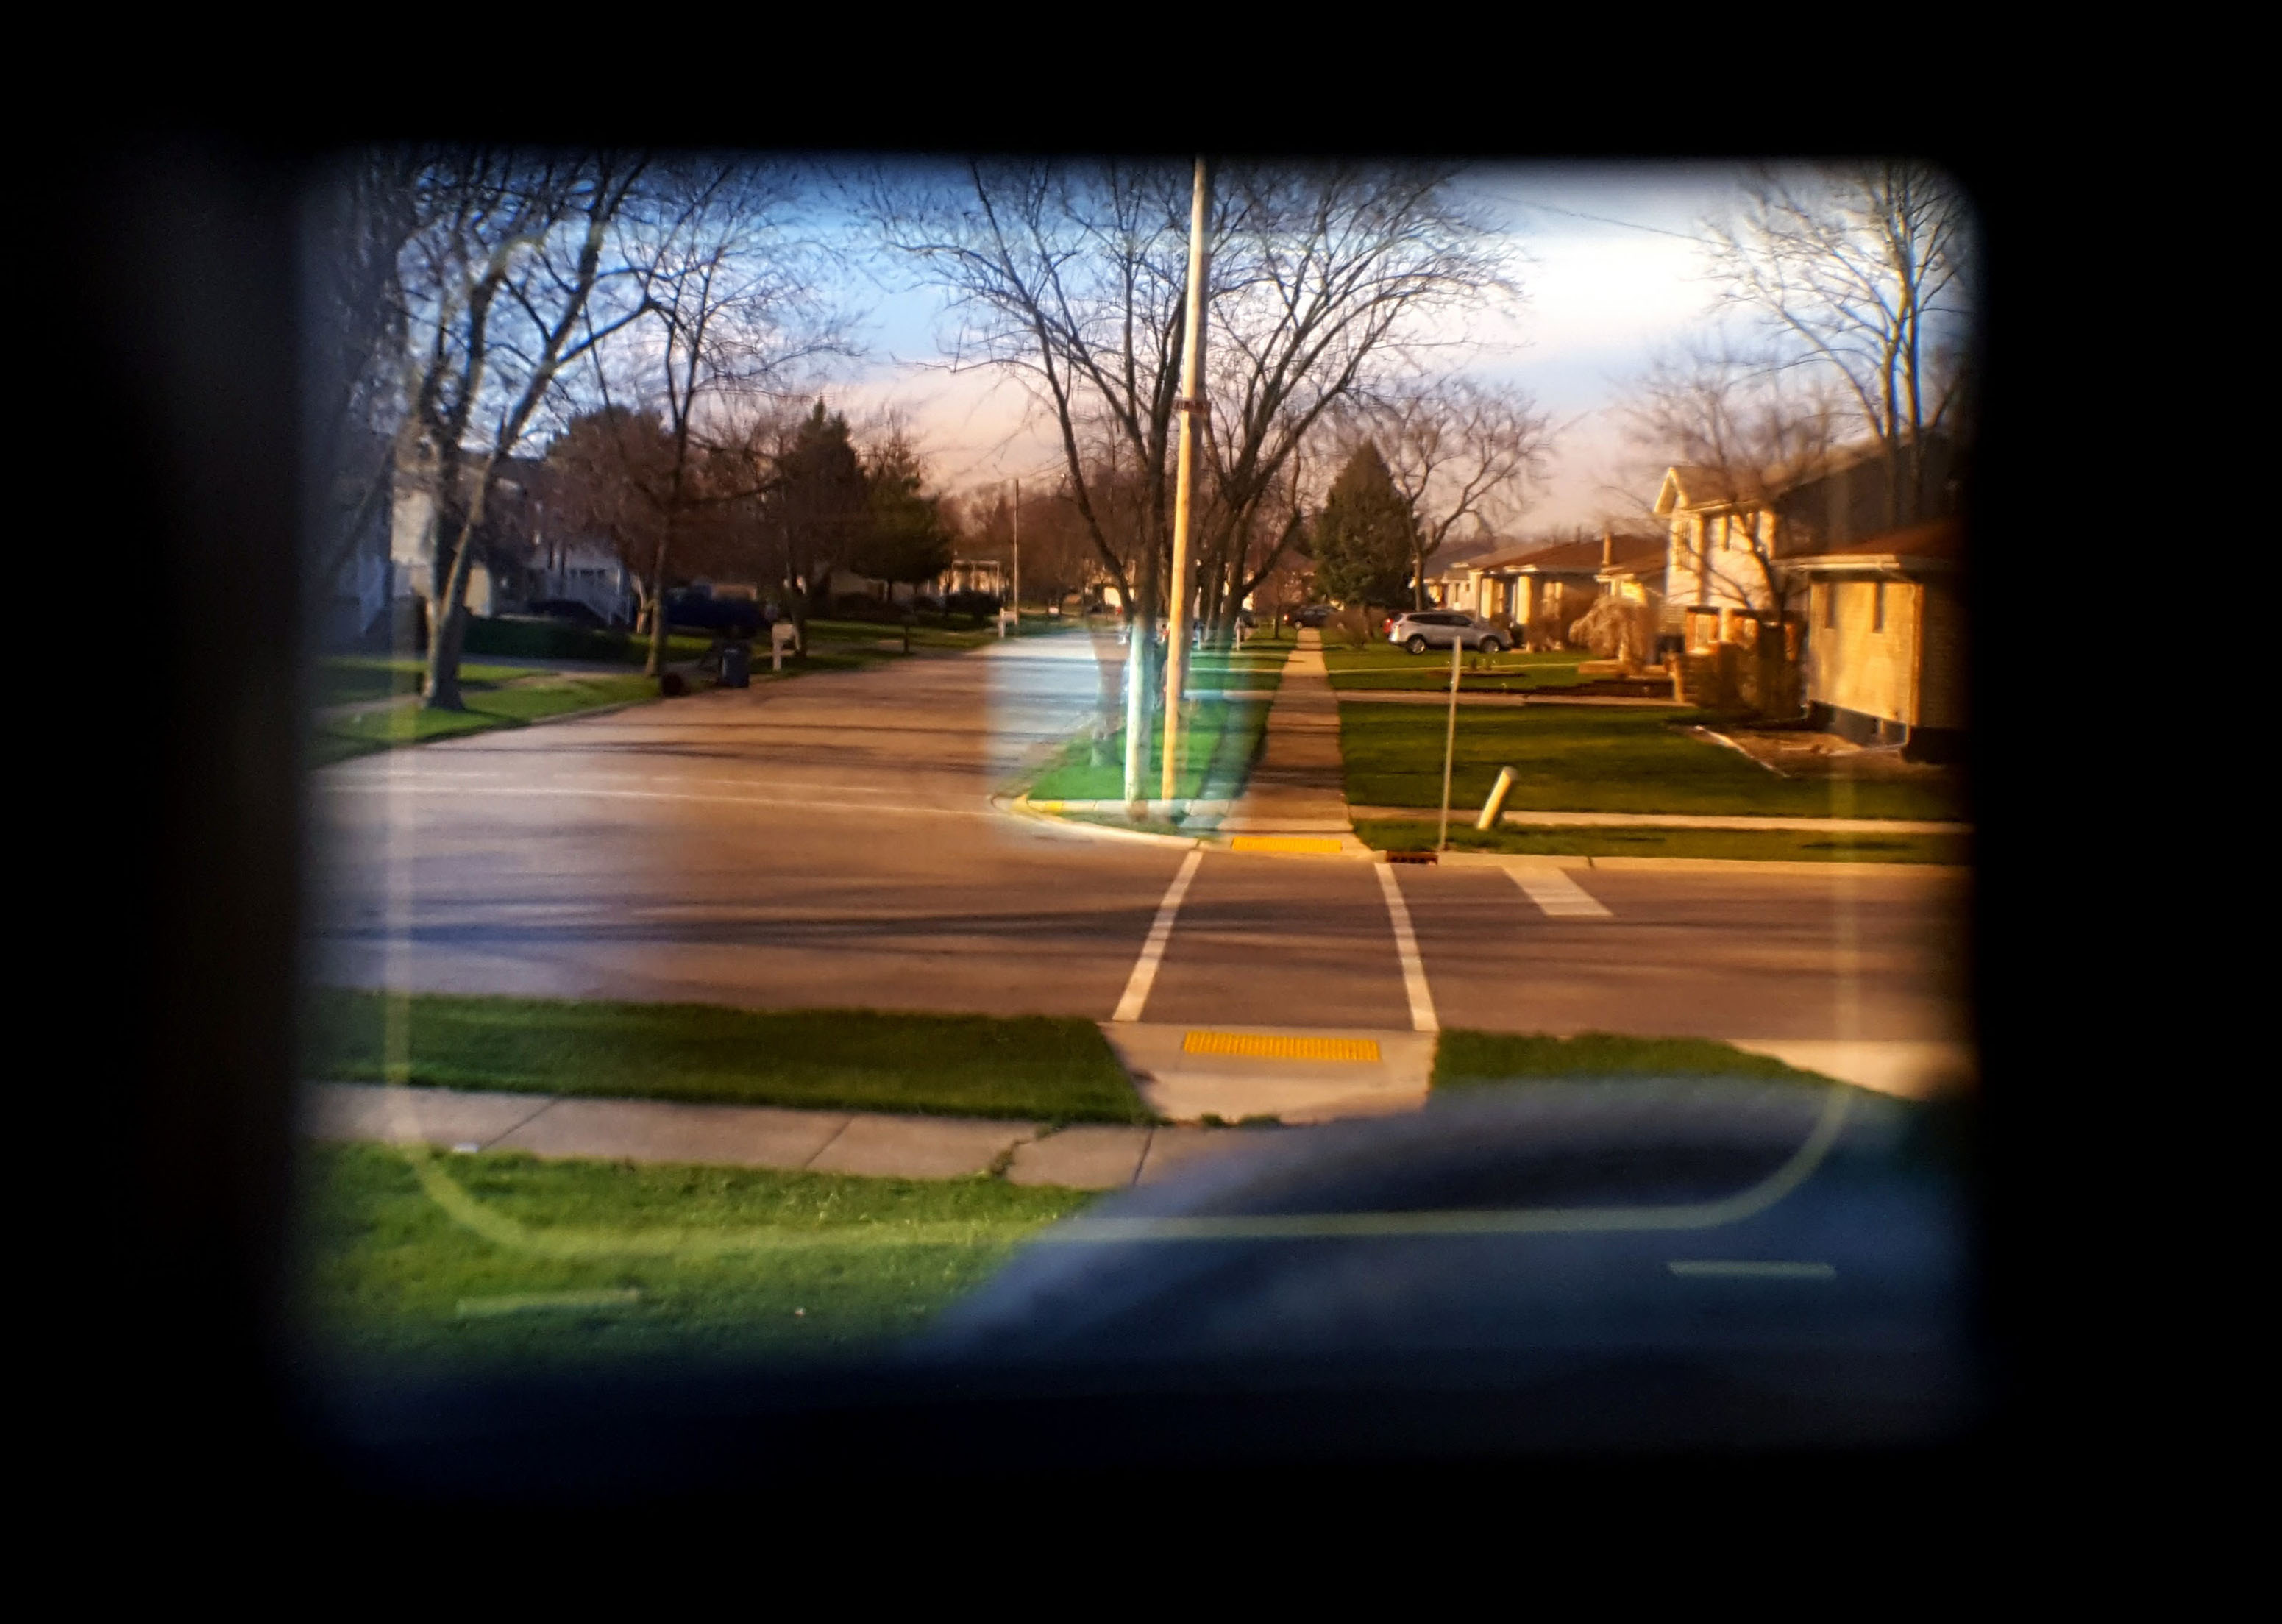
The first patch is an amber colored patch in the center of your image, and then within this patch is the bright rangefinder patch. The darker “outer” patch helps to increase contrast between the main part of the viewfinder and the rangefinder image. While still not as large and bright as a Leica M3, it is FAR more useful than many coincident image rangefinders found on other cameras from the 50s, 60s, and 70s. This thing puts the dim rangefinders in cameras like the Yashica Lynx to shame. There are also projected bright lines indicating the 45mm frame. The bright lines are not parallax corrected, but there are parallax marks for close focus situations. In the image to the left, the brown frame looks like it goes all the way to the right of the viewfinder, but that’s a side effect of how I captured the image using my cell phone. In reality, the brown image is a lot smaller than what you can see in the example I am sharing here, but it still gives you an idea of the excellent contrast between the main viewfinder and rangefinder images.

The Uniomat has a single stroke wind lever on the back of the camera that swings out a full 230 degrees from it’s resting position. This can be a little awkward for people with small hands, but thankfully, it can be done in several small motions, rather than one single one.
With the excellent rangefinder patch and simple exposure system, I took the camera with me on a walk around the block with my son. I figured that the challenges of capturing a moving 3 year old was the ideal test for a camera that was likely sold to parents in the 1960s who wanted something a little better than a cheap Bakelite box camera, but didn’t care for the advanced features of an SLR.
I had the advantage of shooting most of the roll on a bright and sunny day where I had to take a single meter reading and leave it there for most shots. For a few where my son stepped into shade, I would adjust the exposure a little “to the left”. I actually got used to where the exposure ring needed to be for both sunny and shady shots, 15 for sunny, and 12 for shady. According to the user’s manual, 15 means 1/480 @ f/8 and 12 means 1/220 @ f/4. Would these be correct? Who knows!
Overall, I really enjoyed shooting with the Uniomat. I think that for the target audience in the early 1960s who might have wanted an easy to use camera that allowed them the accuracy of a bright and easy to use rangefinder, the reputation of a Rokkor lens, and an easy to use exposure system, this camera accomplishes the job masterfully with only the slightest of compromise. There’s no batteries to worry about, and you don’t need to know a lick about exposure settings to get consistently great photos!
I can wholeheartedly say I that I am extremely thankful I gave this camera another chance and didn’t let it become a Camera of the Dead. This is a wonderful camera that was absolutely worth the effort!
My Results
I mentioned earlier that this Uniomat was the most “far gone” camera I’ve ever been able to bring back. At one point, this camera sat in pieces inside of a Zip-Loc bag in my basement awaiting a Camera of the Dead review, but for whatever reason, I decided to give it one more try and boy, am I glad I did!
Before shooting the camera, I took every precaution I could to ensure the camera was working correctly, and as far as I could tell, it was. I wanted to play it safe with my film selection, so I went the safe route and loaded a roll of Fuji 200 and walked around my house shooting whatever I could see. I tried closeups, motion shots, and nature photos. I was nervous though, how would they turn out?


Fantastic! That’s how they turned out! Not only did the camera work perfectly through the whole roll, since I had to rely on the meter for every shot, I can say the meter is clearly working well too. Working selenium cell meters are not something you can take for granted, but when the camera’s exposure system depends on one, the odds are certainly stacked against you.
The iris-less shutter design clearly worked well too. I shot most of these outdoors in bright sun using EV 15 which means 1/480 @ f/8 and the images came out great! The depth of field and excellent rangefinder made getting accurate focus extremely easy. The 4-element Rokkor lens produced images with excellent sharpness across the whole frame with little to no vignetting, or any other kind of optic anomaly. Color reproduction was excellent as well. While Fuji 200 is generally a vibrant film, I have seen it get washed out with lesser lenses so accurate colors aren’t something you are guaranteed with every roll.
If the Uniomat was aimed as a point and shoot camera for the novice photographer in the early 1960s, I can wholeheartedly say that Minolta did an outstanding job! The Uniomat/Anscoset series had 3 generations and was in production for 5 years. This might not seem like a really long time, but if you consider how fast technology was advancing them, very few models lasted 5 years.
I think the Uniomat is a handsome camera, with an unusual grey body covering, a clean top plate, and a simplistic exposure system that works extremely well. I realize finding one in working condition will be a challenge for others, and I didn’t exactly have an easy time getting this one working, but if you ever come across one that works, snatch it up immediately! This is an outstanding camera. I loved shooting mine and cannot wait to load it again.
My Final WordHow these ratings work |
The Minolta Uniomat is a fantastic camera that on the surface looks just like any other Japanese rangefinder, but in fact, it has a very innovative shutter and exposure system, that while not a true auto exposure system, simplifies the process of getting the correct exposure to the point where absolutely no knowledge of shutter speeds or f/stops is necessary. It has one of the best viewfinders of any rangefinder out there, and with the excelent 4-element Rokkor lens, makes candid snapshots extremely easy. In some ways, the Minolta Uniomat was one of the first true “point and shoot” cameras. Highly recommended! | ||||||
| Images | Handling | Features | Viewfinder | Feel & Beauty | History | Age | |
| 2 | 2 | 1 | 2 | 2 | 0 | 20% | |
| Bonus | +1 for overall excellence, a unique shutter and exposure system, makes the camera very easy and highly capable | ||||||
| Final Score | 11.8 | ||||||
Additional Resources
http://camerapedia.wikia.com/wiki/Minolta_Uniomat
http://camera-wiki.org/wiki/Minolta_Uniomat
http://www.cjs-classic-cameras.co.uk/minolta/minolta.html#uniomat
https://yashicasailorboy.com/2017/03/03/minolta-uniomat-iii/
http://wkoopmans.ca/notebook/?p=8409
http://www.collection-appareils.fr/x/html/page_standard.php?id_appareil=11491
https://www.photo.net/discuss/threads/minolta-uniomat.352499/
Thanks for the review Mike. I have one of these somewhere, as I recall, it gave me excellent images, I must look it out and put a roll through it.
I have this camera, with its leather carry case, a working shutter and working circular selenium meter, though I haven’t put film in it since 1984. Maybe keeping it in its case has preserved it. I was about 8 when my dad got it (we were stationed in Germany), upgrading from our Brownie Hawkeye. I thought his pictures looked like beautiful postcards. It led me to get into 35 mm photography and darkroom work as a teenager, though I quickly got either a Yashica Electro or TL Electro, don’t remember which. Maybe over time I had both, later a used all metal Ricoh, then an Olympus OM-1
I have ALWAYS been in love with the feel and sound of the shutter. of this rangefinder. A gentle squeeze, and the sound is so quiet! I have taken high key pictures of these two cameras (the Hawkey and the Minolta) and though I have purged my possessions countless times over the decades, these cameras are two with which I cannot part. Thank you so much for this post. Reading this put a big smile on my face. It is a beautiful little camera.