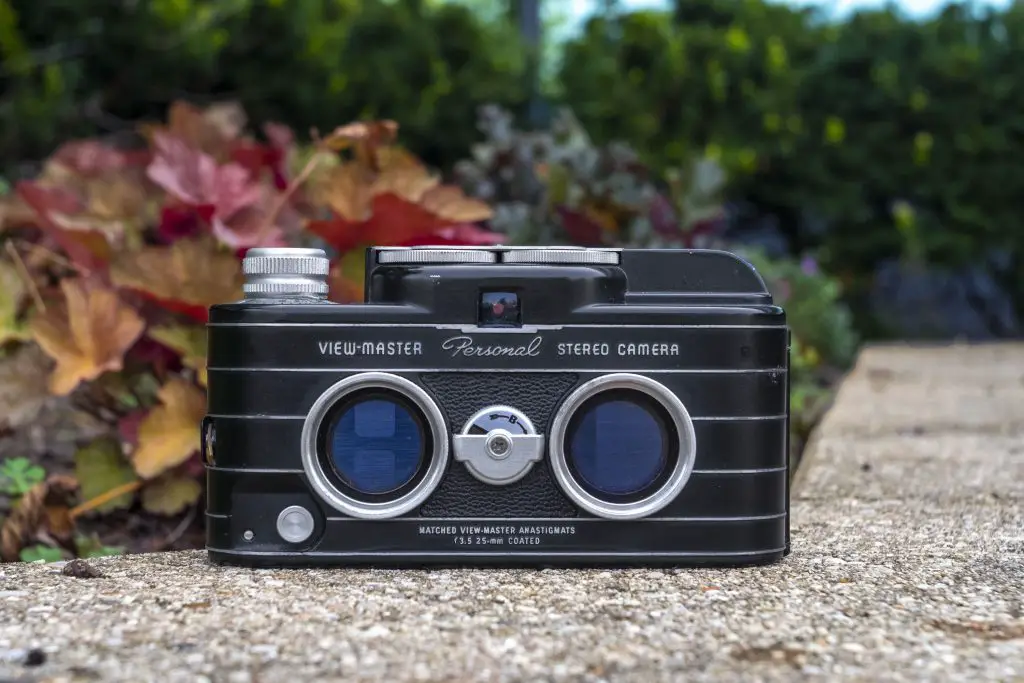
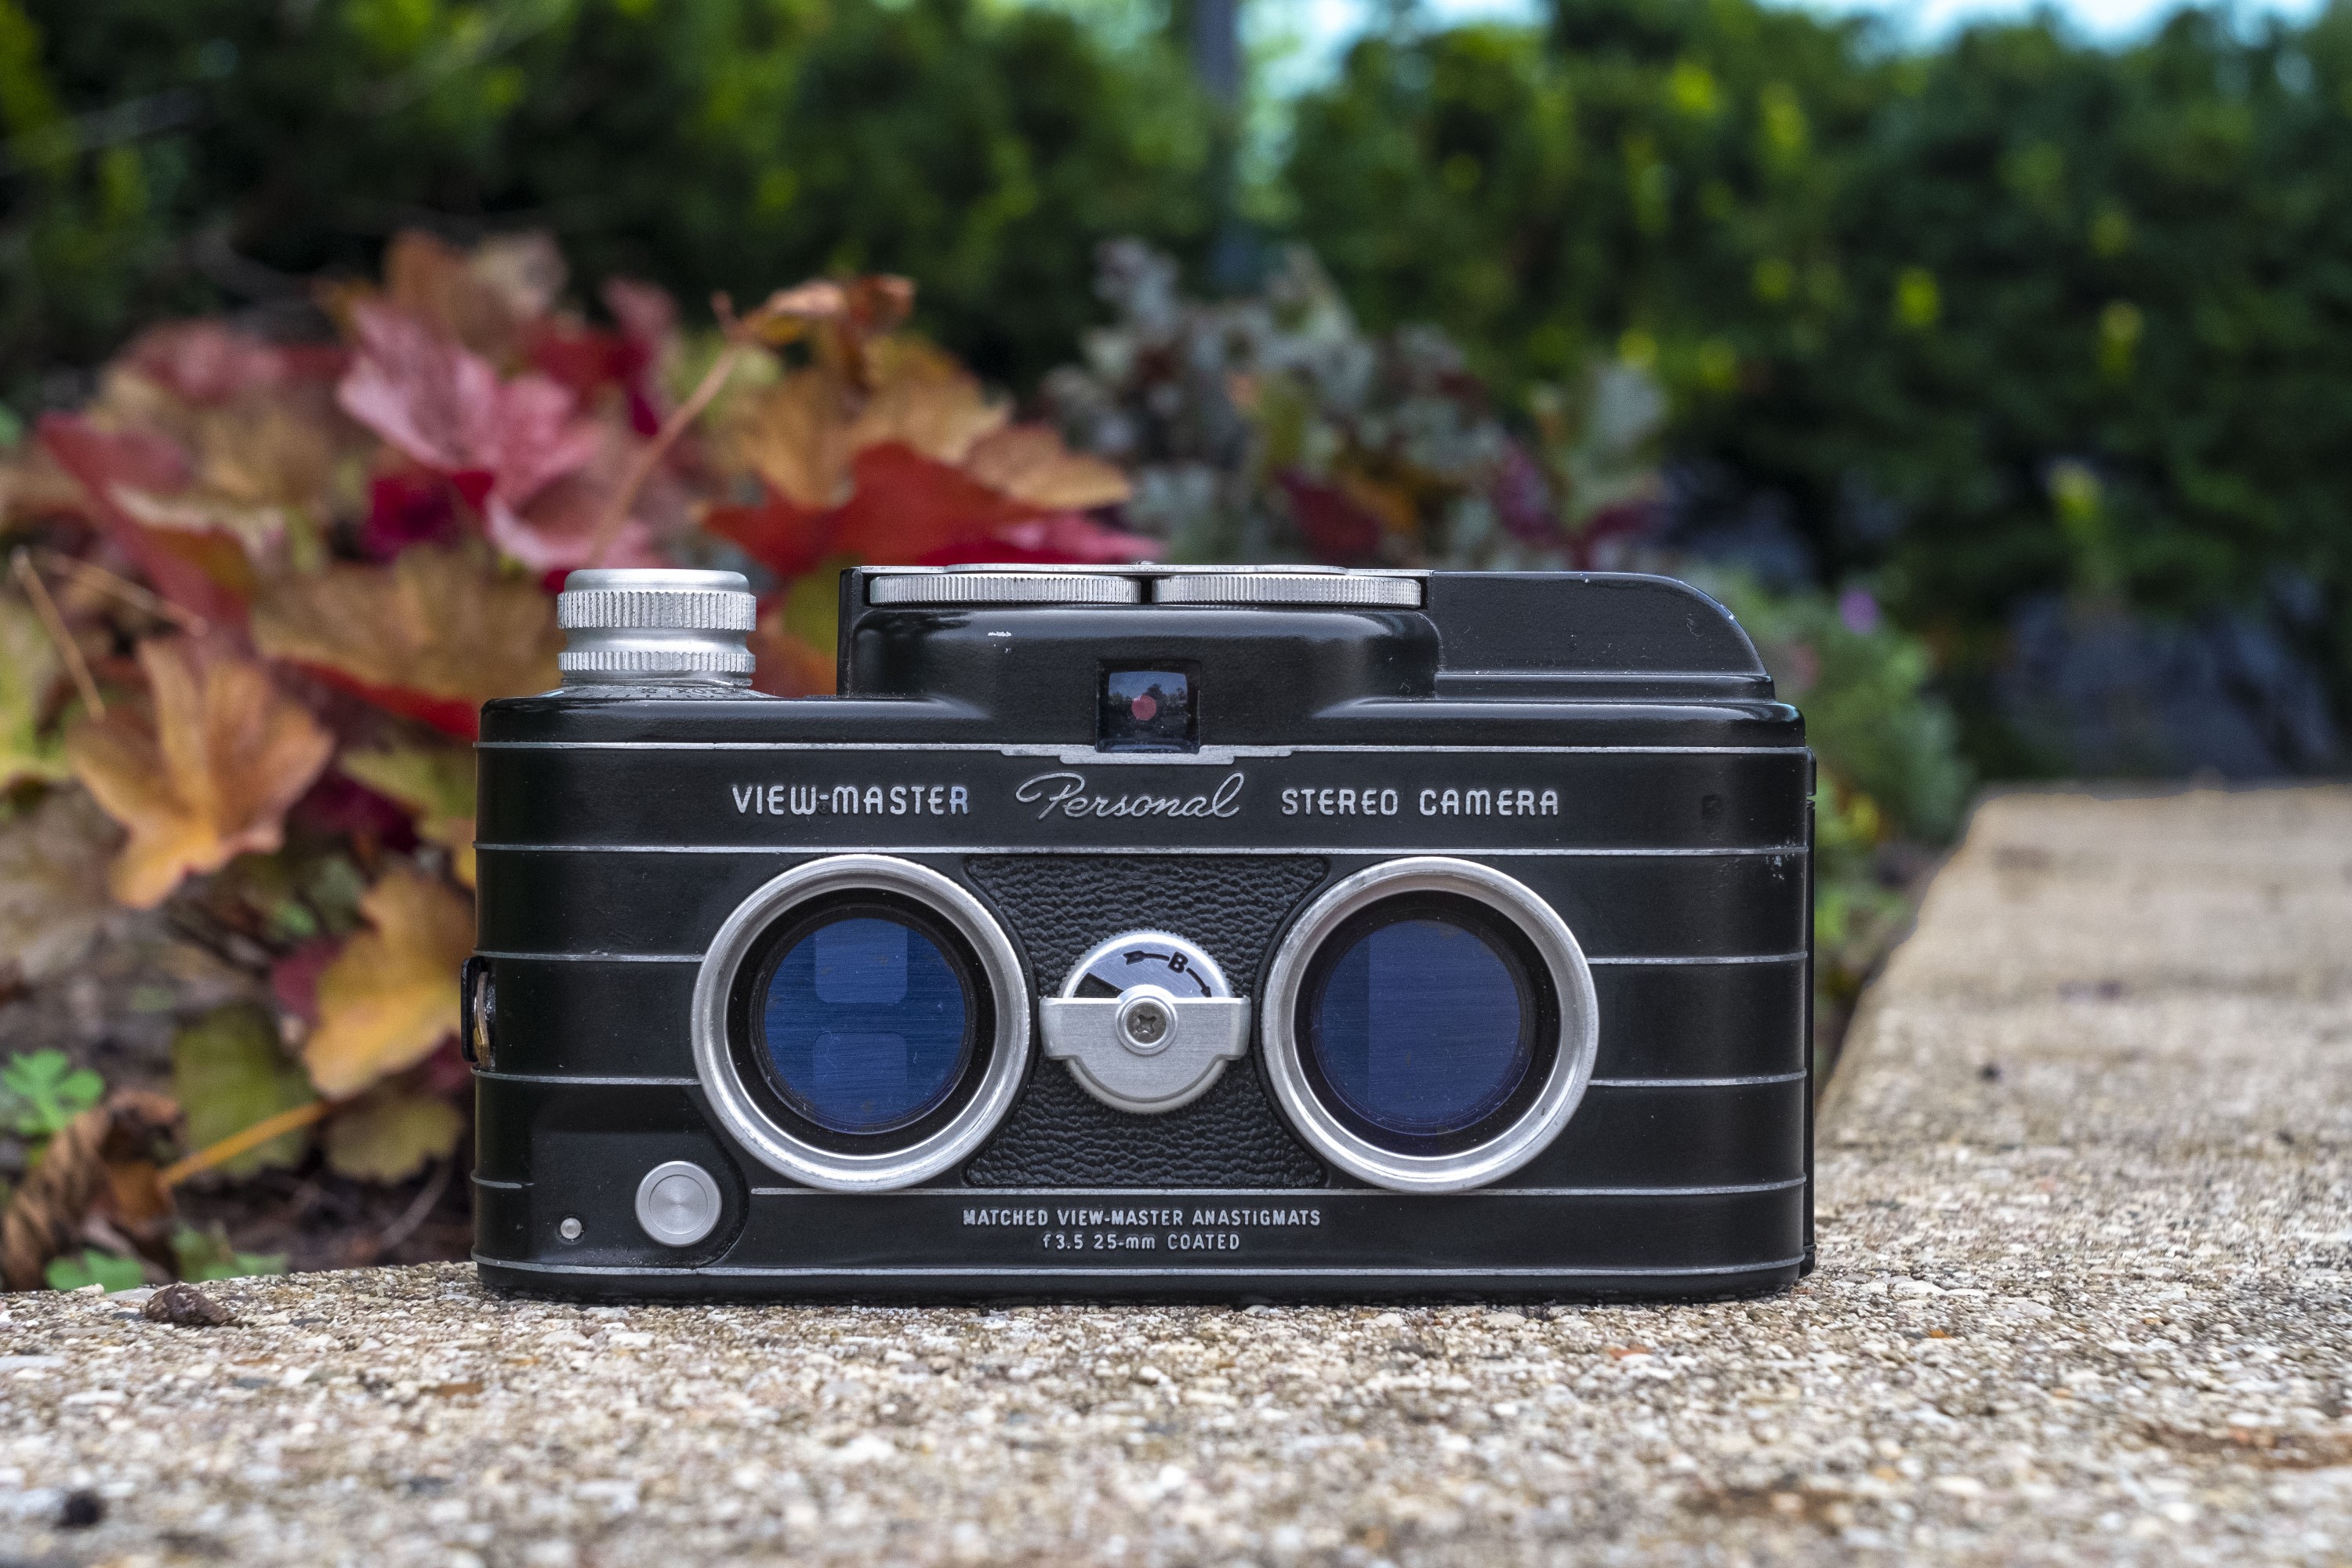
This is a View-Master Personal Stereo Camera, made by Sawyer’s Inc., out of Portland, Oregon between the years of 1952 and 1955. The View-Master Personal Stereo Camera shoots 14mm x 12mm stereoscopic images on regular 35mm film for use in View-Master slides, slide viewers, and projectors. The circular View-Master slides and their red viewers were popular among children throughout the second half of the 20th century and are still being produced today with pre-loaded images showing things such as cartoons or far away travel destinations. The idea behind the View-Master Personal Stereo Camera was to be able to make your own images which could then be punched out and inserted into blank slides for viewing of your own stereoscopic images. A second View-Master camera was introduced in 1962 but production of that model ended shortly thereafter. Use of these cameras remained popular throughout the next several decades with blank slides staying in production until the early 1990s.
 Film Type: 135 (35mm) (up to 69 stereoscopic pairs on a 36-exposure roll of film)
Lens: Twin 25mm f/3.5 View-Master Anastigmats coated 3-elements
Focus: Fixed Focus, Depth of field at f/16 is 4 feet to Infinity
Viewfinder: Scale Focus Reverse Galilean
Shutter: Twin Metal Blade
Speeds: B, 1/10 – 1/100 seconds
Exposure Meter: None
Battery: None
Flash Mount: View-Master Flash Attachment
Weight: 658 grams
Manual: https://butkus.org/chinon/viewmaster_stereo/viewmaster_stereo.pdf
How these ratings work |
The View-Master Personal Stereo Camera was an innovative solution for people wanting to make their own View-Master stereo reels. With a clever exposure calculator and easy to use focus free operation, the camera can make up to 69 stereo pairs on a single 35mm roll of film. With the original film cutter and blank reels, making your own reels was easy, but as a camera, it is impractical to shoot today. The tiny 12mm x 14mm exposures are only good enough for thumbnail quality images, and scanning them for use today is a chore. Still, this was a very cool and gorgeous camera worthy of sitting on any collector’s shelf, just don’t expect to shoot it very often. | ||||||
| Images | Handling | Features | Viewfinder | Feel & Beauty | History | Age | |
| 1 | 1 | 1 | 0 | 2 | 1 | 30% | |
| Bonus | +1 for one of a kind uniqueness, no other camera is like it | ||||||
| Final Score | 8.8 | ||||||
History
The history of stereoscopic photography is almost as old as photography itself, dating back to the early 19th century as early photographers strove to recreate images that when viewed through a special stereoscope, would recreate depth perception in still images, similar to how our own eyes work.
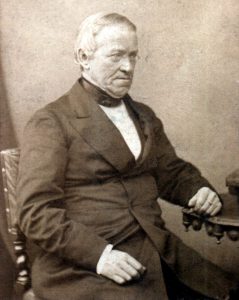
The man most commonly cited as the inventor of stereoscopy is Sir Charles Wheatstone, who in 1832 invented a variety of “Wheatstone Stereoscopes”, some using reflecting mirrors, and others using prisms. Wheatstone’s original scopes used hand drawings rather than photographic images, and had the pair of images opposed from each other facing towards twin 45 degree mirrors or prisms.
Stereoscopy would remain a popular field of study throughout the 19th century as a variety of other inventors such as David Brewster and Oliver Wendell Holmes improved upon the concept first by placing the two images side by side instead of 180 degrees apart, and later making the technology more portable and easy to use.
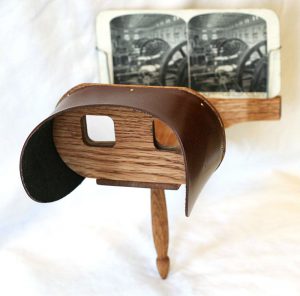
Variations on the Holmes stereoscope became extremely popular in the late 19th and early 20th centuries as building them was very easy. Consisting of nothing more than a wooden frame and two prismatic lenses, building a stereoscope was easy, but creating the images to go in them was a bit more difficult.
Early cameras of this time were very large and heavy, and had slow shutters and even slower film emulsions. In order to create a realistic stereoscopic image, two separate lenses with two separate shutters needed to be spaced apart approximately the same distance as two human eyes, and needed to be triggered simultaneously and with the same shutter timings so as not to have two images with differing exposures.
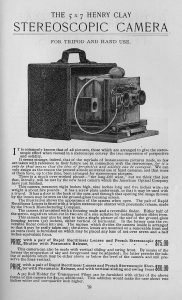
The earliest stereoscopic cameras were essentially just two regular cameras built close together and triggered with a single shutter release linkage. Cameras like the Henry Clay 5×7 Stereoscopic Camera to the left were featured in photo galleries all over the world. Manufacturers from the United States dominated early stereo cameras, but German companies like Voigtländer, ICA, and Franke & Heidecke churned out cameras like the Stereflektoskop, Polyscop, and Heidoscop continued to refine the art of the stereo camera into higher quality and smaller packages.
In the 1930s, a photo finishing company in Portland, Oregon, USA called Sawyer’s Service, Inc had gained some popularity with a line of scenic postcards that they successfully marketed to department stores and other photographic dealers across the United States. Sawyer’s postcards often featured color images of the Grand Canyon and Carlsbad Caverns.
In 1938, company president Edwin Mayer met a German organist and photographer named William Gruber who had created a stereoscopic rig using two Kodak Bantam Specials connected together to produce stereo slides using Kodak’s new Kodachrome slide film, first introduced a couple years earlier. Gruber had proposed a new system using smaller 16mm Kodachrome film that when used in a special viewer could show multiple stereo pairs in a single slide.
By the next year, at the 1939 New York World’s Fair, the first View-Master system was introduced as a result of that Gruber and Sawyer’s collaboration. View-Master slides came on a paper circular disc with seven stereo pairs, that when used in a special View-Master viewer would rotate, allowing the viewer to see a stereoscopic image through the Kodak slide film using natural lighting.
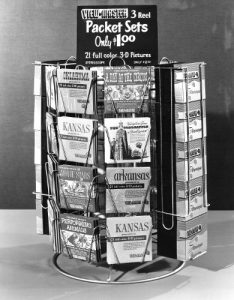
The new View-Master system was patented in 1940 and within a short period of time, replaced Sawyer’s postcards as their best selling product. Initially, only commercially available View-Master slides were available, featuring scenic vistas and children’s cartoons. During World War II, impressed with the ability to show high quality stereoscopic images using a compact viewer, the US military purchases 100,000 viewers and nearly six million reels for training purposes.
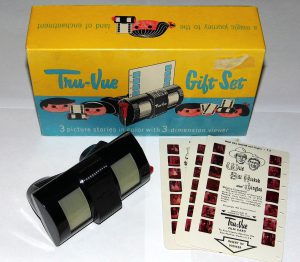
In 1951, Sawyer’s purchased a Chicago company called Tru-View which was the View-Master’s primary competitor, offering a similar arrangement of seven stereo pairs on rectangular, instead of circular cards. This acquisition not only eliminated the company’s biggest competitor, but it allowed them to take over Tru-View’s licensing deal with Disney, allowing them to use Disney characters in their slides. This paid off even further in 1955 with the opening of Disneyland, allowing them to sell View-Master “virtual tours” of the park to those who couldn’t make it there.
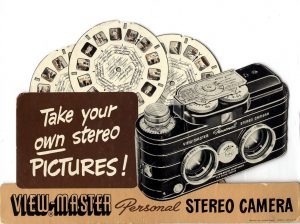
Until this time, all View-Master slides were commercially produced, but in 1952 the company created the View-Master Personal line, which included a View-Master camera, film cutter, home projector, and a line of blank slides allowing anyone to create their own View-Master slides to show off to their friends and family.
Construction of the new View-Master Stereo Camera was done by Stereocraft Engineering, a separate company that would be later acquired by Sawyer’s in 1956. In addition to their work with Sawyer’s, Stereocraft also produced a camera for the Three Dimension Company called the TDC Stereo Vivid which was sold by Bell & Howell in the 1950s,
The View-Master Personal Stereo Camera used regular 35mm slide film, but the manner in which it made the View-Master’s 12mm x 14mm exposures was quite clever. When a new cassette of film was loaded into the camera, the user would advance the film past the leader and start shooting stereo pairs only on the top half of a roll of film. The photographer would continue making exposures on the top half of the film until they reached the physical end of the roll of film. A knob on the camera’s front, between the two lenses was marked “A” and “B” and when rotating to the “B” position, would physically move both lenses and shutters into a position to be able to make more exposures on the bottom half of the roll of the film. Turning the knob to the “B” position would also reverse the film transport, in essence rewinding the film back into its cassette as you shoot more stereo pairs. Upon reaching the beginning of the roll of film again, the film would already be completely rewound into its cassette, ready for developing. Using a standard 36 exposure roll of film, you could make up to 69 stereo pairs depending on how efficiently you loaded the film.

Once the roll of film was shot, you would send it in for regular developing at any lab that could handle color slide film, but would instruct the lab not to cut the negatives. The roll of film would be returned to you, fully developed, with all the stereo pairs contained on the strip of film. Then, using a View-Master film cutter, you would manually cut out each stereo pair and manually load them into blank reels.
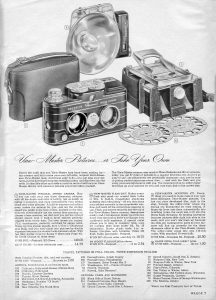
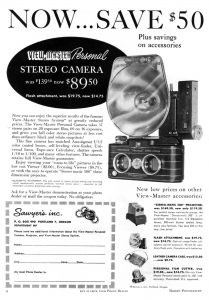 In their 1952 catalog, the American retailer Montgomery Ward’s listed the View-Master Personal Stereo Camera with a price of $149.99. For everything in the catalog, you’d need to add $14.75 for the ever ready case, $19.75 for the flash, and $20 for the mounting kit. Additional reels were sold in packs of six for $1 each. When adjusted for inflation, these prices compare to $1450, $192, $195, and $9.73 respectively.
By August 1955, around the time Sawyer’s ended production of the camera, the company was liquidating the camera for $89.50 and the flash unit for $14.75.
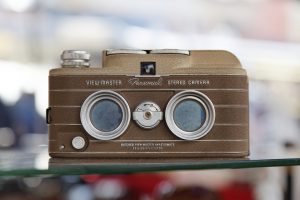
Although most View-Master cameras were painted black with bare metal pin stripes, a tan version also existed and is highly collectible today.
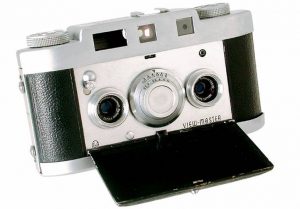
Around 1954, an upscale prototype View-Master camera was built by Dr. Eugen Armbruster for Apparate & Kamerabau in Germany which had rangefinder focusing, an exposure meter, and Schneider Kreuznach Radionar lenses. The camera was never built, instead being simplified without a rangefinder or meter.
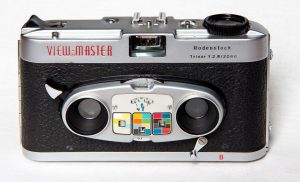
The simplified model was going to be put into production around 1956, but internal turmoil at AkA caused the product to be shelved. AkA would eventually go bankrupt in 1960, and when that happened, Armbruster took his designs to King where the camera was eventually released in 1961 as the View-Master Stereo Color Camera.
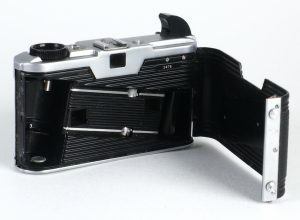
The new camera shared the View-Master name and made the same 14mm x 12mm exposures, but everything else about the camera was different. It still used regular 35mm film, but it traveled through the film compartment diagonally so that the images could be shot on both the bottom half and top half of the film at the same time which eliminated the need to shoot the top half of the roll, then reverse it and shoot the bottom half. This not only simplified construction of the camera as the lenses and shutters didn’t need to move, but it also eliminated gaps in the exposures, resulting in more stereo pairs per roll. Because of this new arrangement of exposures on the film, the new camera required its own film cutter as it was not compatible with the cutter made for the original model.
View-Master reels and viewers soared in popularity throughout the rest of the 20th century, however sales of the cameras were slow. In my research for this article, I never found any information about production numbers, but I have to imagine that not too many people were willing to go through the effort of shooting their own images, getting the film developed, and then getting the cutter, and some empty reels, and loading them.
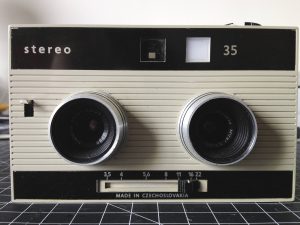
Despite slow sales, the Czech optics company Meopta produced their own version of the View-Master Stereo Color camera which used the same diagonal film transport as the second model. Their camera, simply called the Meopta Stereo 35 was first sold in 1972, but I was unable to find any information about when it was discontinued.
Today, the View-Master Personal Stereo Camera is highly sought after by both camera collectors and fans of the View-Master system itself. Despite being discontinued half a century earlier, Sawyer’s and the companies who would eventually acquire the rights to it, would continue manufacturing blank reels and an underground market of people seeking out these cameras to make new reels has been strong.
Even for those who have no interest in making their own View-Master reels, the camera itself has a beautiful and distinct look that makes it a desirable addition to any collector’s shelf. Finding these cameras in good condition, especially with the film cutter and other accessories can be very expensive.
My Thoughts
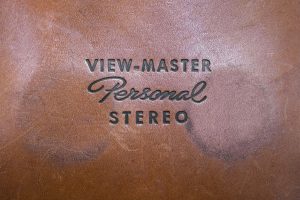
There have been many purpose built cameras made over the years. Cameras have been made, or adapted for use with microscopes, oscilloscopes, for dental use, and even for taking pictures of distant galleries. As you might image, each of these cameras requires a little more understanding of its operation than something like say a Pentax Spotmatic or a Yashica Electro in which you can just load in some film (and a battery) and start shooting.
The View-Master Personal Stereo Camera is no different. When I first picked this camera up in a resale shop near my work, I initially thought shooting it would be as easy as any stereo camera. Load in some film, set the exposure, and press the shutter release and I’ll capture two images of the same thing.
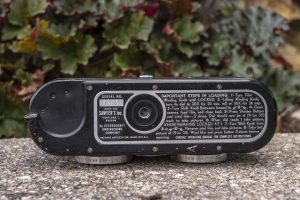
While the camera wasn’t designed to be complicated to use, it is different enough from your typical 1950s camera that a refresher of the manual is definitely something you’d want to do before using one of these cameras. If you don’t have access to the manual, thankfully Sawyer’s printed most of the more important instructions on the camera’s bottom starting with how to load the camera.
Although the View-Master camera uses regular double perforated 35mm film, special care must be taken to ensure that the entire length of the film can be properly shot. This involves making sure the front “A/B” knob on the front is in the correct position and the exposure counter is set to help remind you how many exposures you’ve shot.
The top plate continues with some instructions, this time for setting the correct exposure. Although lacking in any sort of exposure meter, the View-Master camera has a clever exposure calculator in which a rotating dial is coupled to both the aperture and shutter speed wheels. By setting the inner wheel of the calculator to a film speed between 5 and 100 and aligning it with the Winter or Summer mark, and then pairing up the available light conditions by rotating either the shutter speed or aperture wheels, you can obtain correct exposure based on the calculator’s recommendations.
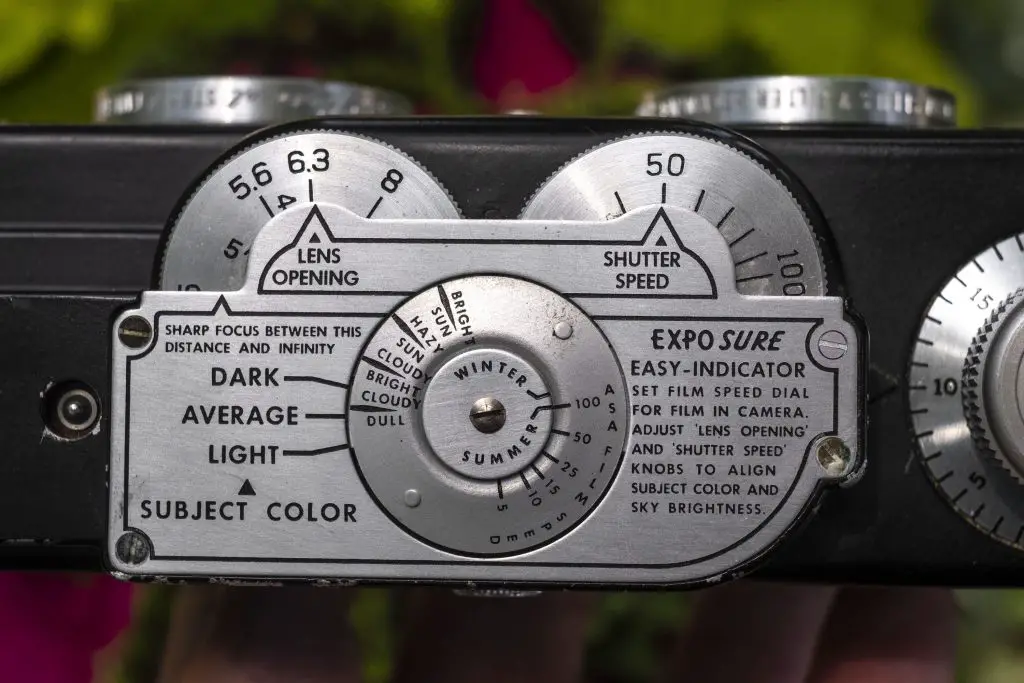
While clever, I ended up using Sunny 16 during my trial roll of film through the camera. It is worth noting though that this camera was primarily used with Kodachrome slide film, which had far less latitude than typical C41 negative color film does today, so getting the exposure right was much more important for original users of this camera.
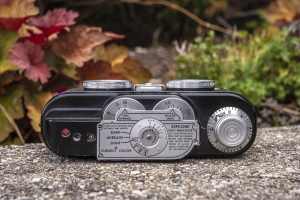
To the left of the exposure calculator on the camera’s top plate is a small hole with a red X which rotates as film advances through the camera. Since the View-Master camera lacks a rewind knob, there is nothing to help you see that film is advancing through the the camera, so the red X comes in handy. To the right of the X is a screw hole and flash contact which is used with the View-Master camera’s proprietary flash gun.
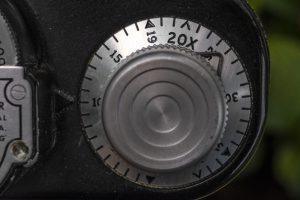
On the other side of the camera is the combined film advance knob and exposure counter which requires a bit of explaining too.
In the image to the left, you’ll notice a metal wire triangle pointing to the 26th exposure on the counter. This triangle can be moved to any position on the counter and is intended to be used as a reminder of when you’ll need to switch from shooting on the top half (side A) to the bottom half (side B) of the film. The counter goes up to 36 with extra markings of “20X” and “36X”. These are where you’d move the triangle if using a 20 exposure or 36 exposure roll of film. The reason these marks aren’t exactly at the numbers 20 or 36 is to account for two extra advances of film for the film leader.
When loading in a 36 exposure roll of film, set the mark to the 36X position. After closing the film door, advance the film two exposures until the counter is at 1. Shoot 36 exposures and when you reach the end of the film, you turn the front knob from “A” to “B” at which time you have to rotate the film advance knob in the opposite direction, counting down towards 1 again. It is a bit confusing to type, but think of it, that on side A of film, you’re counting up, and on side B, you’re counting back down as you rewind the film back into the cassette. Once you get back to “1”, do not keep shooting, otherwise you risk exposing the already exposed film leader.
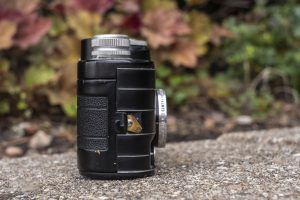
Opening the camera requires rotating the metal lock on the camera’s right side to release the door. On my example, this lock was extremely tight and difficult to move. I can only imagine this is a result of age, and that when these cameras were newer, it wasn’t as difficult.
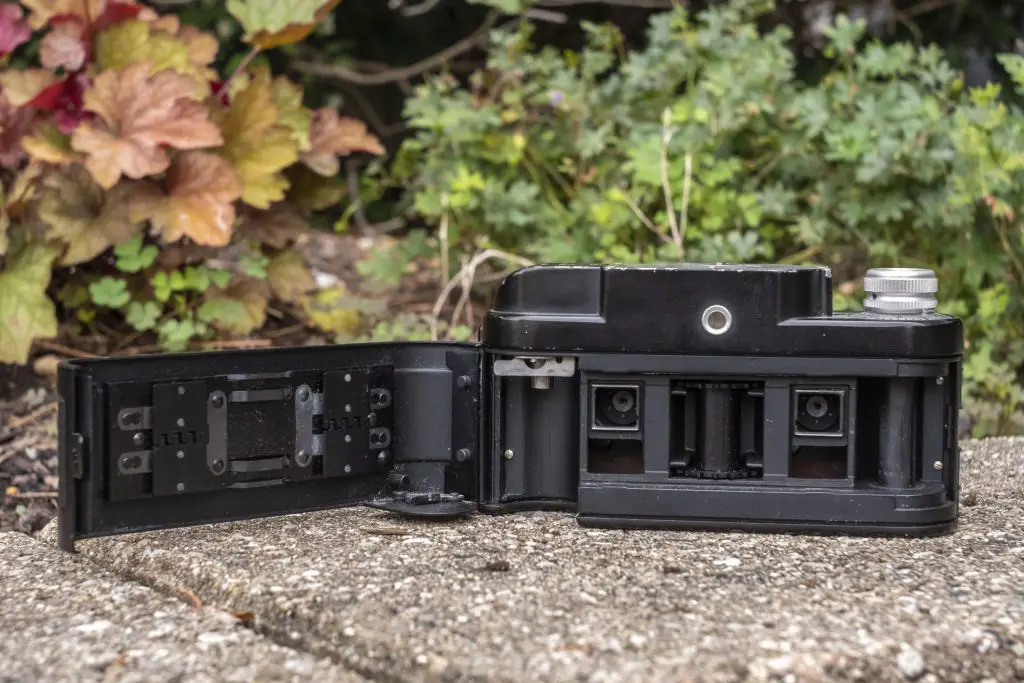
Once you have the left hinged door open, the film compartment of the View-Master camera looks like no other.
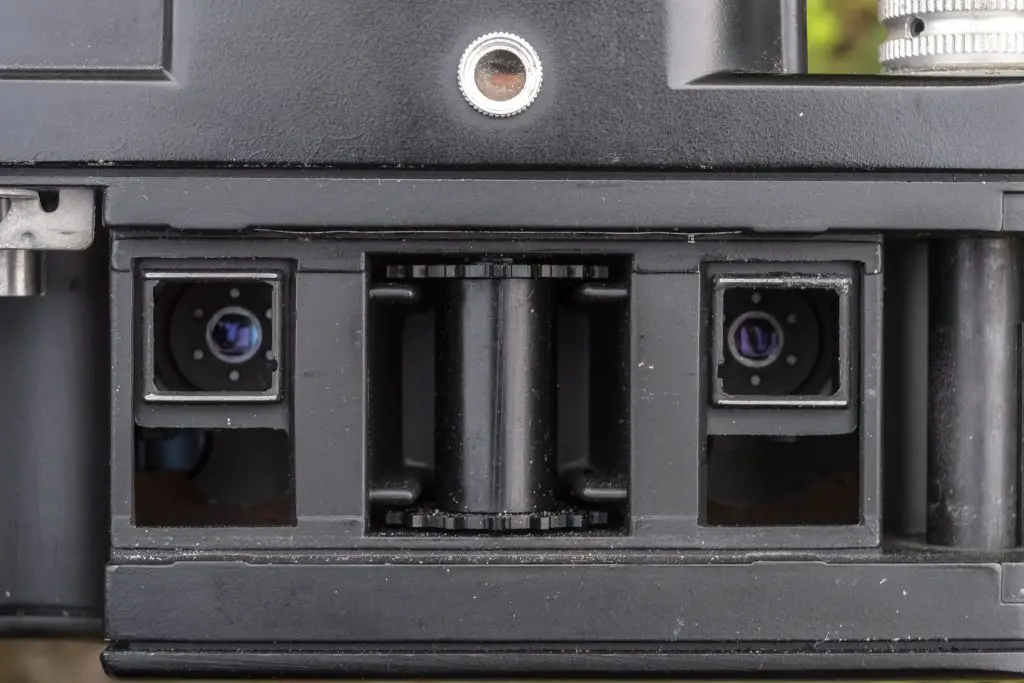
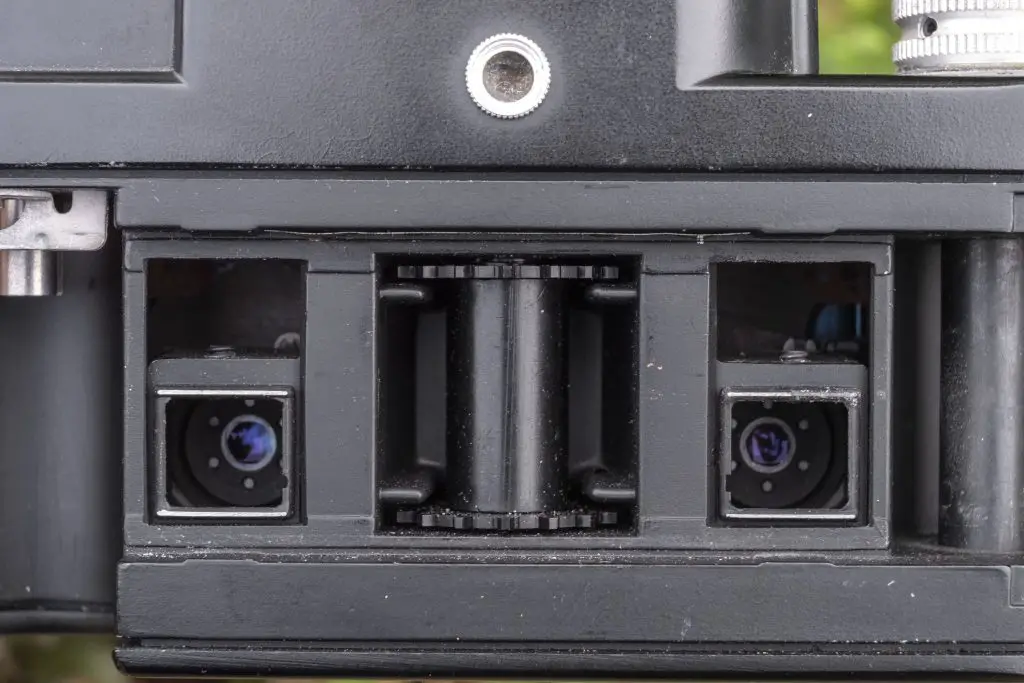
It is here where you can most clearly understand how the “A/B” modes of the camera work, showing a pair of tiny lenses and shutters in their own vertically traveling compartments. To make room for the stereo images, the film gate is a lot wider than that of a normal 35mm camera. Film travels from left to right onto a fixed and double slotted take up spool. A cylinder with sprockets is in the middle of the lenses for the exposure counter.
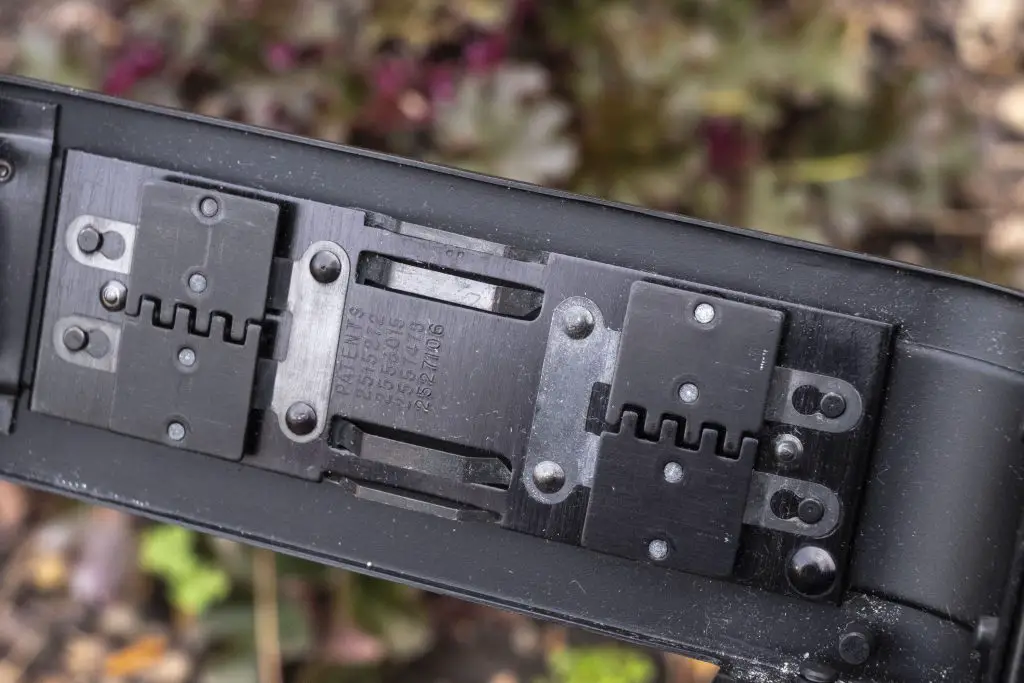
The inside of the door has two separate pressure plates, one for each lens, with a zigzag pattern between the top and bottom halves, allowing the pressure plate to flex a bit when the lenses are being moved from the A to the B position. It is all cleverly packaged in a way that accomplishes everything a normal 35mm camera would need, while working within the View-Master camera’s requirements.
Loading film into the camera is the same as any other 35mm camera, just with a longer film gate and the toothed sprocket wheel in the middle. When this camera was new, Sawyer’s recommended either Kodachrome or ANSCO Color Slide film. You could use whatever film you wanted, but it needed to be compatible with the camera’s limited 1/100 top shutter speed, and it had to be slide film if you wanted to use it with a View-Master viewer.
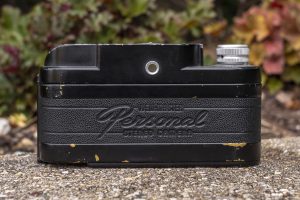
The back of the camera is where you’ll find the circular opening for the viewfinder and an elegant Kodak Retina-esque embossed logo into the rear body covering.

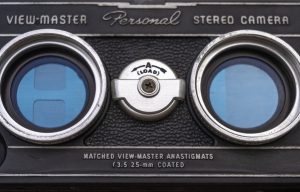
The most eye catching part of the View-Master camera’s design are the two blue tinted “lenses” on the front of the camera. I put lenses in quotes as what you see isn’t really the lens, rather the blue metal blades of the shutter behind a glass window. Around each window, the camera is threaded to accept Series V filters. Although removable, View-Master cameras are almost always found with the Series V retainer screwed into the body of the camera. With the shutter not cocked, you can see two squares for the lens opening in the left window, but after cocking the shutter, these squares move toward the middle.
The shutter release is the circular button near the 7 o’clock position around the left window, and pressing it makes a clockwork sound reminiscent of a slow speed governor, except on the View-Master, you hear it at all speeds. I’ve never seen one of these cameras disassembled before, but I have to imagine there’s some sequence of gears that allow both shutters to remain synced which makes this sound.
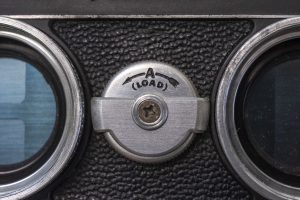
Finally in between the two windows is the “A/B” dial which when rotated, both moves the lenses and shutters up and down within the film compartment, and also changes the direction of the film advance knob.
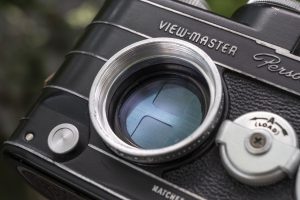
When it is time to make an exposure, the shutter release is located in the bottom left corner of the camera’s front. In use, it is easy to reach with your right index finger, but its location is not instinctive to someone who has never used this camera before. After a few exposures into my first roll, I never struggled to find it, it is peculiar. Perhaps the most unique aspect of the shutter release, isn’t in the button itself, but in the sounds the camera makes when the shutter is firing. Even at the camera’s top shutter speed, the sound of clockwork gears spinning, like as if the self timer was running are cool to hear, but definitely eliminate any level of discreetness you’d have with this camera. I have to imagine at least one parent getting the stink eye shooting stereo slides of his daughter’s dance recital!
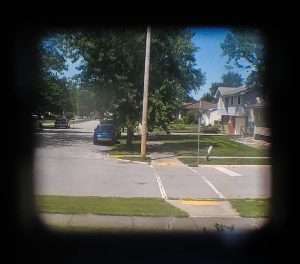
The viewfinder is just a straight through square window with no frame lines or exposure information of any kind. The only noteworthy thing I can say is that it gives a rather approximate view to a normal 50mm lens on a full frame camera, despite shooting very small 14mm x 12mm images.
Despite the word “Camera” being in the View-Master Personal Stereo Camera’s name and it having all of the necessary parts of a camera like a shutter, lens, and film, this isn’t just any camera. This is a specialized tool created for one specific purpose and although I had no intention of ever shooting it and making View-Master reels, I still wanted to see what the experience was, and see what kinds of images I could get from it by scanning the tiny negatives into my computer.
My Results
Normally when I test out a camera, I try to pair up where I am going to shoot the camera with a type of film that might work to those strengths. If I’m out shooting in the dead of winter or during an overcast day, I’ll choose a faster black and white film. In the spring or fall, I’ll likely pick more vivid films like Kodak Ektar. For general purpose shots, I usually fall back on Fuji 200, or something predictable.
With the View-Master Stereo Camera however, being such a purpose built camera, I struggled in how I would use it. I knew I would never cut and mount the images into View-Master reels, for that I would have needed to use slide film which I don’t have the chemicals to develop myself. Even if I wanted to scan these images as stereo pairs, additional care would have needed to be taken to ensure I shot images that worked well with a stereo viewer.
In the end, I decided just to use the View-Master Stereo Camera as a regular point and shoot, capturing moments of everyday things I saw, and hope for the best. After all, it is likely most people who would have bought this camera probably used it in the same way.
Using the View-Master Stereo Camera as a point and shoot isn’t that hard as it was meant to be simple. The camera is focus free with the only thought required for sharp images is to not get too close to your subject. The top dial has a minimum focus indicator which varies depending on which f/stop you’re using. Wide open, you need at least 7 feet of space, but stopped down you can get as close as 4 feet.
As I mentioned above, had I been using this camera to actually make View-Master slides, an additional challenge would be to find things that benefit from a stereo image, such as a portrait or still life of something 8-12 feet away. Since that wasn’t an issue for me, the only challenge that remained is finding enough things to shoot up to 69 images of. I only used a 24 exposure roll in the camera thankfully and not a 36, but like happens with half frame cameras, it can sometimes be a challenge to finish the roll with so many exposures.
The film loaded in this camera sat in there for nearly 2 months as I would take it with me here and there to capture every day shots. With the limited range of shutter speeds, I mostly shot it outside, and knowing that the small negatives would not have a ton of resolution, I didn’t take the camera with me to get any type of memorable shots.
I won’t say the shooting experience was bad, if anything it was cool to hear the clockwork noises of the shutter firing, but when you’re out and about with the View-Master Stereo Camera, you will never forget that this is not just a normal camera and that it was built for a very specific purpose.

I felt a sense of relief when I finished the roll of film, and developing it was no different than any other roll of C41 film, but the biggest challenge with using this camera came in scanning its tiny 14mm x 12mm images. Since there’s no straight line to cut the film, you need to zig zag around images when cutting a length of film to fit in the film holder. The film fit into my Epson film holder fine, but I had to scan entire strips in all at once and start cropping images in Photoshop. Although I made no attempt to scan in stereo pairs, had I wanted to, doing do would be difficult because images from other stereo pairs get in between others, so additional effort is required to find the other half of your stereo pair.
With all of my belly aching out of the way, I can say that the images did come out better than I had anticipated. The quality of the images definitely suffer from the smaller negative, but they’re not THAT bad. When viewed on a cell phone or as a thumbnail in this article, there’s a decent amount of detail. Exposure seemed pretty good, suggesting the shutter timings on my camera were still working correctly. The twin View-Master Anastigmats show a noticeable amount of vignetting near the corners, giving the images a cool “lo-fi” look. Sharpness was hard to tell as grain was so prevalent in my sample roll, but focus wasn’t an issue. I never attempted any close-ups with the camera though, so I really didn’t expect to see any out of focus shots.

The View-Master Stereo Camera is very cool. Not only is it attractive with its all black pinstriped body and gorgeous blue “lenses”, the camera has a really clever exposure calculator on top of the camera that I wish other companies would have used. Although some familiarity with the user manual is a requirement before loading and using the camera, once you’ve learned its controls, shooting it is simple. Assuming you work within the exposure limits of whatever film you have in it, depth of field is so great, focus is not something you really need to be concerned with.
Finally, the images that the camera makes are definitely good enough for the purpose it was meant for. When Edwin Mayer and William Gruber first thought up the View-Master system, there’s no way they could have imagined that people 80 years later would be viewing images on high resolution 4K LED computer monitors, so the fact that I got anything at all, is impressive.
That said, this is an impractical camera to shoot today. If you really like strange cameras that require you to jump through hoops at nearly every step from loading film to scanning in your developed film, then by all means, go ahead and shoot one. But I suspect anyone who already has one of these in their collection, or is considering buying one, will just place it on a shelf and admire its beauty and history, just like I will after this review is complete.
Related Posts You Might Enjoy
External Links
https://en.wikipedia.org/wiki/View-Master_Personal_Stereo_Camera
http://camera-wiki.org/wiki/View-Master_Personal
https://www.viewmaster.co.uk/htm/camera.asp
https://www.pacificrimcamera.com/pp/viewmasterproto.htm
http://www.vmresource.com/camera/camera.htm
http://www.jollinger.com/photo/articles/view-master-system.html



I found a deal on a brown one, and found the (rather expensive) currently on eBay. Finally found some blank reels, I just put a test roll of black and white in to test the function of the camera, then if all goes well, I’ll shoot some Ektachrome.
I found this amazing TV episode showing production at the Sawyer’s factory …
I have a broken one – but it came with instructions. Seemed pretty complicated! I’d be interested in a whole outfit so I could make some viewmaster discs!
The Expo – SURE calculator: That’s genius!
Noah Henderson of “Analog Resurgence” on the original Viewmaster system: https://www.youtube.com/watch?v=zy0fBBEqjgI
I bought mine from the original owner in Honolulu. Either I’m missing something or my camera is a different design, or is broken: After loading in “A” min counts down the other direction when winding: 36,35, 34. . . Also, my red cross rotates when winding whether there is film in it or not. A classic problem with these old 1952 Sawyer View-Master cameras is the shutters popping open upon winding. All I had to do to stop it from doing this is winding it and shooting it 100 times. It works every time now. It was just sitting on a shelf for 60 years.
But why does mine not start and one and advance to 36 in “A”?
I think that your some of your exposures are also showing evidence of shutter bounce in the form of darkening on one side. The open stroke of the shutter is bouncing back and partially closing before the second stroke closes it out. The gasket that the shutter strikes hardens with use and age.
Appreciate the detail you went into with this camera, I was able to grab one for around 70 USD on ebay. My goal was to block off one side of the camera during a pass through of the film and then switch over to the other side, giving around 144 shots on 35 roll.