
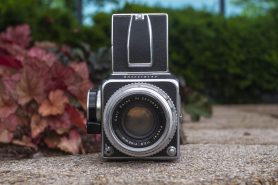
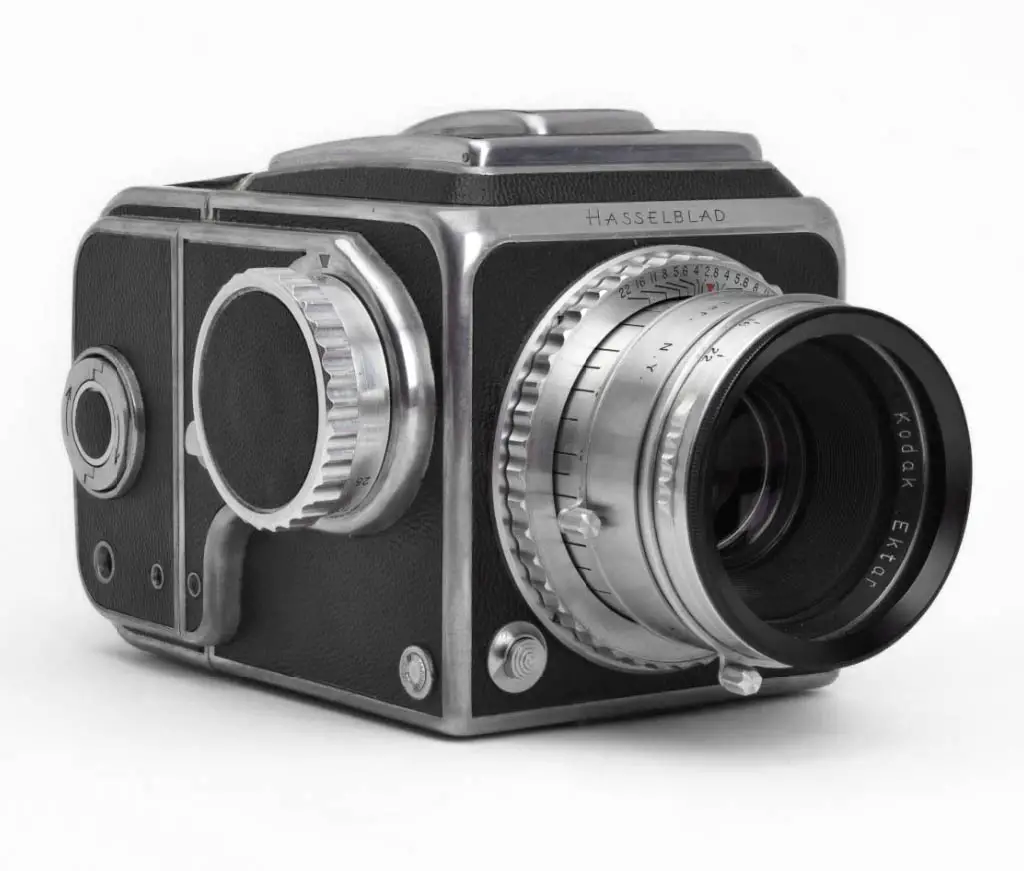
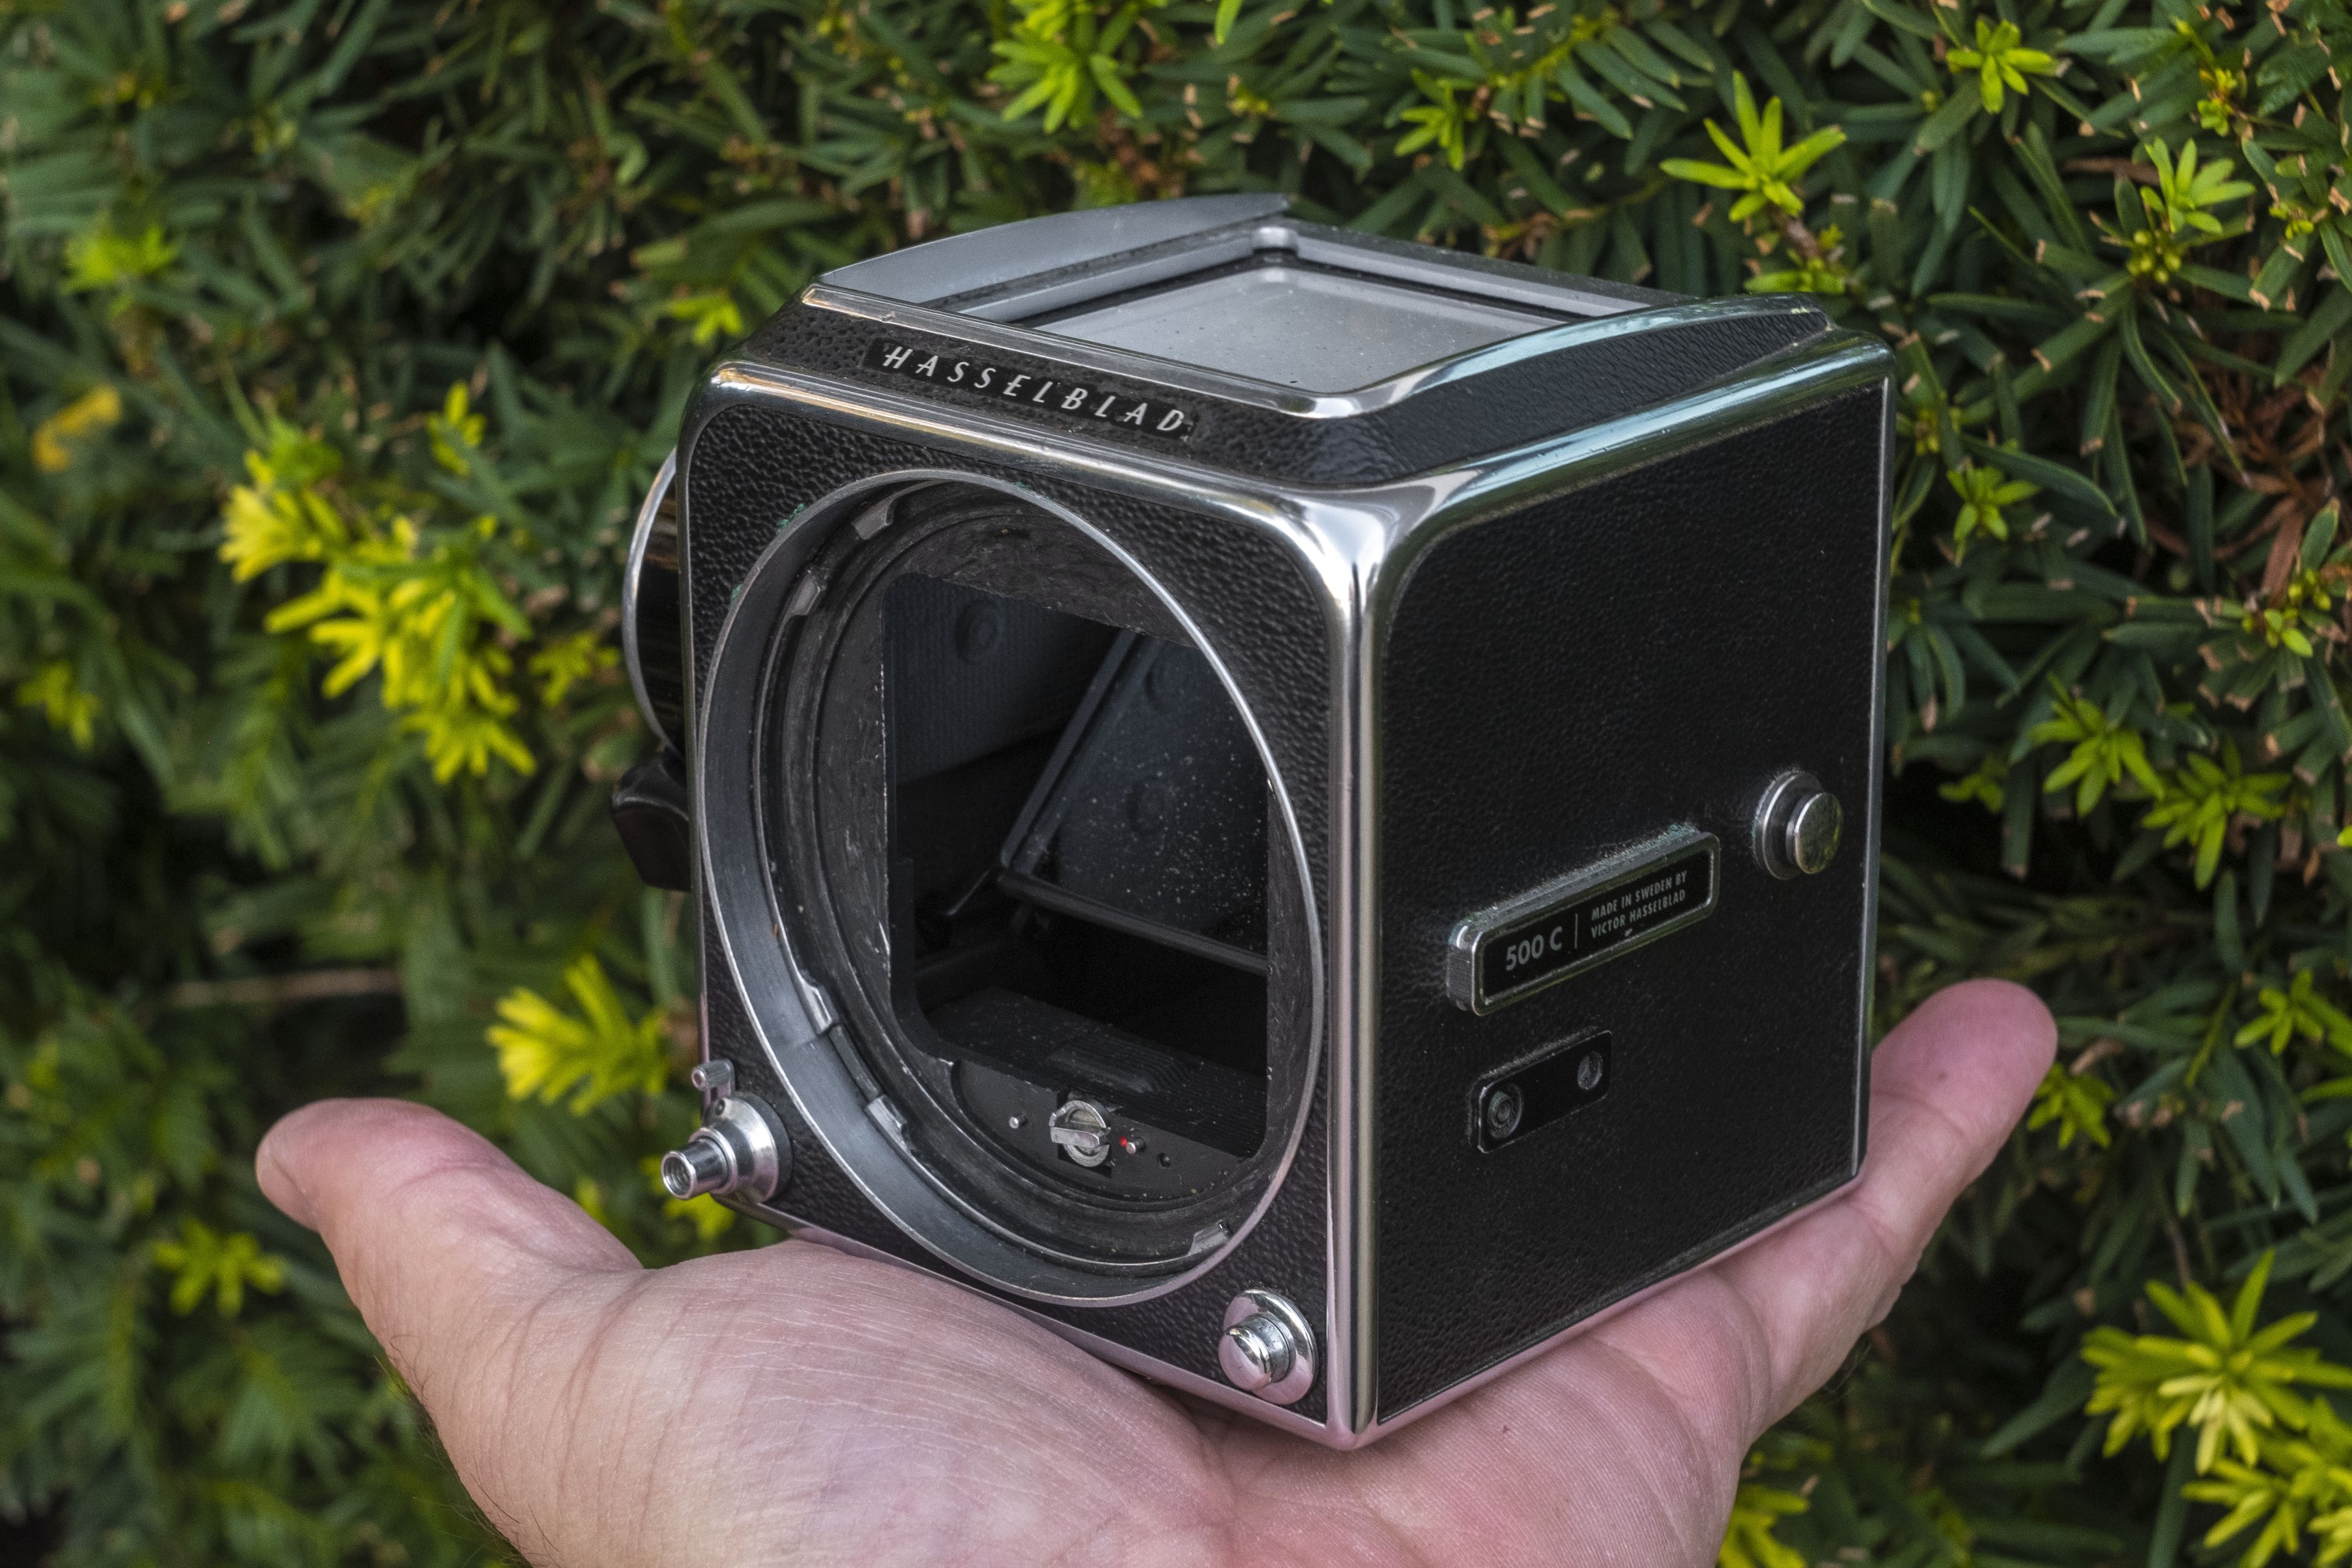
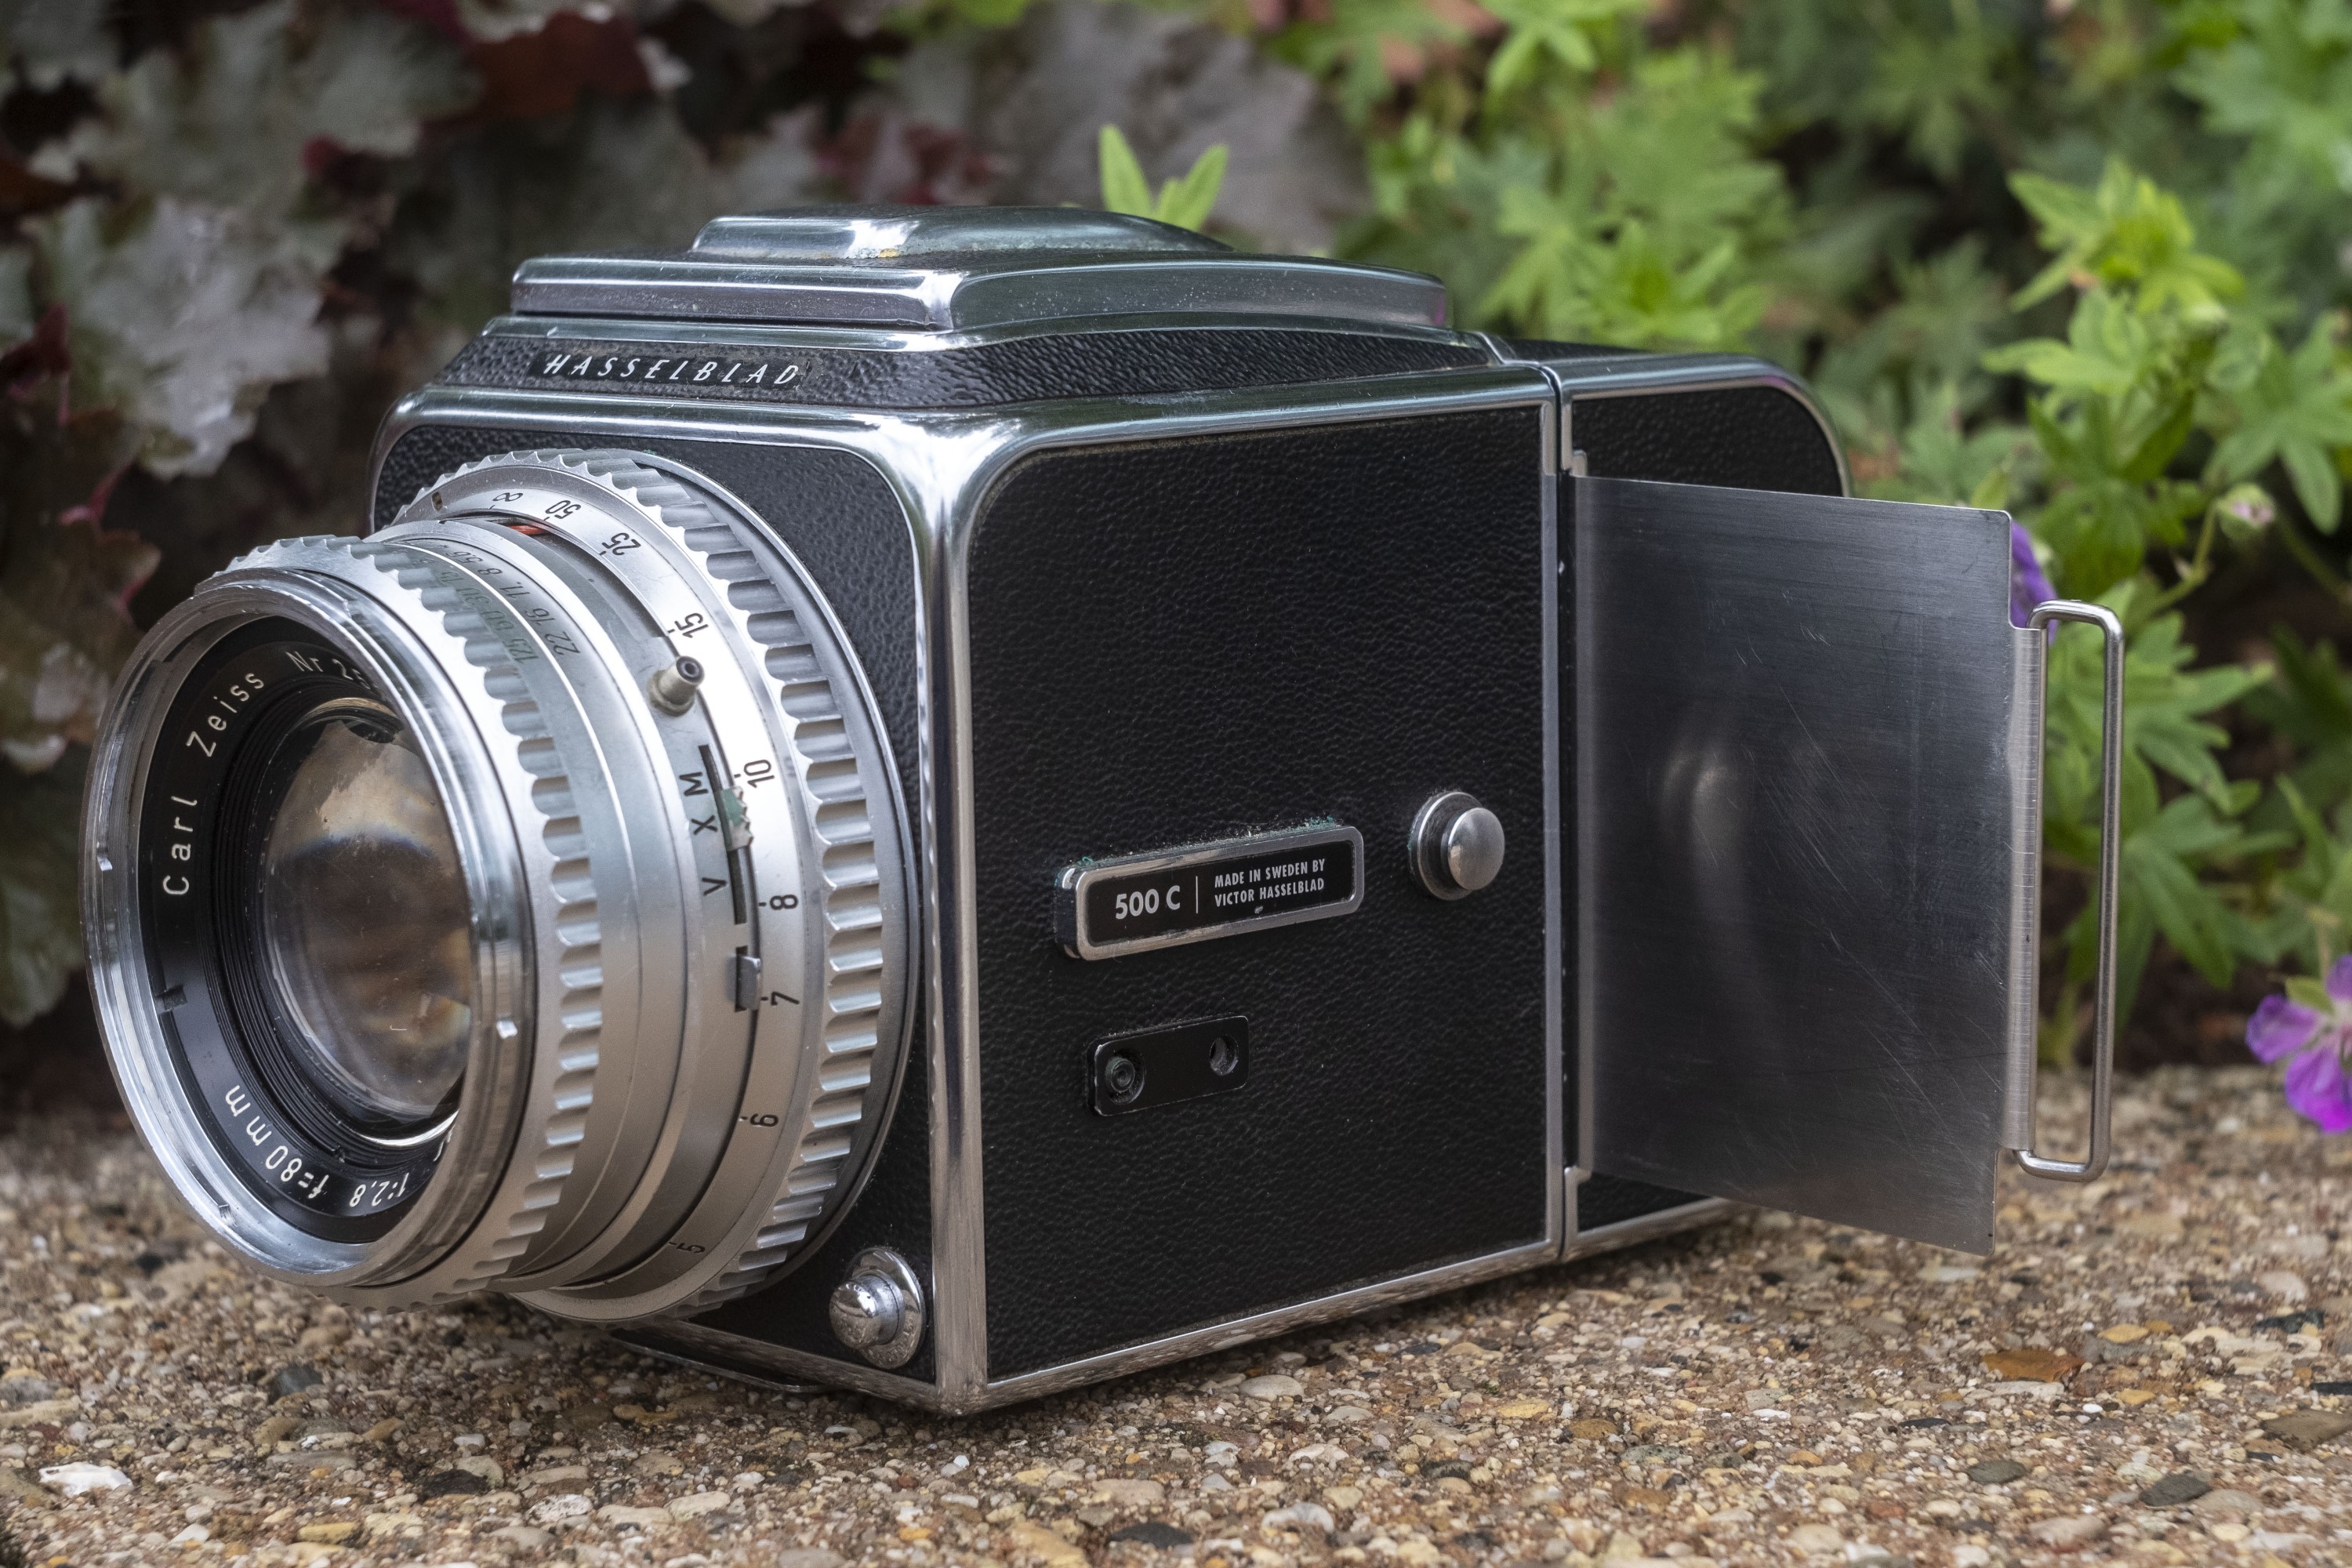
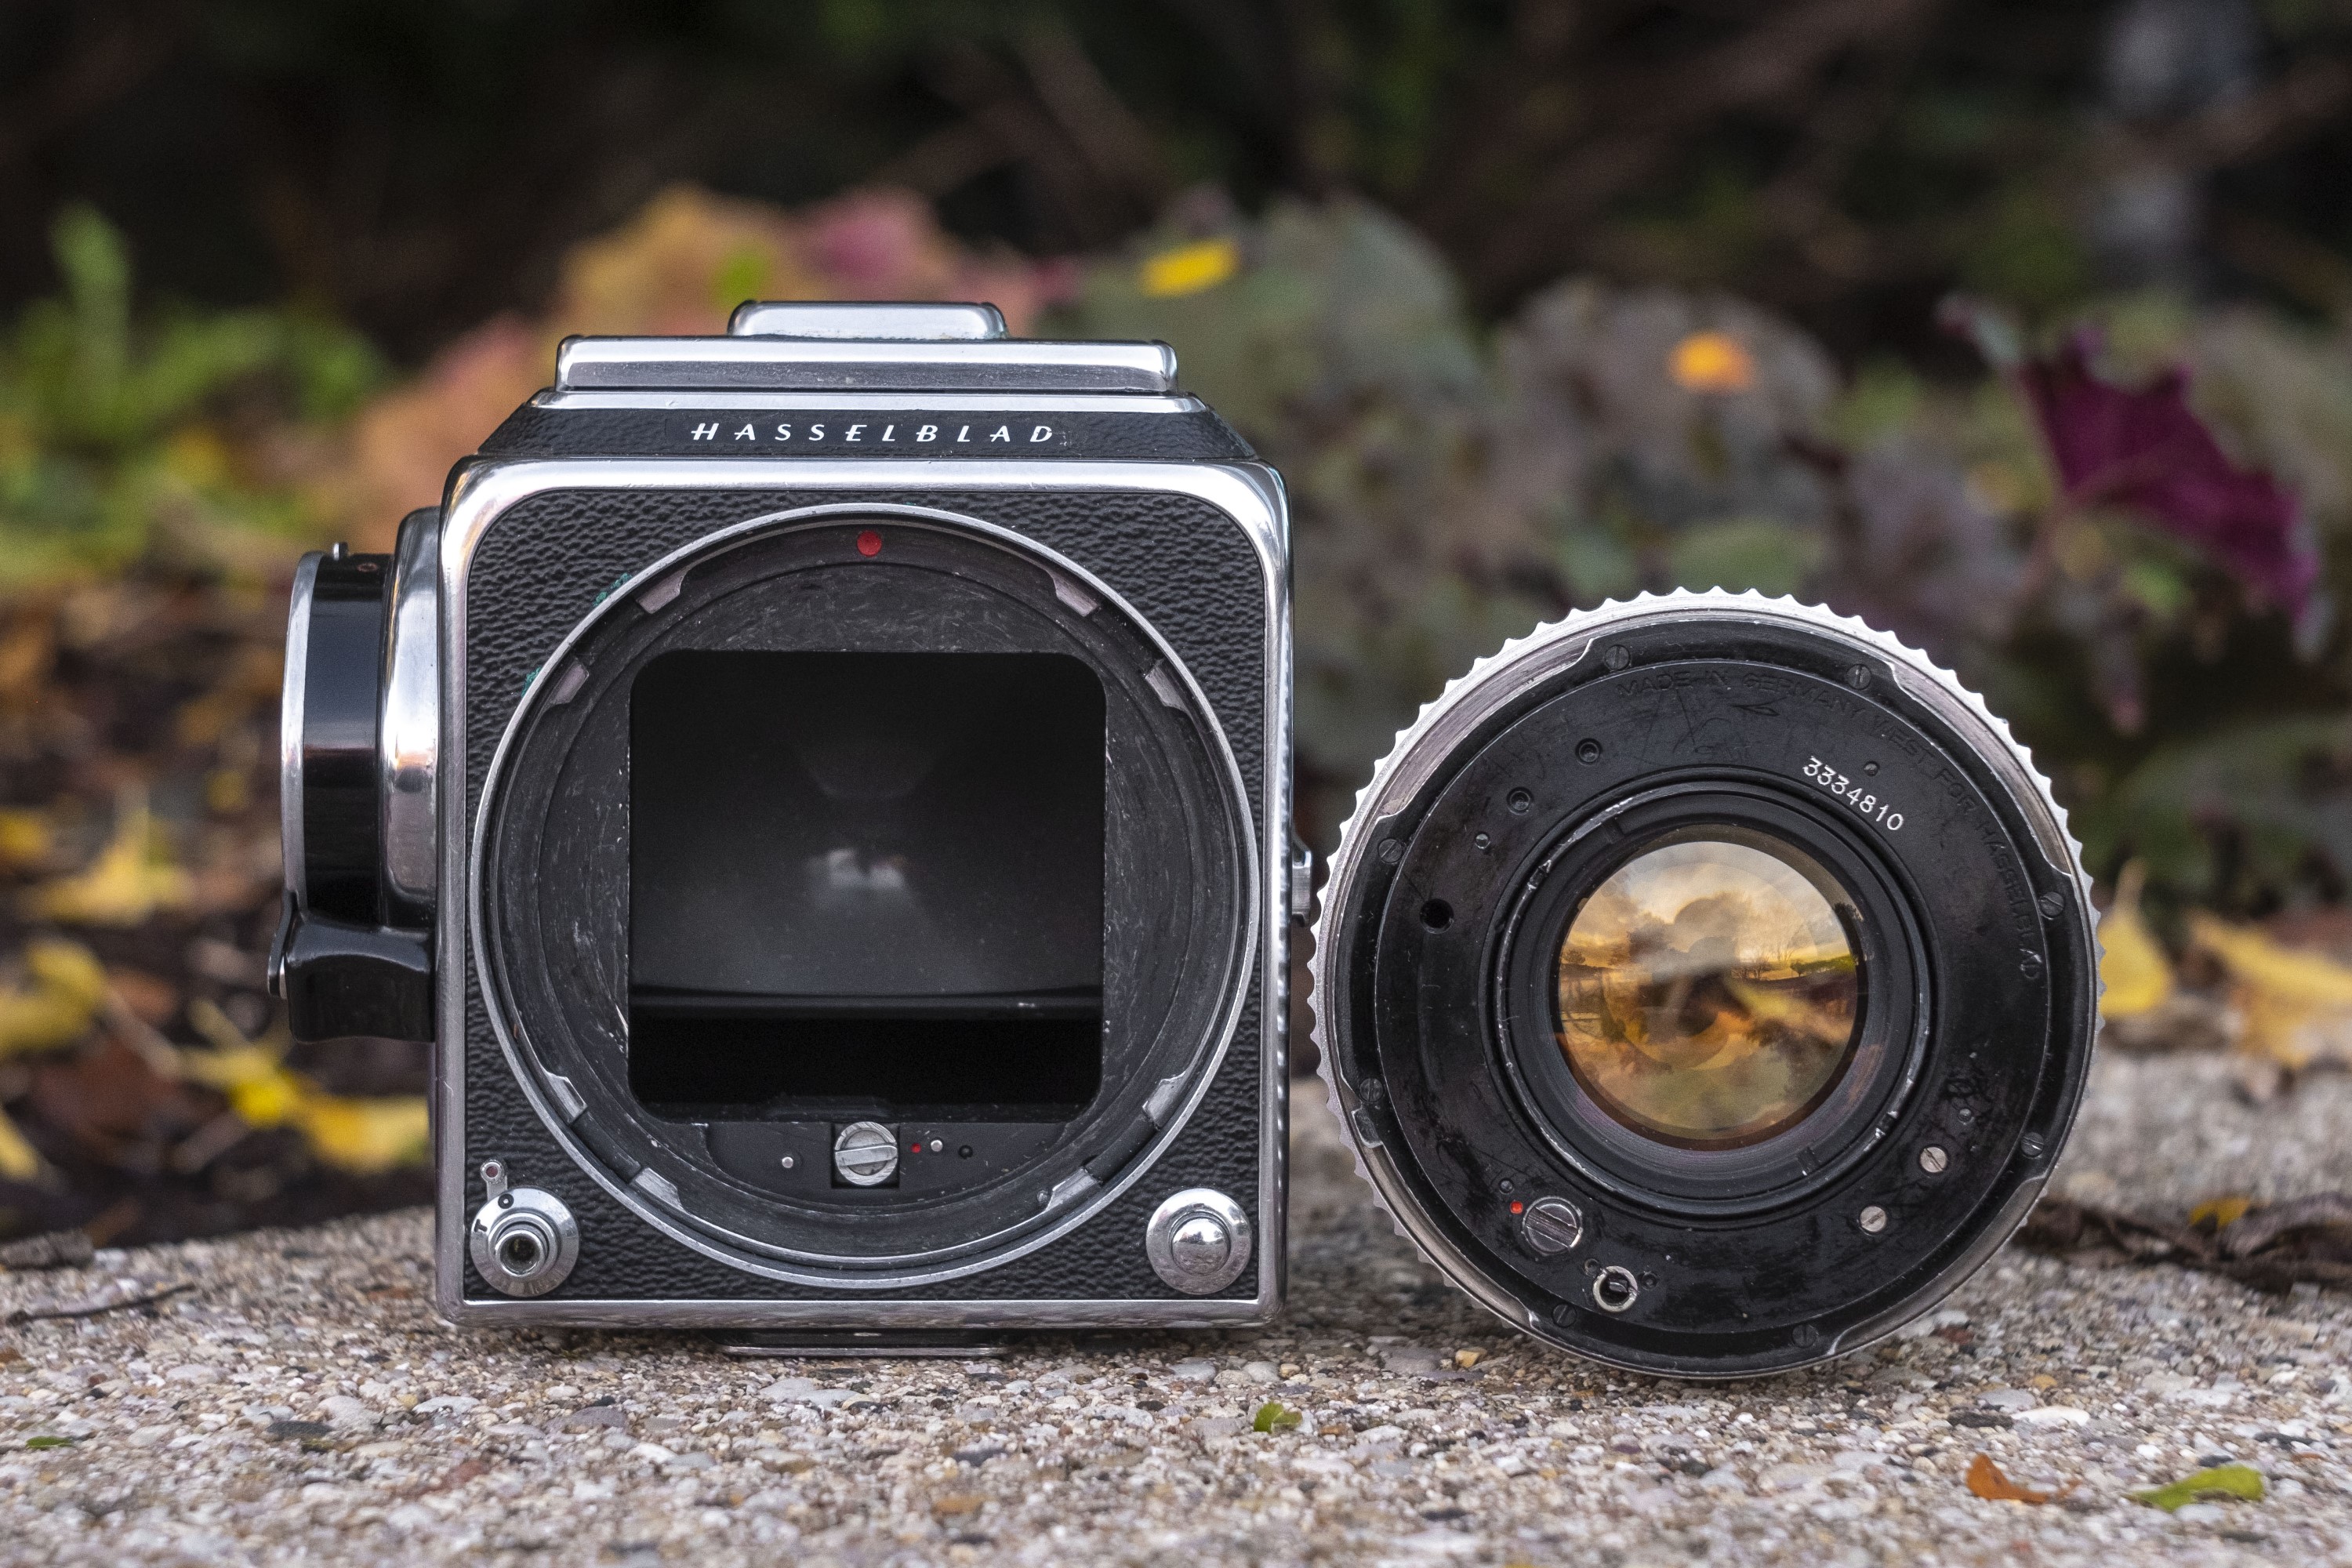
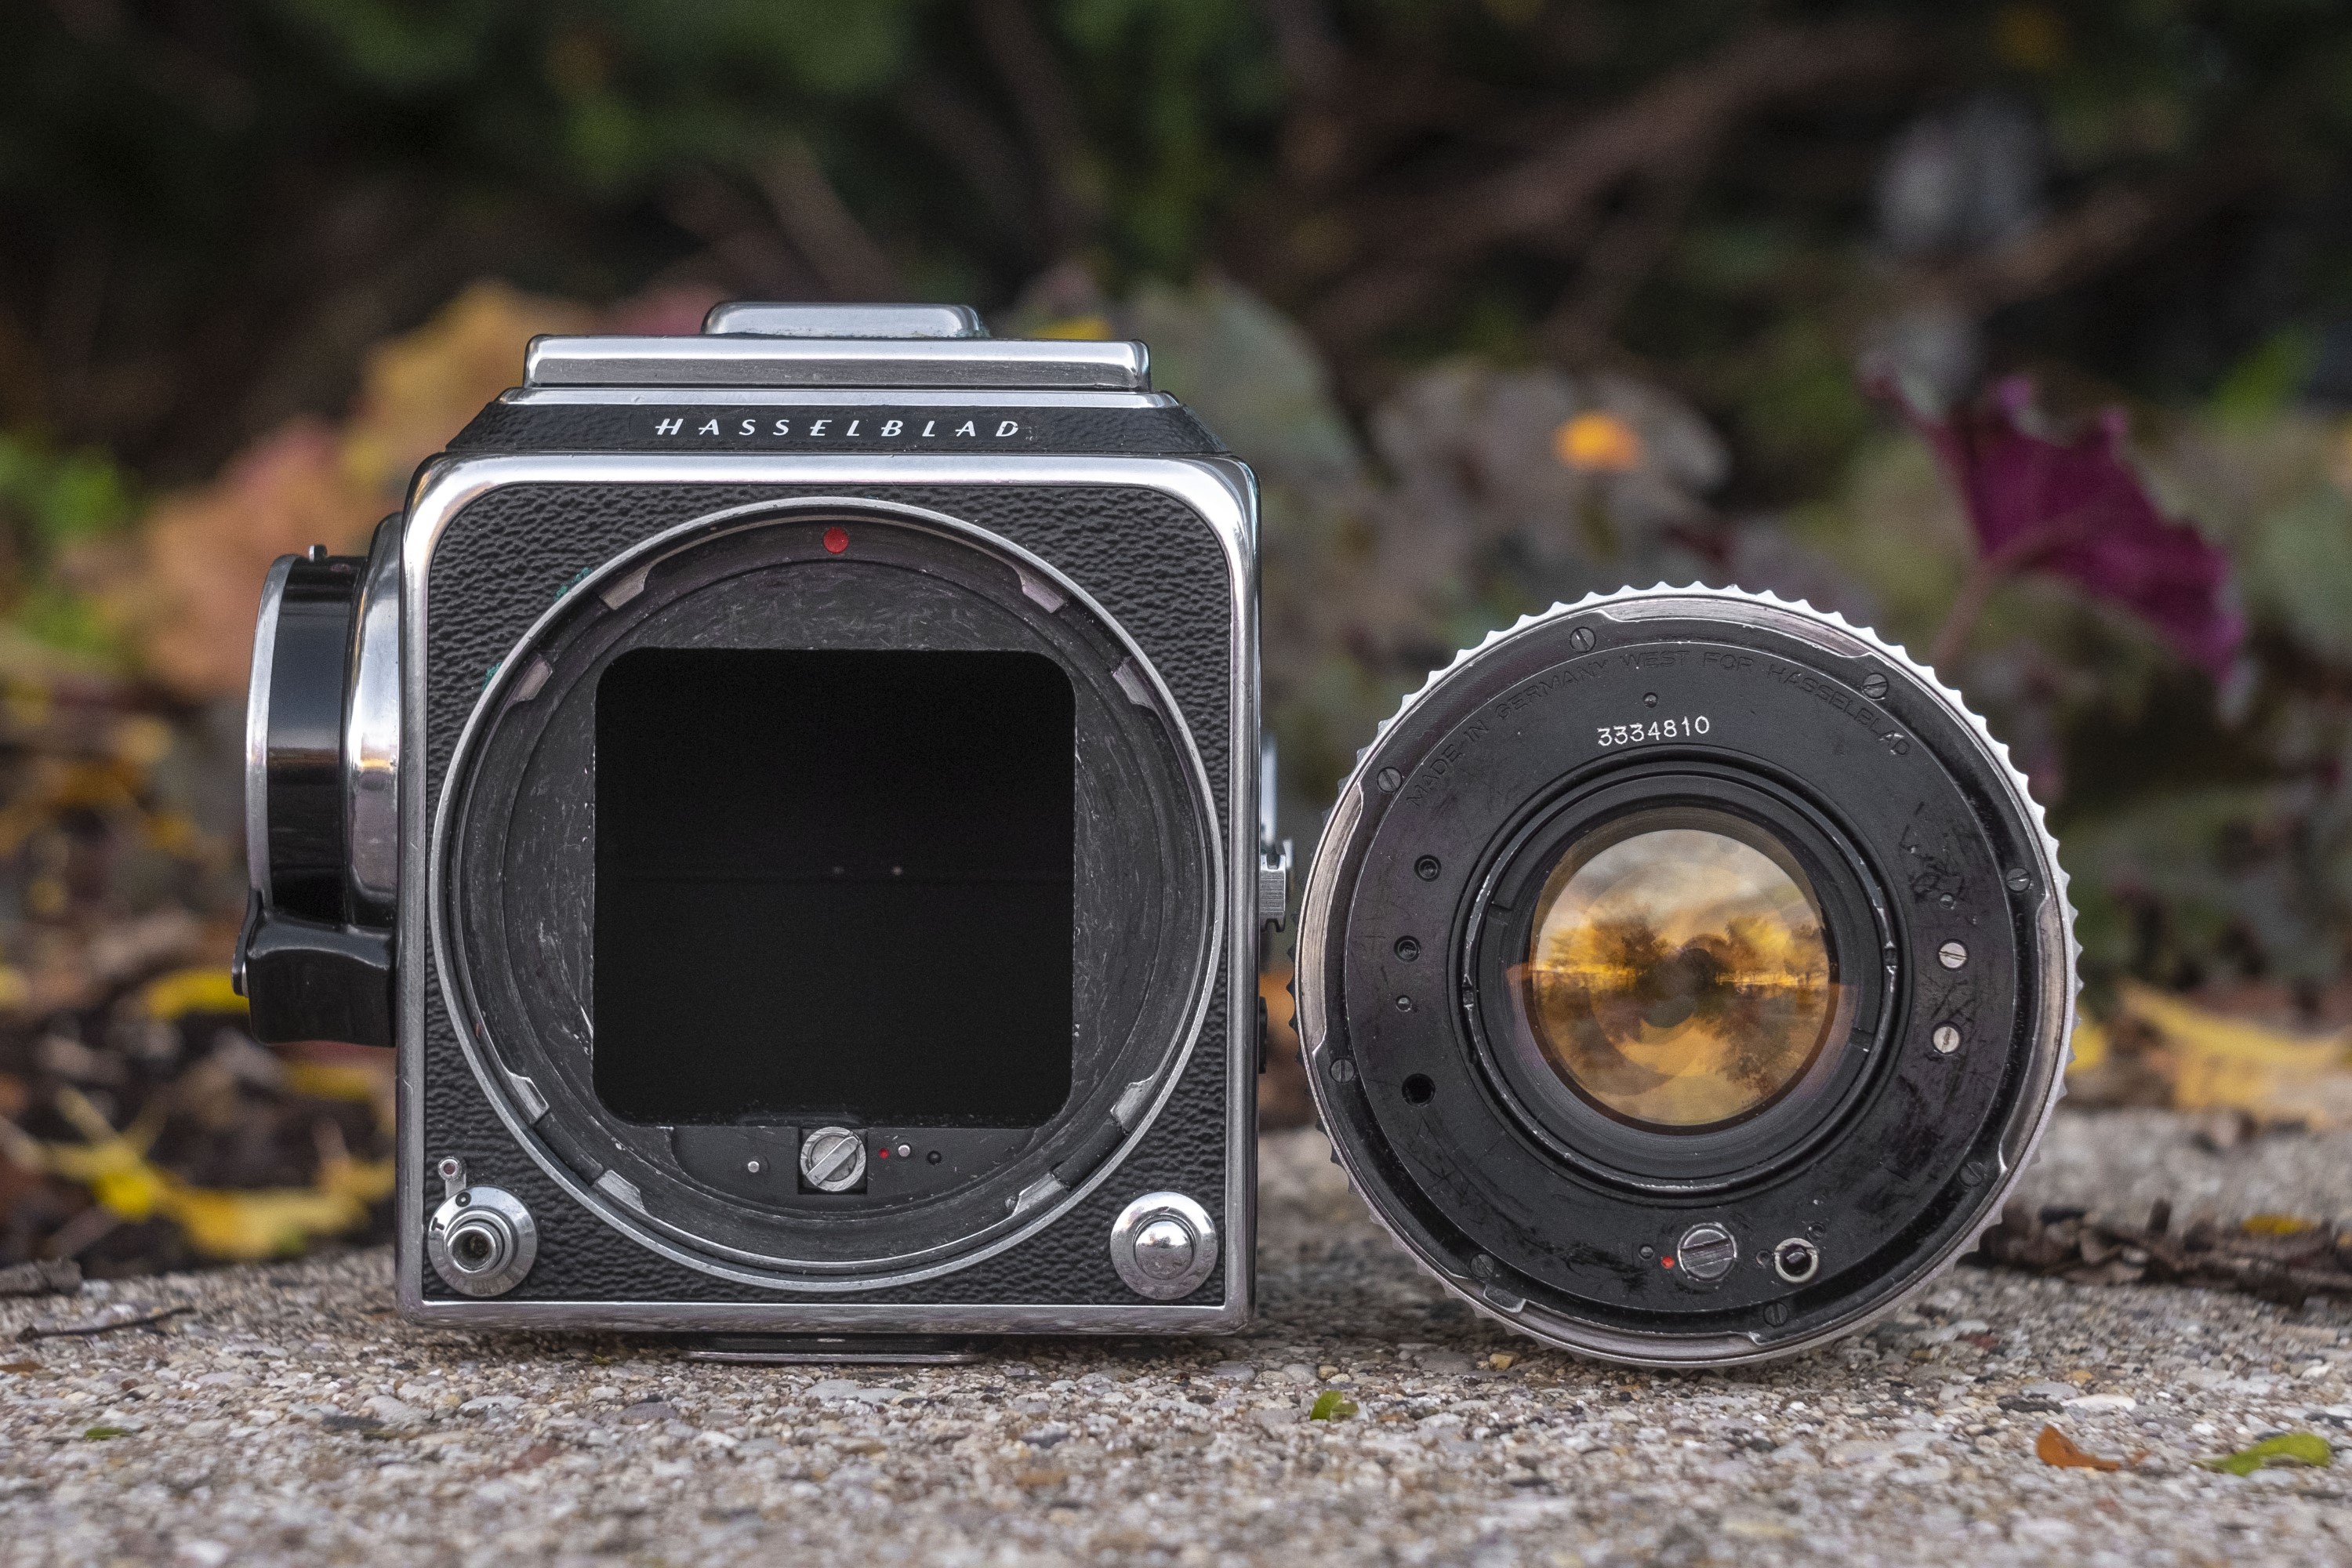
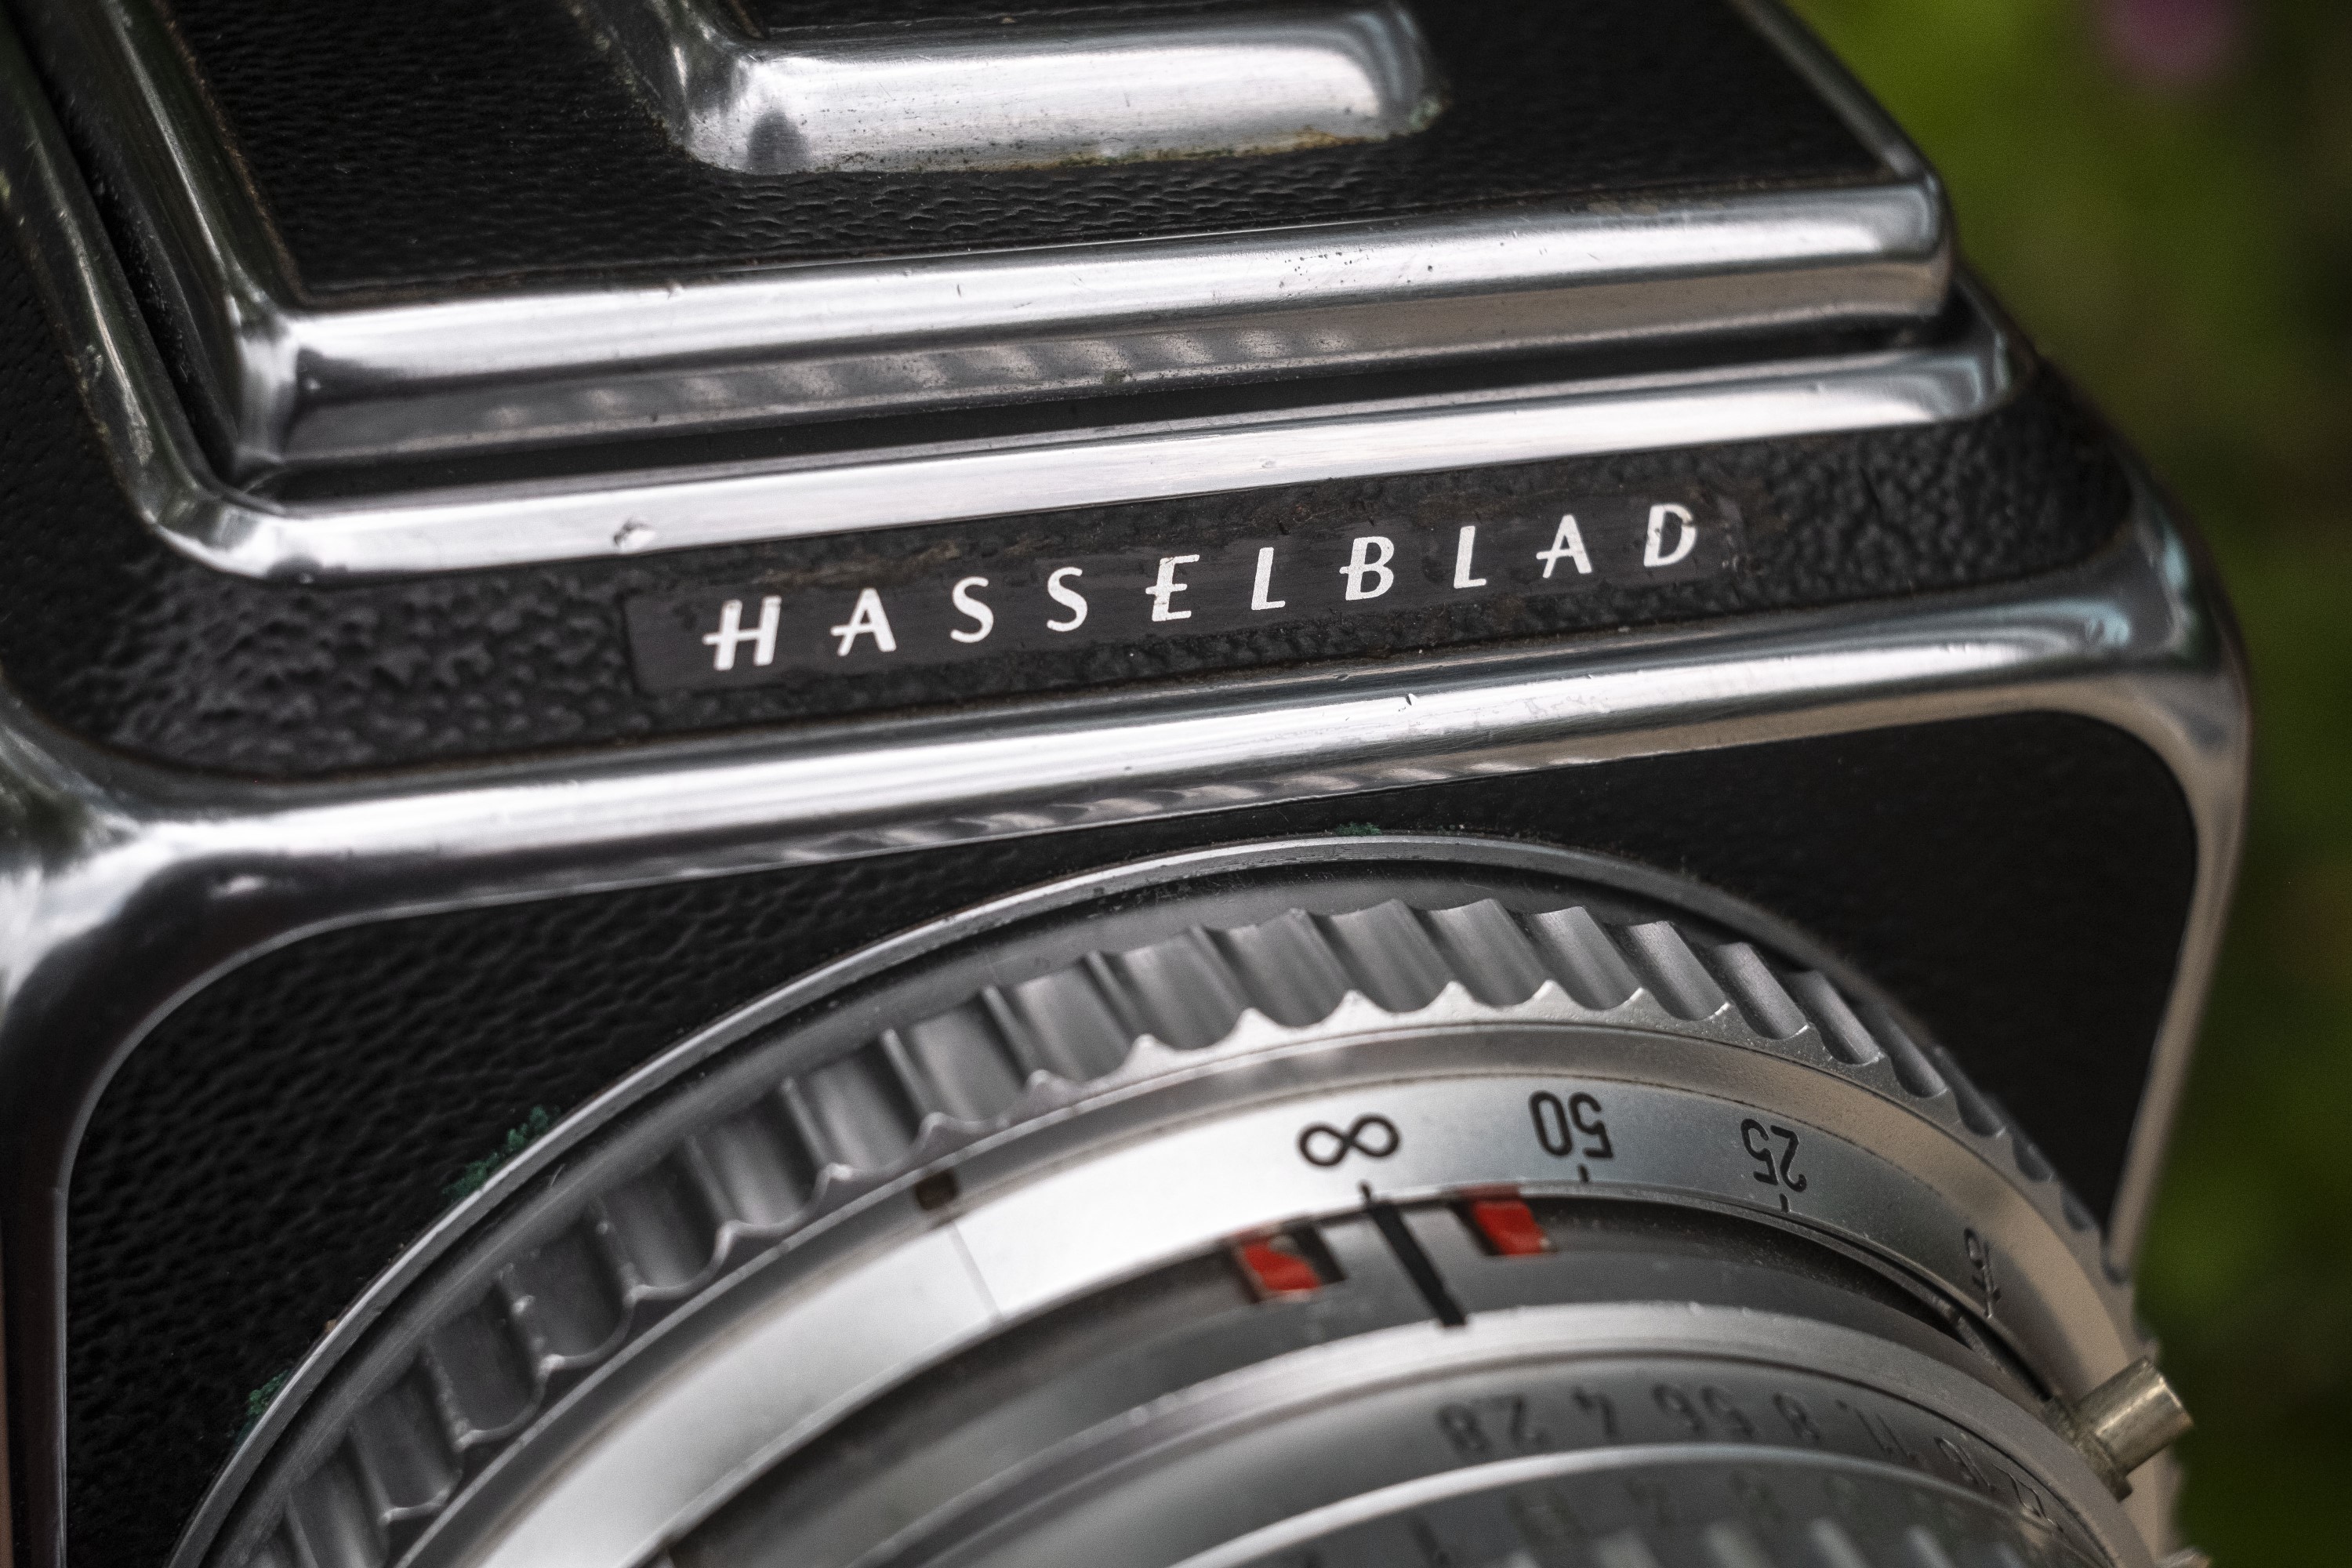
This is a Hasselblad 500 C, a medium format SLR produced by Hasselblad in Gothenburg, Sweden between 1957 and 1970. With the 500 C, Hasselblad switched to a between the lens leaf shutter in place of the unreliable focal plane shutters of earlier models. Along with new lenses, the camera retained features from the earlier models like interchangeable viewfinders and magazine backs, making for a very successful system camera. The Hasselblad 500 C would go on to not only be one of the most iconic cameras in the history of photography, but also one of the longest lived, evolving into later models which retained the same basic design and features.

Film Type: 120 Roll Film (twelve 6cm x 6cm exposures per roll), + Other Removable Backs
Lens: 80mm f/2.8 Carl Zeiss Planar coated 7-elements in 5-groups + Others
Lens Mount: Hasselblad Bayonet
Focus: 3 feet to Infinity
Viewfinder: Interchangeable Waist Level Reflex Viewfinder
Shutter: Synchro-Compur MXV Leaf
Speeds: B, 1 – 1/500 seconds
Exposure Meter: None
Battery: None
Flash Mount: ASA Port with M and X Flash Sync
Weight: 1430 grams (complete), 968 grams (no lens), 573 grams (no lens or back), 488 grams (body only)
Manual: https://www.cameramanuals.org/hasselblad/hasselblad_500c.pdf
How these ratings work |
The Hasselblad 500 C is one of the most influential and successful cameras of all time. It is the medium format SLR that many cameras aimed to copy because it’s formula works so well. With an excellent selection of lenses and accessories, the camera is capable of excellent 6×6 photographs, assuming it works. With prices easily exceeding four digits, getting into a Hasselblad system is not a cheap proposition, but for those willing to spend the money, this is one of the best cameras ever made. | ||||||
| Images | Handling | Features | Viewfinder | Feel & Beauty | History | Age | |
| 2 | 1 | 2 | 2 | 2 | 1 | 30% | |
| Bonus | none | ||||||
| Final Score | 13.0 | ||||||
History
The earliest origins of Hasselblad date back to 1841, but the company that exists today as Victor Hasselblad AB does not have a straight line back to that original company. As often happens with many companies, the history bounces around a bit.
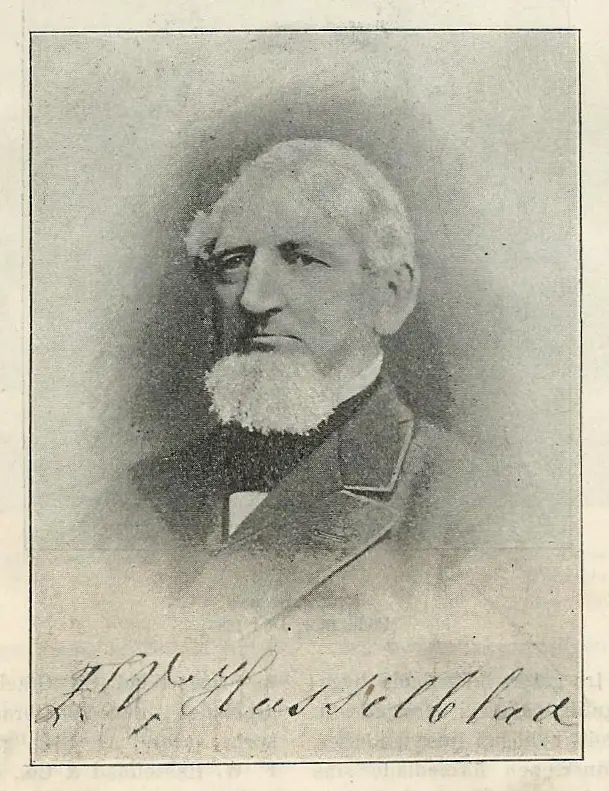
The name “Hasselblad” comes from it’s original founder, Fritz Viktor Hasselblad, who in the 1830s worked as a merchant servant for his older brother Carl Henrik Hasselblad in Gothenburg, Sweden. At the age of 25, young Fritz was very ambitious and in early 1841 he left his brother’s company to try and make it on his own.
On May 15, 1841, Fritz Hasselblad filed paperwork with the local magistrate to do business under the name F. W. Hasselblad and Company. Hasselblad’s new company worked in the trade business, importing luxury items such as sewing machines, household articles, travel accessories and other products into Sweden.
Many years later, Fritz Hasselblad’s son, Arvid Viktor had an interest in photography and on his honeymoon to London in 1885, he met George Eastman and struck a deal making Hasselblad the sole distributor for Eastman’s products in Sweden.
The photographic division of Hasselblad continued to grow, and in 1908 was broken off into a separate company called Hasselblad Fotografiska AB to better meet the demands of the industry at that time. A nationwide network of shops and photo labs was created, and along with their imported goods, Hasselblad was the largest photographic goods company in Sweden, but the company wanted to set their sights even higher.
(Not So) Fun Fact: The names “Viktor/Victor” and “Fritz” were very common back then and all three of the early founders of Hasselblad had combinations of these names in their proper names making research for this article somewhat of a challenge.
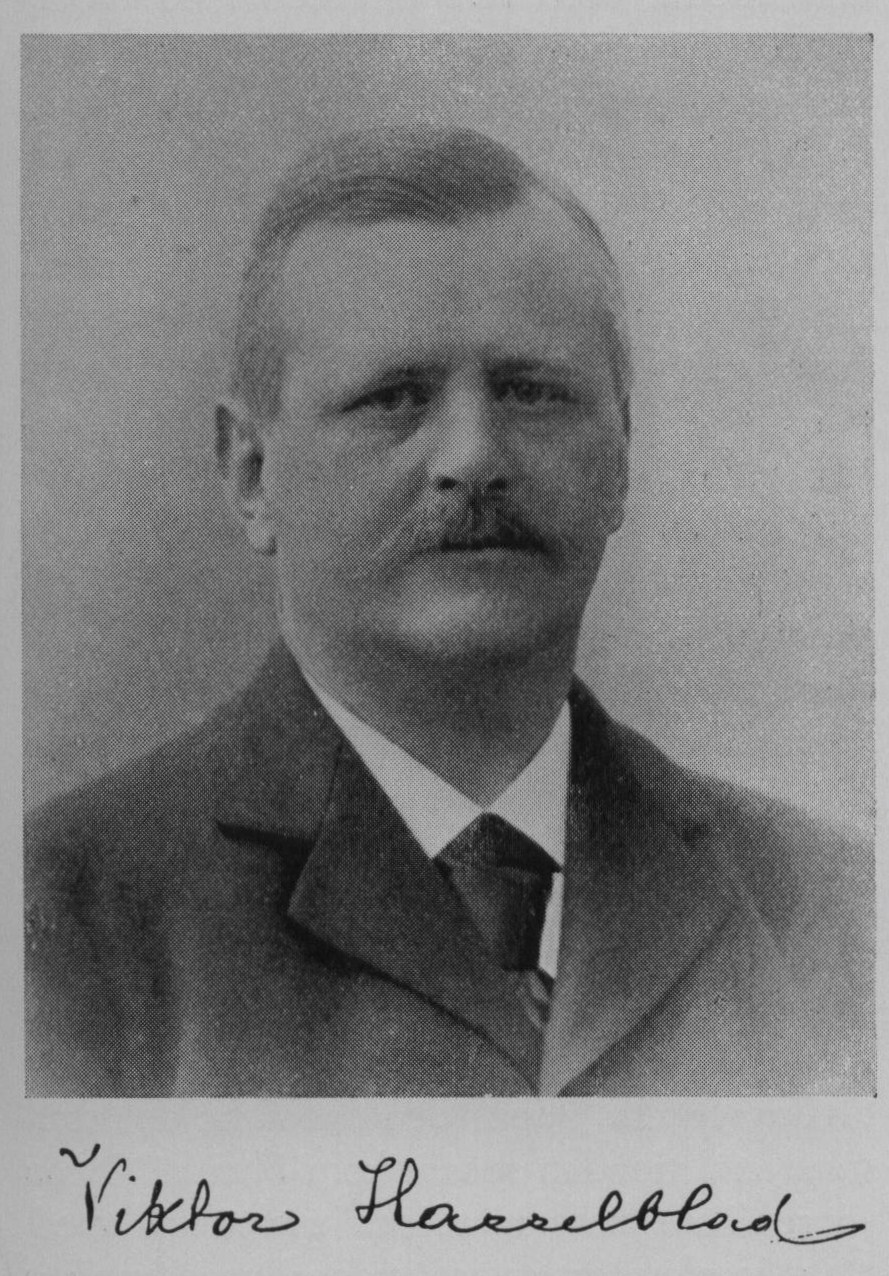
In 1924, at the age of 18, Arvid Hasselblad’s grandson Victor was sent to Dresden, Germany which at the time was considered the photographic center of the world. There, Victor would learn from some of the greatest minds working for the biggest companies about camera and optics design. Over the next several years, Victor took on a variety of jobs working for different companies in France and the United States, studying their designs and processes. In 1926, Victor Hasselblad went to work for George Eastman in Rochester, New York where his family’s connections to Eastman gave him unique access.
Eventually, Victor would return home to work for the family business, and for reasons I could not discover while researching this article, he had a falling out with his father, which in 1937 resulted in him leaving the business and starting up his own company in Gothenburg, called Victor Foto. In April 1940, Victor Hasselblad would setup a new company, called Ross AB in an old automobile shop with the intent to manufacture his first camera for the Swedish military.
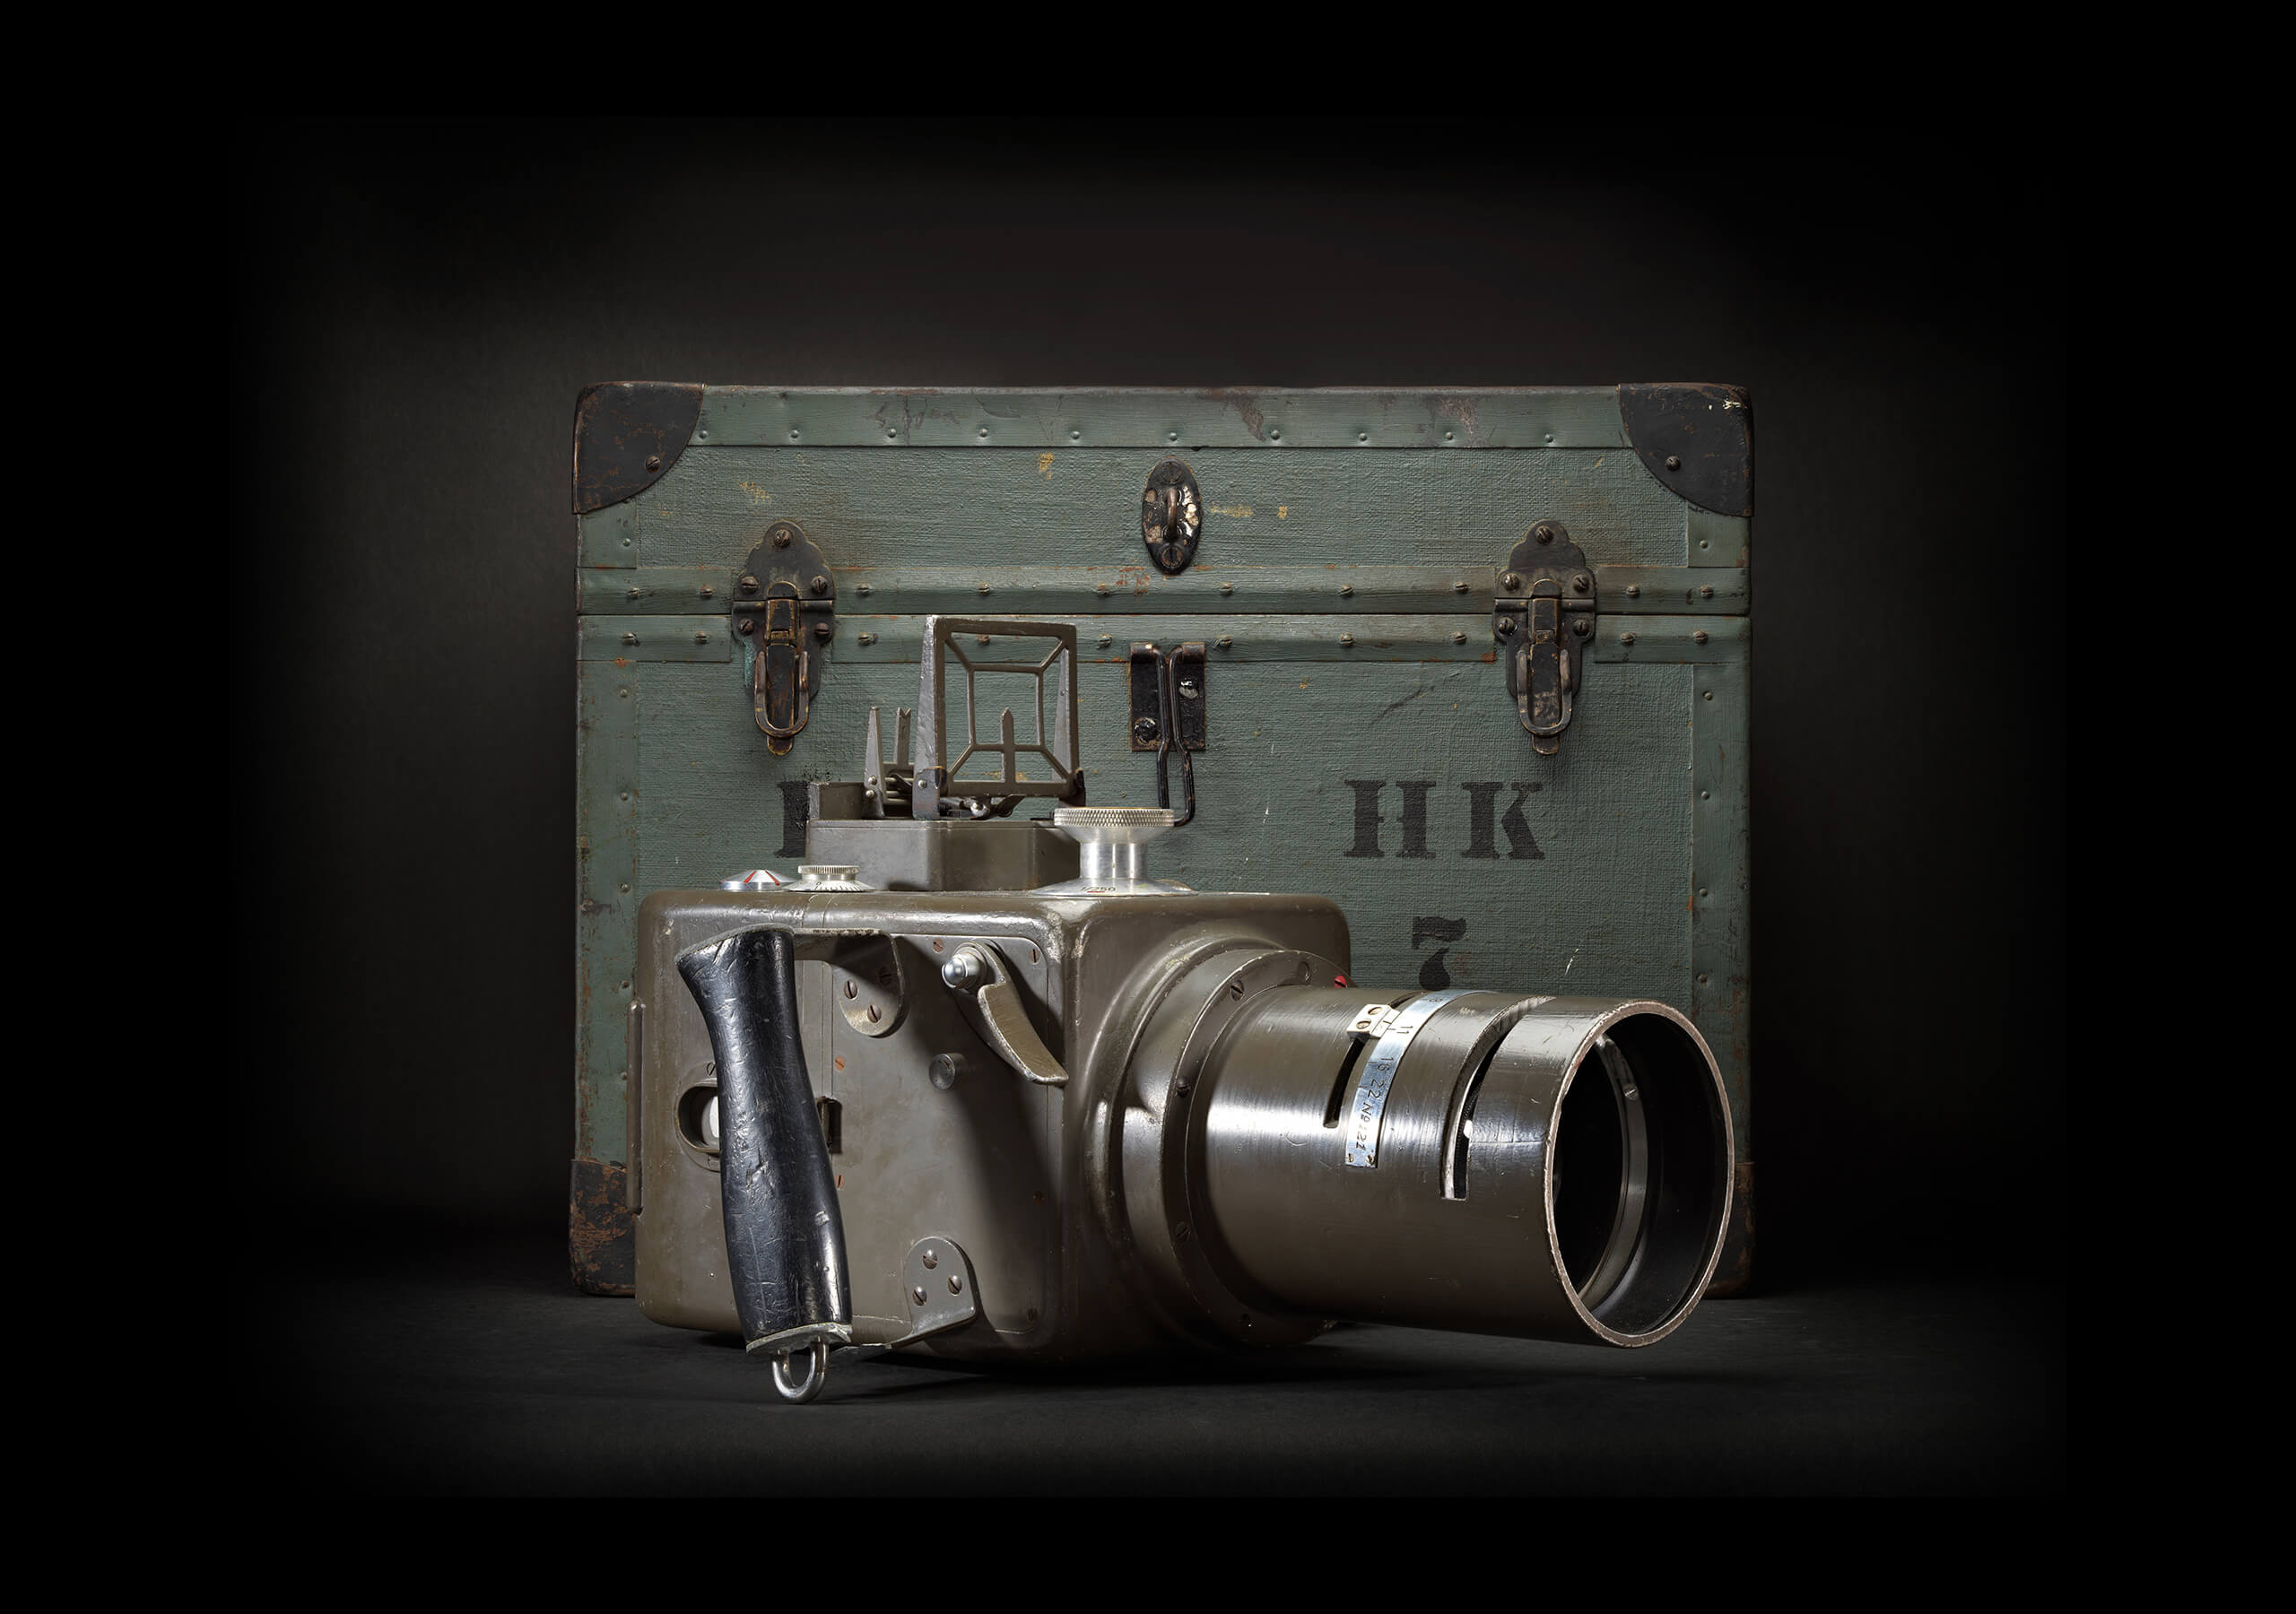
The next year, Ross AB would finish it’s first camera, the HK-7 which was inspired by an aerial camera found in a downed German aircraft during the early days of World War II. At the direction of the Swedish air force, Ross AB would build a number of HK-7s and a second camera called the SKa4 for use in Swedish air craft.
In 1942, Victor Hasselblad’s father and CEO of F.W. Hasselblad & Co., Karl Erik Hasselblad died. As a result, ownership of the company along with it’s photographic division, passed onto Victor Hasselblad, and once again Victor was back working for his family’s company.
After the war, F.W. Hasselblad & Co. would continue to produce many of the same products they had been making before and during the war such as watches and clocks, in addition to it’s photographic products as well. Despite their success at wartime camera production, Hasselblad wasn’t yet turning a profit on it’s photographic products.
In 1945 a new Swedish Automobile company called Saab would be created to build Sweden’s first automobile using parts supplied by Hasselblad. At this same time, Victor Hasselblad prioritized the creation of a new line of civilian cameras. With the cooperation of Saab industrial designer Sixten Sason, in 1948 Hasselblad would produce it’s first postwar camera, the 1600 F.
Hasselblad’s new camera was very complex and early copies were unreliable. The company’s experience at making clocks helped them to refine their camera making abilities, eventually improving the quality of early cameras. Only a few hundred of the early 1600 F models were made and despite having poor reliability, have become very desirable by collectors.
Despite their early struggles, Hasselblad learned quickly and by 1953, had an all new camera, the 1000 F which improved almost everything about the earlier model. In addition to their cameras, Hasselblad also made available a range of lenses made by the world’s best lens makers including Kodak. Everything from a 60mm Distagon to a 200mm Sonnar could be purchased in a Hasselblad mount, making them very popular for professional photographers.
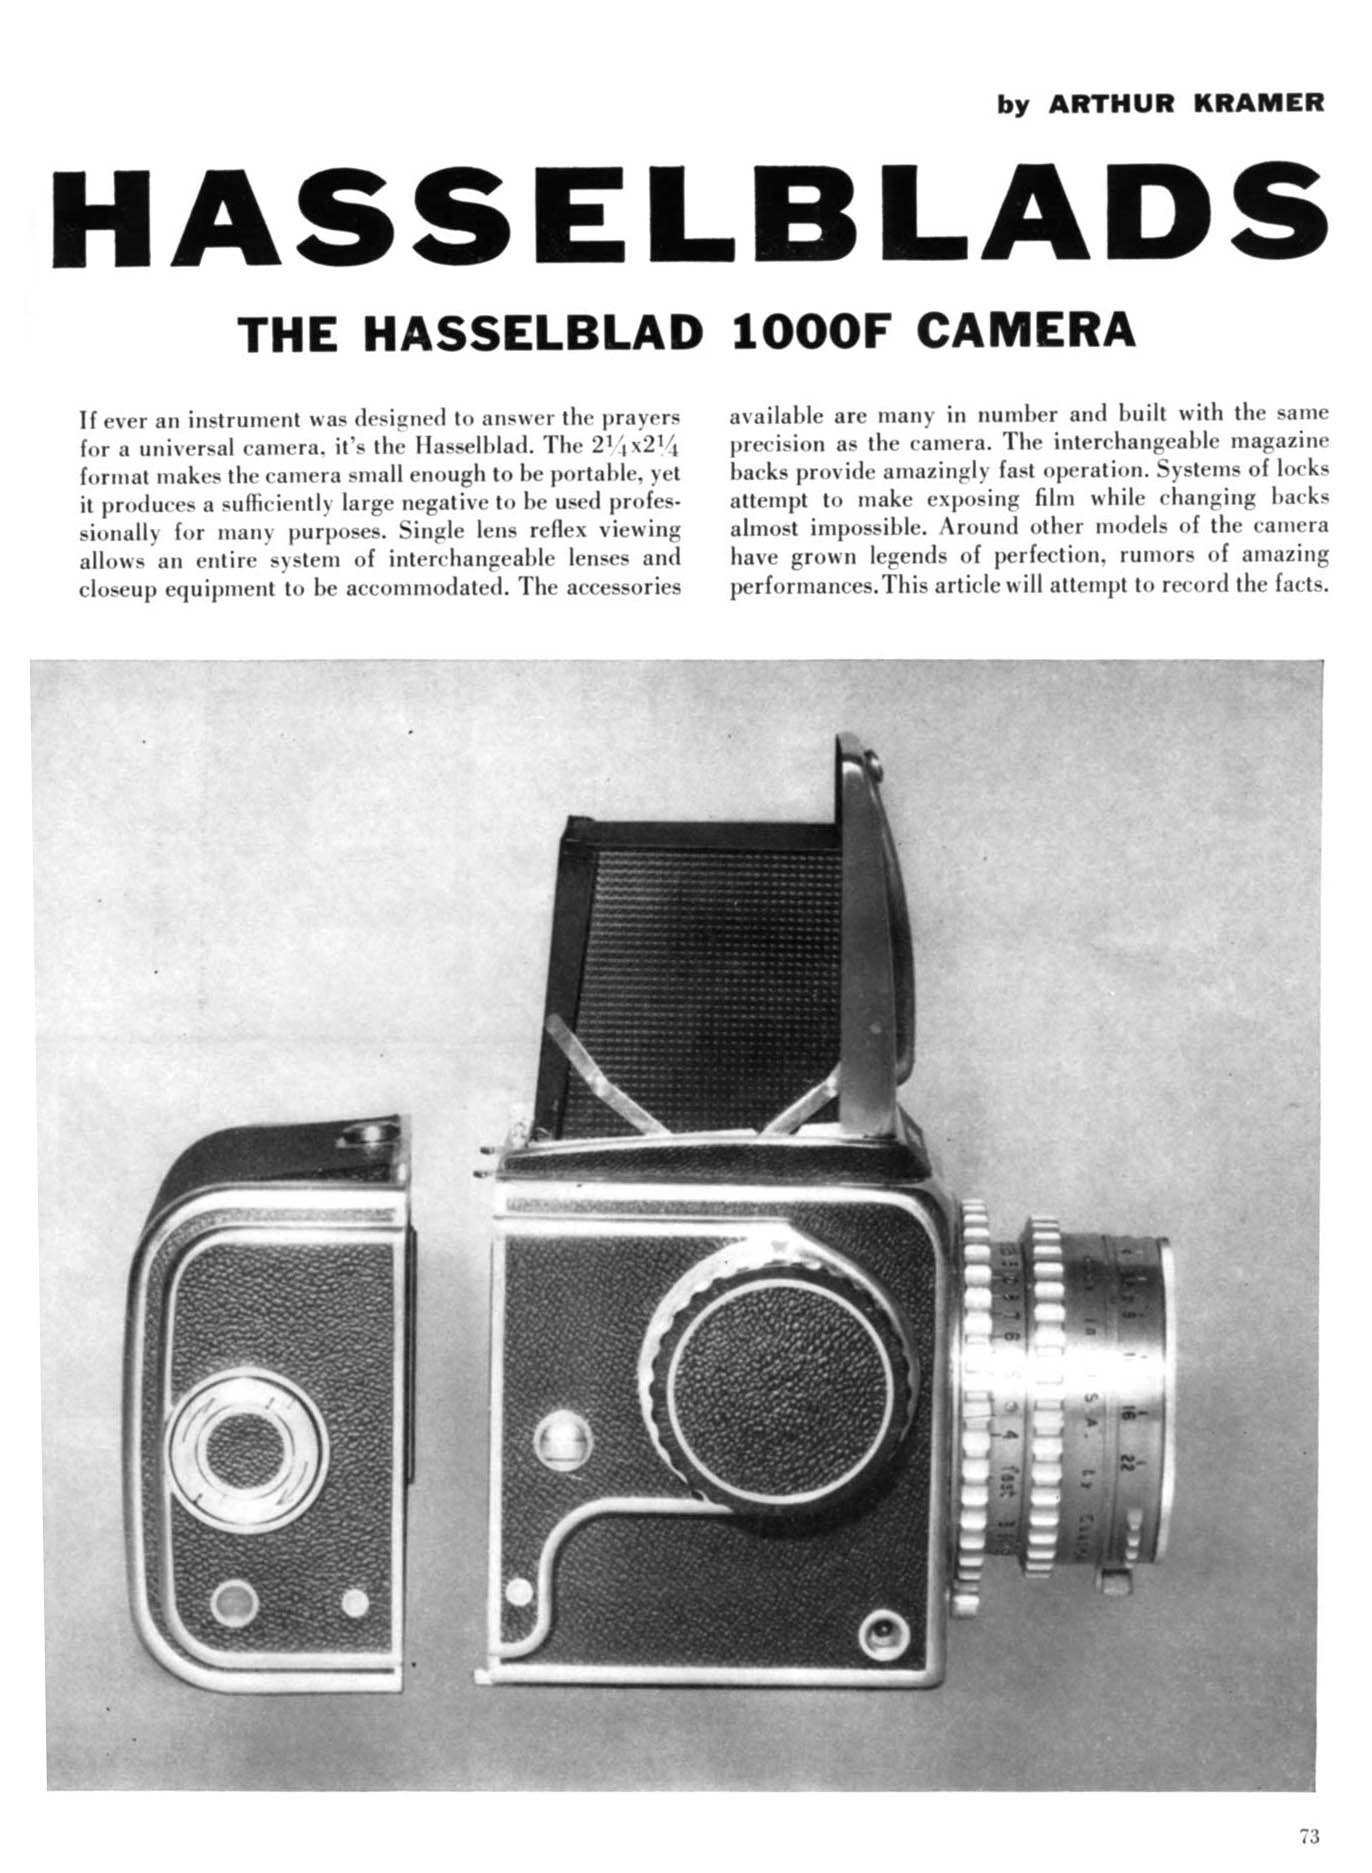
Hasselblad’s reputation as a camera maker received a huge boost in December 1954 when the American magazine, Modern Photography ran an in-depth test of the 1000 F. In that article, they put over 500 rolls of film through their test camera, intentionally dropping it twice, to see how it would hold up, which it did.
In 1957, the 500 C made it’s debut which would turn out to be the company’s most successful platform. Variations of the 500 C continued to be produced as recently as 2013. With the 500 C, Hasselblad addressed the earlier model’s most glaring problem, which was it’s focal plane shutter. In it’s place was a new between the lens Synchro Compur leaf shutter which was far more reliable, and despite lacking speeds above 1/500, it offered flash synchronization at all speeds, up from only 1/25 on the earlier models.
Since the shutter was inside the lens, swapping lenses also swapped the shutter as it was an integral part to each lens. To accommodate the new leaf shutter, many changes to the camera body needed to be made. Starting with a new bayonet lens mount, older lenses for the focal plane shutter models will not work on the 500 C. A rotating pin at the base of the mount is the link between the body mounted film advance lever and the cocking rack inside the lens. A requirement of the 500 C is that the shutter must be cocked before removing the lens, which at the time of it’s release caused some concern among photographers who believed that a shutter should never be stored cocked.
Other changes to the body included a hinged baffle at the back of the body, in front of the dark slide, to provide further light protection from film, in the event the lens is removed with film in the camera. This baffle is coupled to the shutter release and opens and closes only at the moment of exposure. A new rapid shutter release which performs the first half of the shutter release sequence without actually firing the shutter allows for quick action photography using an auxiliary viewfinder, and a new tripod base plate which connects to a quick release allowing the camera to be quickly attached and removed from the tripod in a studio without having to screw something into the threaded bushings.
With new lenses came new designs as the standard lens was now a 6-element Zeiss Planar 80mm f/2.8. According to a test done by Modern Photography in January 1958, the new lens was optically superior to other 4 and 5-element lenses that preceded it.
When it first went on sale, a Hasselblad 500 C with the 80mm Planar lens sold for $480 with the optional knob mounted exposure meter for an additional $24.75. When adjusted for inflation, these prices compare to $4600 and $235 today, making them one heck of an investment for the serious photographer.
The new Hasselblad 500 C generated a lot of excitement upon it’s release, mostly because of the available medium format SLRs that were available at the time, none were especially reliable and suitable for heavy duty professional work. Hasselblad took out a large number of ads in various photography magazines to promote their new camera. The gallery below is just some of the many ads I found while researching this camera.


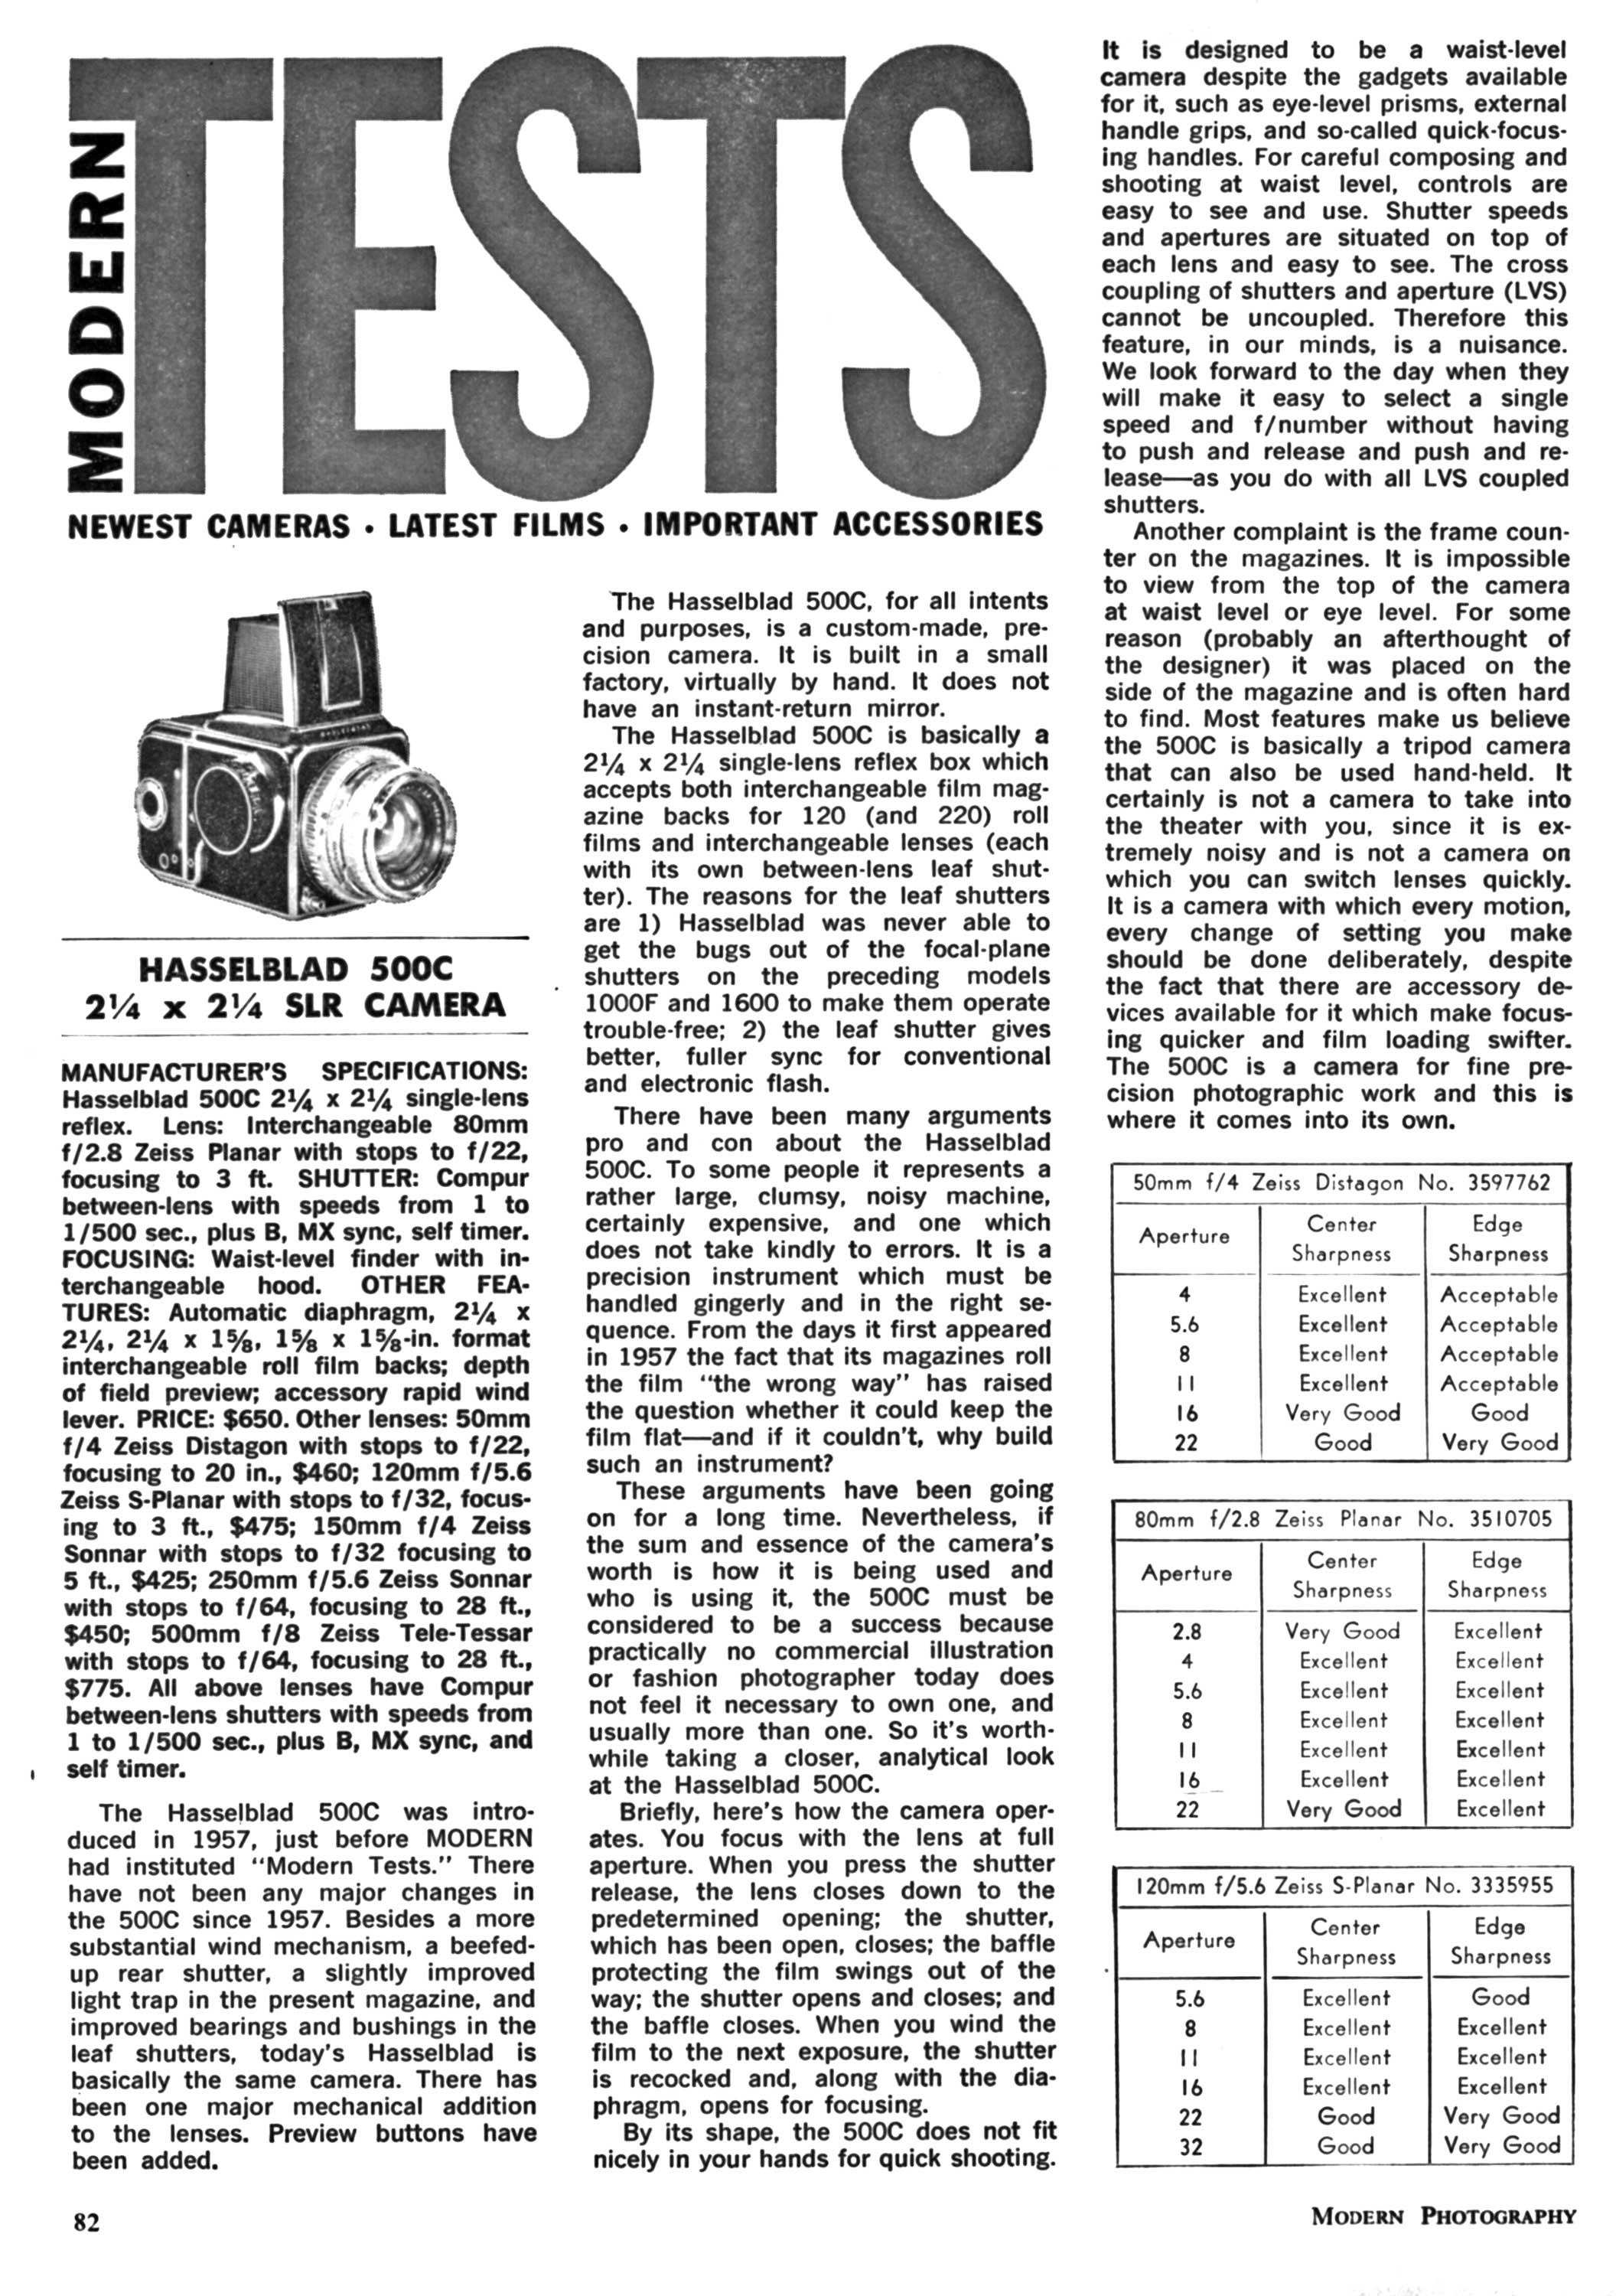
The following 7 page test of the Hasselblad 500C appeared in the January 1958 issue of Modern Photography and gives a good breakdown not only of the camera’s new features, but an article within the article explores how the advancements of the 500 C might impact future 35mm cameras. When this article was originally printed in the magazine, both articles were intertwined together, which is how it was scanned into this PDF, so be sure to pay attention to which part of the article you are reading.
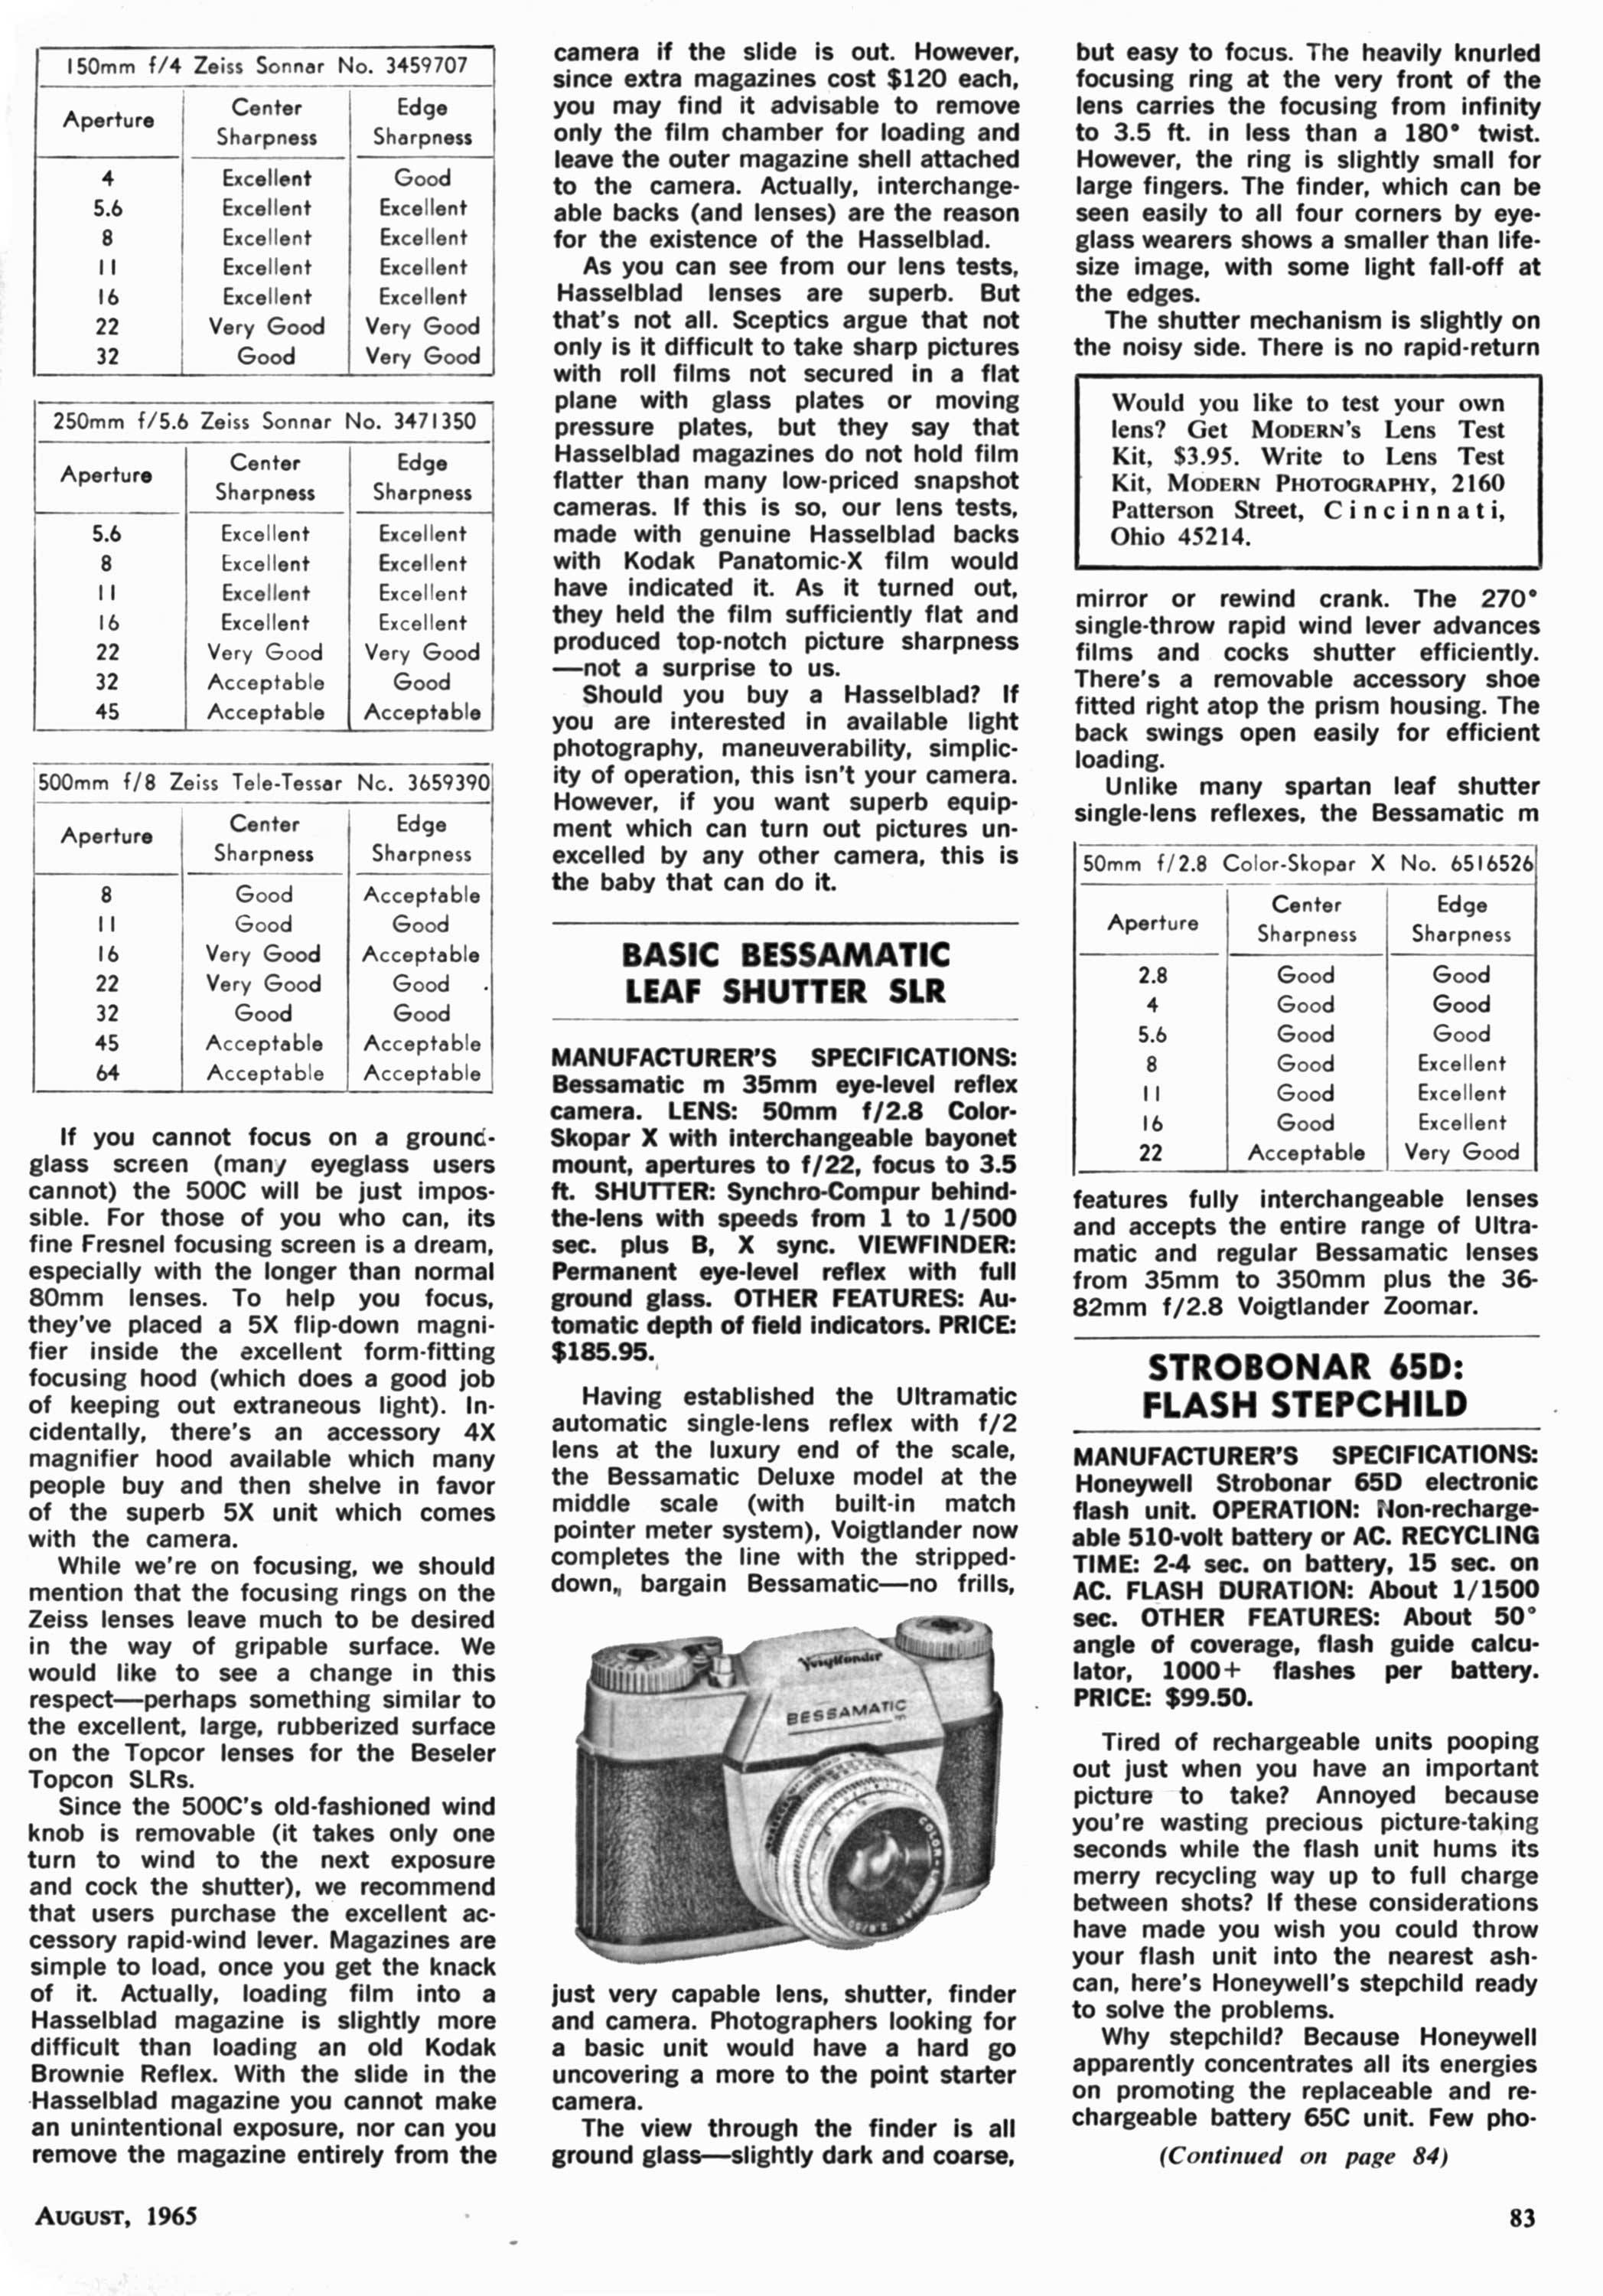
A second, more technical review of the camera along with some sharpness tests of various lenses appeared in the August 1965 issue of Modern Photography. This second article, doesn’t really share anything new, but does offer some rare criticism of the camera’s complexities, suggesting that it might not be the right camera for someone wanting an easy to use camera.
Despite a very high price, the Hasselblad 500 C was very successful, appealing to professional photographers in many industries. Hasselblad cameras developed such a high reputation for quality and dependability that in 1962, NASA started using them on space flights, some even being used on the moon.

In 1965, a version of the 500 C with a motorized drive called the 500 EL was introduced along with a few other changes. The 500 C would remain in production until 1970, at which time it was replaced by a very similar model called the 500 C/M which added support for interchangeable viewing screens, a new type of film magazine called the ‘automatic back’.
Despite sticking with the same basic formula for nearly 2 decades, by the late 1970s and into the 80s, a variety of new models were released, including the Hasselblad 2000FC in 1977 which reintroduced a focal plane shutter, the 500 ELX in 1984, and the 503 CX in 1989.
As each new model was introduced, evolutionary, rather than revolutionary changes were made to the same basic formula, ensuring a backwards compatibility to older lenses, and familiar operation to photographers.
Hasselblad would continue producing square body film cameras in the style of the 500 C until 2006 when the final model, the Hasselblad 555 ELD was discontinued in favor of the company’s digital H-system. This ended a run of nearly 50 years from the first 500 C in 1957 making it one of the longest running and successful camera systems ever made.
Today, the name Hasselblad is still associated with quality cameras made to the highest standards. All Hasselblads are desirable by collectors and shooters alike for their build quality, excellent images, and rich history. Picking the most successful model is difficult as there’s many to choose from, but in terms of which model was produced the longest, the Hasselblad 500 C takes the crown there.
If you are in the market for a medium format SLR, any of the leaf shutter Hasselblads are excellent options, but make sure you give your wallet a stretch for trying to pick one up as most models, in good working condition approach and in many instances, exceed $1000 on the used market. For someone wanting to casually try a medium format SLR, there are several much less expensive options, but if you want the best, then you’ll have to pay for the best.
My Thoughts
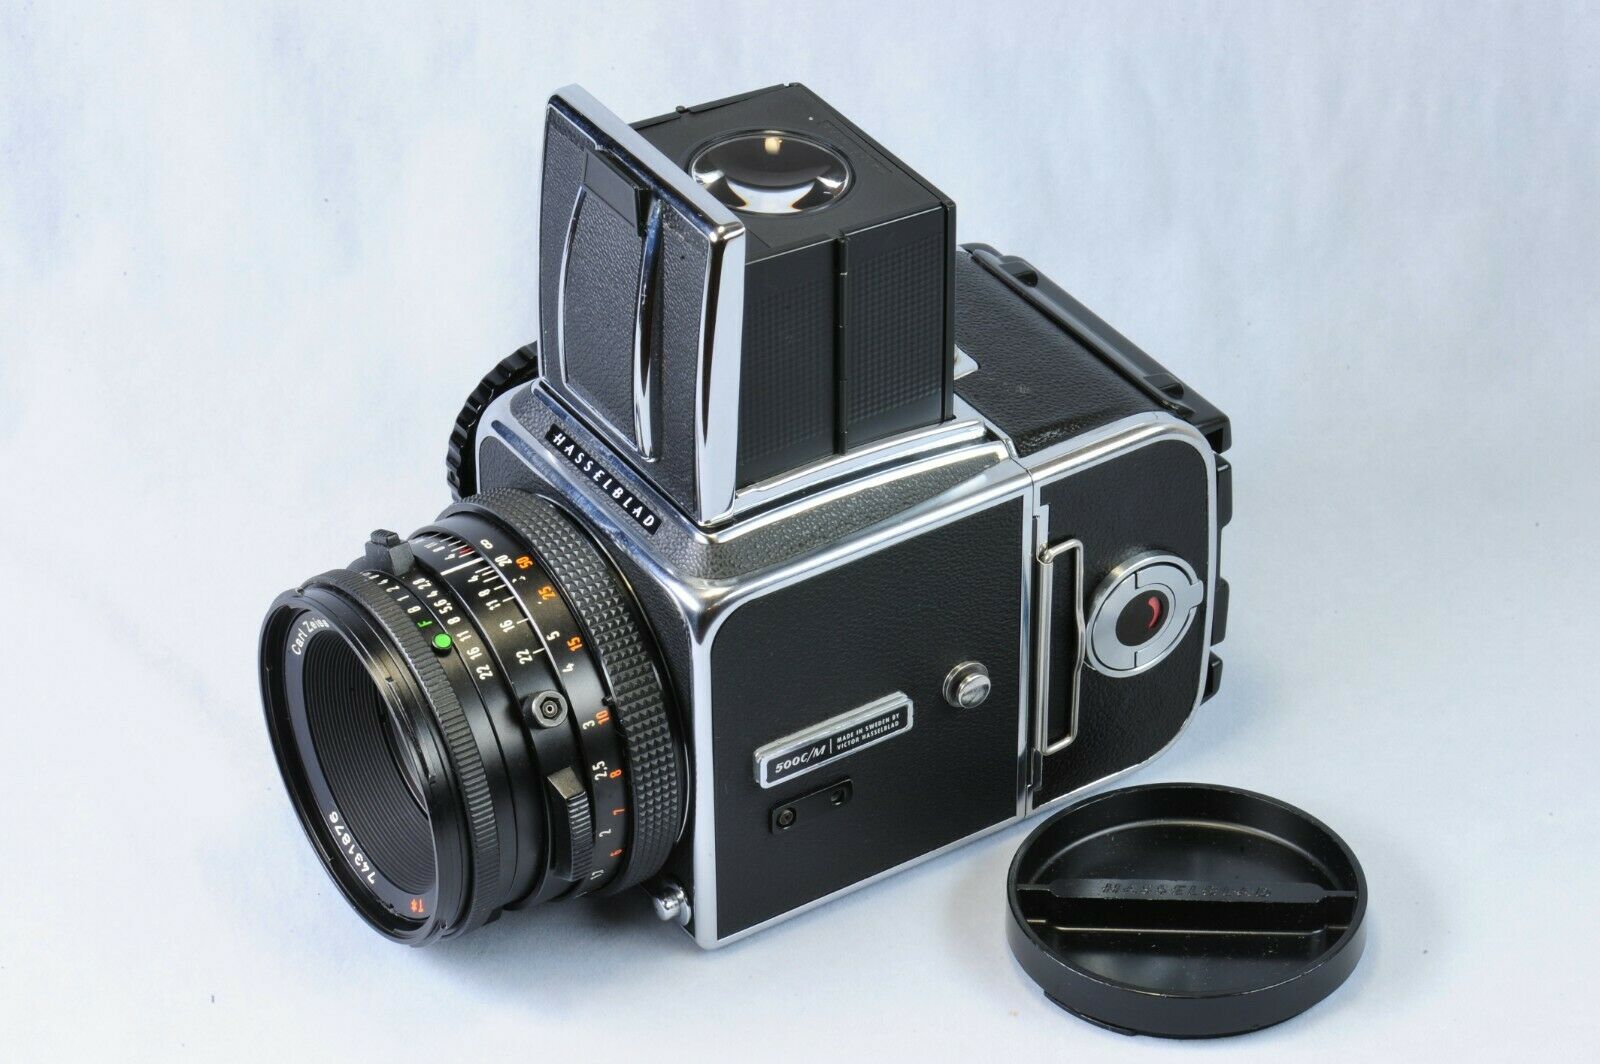
Who wouldn’t want an opportunity to shoot a Hasselblad for free? Back in the spring of 2021, while visiting Gary Camera and Photo in Merrillville, Indiana, I was talking to shop owner Barry and he agreed to let me take this 500 C I found buried in the back of an old display shelf out for a spin. When I first asked, he told me he didn’t think it worked. After fiddling with it for a bit and swapping the back with that from another, it sprung to life so I wrapped it nicely in some padding, put it into my backpack and took it home.
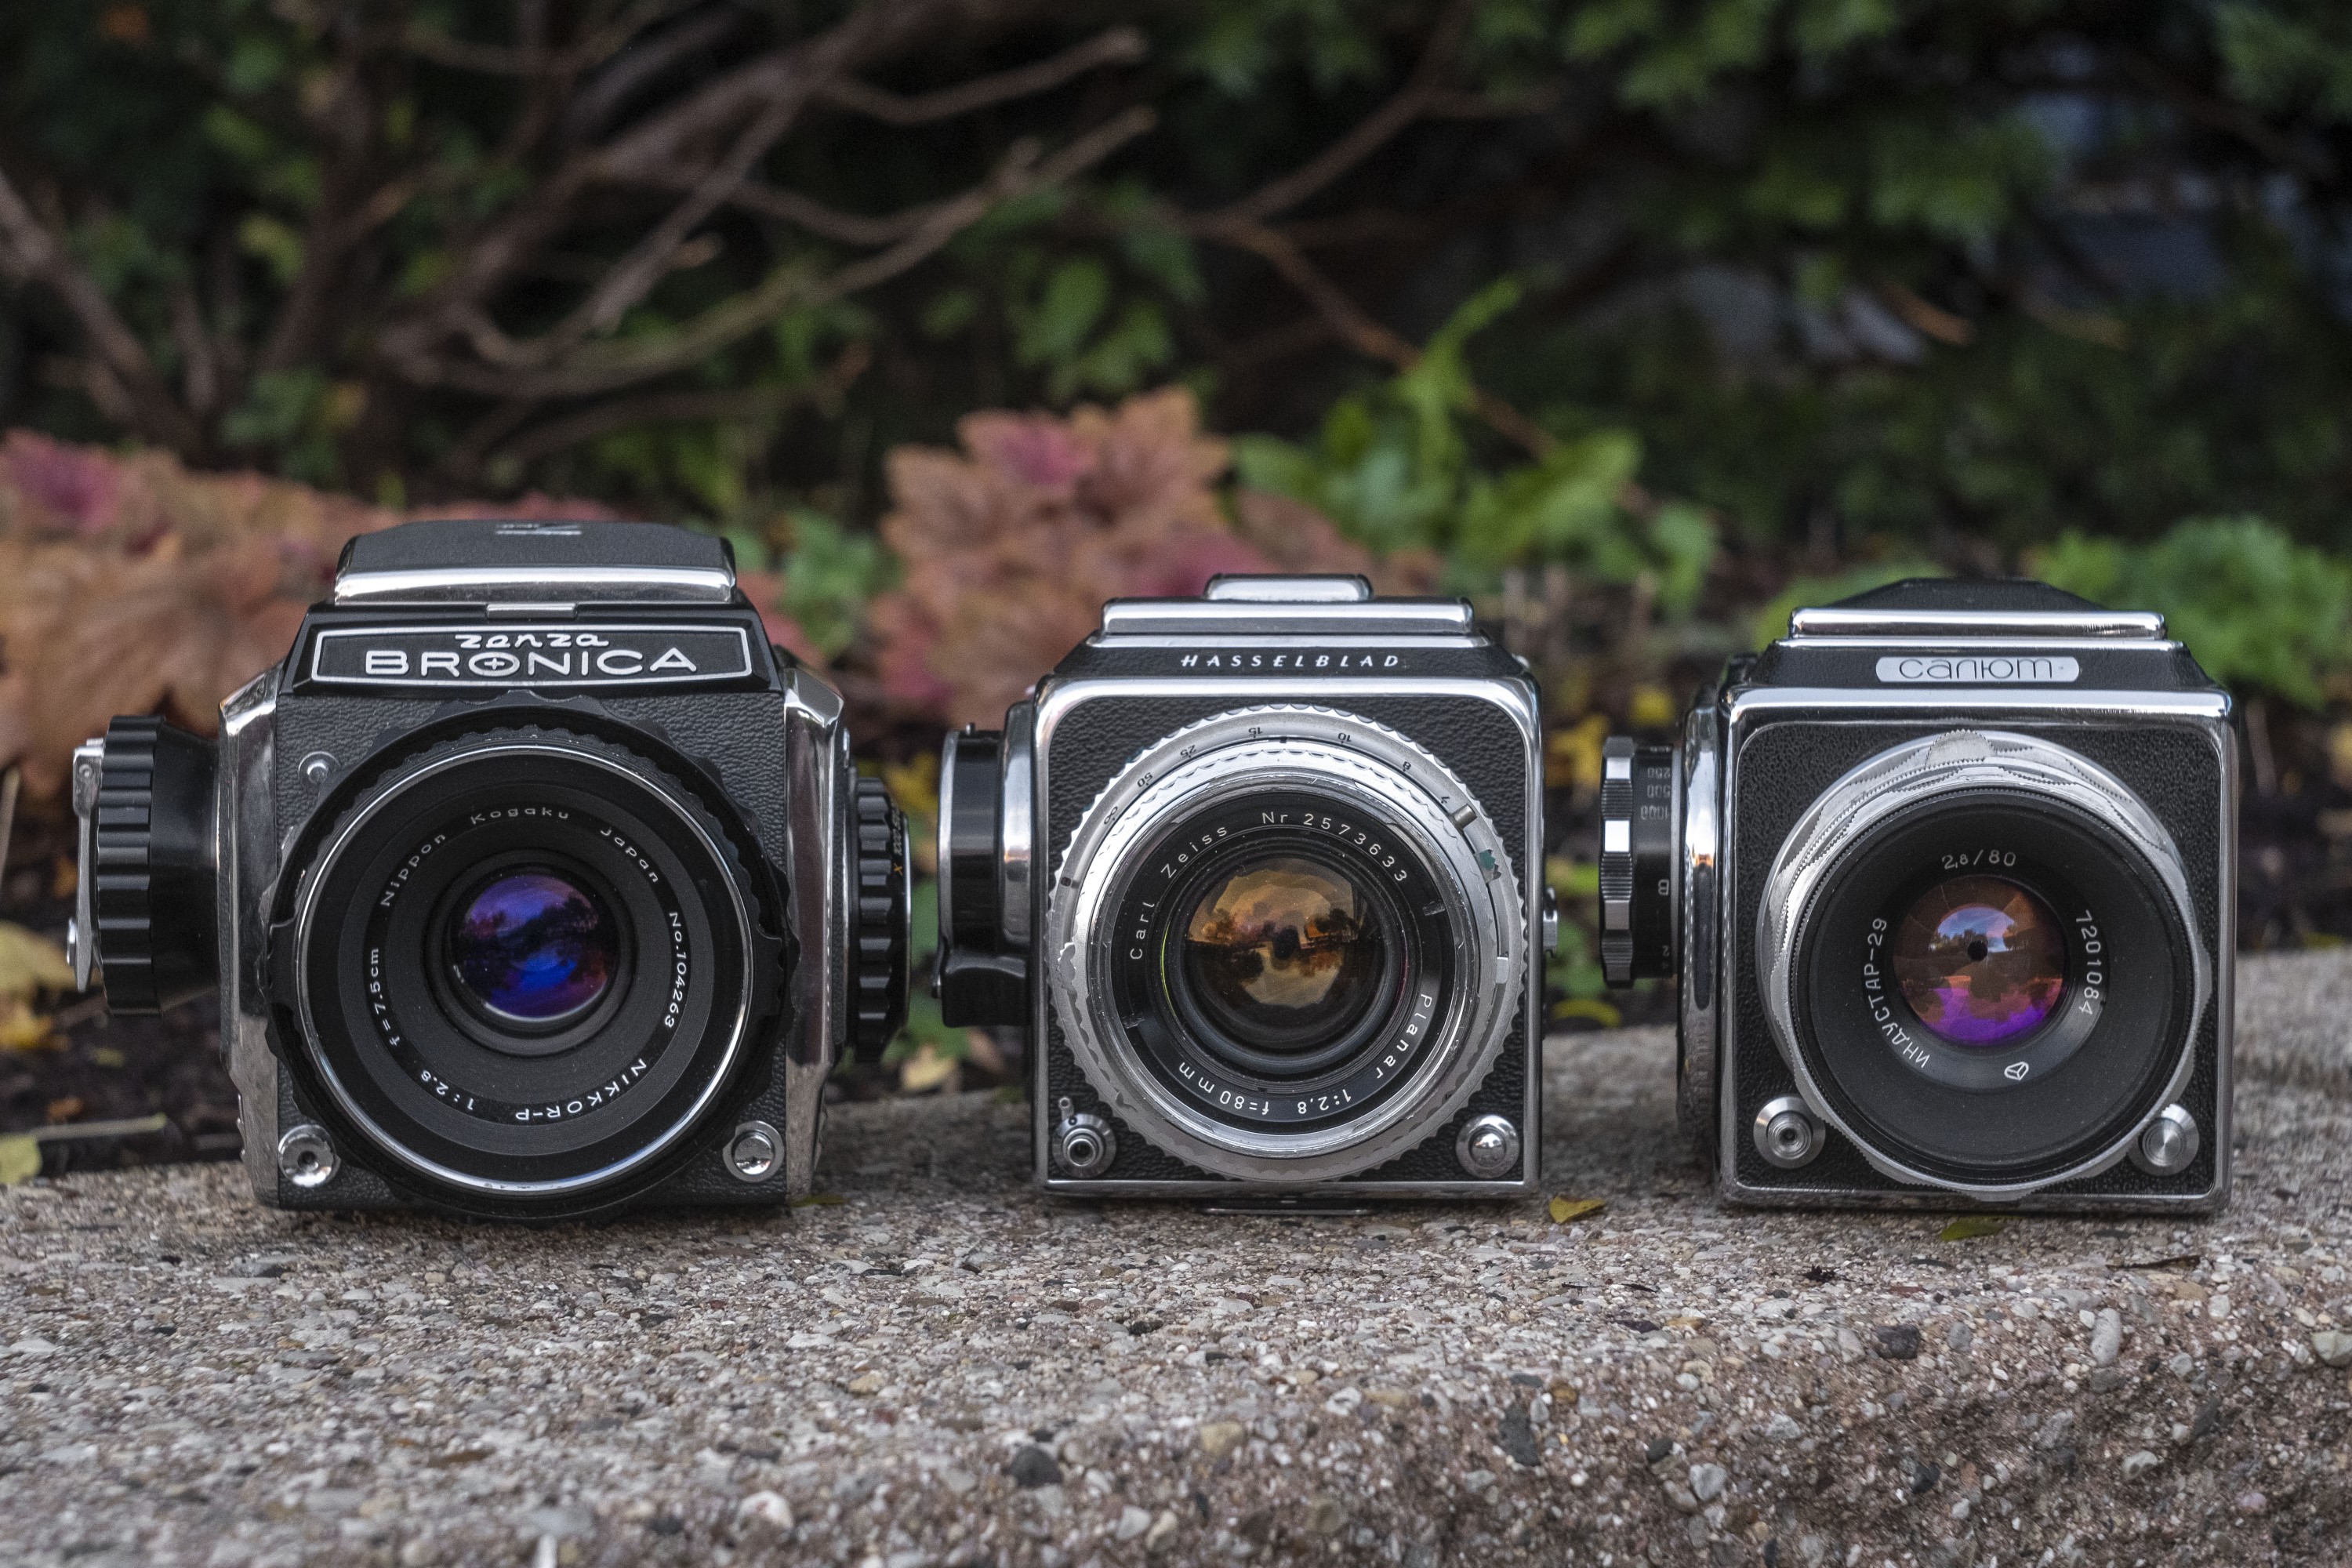
Having used other 6×6 SLRs before, the Hasselblad immediately felt familiar to me. That’s not necessarily a bad thing however as the success of this camera is why cameras like the Bronica and Soviet Salyut/Kiev cameras exist in the first place. Build quality is excellent, and although this example had some conditional issues like damage to the chrome plating in places and some separation in the lens, overall, the camera seemed to be in remarkably good condition.
With the lens, back, and viewfinder attached, the 500 C weighs 1430 grams, which is very similar to the Arsenal Salyut at 1462 grams, but quite a bit lighter than the Zenza Bronica S2 which weighs a massive 1857 grams in shooting configuration. The ergonomics of the camera are very good, especially when used at waist level. Although I did not have access to an eye level prism, I’ve used them before on other medium format SLRs like the Pentacon Six and Mamiya M645 and I struggle with holding a large and heavy cube to my face. I definitely prefer using this style of camera at waist level.
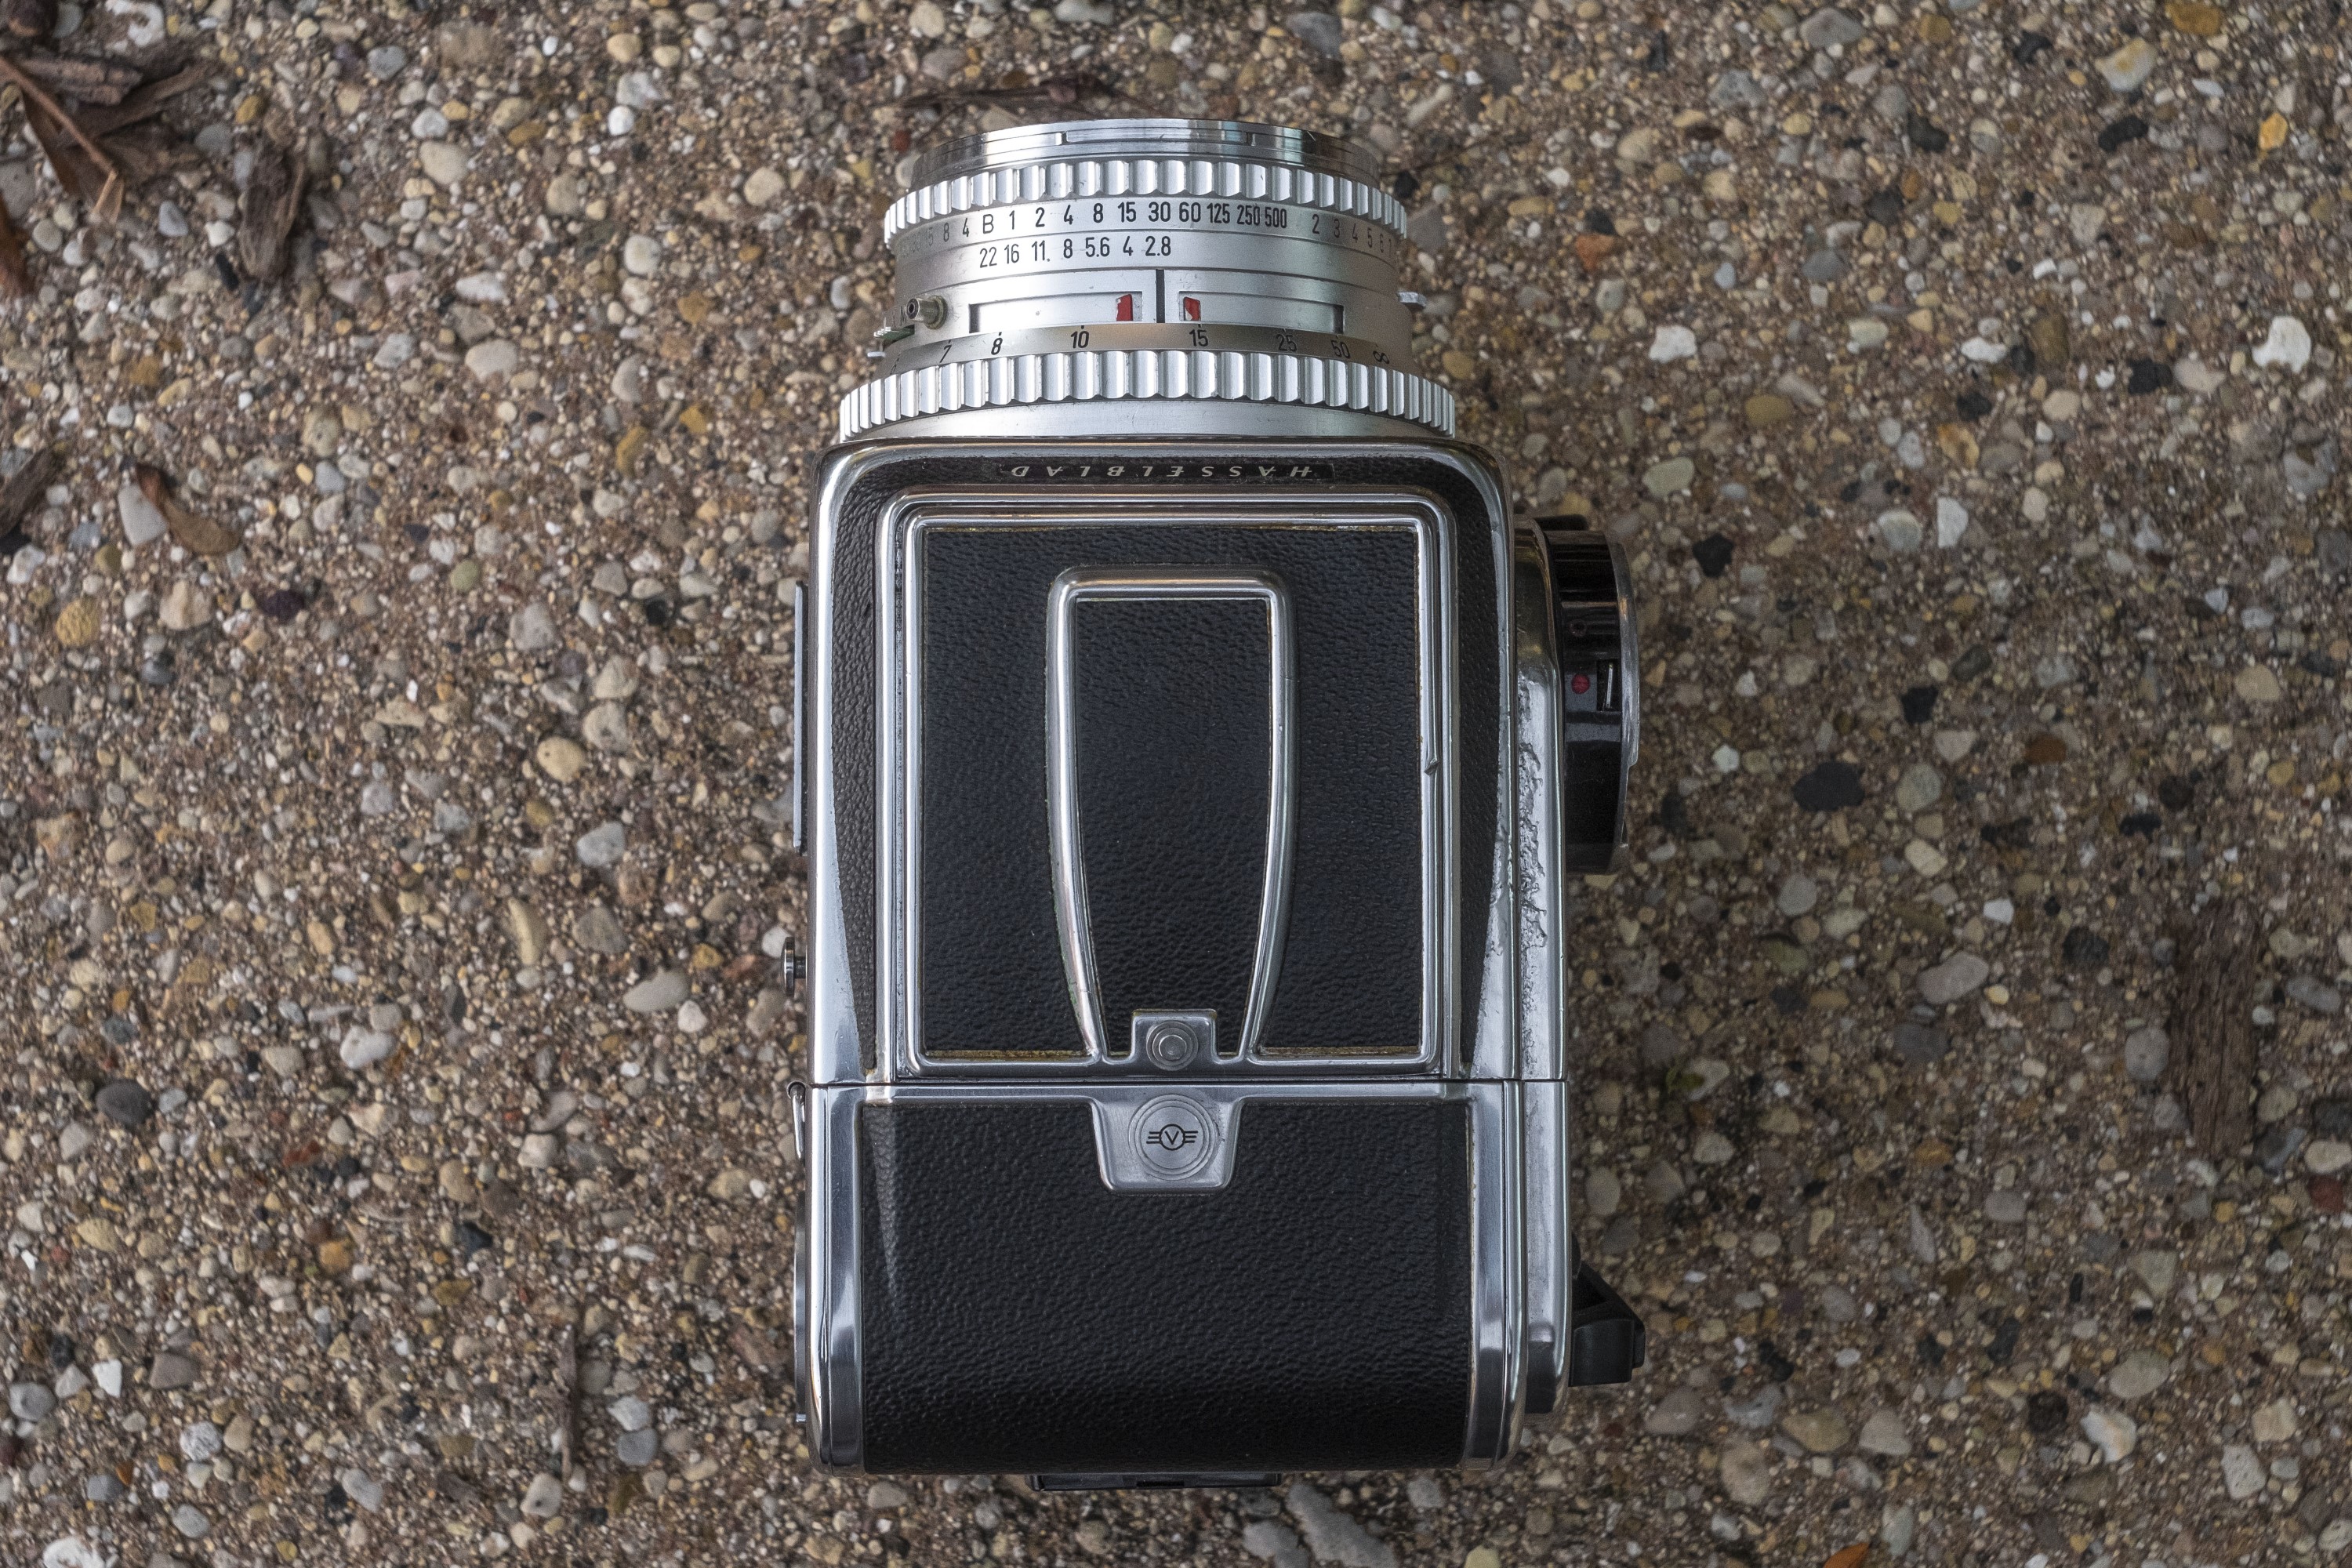
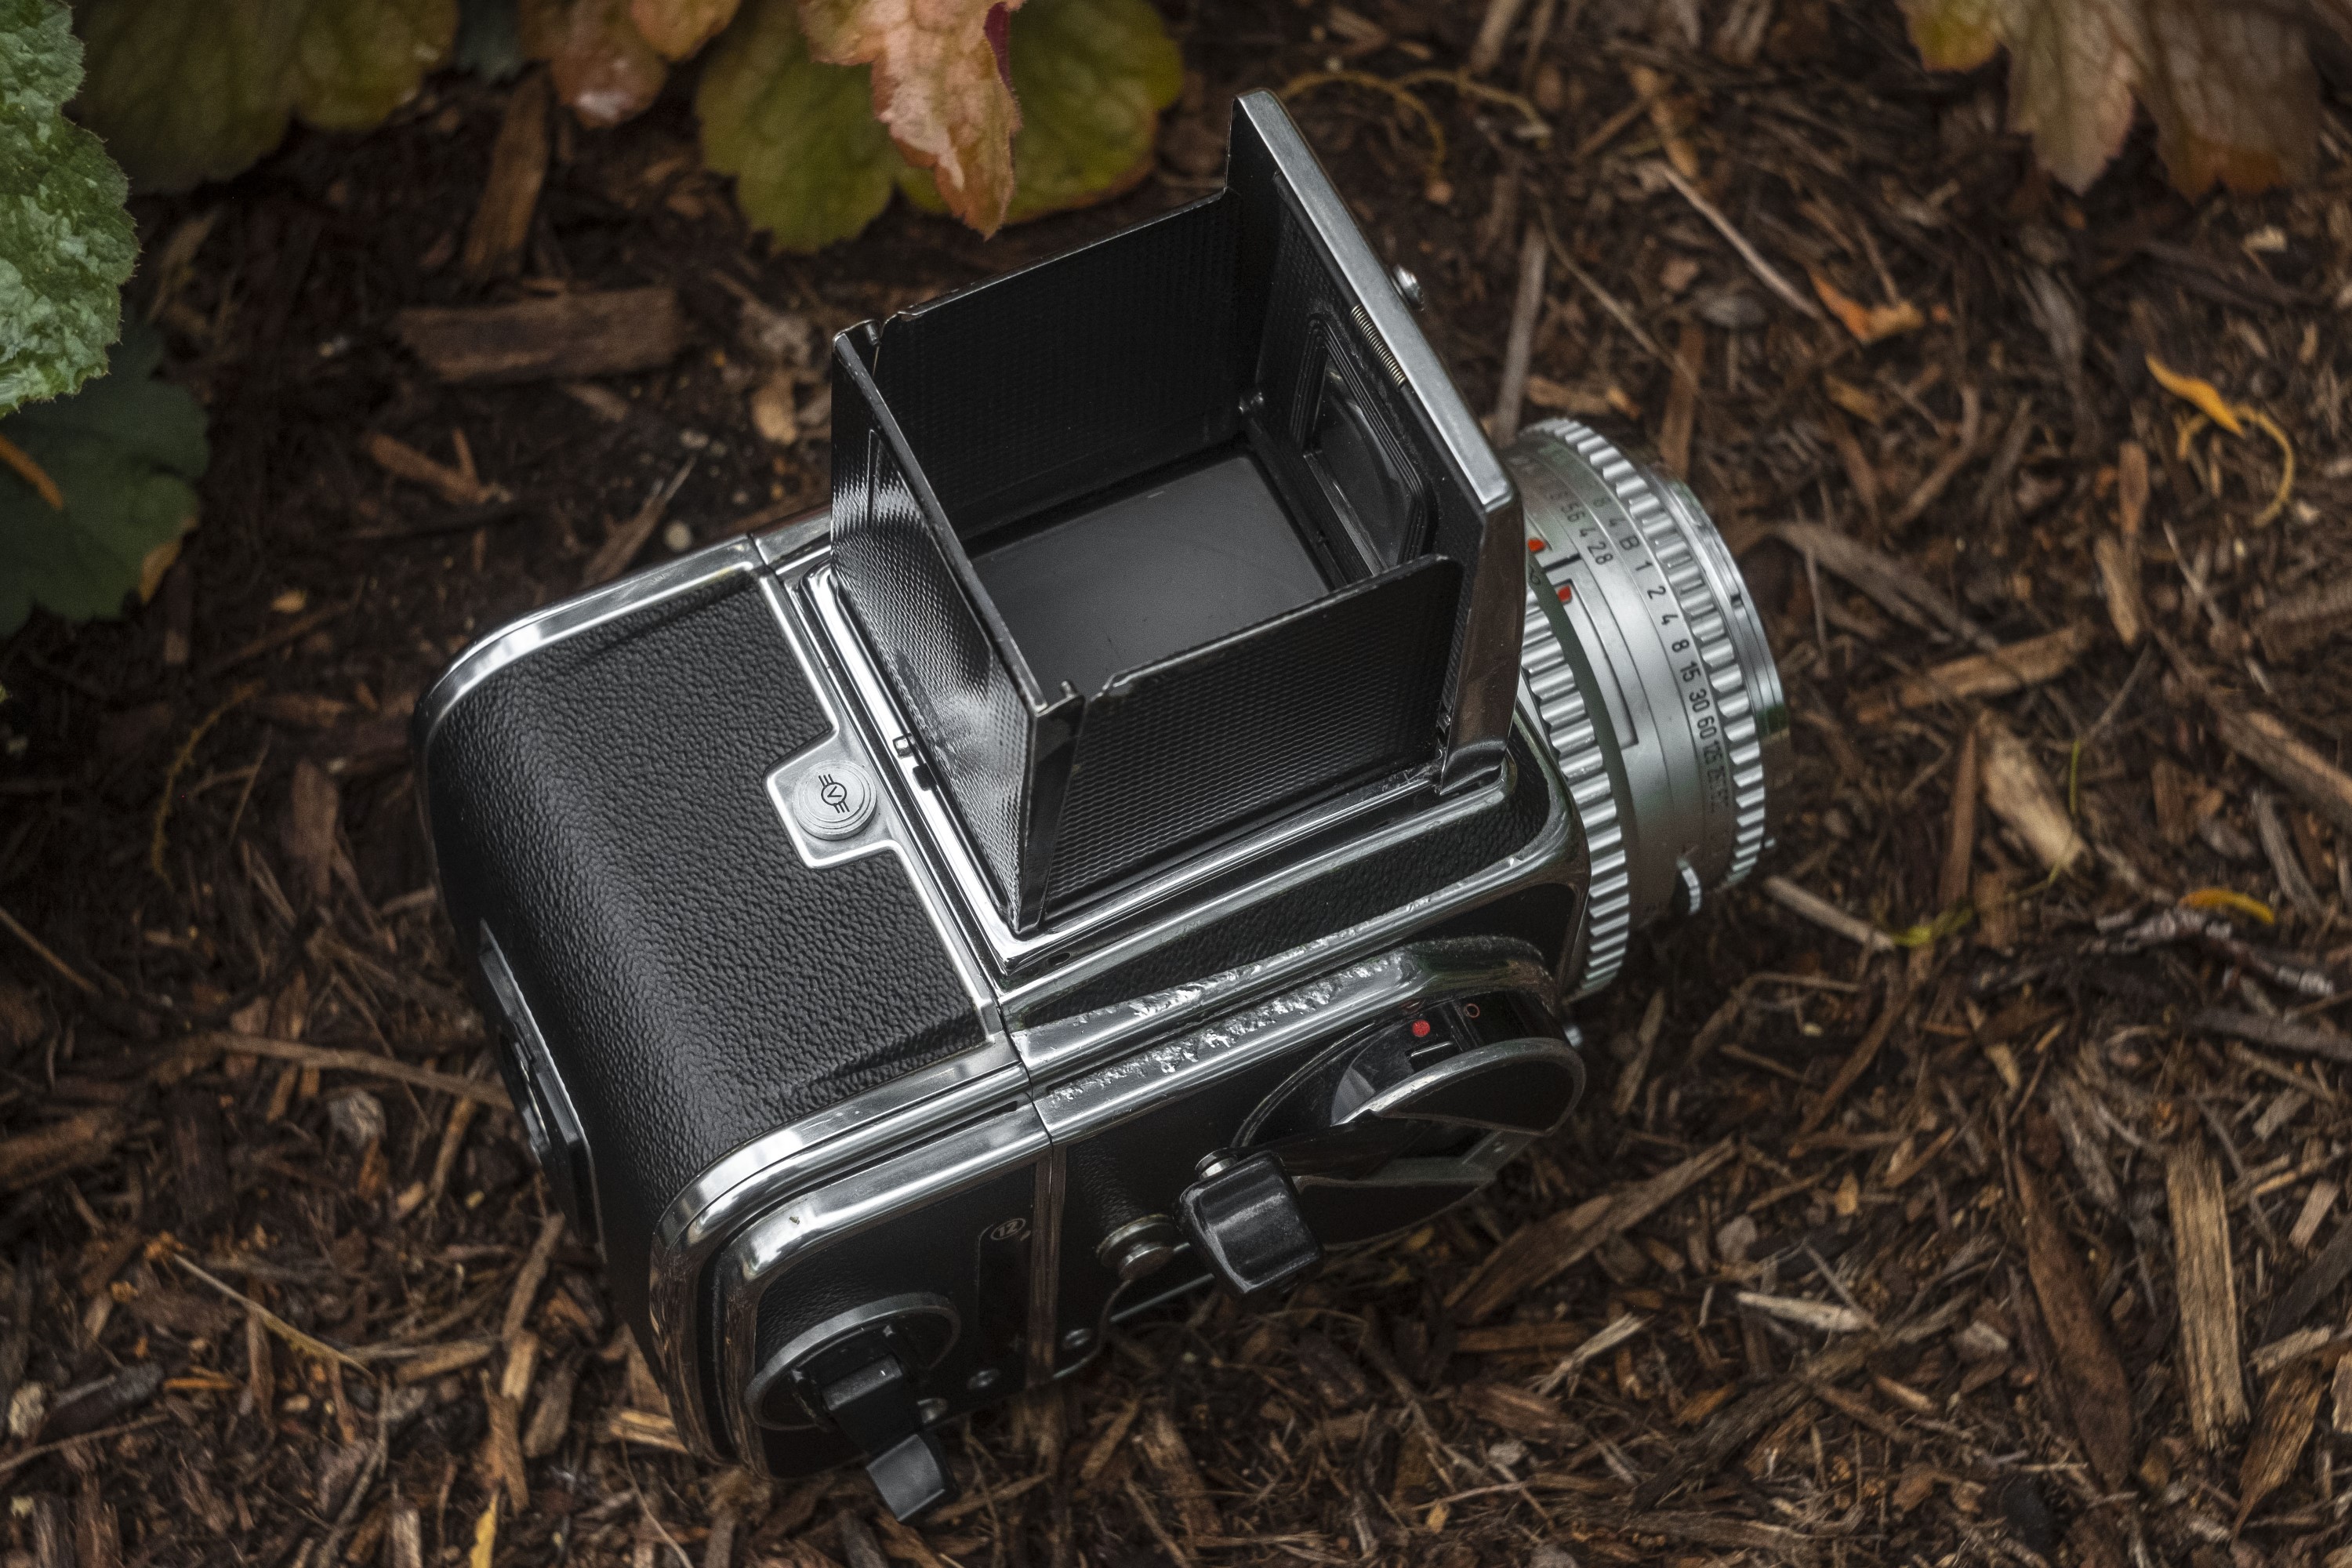
From up top, you see the hinged hood for the waist level viewfinder and a small round release near the rear edge. Be careful though as a larger round release, immediately behind the hood release is for removing the back of the camera. Although it’s never happened to me, I wonder if anyone trying to open the viewfinder has ever detached the back.
With the hood up, the view through the viewfinder is near life size, with a noticeable Fresnel pattern on the focusing screen. There are no other focusing aides such as a microprism circle or split image, but these can be replaced with ones that do. Brightness is even across the frame into the corners, but not quite as vibrant as those found on later cameras. For shooting outdoors, it’s not likely to be a problem, but if you intend on shooting a lot of indoor photography, you might want to invest into an upgrade to the screen.
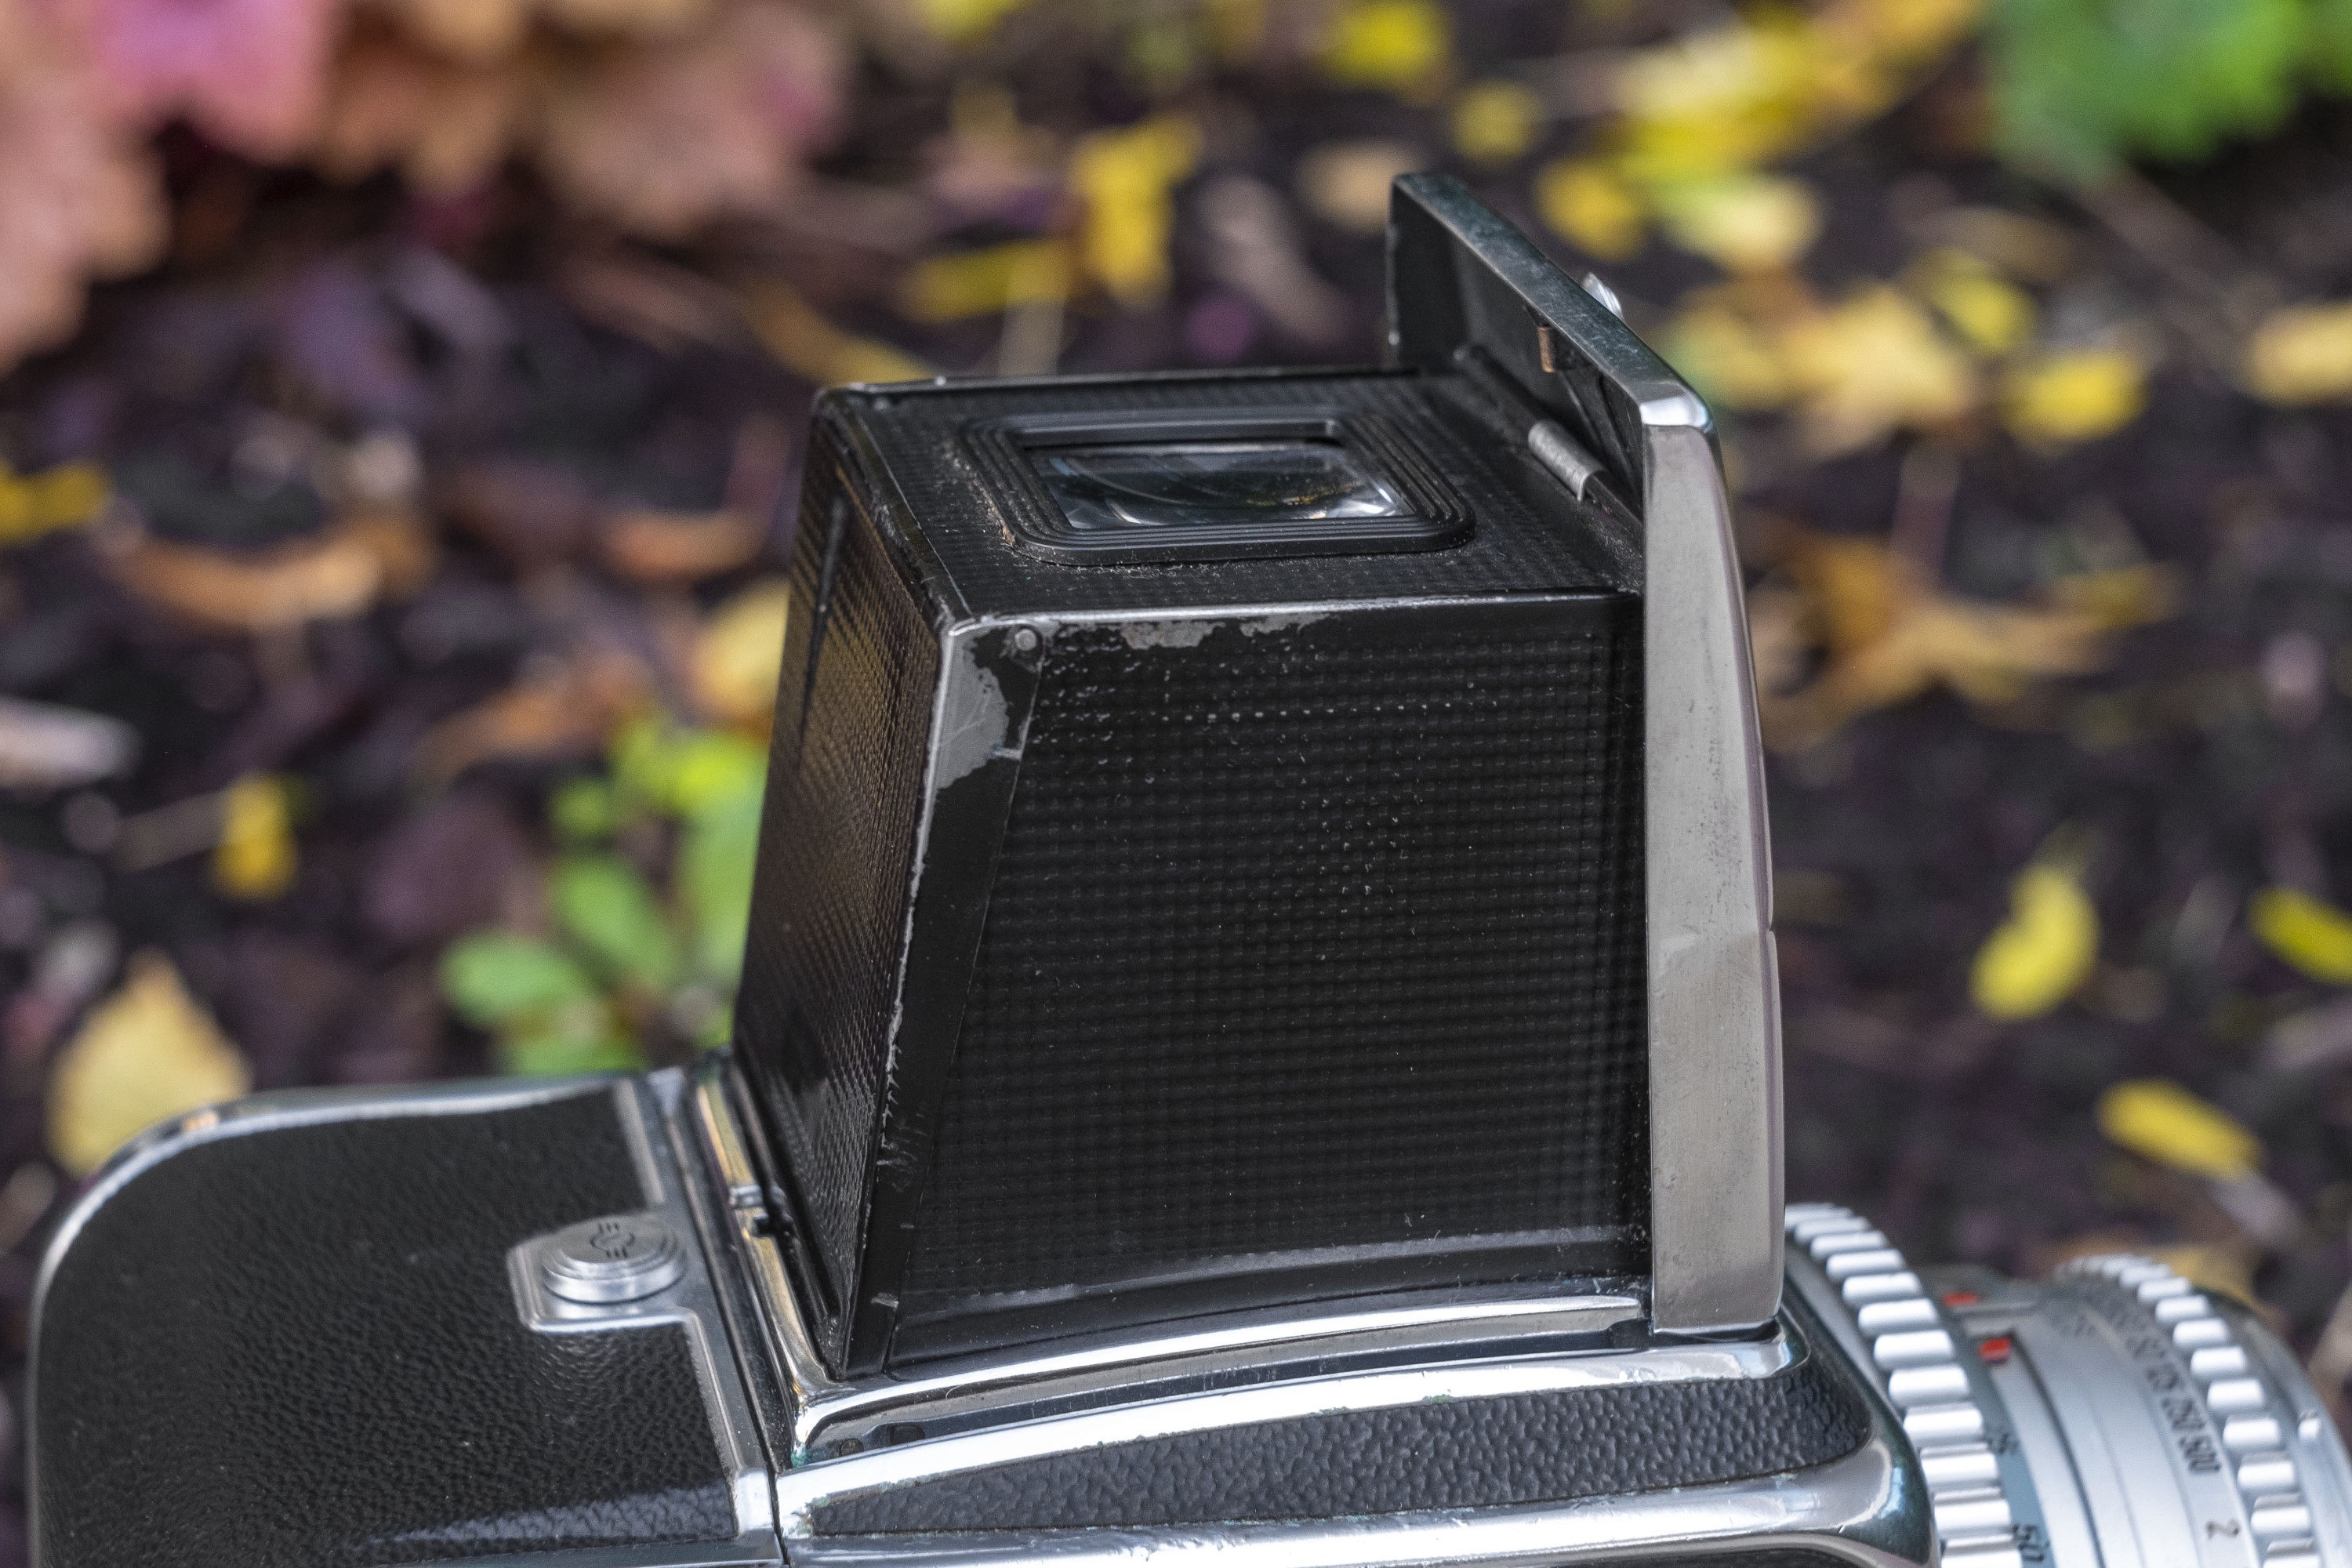
As is common with most waist level cameras, on the inside of the top of the hood is a hinged magnifying glass. A small locking pin at the very top of the inside of the hood releases the magnifier allowing it to swing up. After releasing the magnifying glass, you must manually push it part way back down, while squeezing the top and bottom parts of the hood together, to allow for two small divots on the sides of the magnifier to catch two small pins on the sides of the hood to keep it in a shooting position. This sounds more complicated to write than it is in person. With one in front of you, it should be pretty obvious how to lock the magnifier into position. In the image to the right, you can see the magnifying glass locked in position.
The camera’s right side has a lot going on. Starting with the film advance knob, a single 360 degree motion advances the film one frame and sets the shutter ready for the next exposure. A small release pin at the top of the advance knob allows you to remove the original film advance knob and replace it with the rapid advance one with flip out handle as seen in the image to the left. Additionally, a metered knob was also available that had an uncoupled selenium meter along the leading edge of the knob.
The entire process of advancing the film and cocking the shutter is very fast and reasonably quiet, at least compared to other cameras like the Zenza Bronica S2 and Arsenal Salyut which are very loud. Compared to those two cameras, the Hasselblad 500 C has the smoothest film transport and is the least noisy, but by no means is this a quiet camera. If you have a need to be discreet while shooting film, cameras like the Hasselblad 500 C might not be the best choice.
In the short video below, I go through the entire motion of opening the viewfinder hood, advancing the film and cocking the shutter, firing the shutter and repeating twice more. Although it sounds noisy in this video, it is not as loud as other cameras.
A small black button beneath the film advance knob is called the Rapid Release button and is normally used for quick action scenes in which either an auxiliary viewfinder or zone focus is being used.
With the shutter set, pressing this button closes the shutter and readies the diaphragm to the chosen f/stop and raises the mirror, blocking the viewfinder. Then, with a second press of the shutter release, the shutter fires, making the exposure. The benefit to doing this is that it eliminates the slight delay of a normal exposure when the camera has get everything ready, allowing for a truly instantaneous exposure. As with normal exposures, this button cannot be operated with the dark slide in place.
On the side of the magazine, there is a second film advance knob which is used when loading a new roll of film. The one seen on this example is different because I have a later magazine from the Hasselblad 500 C/M. The most obvious difference between the two is in the presence of a smaller rapid wind handle. The purpose of this handle is to ready the film for it’s first exposure after loading in a new roll, and also for taking up the tail of paper after finishing a roll.
Below the film loading knob is the exposure counter. The film back seen on this, and most Hasselblad 500 C cameras, is the 12 exposure 6×6 magazine, but at the time of it’s release there were other options. There were film backs that made sixteen 4.5cm x 6cm exposures, sixteen 2″ x 2″ super slides, 24 6cm x 6cm exposures on 220 film, and even a special back that used perforated 70mm film. There might have even been more that can be used, but regardless of which back you have, they attach and work the same way.
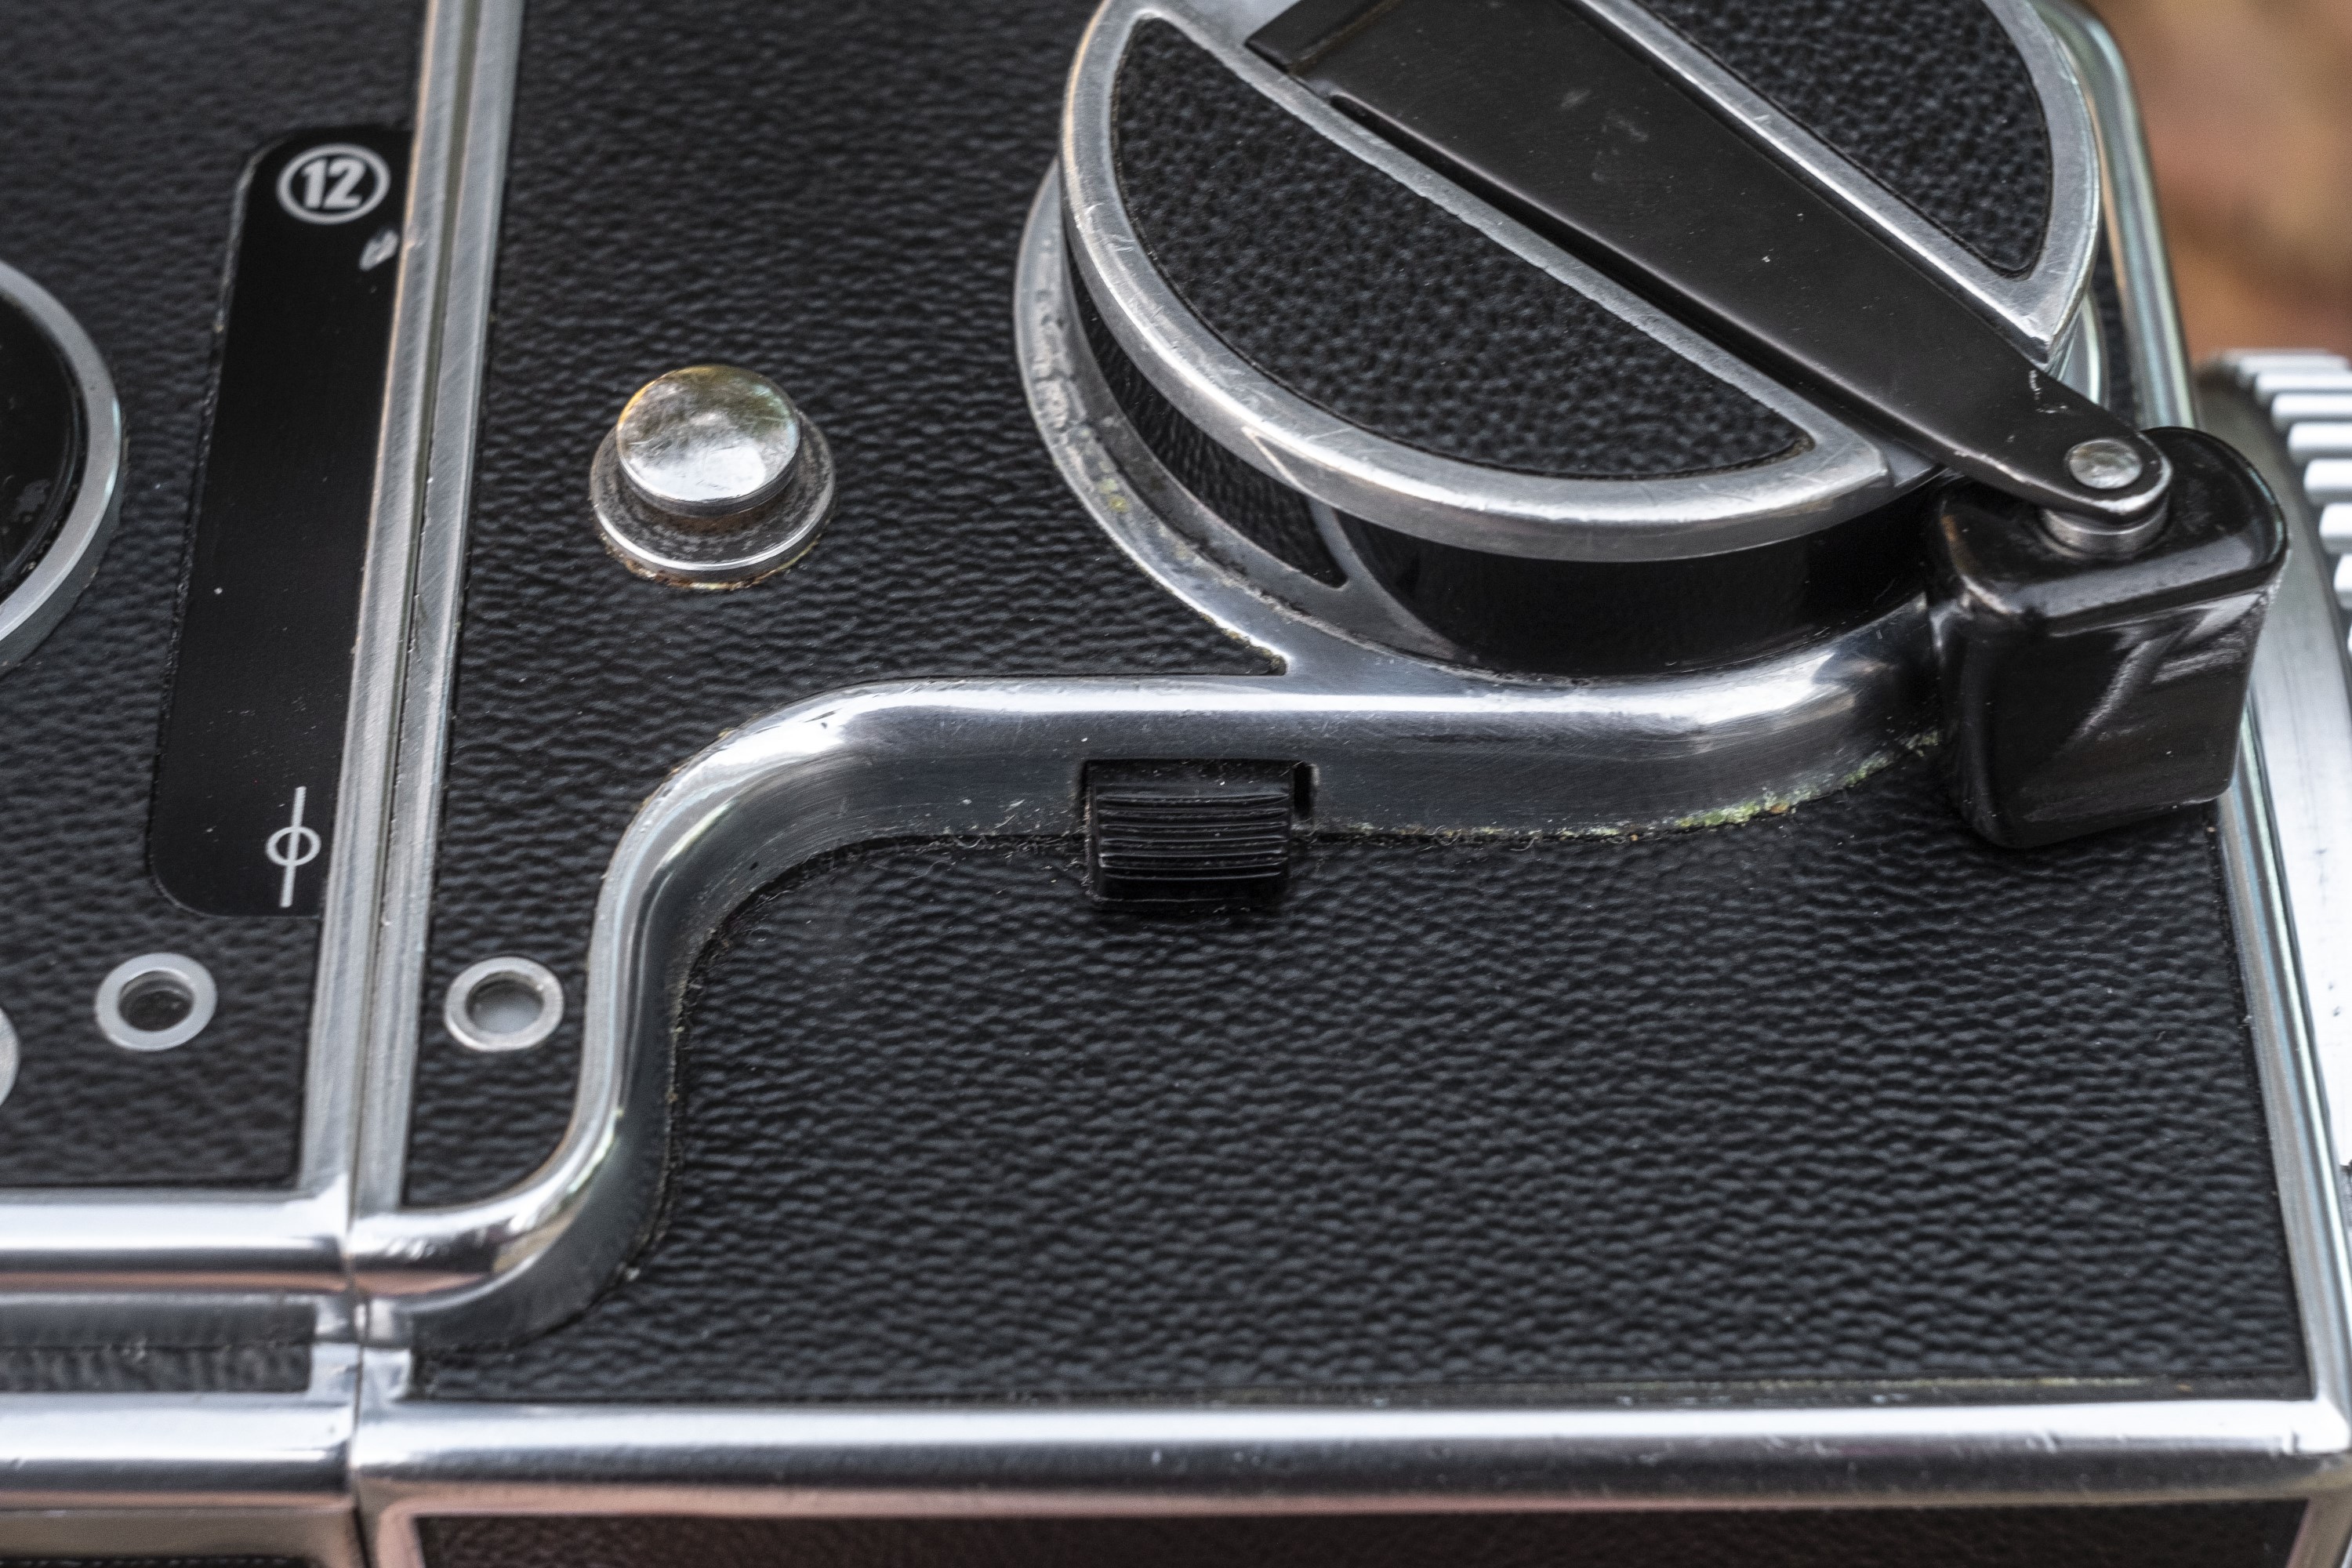
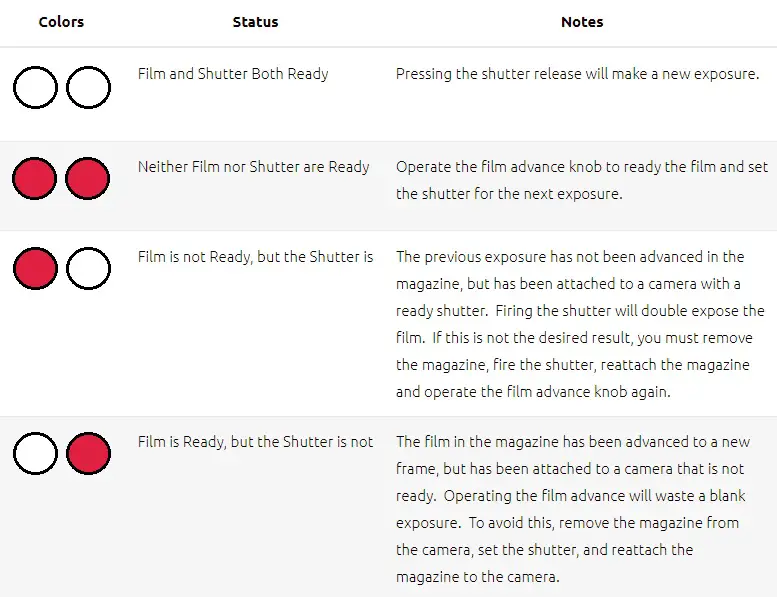
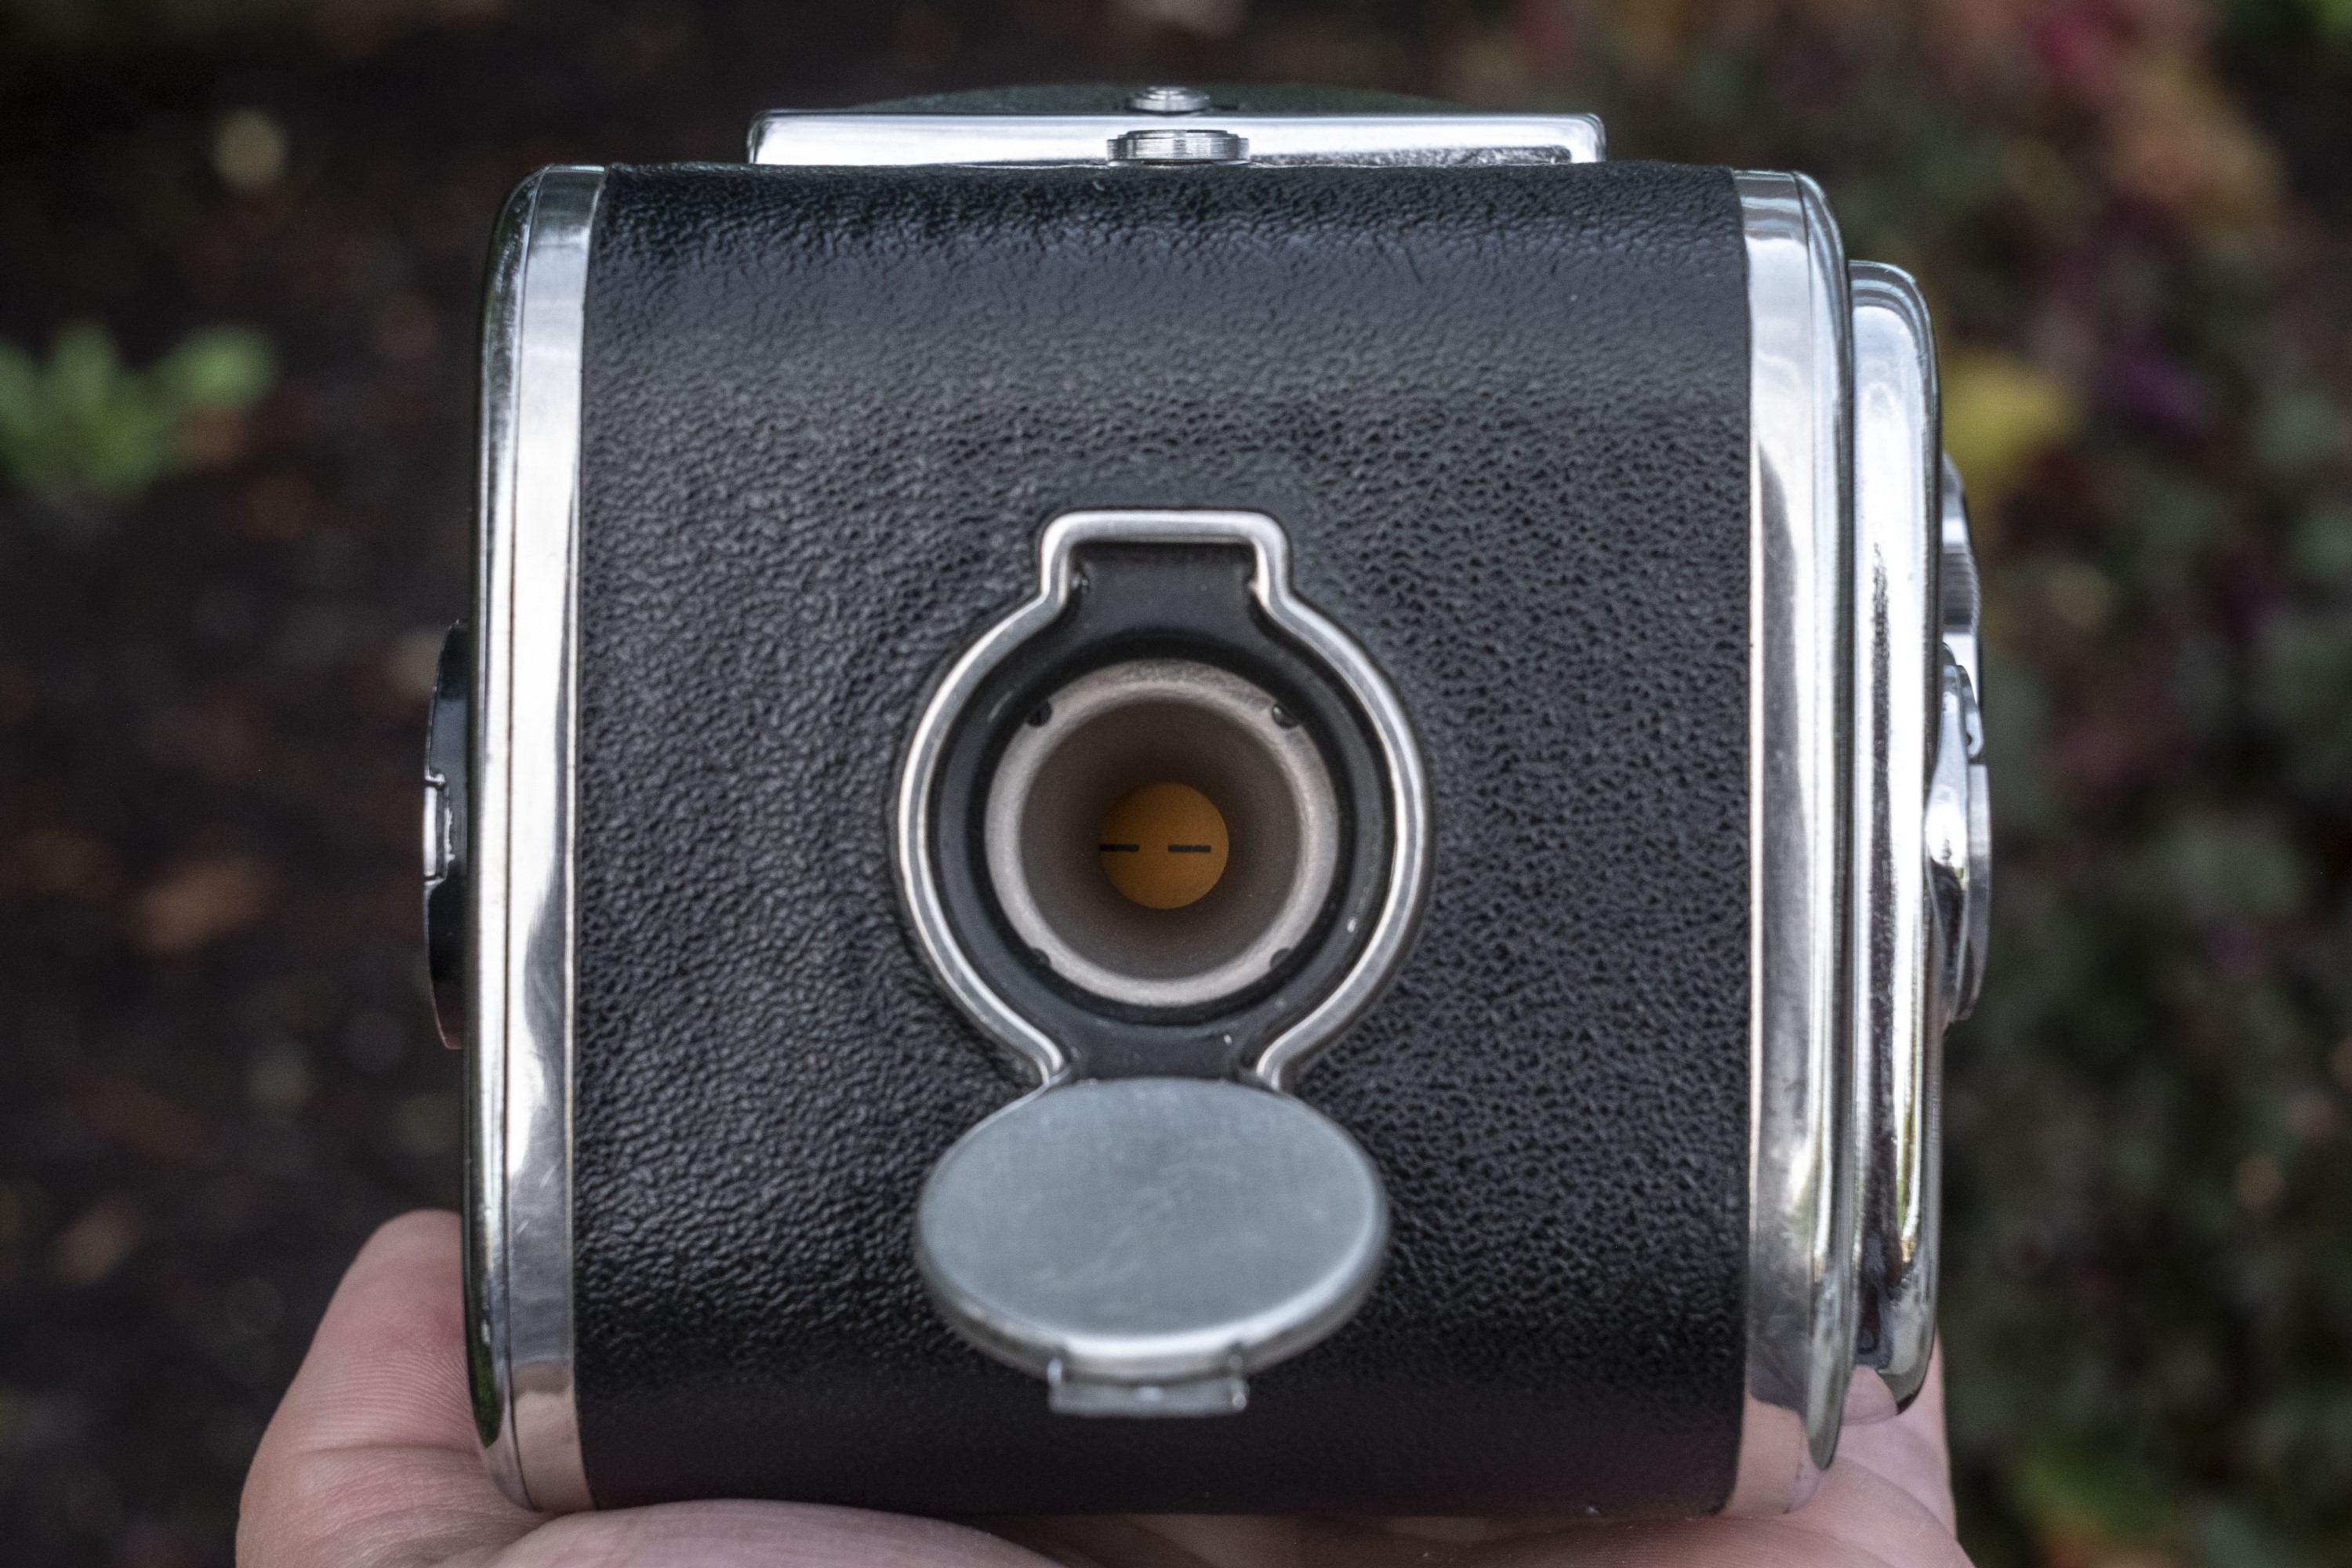
Finally, there are two round windows, one each at the base of the magazine and the other on the camera itself. The purpose of these two small windows is to show the status of the film in the magazine and the shutter in the camera. Since the Hasselblad is designed to swap film magazines mid roll, it is important to keep track of the status of both the film in the magazine and the shutter, so as not to double expose or waste an exposure. The chart below explains the meaning of both circles.
The Hasselblad 500 C has a double exposure prevention that can be overridden by temporarily detaching the film magazine, turning the film advance lever to cock the shutter again, and then reattaching the magazine. Doing this will expose the same piece of film twice, if you so desire.
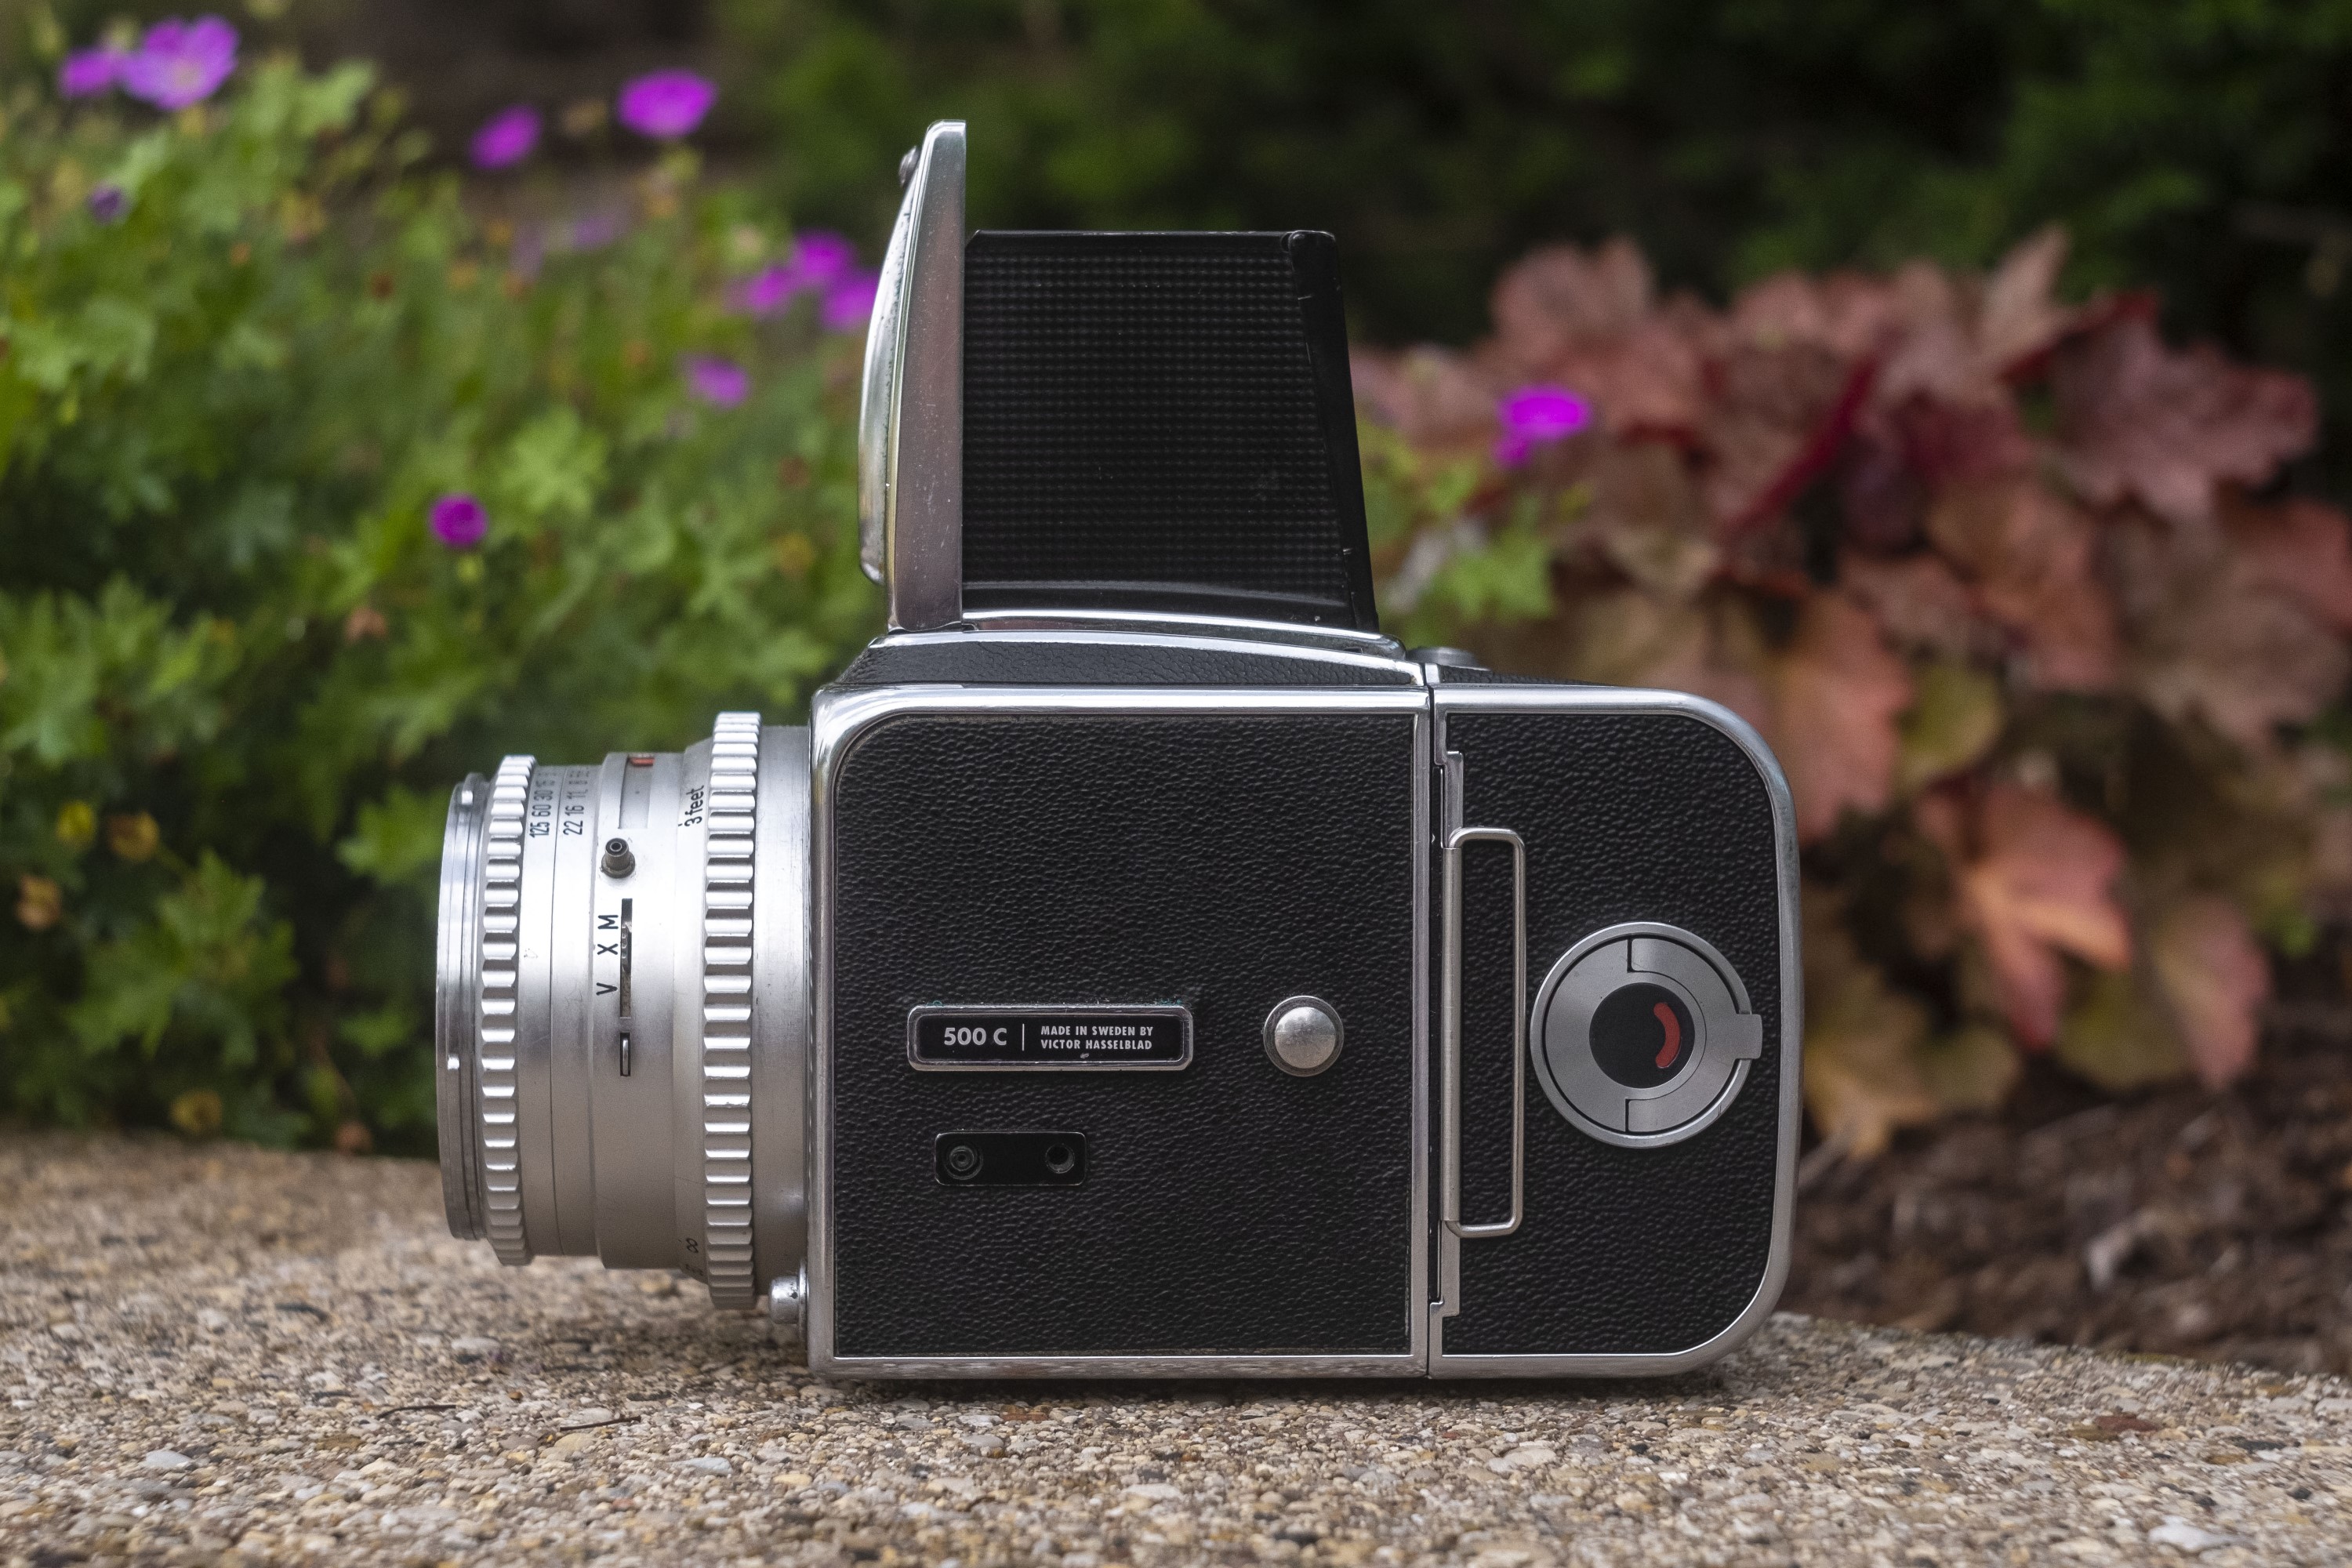
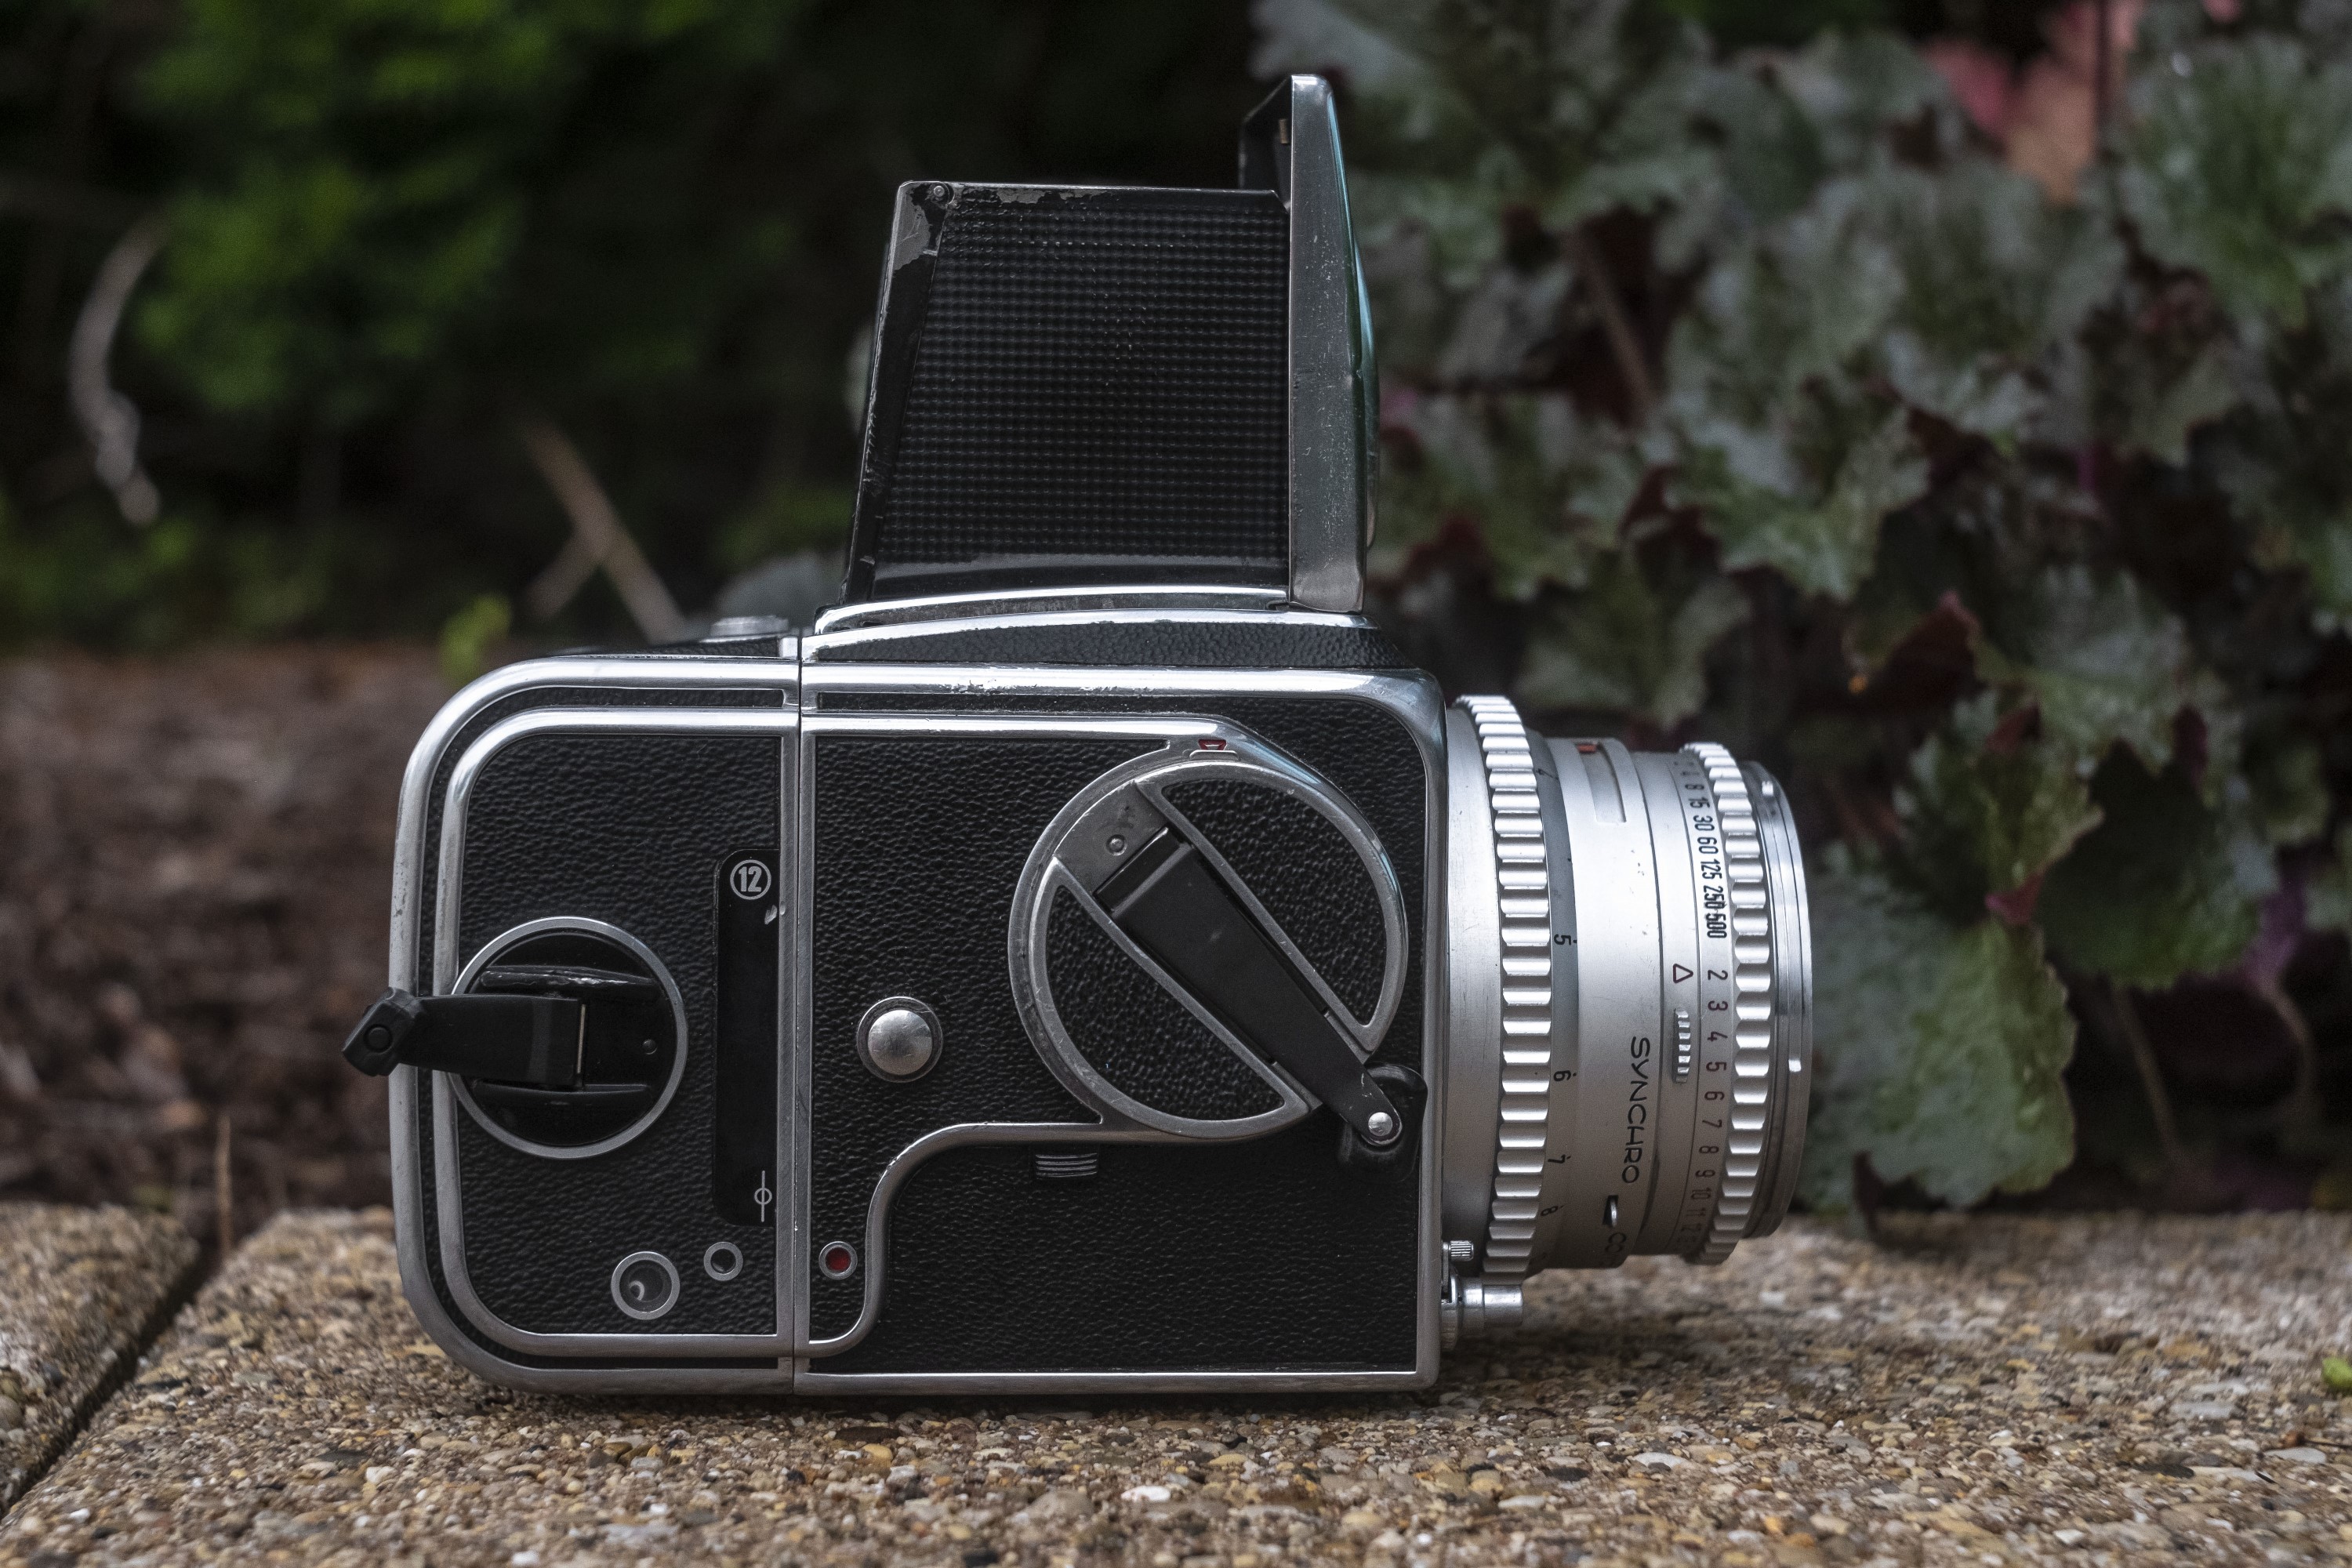
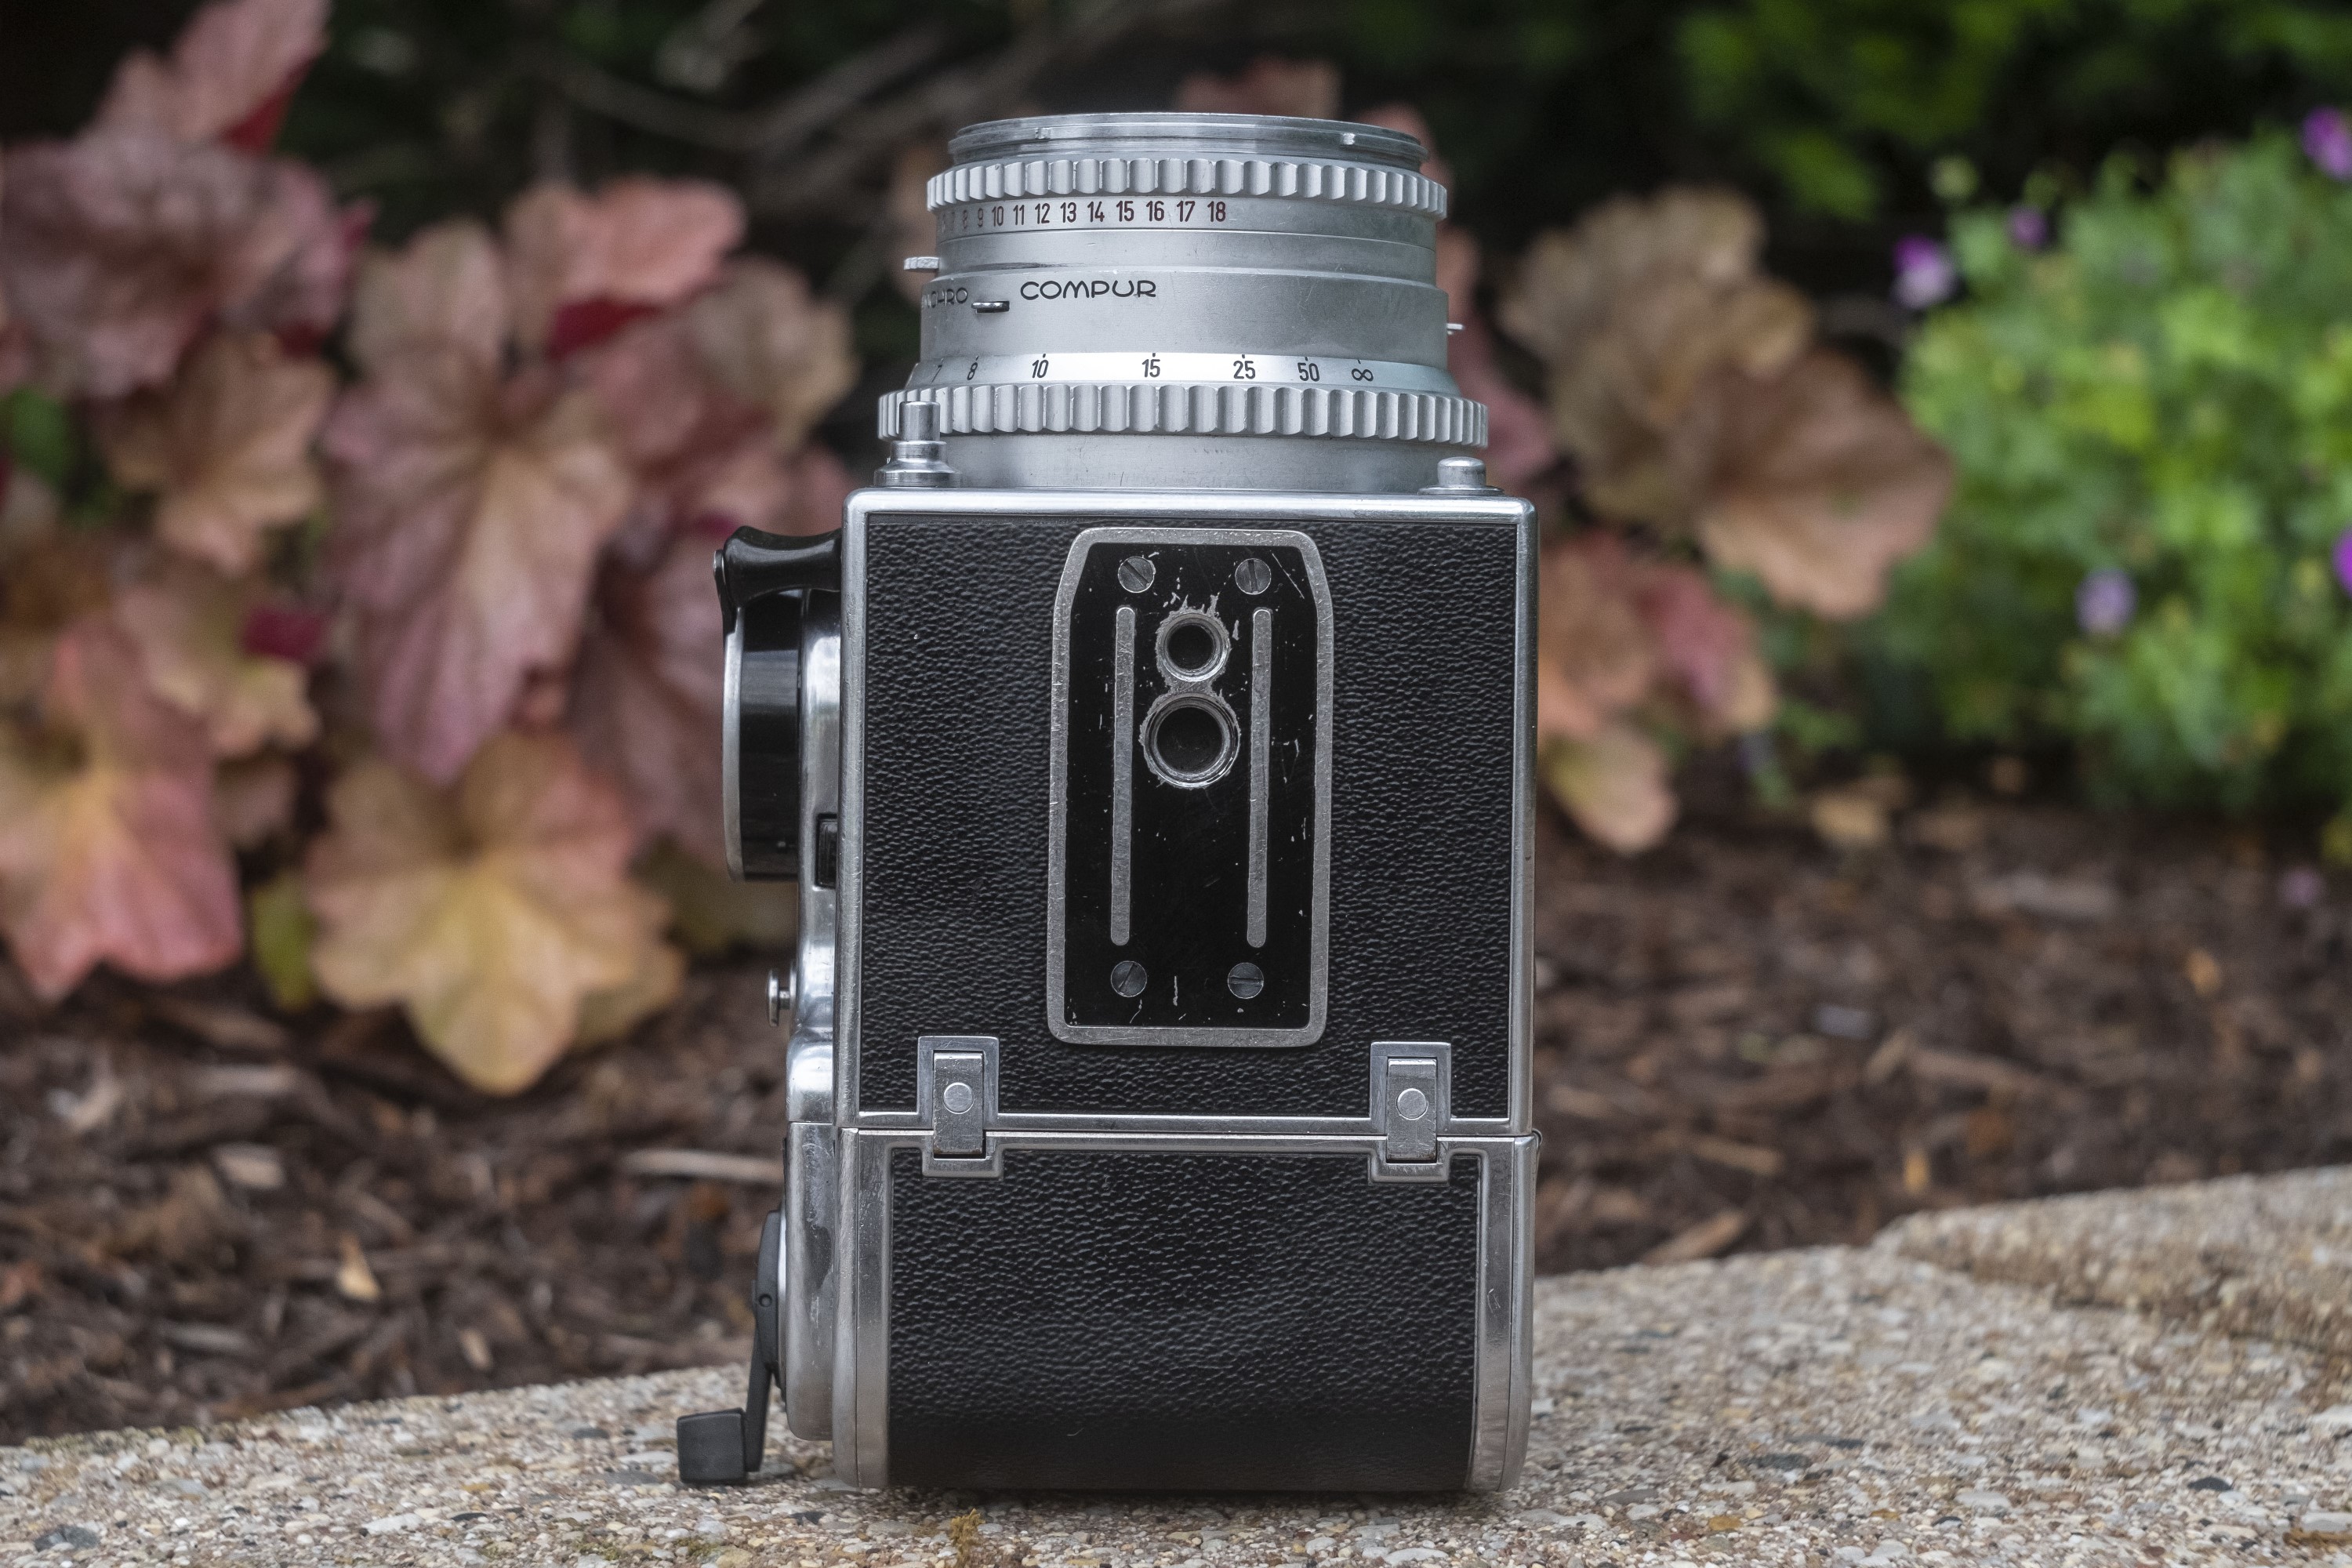
The left side of the camera is far less interesting, featuring an auxiliary flash sync port, strap lug, and a rectangular name plate which also doubles as an attachment point for accessories like the optional sports finder which slides into grooves above and below the name plate.
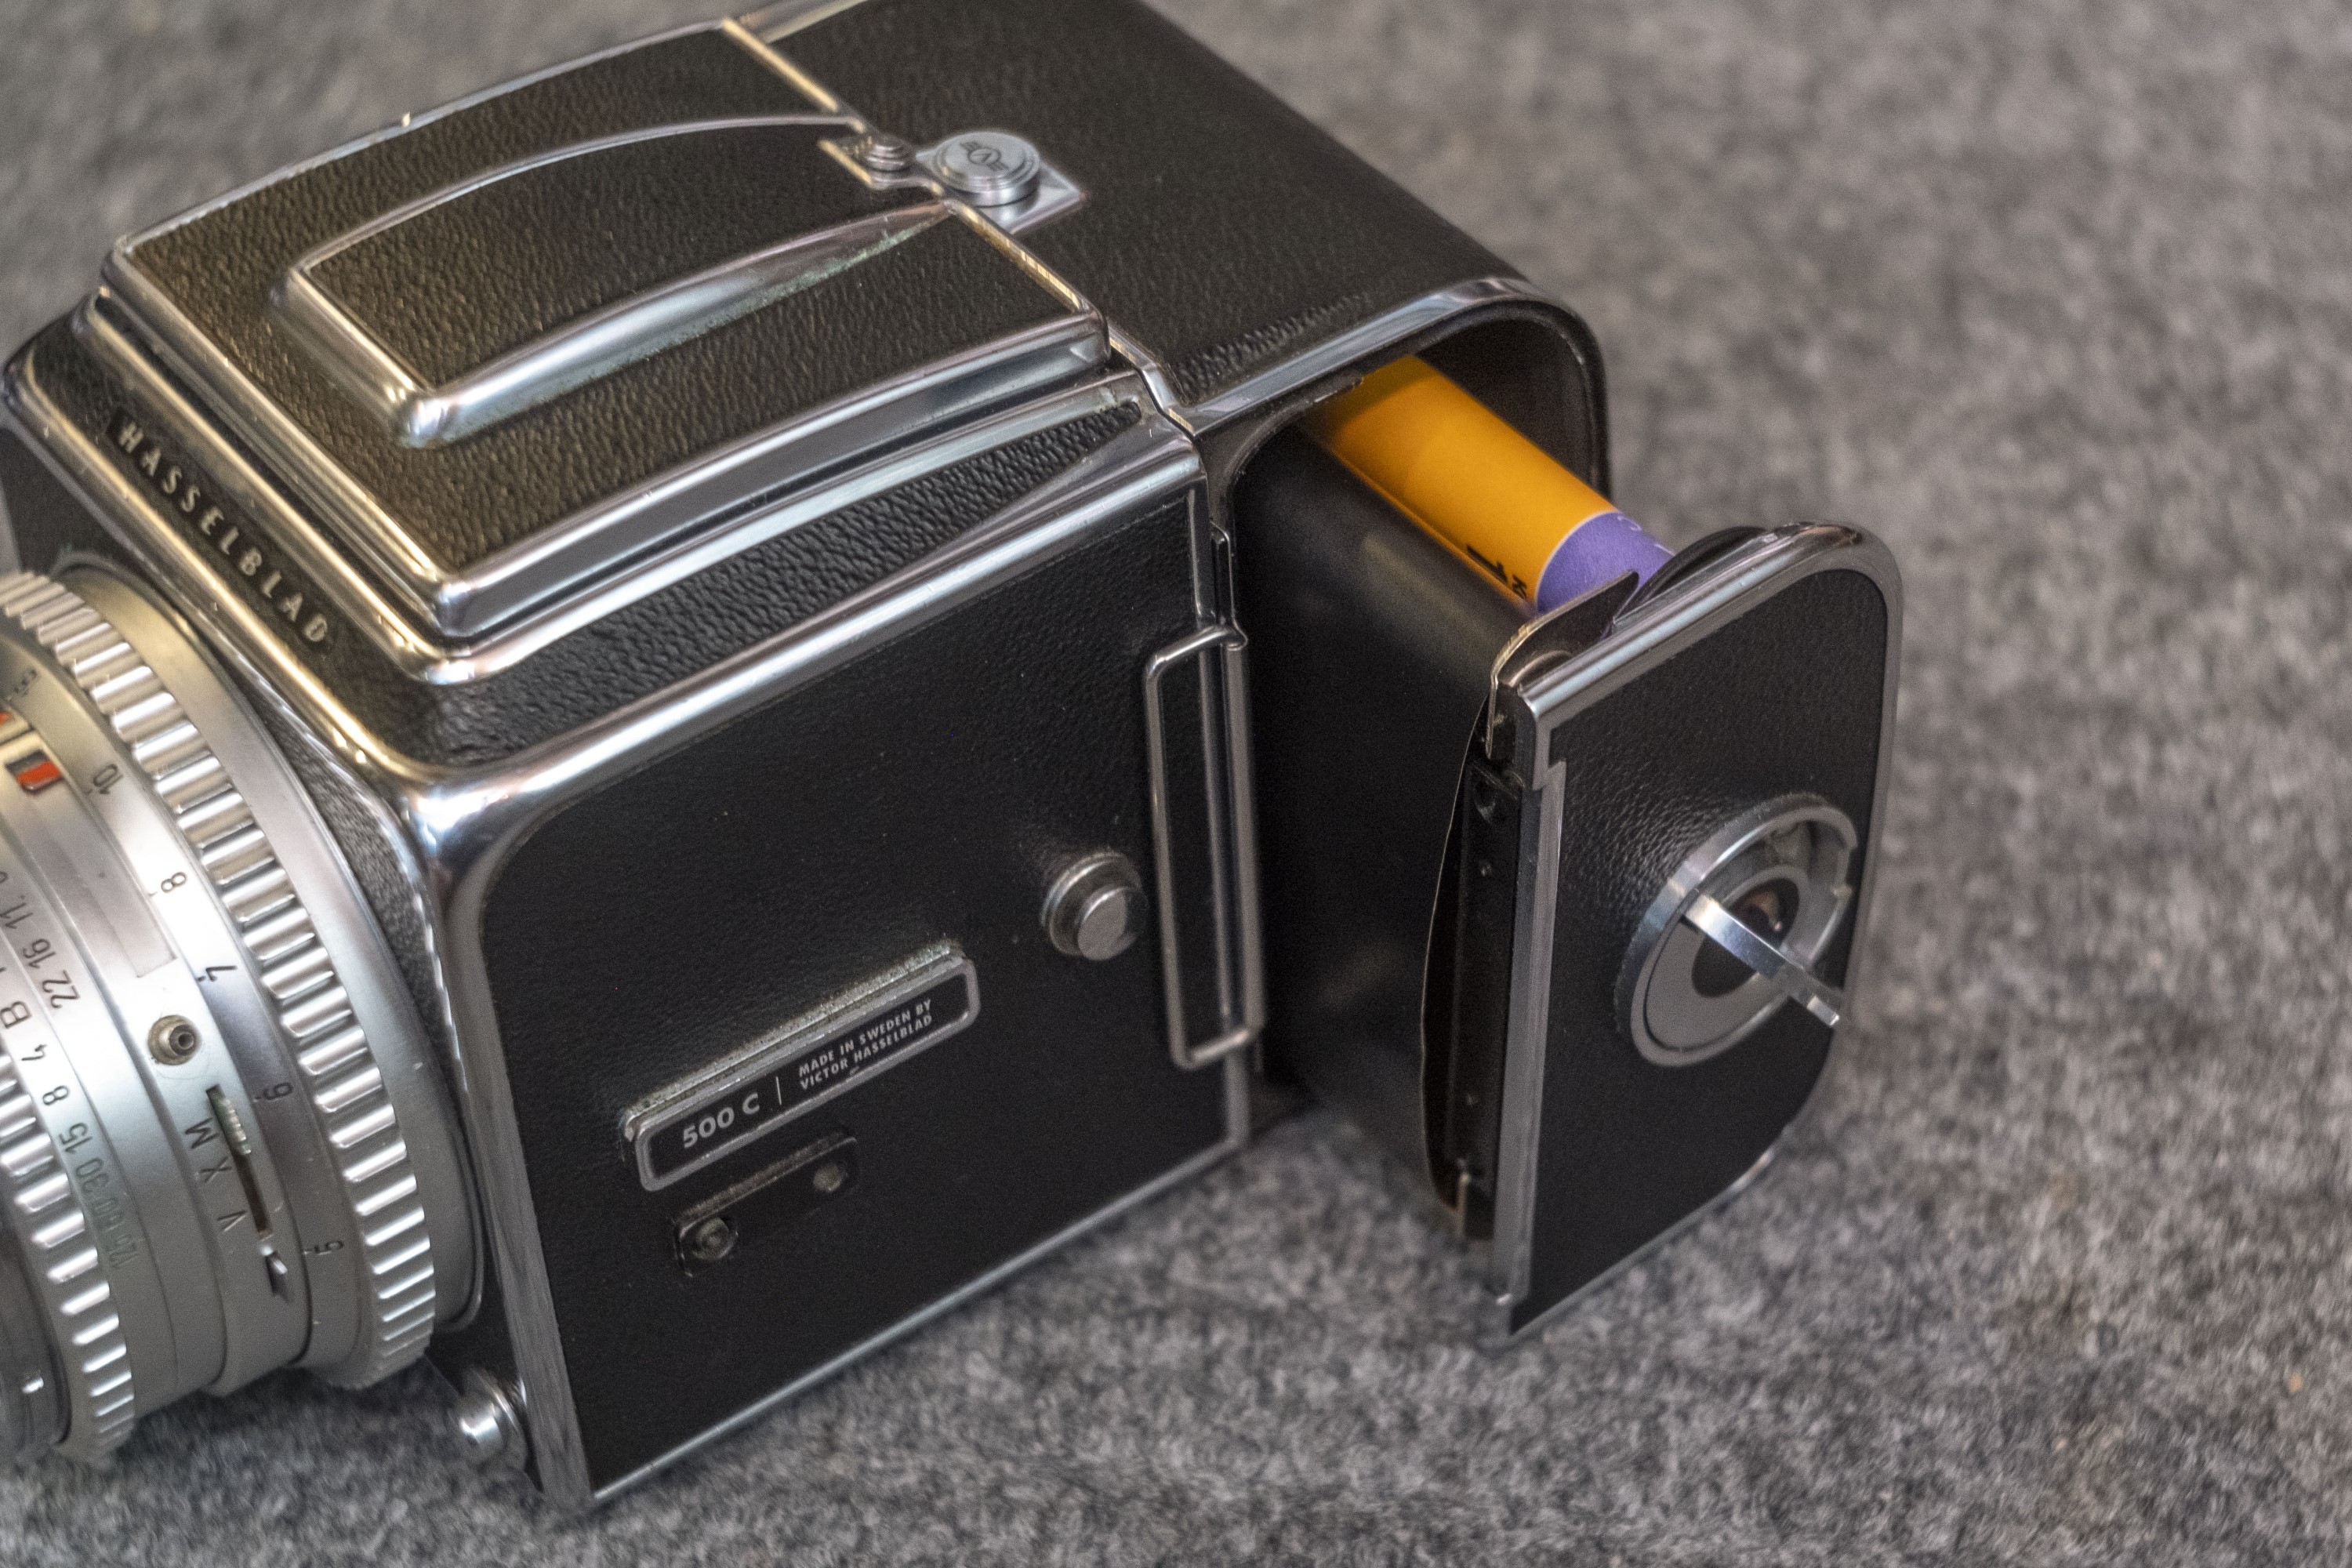
On this side of the magazine is the removable dark slide, which protects film in the magazine when it is being removed from the camera. The Hasselblad 500 C, like most cameras equipped with this feature, cannot fire it’s shutter with the dark slide inserted. If you are testing this camera and cannot fire the shutter, be sure to remove the slide first. Finally, on the magazine is the release catch for the film holder. Fold out the curved handle and give it a slight counterclockwise twist and you can pull out the film magazine for loading film.
Loading film into the Hasselblad 500 C is similar to most other Hasselblad SLRs and copies like the Arsenal Salyut, but can be intimidating for someone who has never done it before. I will cover the process for loading film in a separate section later in this review.
Note About Film Magazines: The Hasselblad 500 C I have for this review has a later magazine attached to it that is slightly different from the original magazines that would normally be found on it. You can easily tell the difference by looking at the wind knob on the side of the magazine. Earlier ones have a curved metal lock whereas later ones like this have a black fold out handle. Both styles can be used on the 500 C, but the film loading process is a little different on the later version like this. I will try to explain the differences in the appropriate sections below.
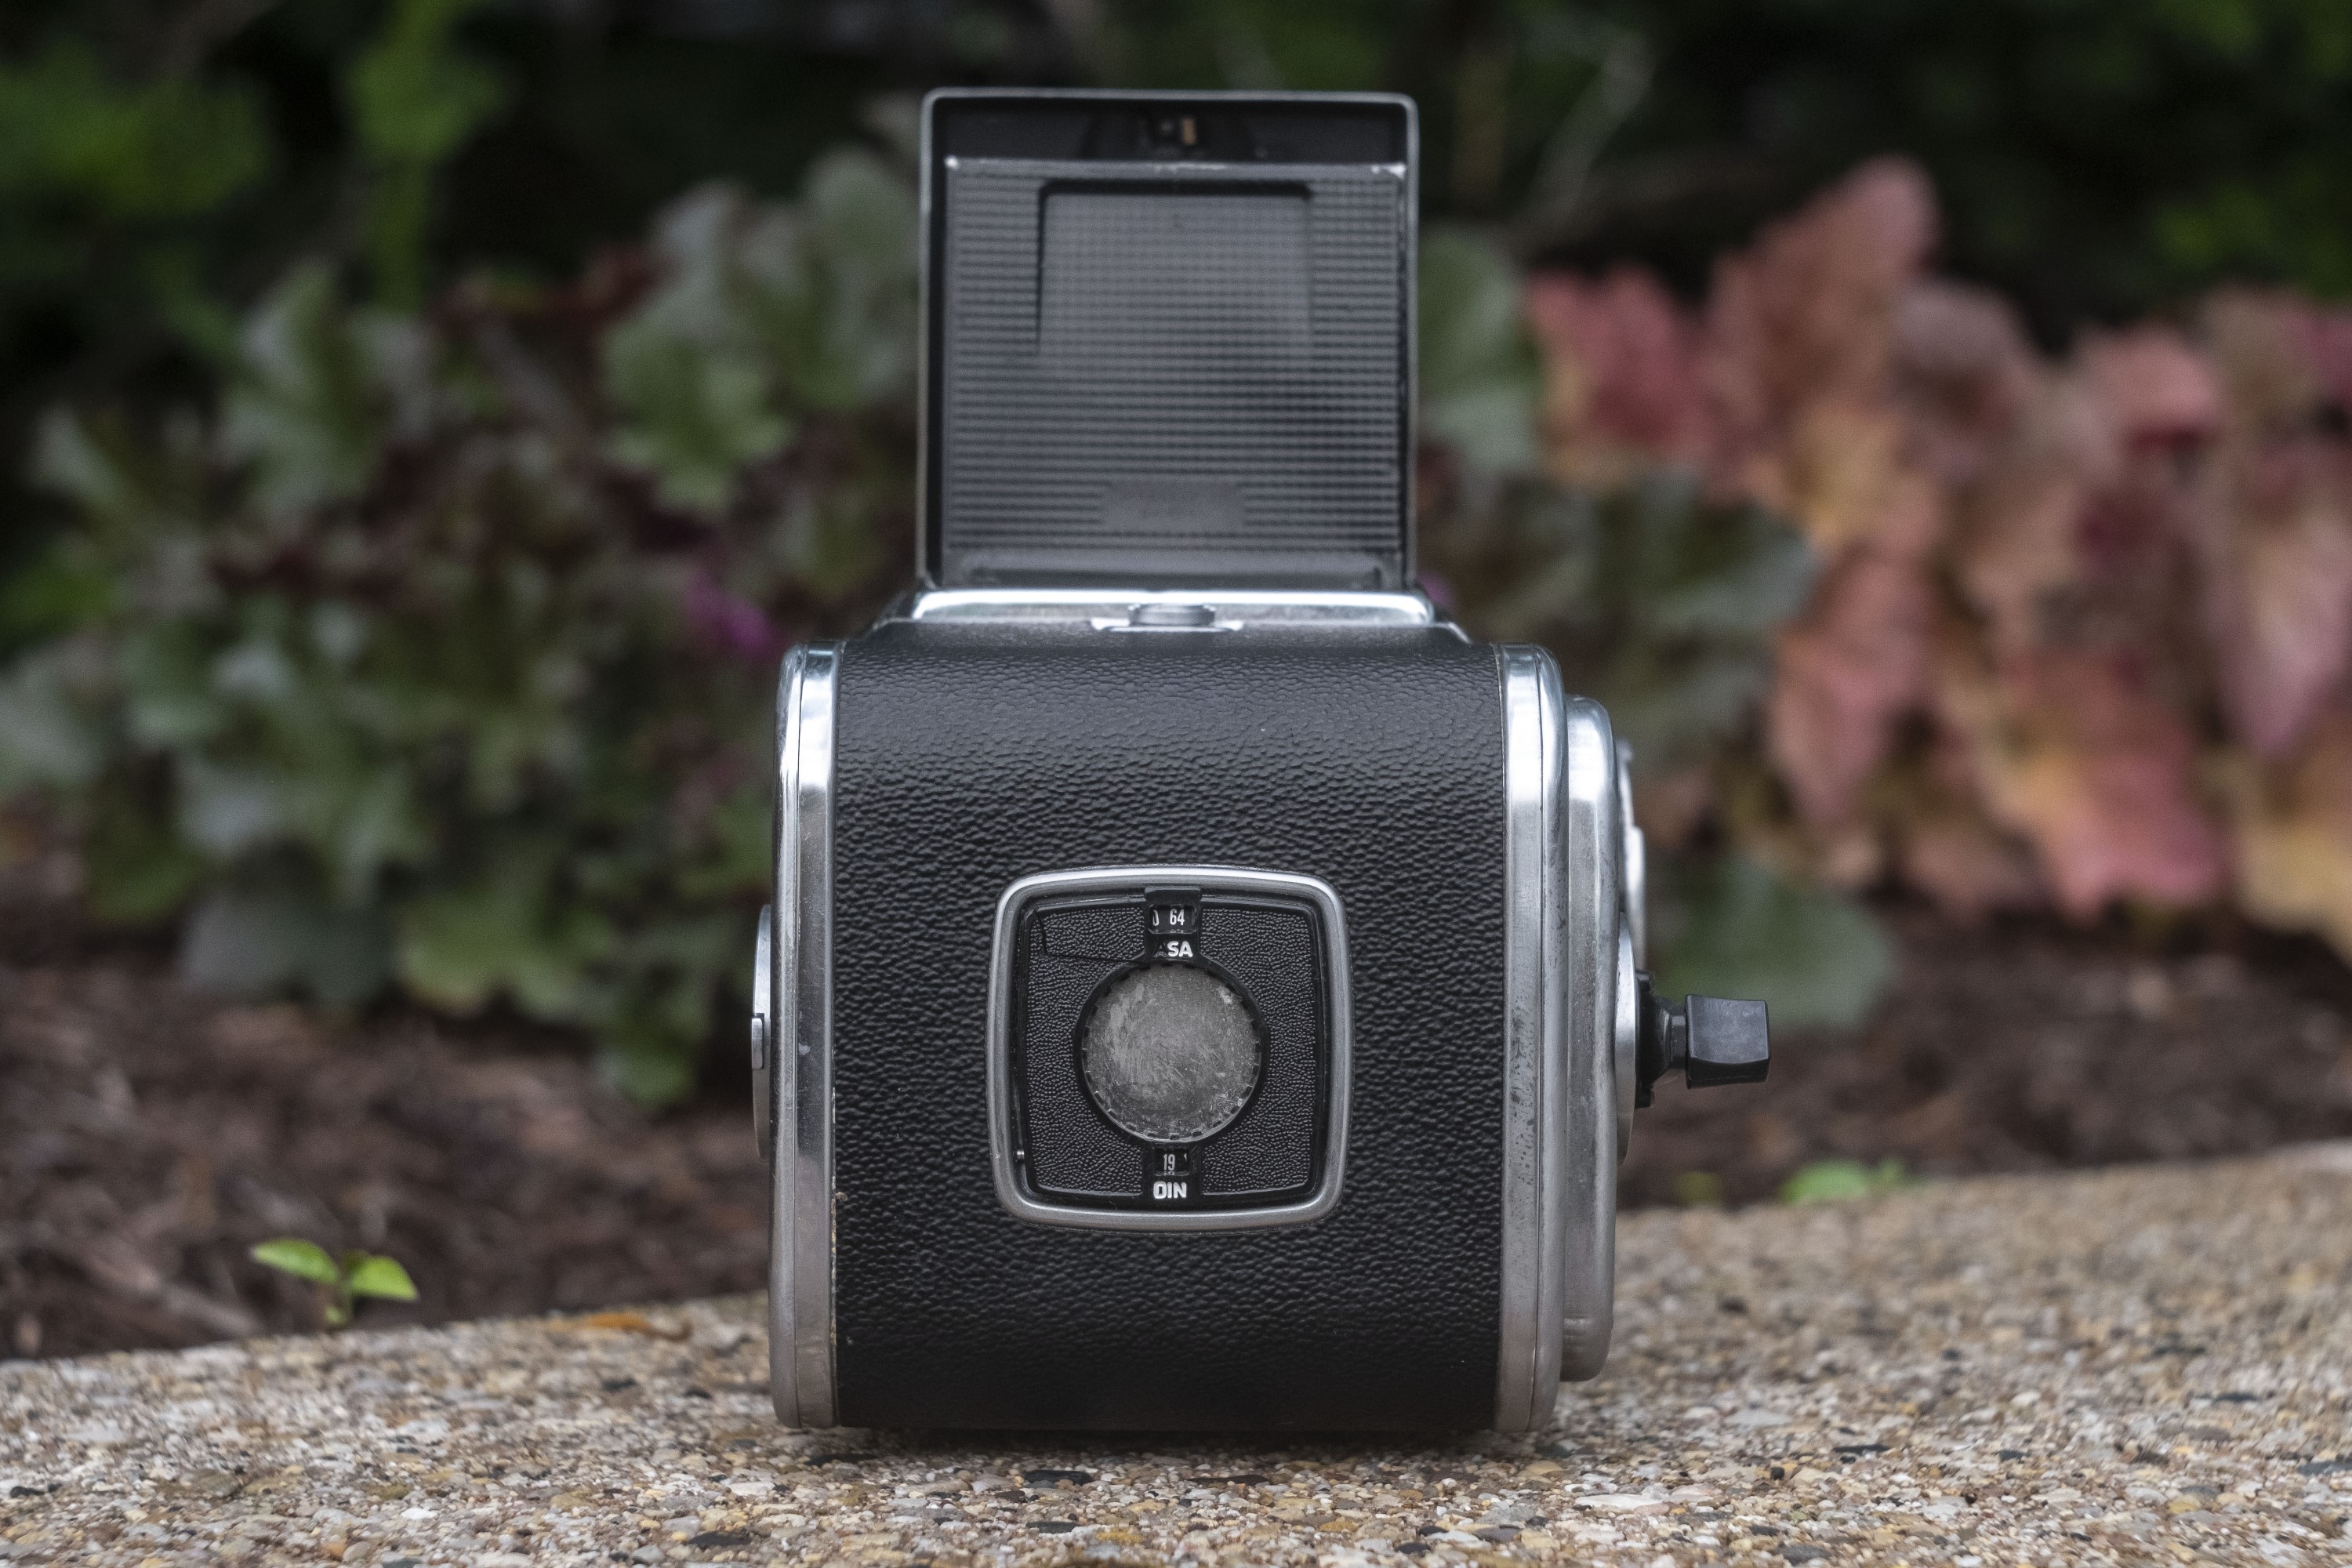
The back of the magazine on this camera has a round opening which I believe on this example is missing a piece. The black plastic frame folds out, seemingly to insert the box end to act as a reminder of what film is in the camera, but separate windows displaying both ASA and DIN numbers act as reminders.
Earlier magazines have a round door that can be opened to peer through a hole in the back of the pressure plate so you can read the exposure numbers on film loaded in the camera.
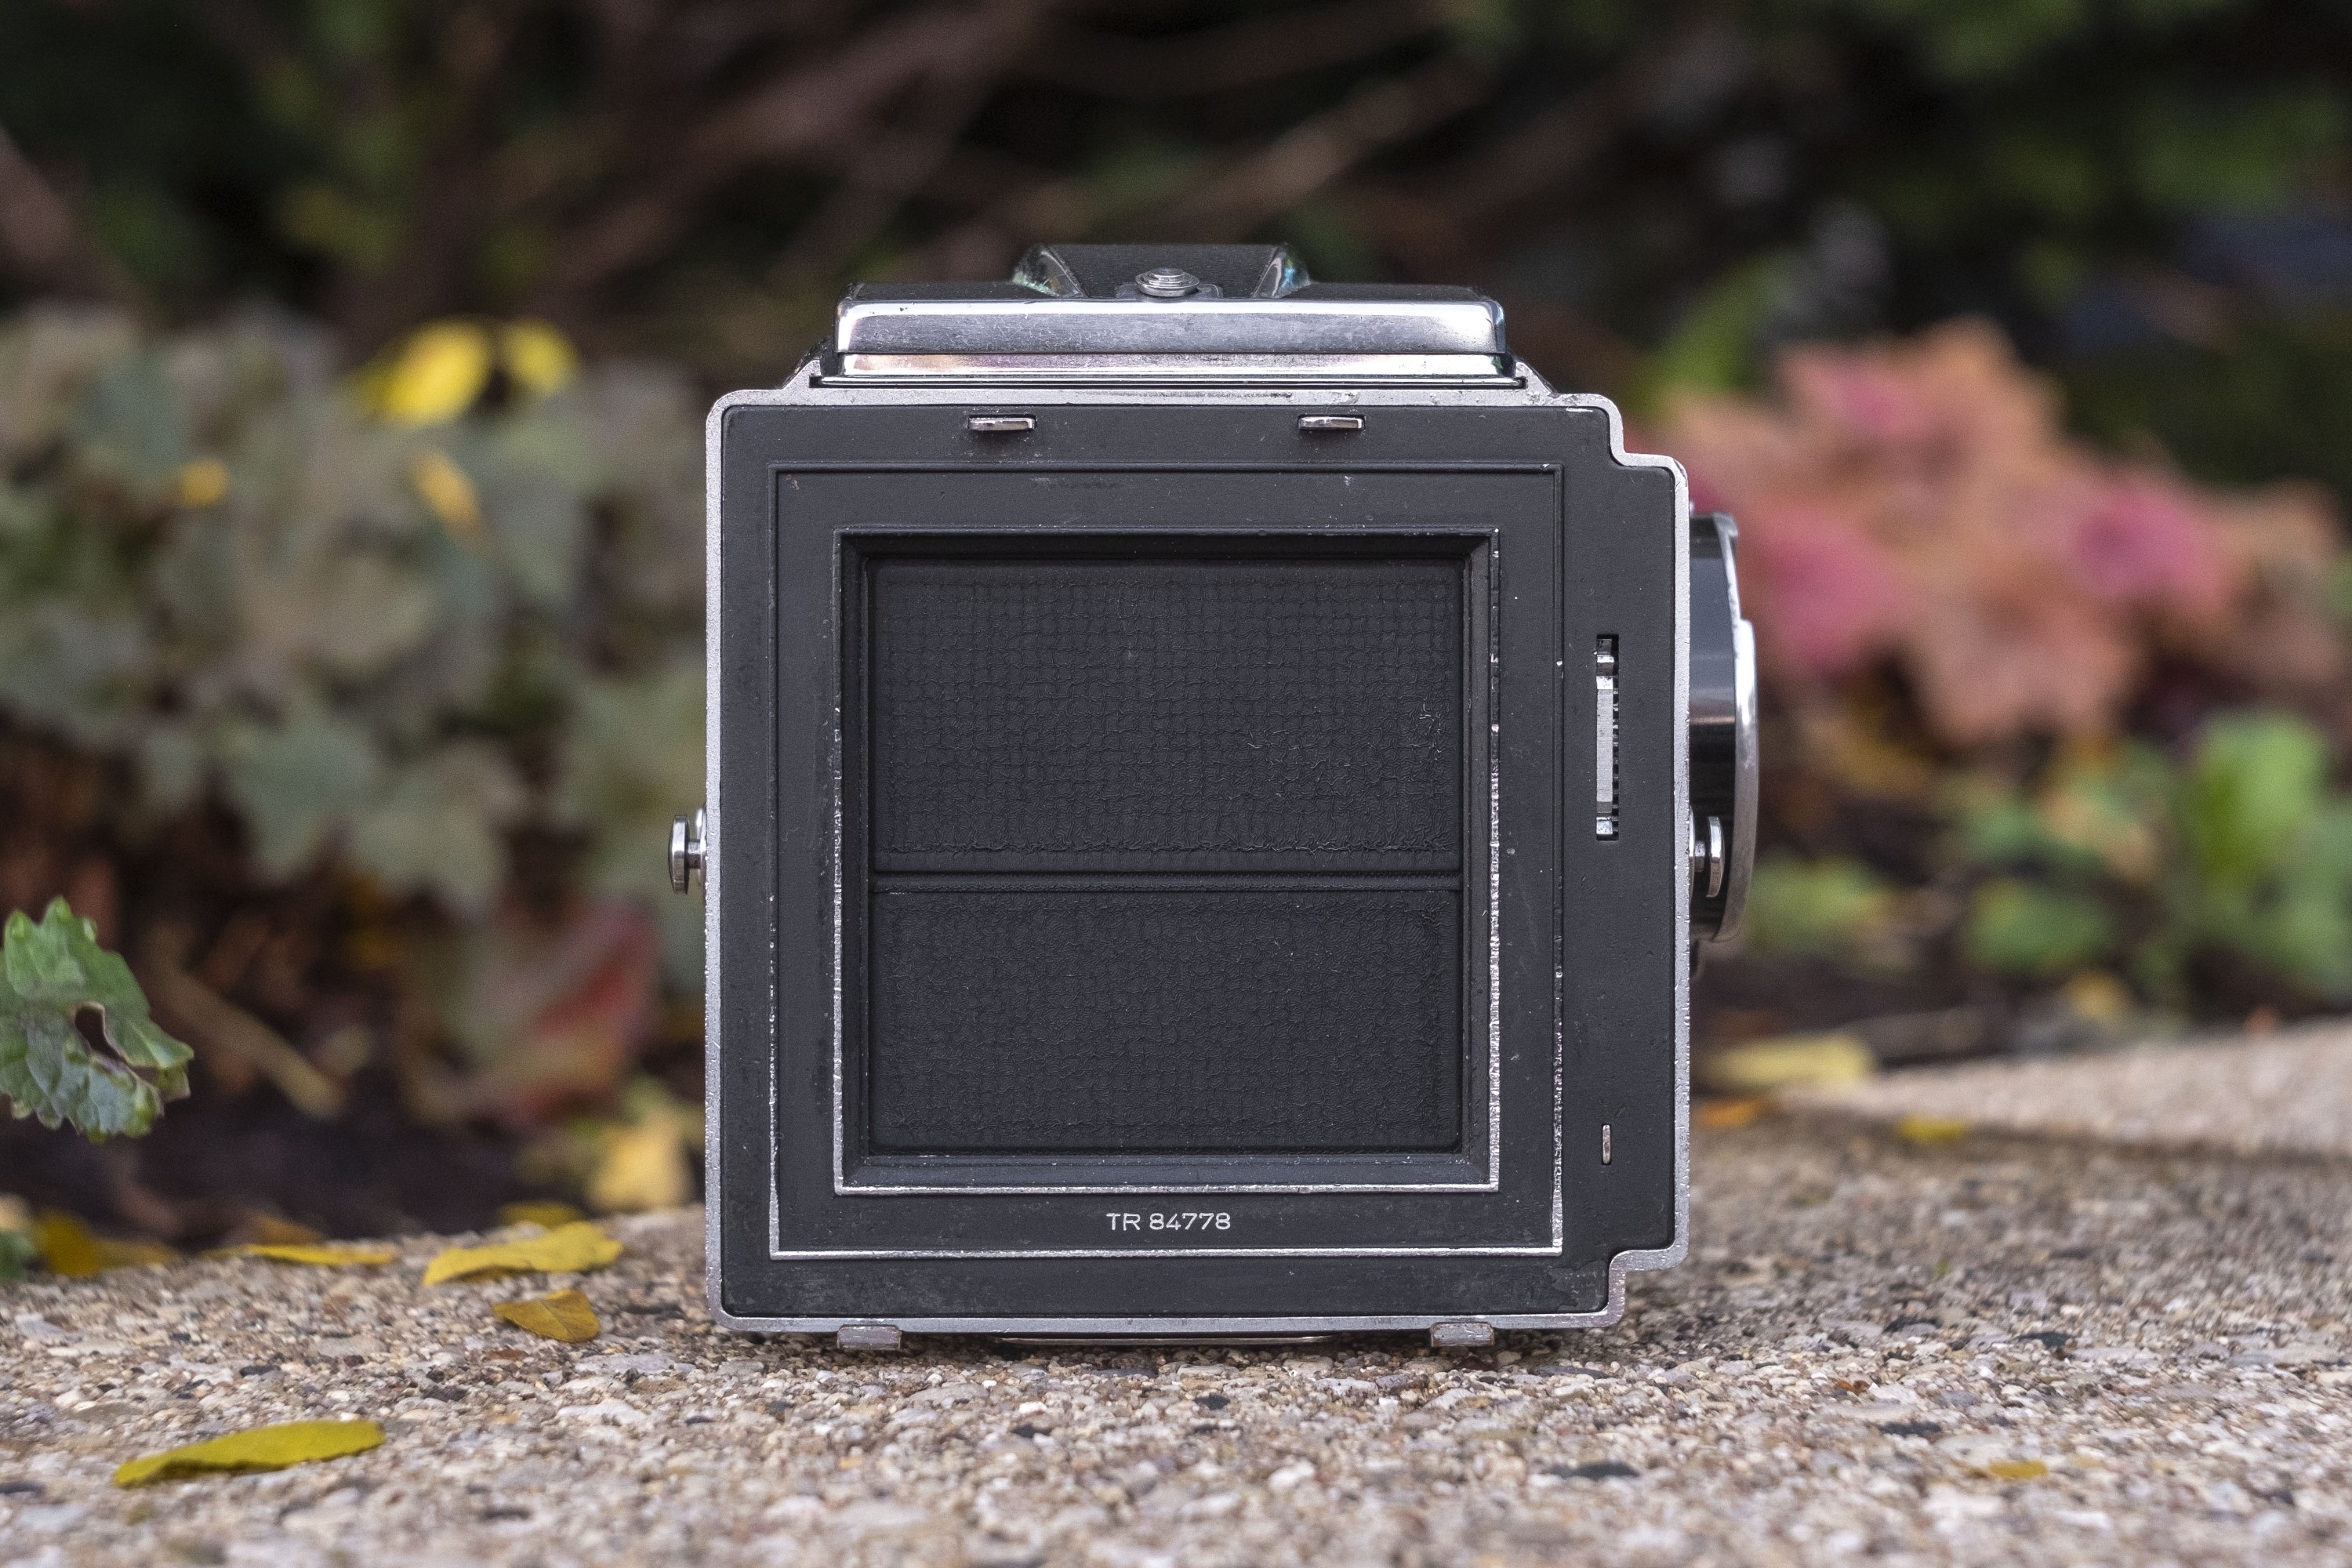
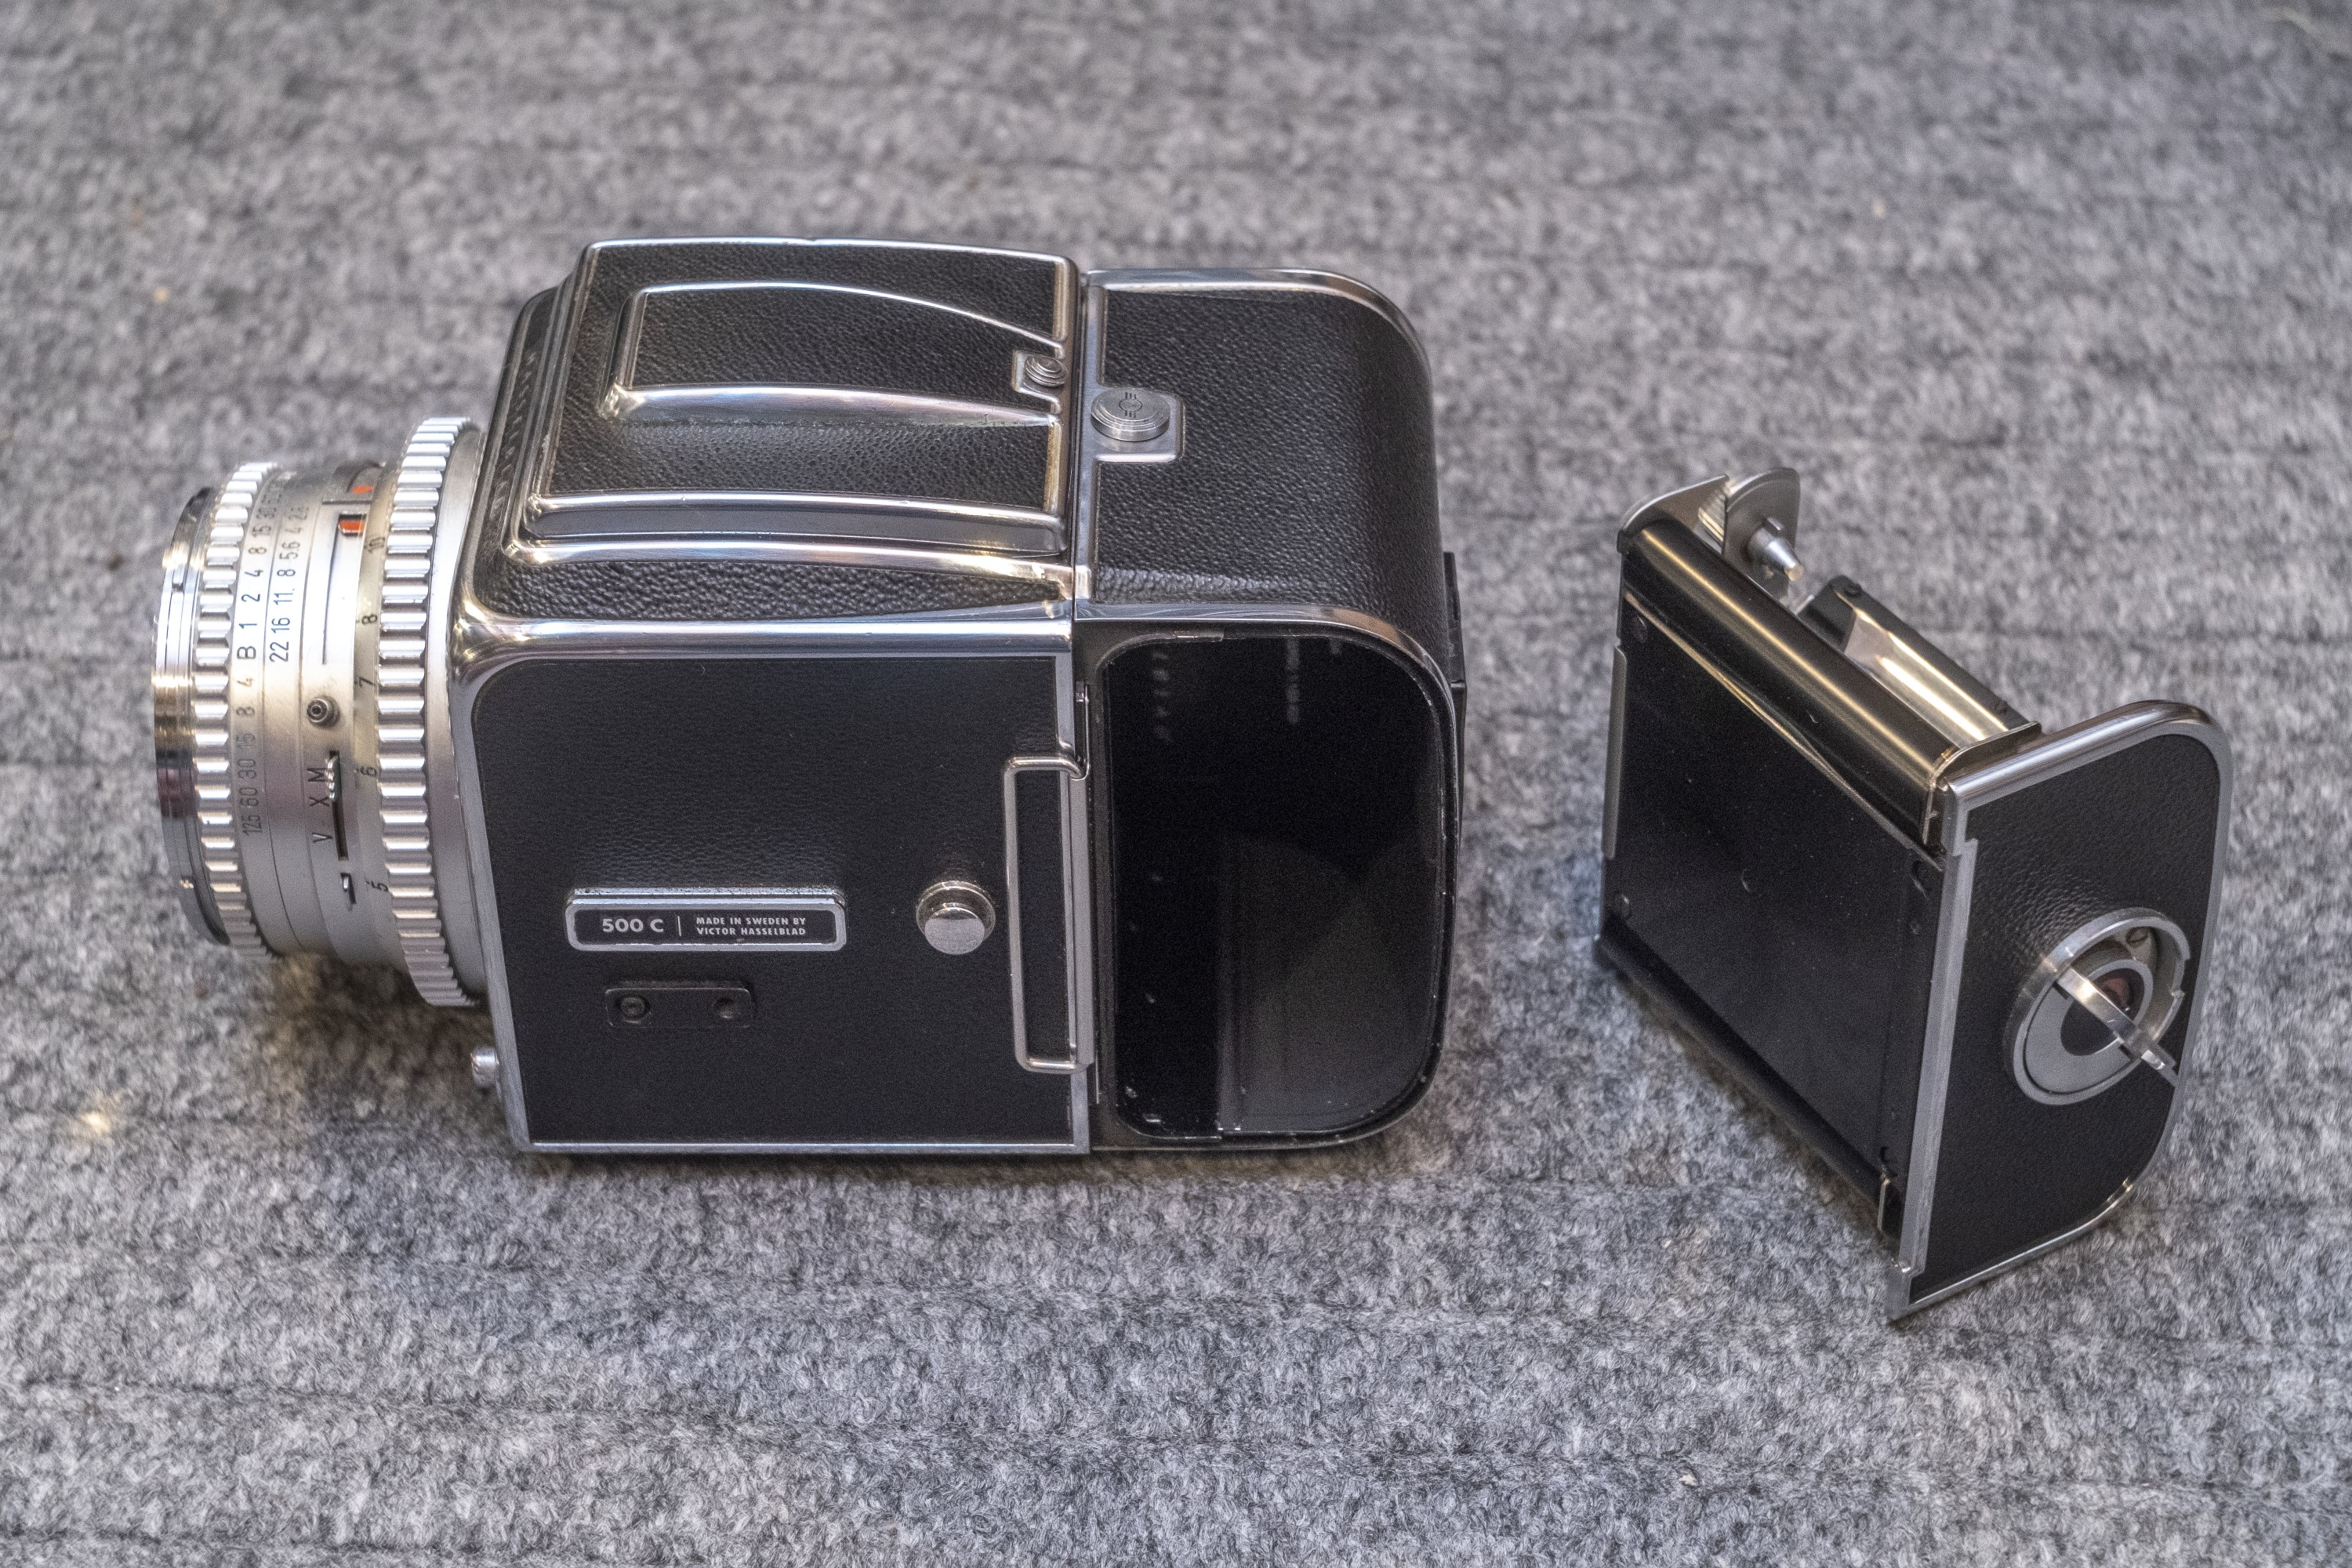
With the back of the camera removed, there is an auxiliary blind that further protects the film from light while changing lenses. This blind is directly coupled to the both the body’s primary and rapid shutter releases and will not open unless pressure is put on one of the two.
Interestingly, the auxiliary blind can also be used as a secondary shutter when using some special purpose lenses which lack an internal shutter. In this case, exposures can only be made at a fixed 1/2 second shutter speed.
On the bottom, the camera has a unique tripod plate which has both threaded holes for 1/4″ and 3/8″ tripod bushing, ensuring compatibility with both European and Western tripods.
The tripod plate itself also has grooved edges on both sides which allow for an optional quick attachment which allows the user to quickly attach and detach the camera from a tripod without having to unscrew the bushing.
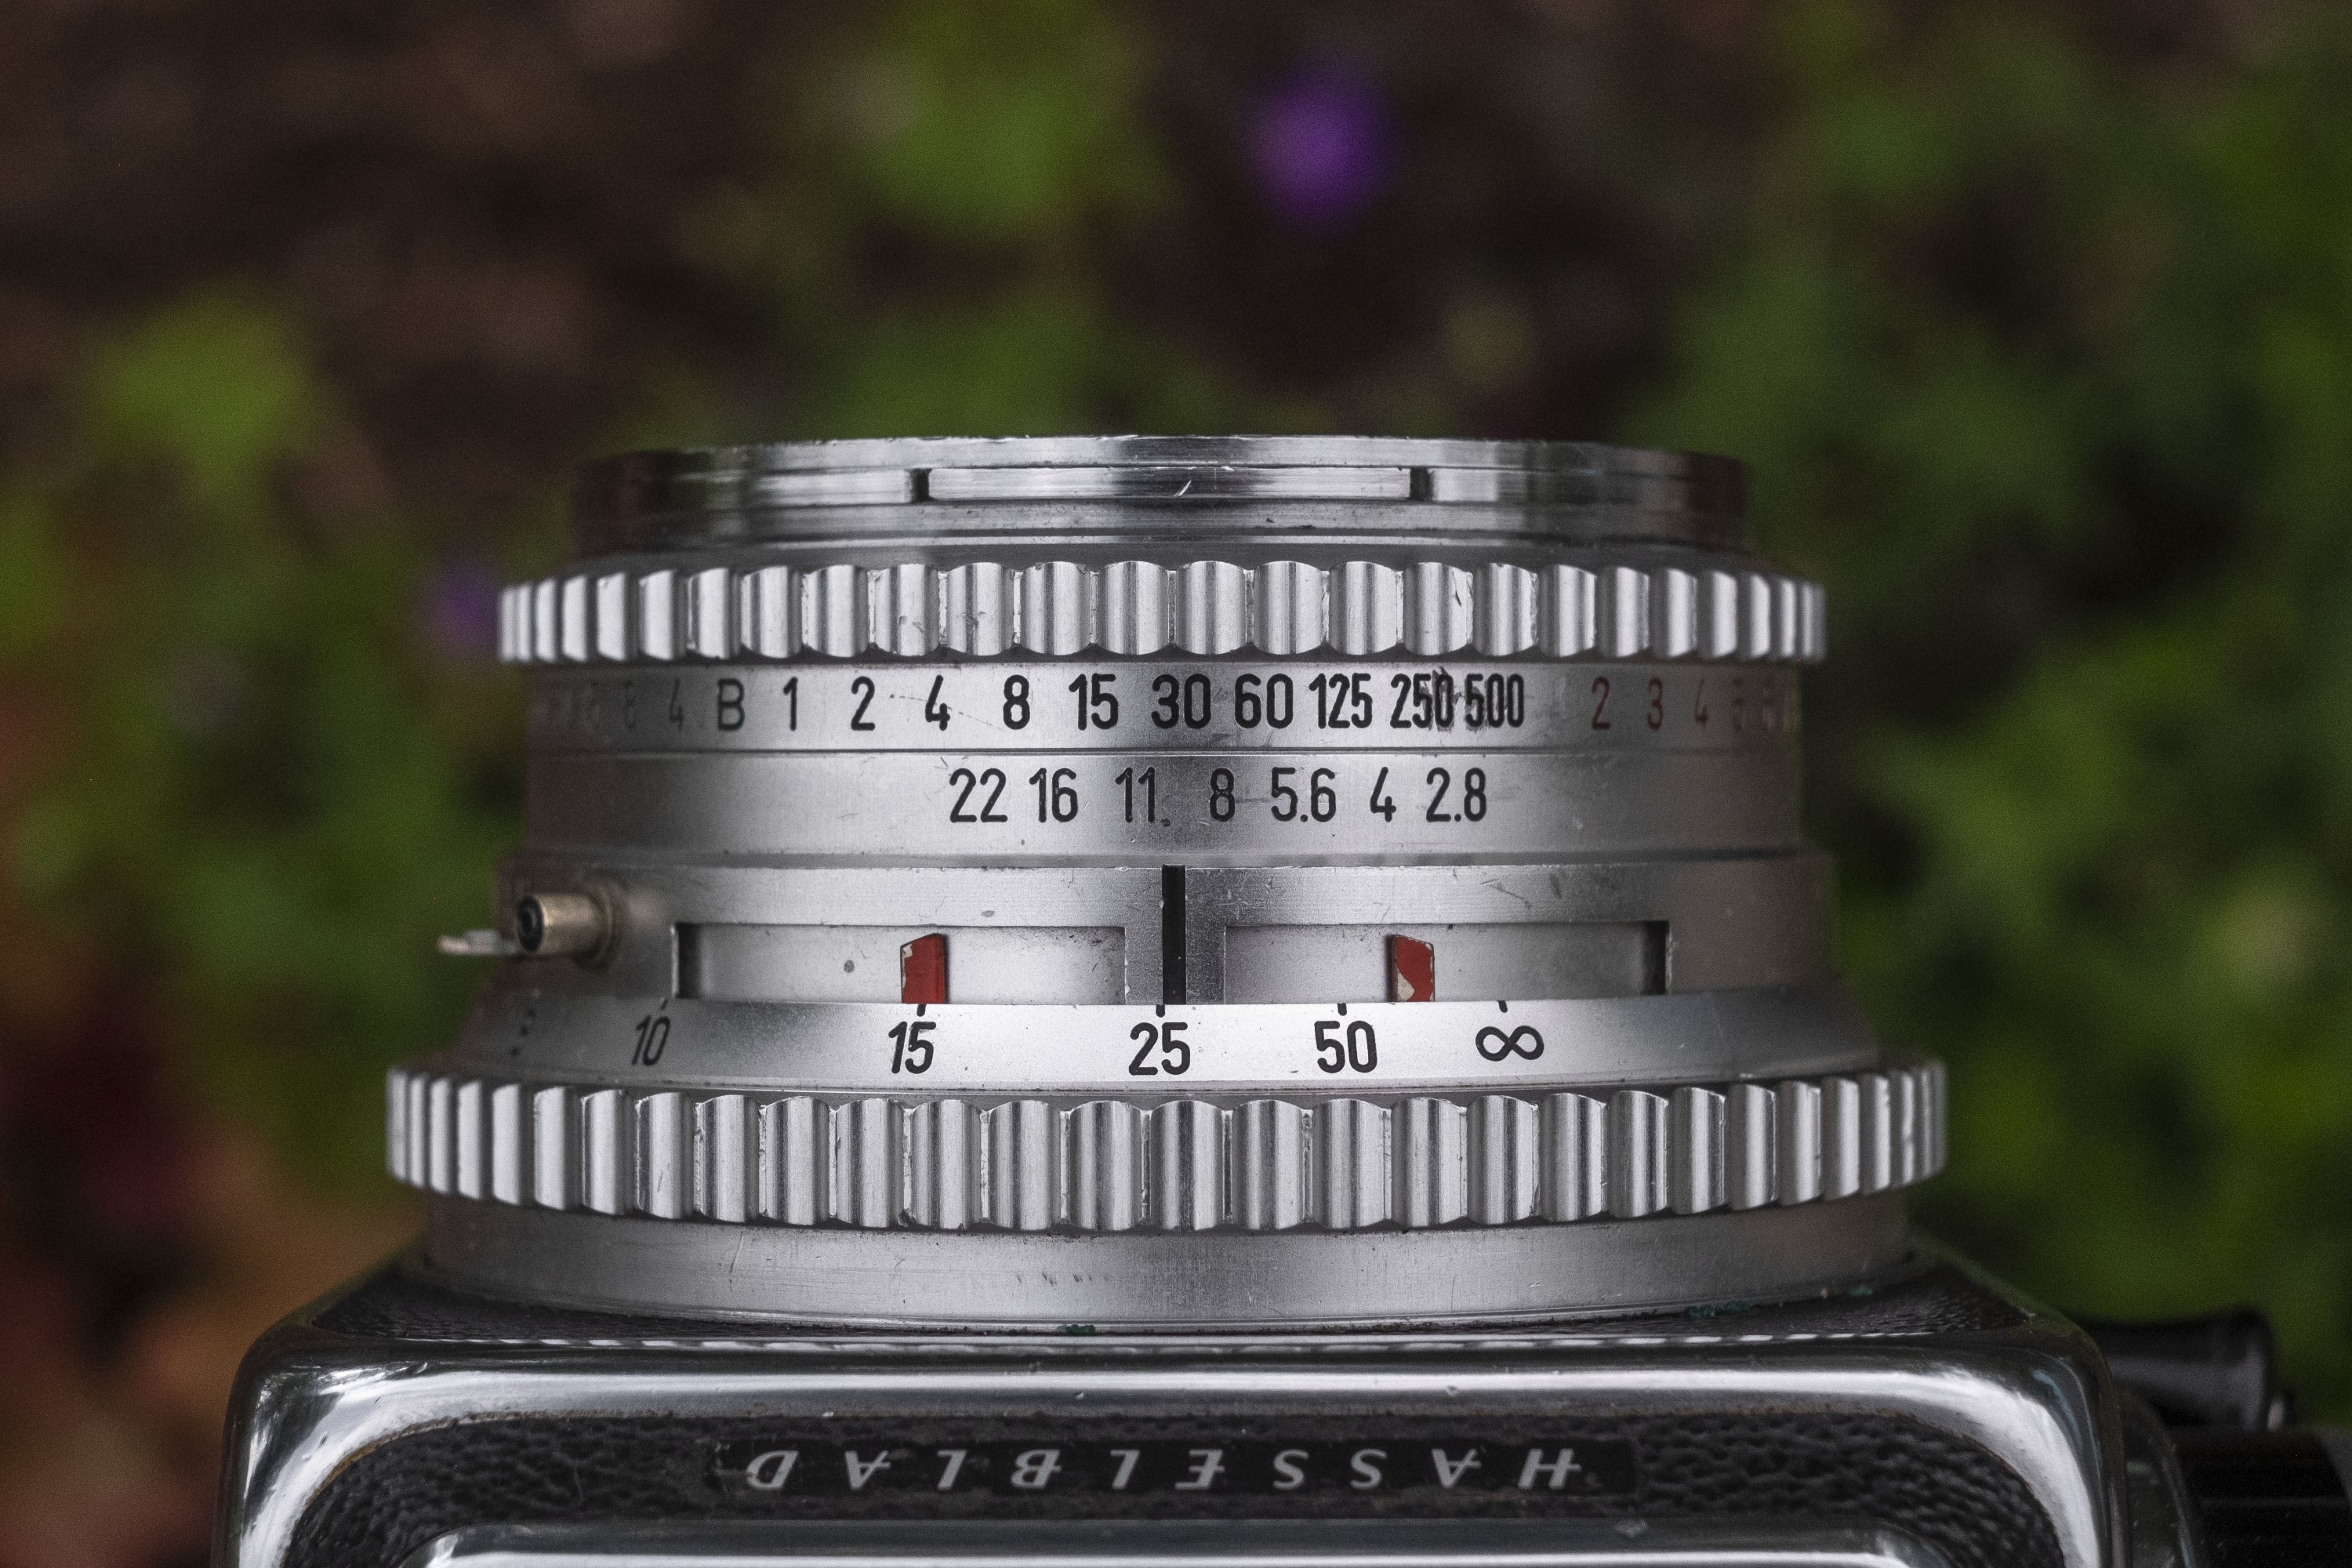
Where the Hasselblad is most different from both the Bronica S2 and Salyut is that it has a leaf and not a focal plane shutter. As with most leaf shutter SLRs, the controls for shutter speed and aperture are all on the lens itself. The Synchro Compur shutter is integral to each of the 500 C’s lenses, meaning that each time you swap lenses, you are also swapping the shutter. This is both good and bad, in that shutters can be easily serviced outside of the camera, but bad in that you might need to service multiple shutters if you have a large collection of lenses.
The Carl Zeiss Planar lens has a coupled EV scale for both shutter speeds and f/stops. Changing shutter speeds also makes a corresponding change to the aperture to maintain the same EV number. In order to select a different EV number, you must press and hold on a small lever on the aperture ring while turning it. As you change apertures, two red pointers display the depth of field on a variable scale. This works similarly to Schneider lenses on the Kodak Retina Reflex series and other cameras of the era.
The focusing ring is closest to the body and is very smooth and easy to change on my example. The motion of the focus ring is quite long, requiring a 270 degree turn from minimum to infinity focus. For most people, this requires separate smaller motions to make changes to focus, but the benefit to this is that precise focus in the viewfinder is very easy to do.
At about the 2 o’clock position around the lens is a flash sync port and beneath it, a slider to change between M and X flash sync, and a V position for the self timer. As is the case with most lenses of this era, it’s not a good idea to try the self-timer unless you know the lens has been recently serviced as age can cause them to jam up the shutter.
Near the 5 o’clock position around the lens, on the front face of the body is the chrome lens release button.
Warning! Removing and attaching the lens to the Hasselblad 500 C is one of the weaker points of the camera and require the shutter to be cocked before attempting to remove the lens. The shutter should be open and you should be able to see through the front glass element into the viewfinder before attempting to remove the lens. If you can see the shutter blades, the lens is not ready to be removed.
With the shutter cocked, pressing the lens release button while giving the lens and shutter a counterclockwise twist will remove it from the body.
If, while the lens is removed from the camera, either the shutter release on the body or the shutter in the lens itself get tripped, you must re-sync the lens to the body. First, wind the film advance on the body to lower the mirror and rotate a coupling pin near the bottom of the lens mount. If the shutter in the lens is still open, you should be able to reattach the lens by lining up a red mark near the top of the lens to a red mark near the top of the lens mount and giving it a clockwise twist.
If, however, the mirror is down on the body, but the shutter blades are closed on the lens, you will need to use a flathead screwdriver to manually open the shutter in the lens. Looking at the base of the inside of the lens mount, there is a round pin with a horizontal notch going through it. Using a screwdriver or a dull knife, rotate the round pin a full 360 degrees until you see the shutter blades in the lens completely open. You should hear a click in the lens at which point the shutter will remain open and you can now attach the lens to the camera body.
Failure to observe this exact procedure by removing or attaching the lens without both the body and the lens in the correct position, will cause damage!
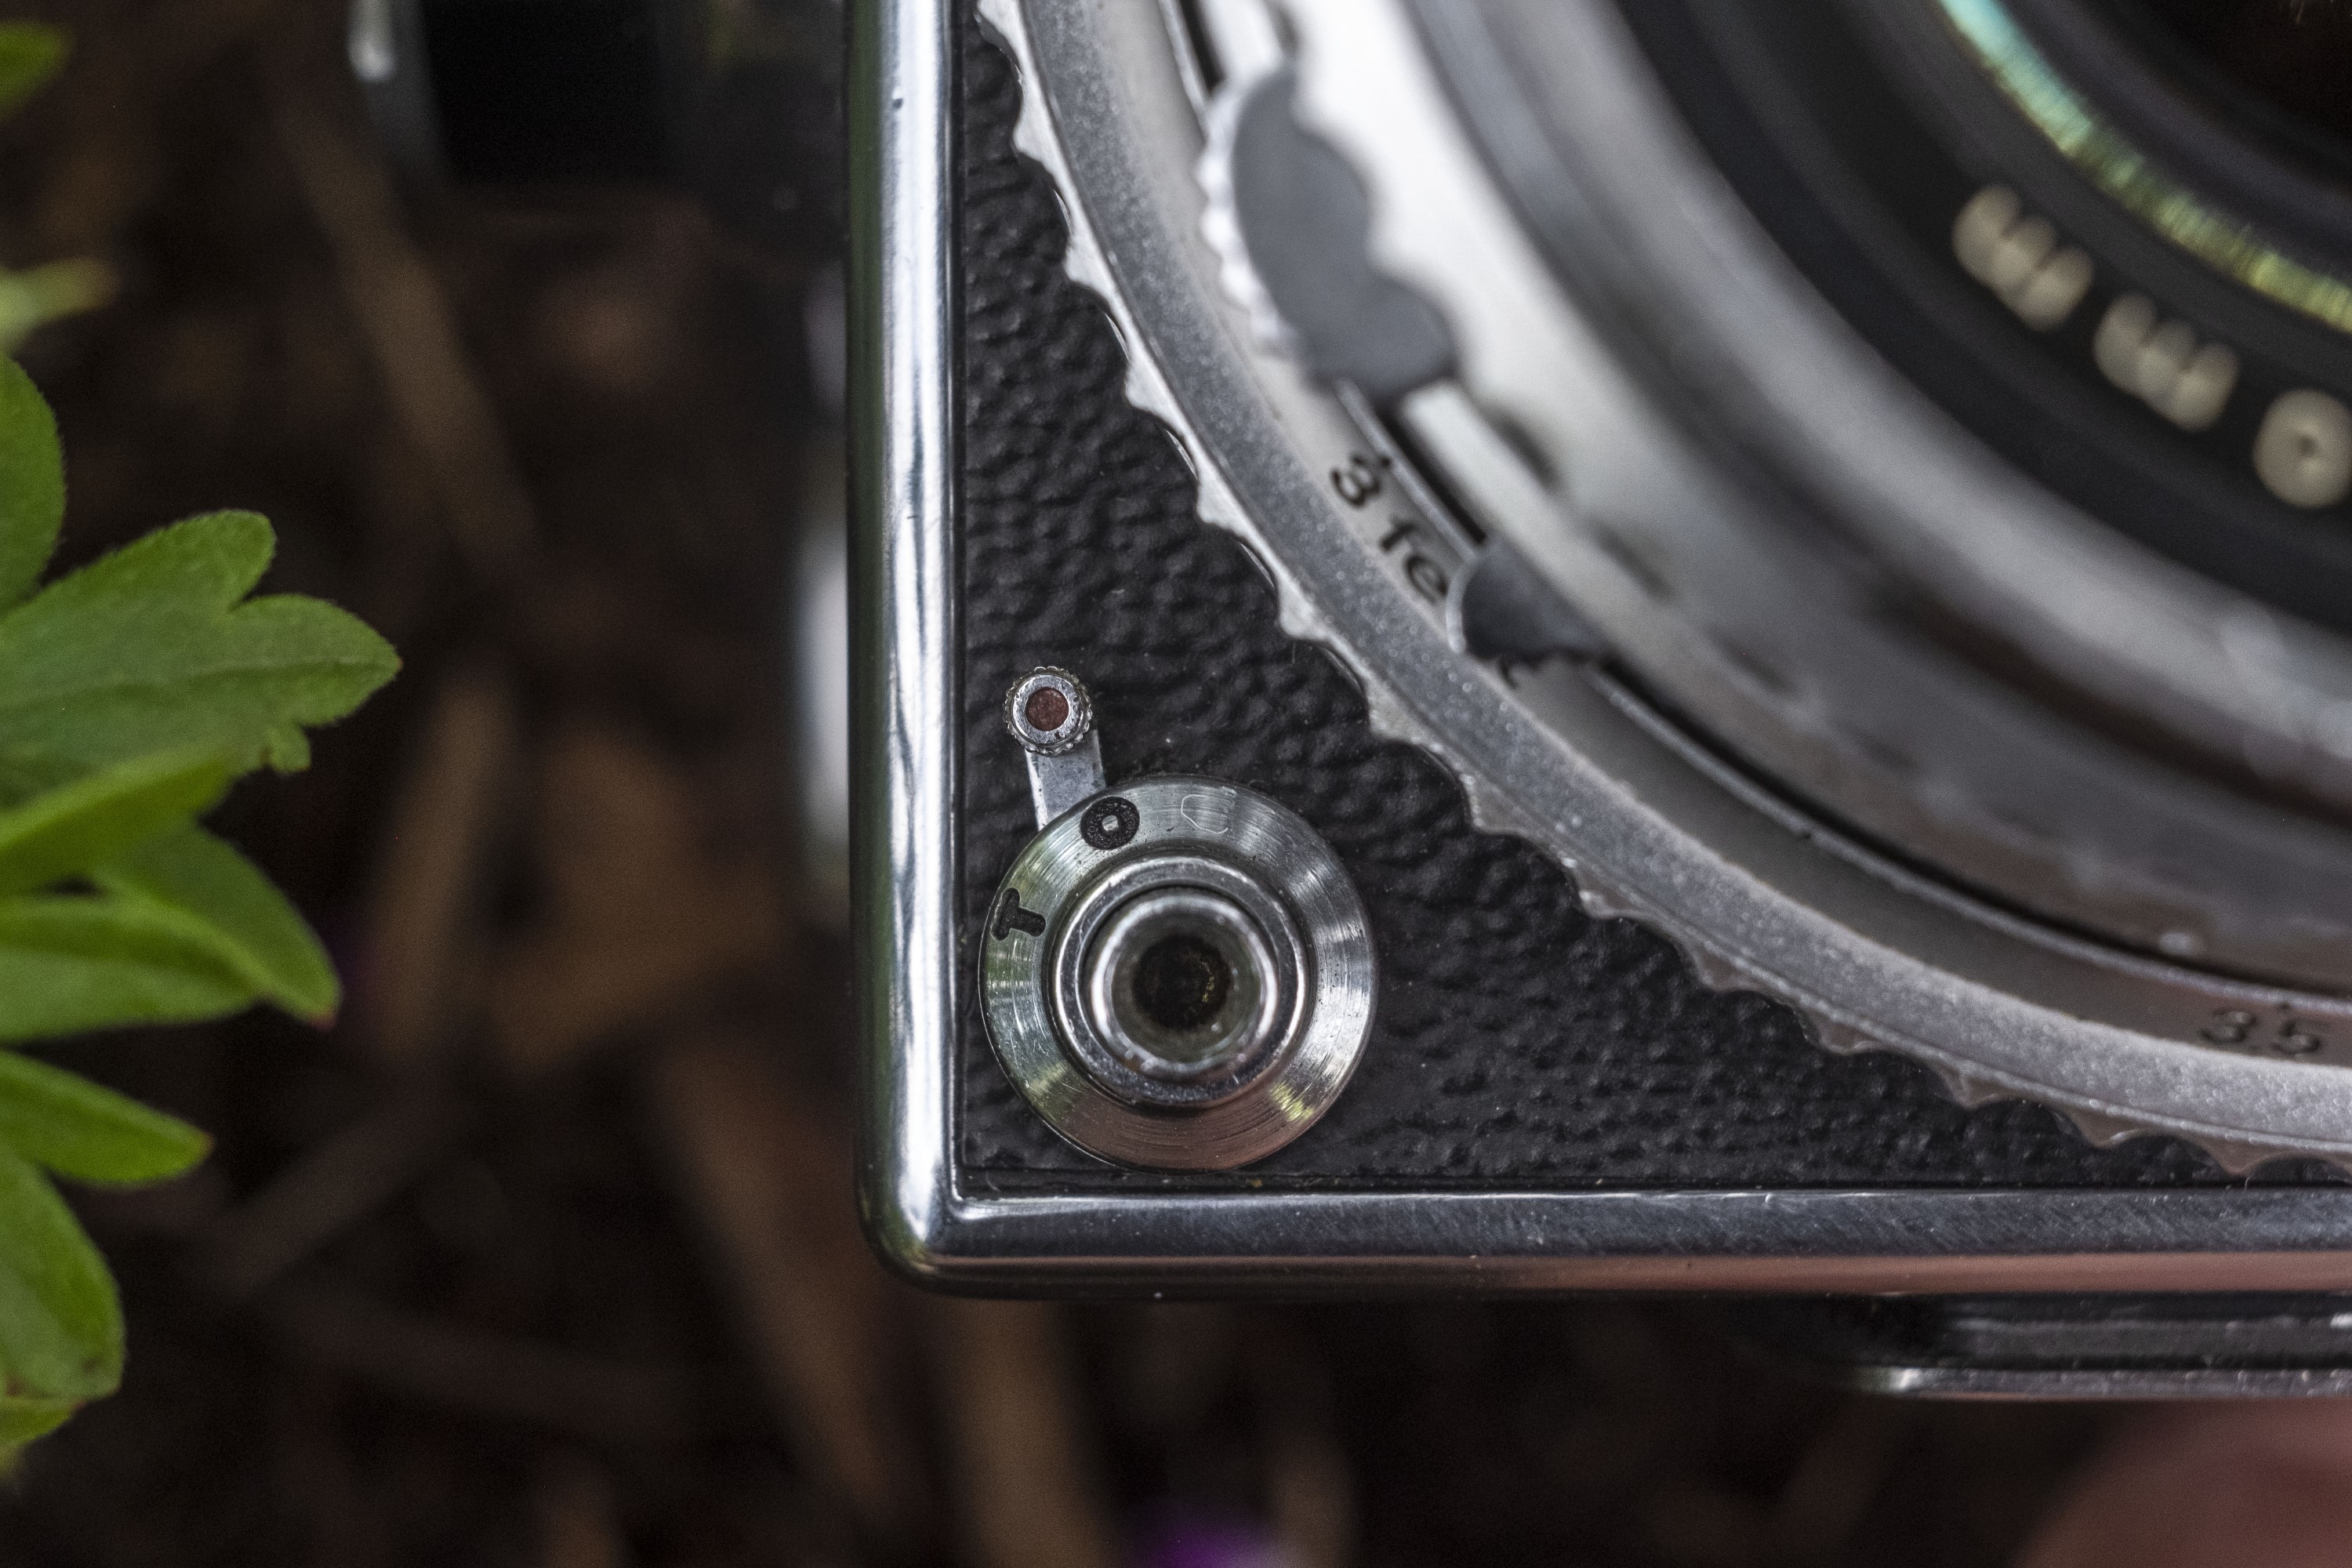
The last area of interest is the shutter release which is located near the 7 o’clock position around the lens on the front face of the camera. The shutter release is internally threaded for a cable release and has a small levers indicated with the letters T and O around it.
With this lever in the O position, the shutter release operates normally at all speeds. Setting the shutter release to the T or “Timed” position, locks the shutter release when it is pressed down. This setting is used with the shutter in B or “Bulb” mode and will keep the shutter open for long exposures, for as long as the lever remains in the T position. To close the shutter, move the lever back to the O position and the shutter will close. Alternatively, changing the shutter speed to anything other than B will also close it.
Slow Shutter Speed Warning: The Hasselblad 500 C effectively has two shutters, the Compur leaf shutter in the lens and an auxiliary blind that is in the back of the camera, in front of the film magazine. Pressure on the shutter release is what opens and closes this blind and must be maintained throughout the entire exposure when using shutter speeds 1/4 and slower. Selecting a slow shutter speed and releasing the shutter release before the entire exposure is made, will result in this auxiliary blind closing prematurely, negatively affecting your exposure.
The Hasselblad 500 C is a feature rich and well made camera. It has quite a number of features that require some familiarity to use so you’d be well served to spend some time with the manual before using it. Changing lenses and loading film are things that won’t be obvious to the first time user.
Still, this is an expensive camera with a great lens, and with a good working example, you are rest assured of many years of quality photographs…assuming it works, that is.
Loading Film
Loading film into the Hasselblad 500 C is done without having to remove the magazine from the back of the camera. The entire process is similar to most other medium format SLRs by Mamiya, Bronica and others but there are some differences that the first time user should be aware of.
You can load film with or without the magazine attached to the camera. If the magazine is not attached, you need to make sure the dark slide is in position, and you’ll need to manually cock the shutter at the end of the loading process, before reattaching the magazine, but otherwise the process is the same.
Also note that the magazine loaded on this camera is from the later Hasselblad 500 C/M and is a little different from one that is normally found on the earlier 500 C. The two magazines can be interchanged between models, but there are some differences in how film is loaded which I’ll cover below.
Step 1
On the camera’s left side, fold out the release handle on the magazine and give it short counterclockwise turn and pull the entire film holder out. After pulling the film holder out, you must return the folding release handle to it’s original position by turning it clockwise. Doing this loosens pressure on the film pressure plate, which is necessary to load film correctly.
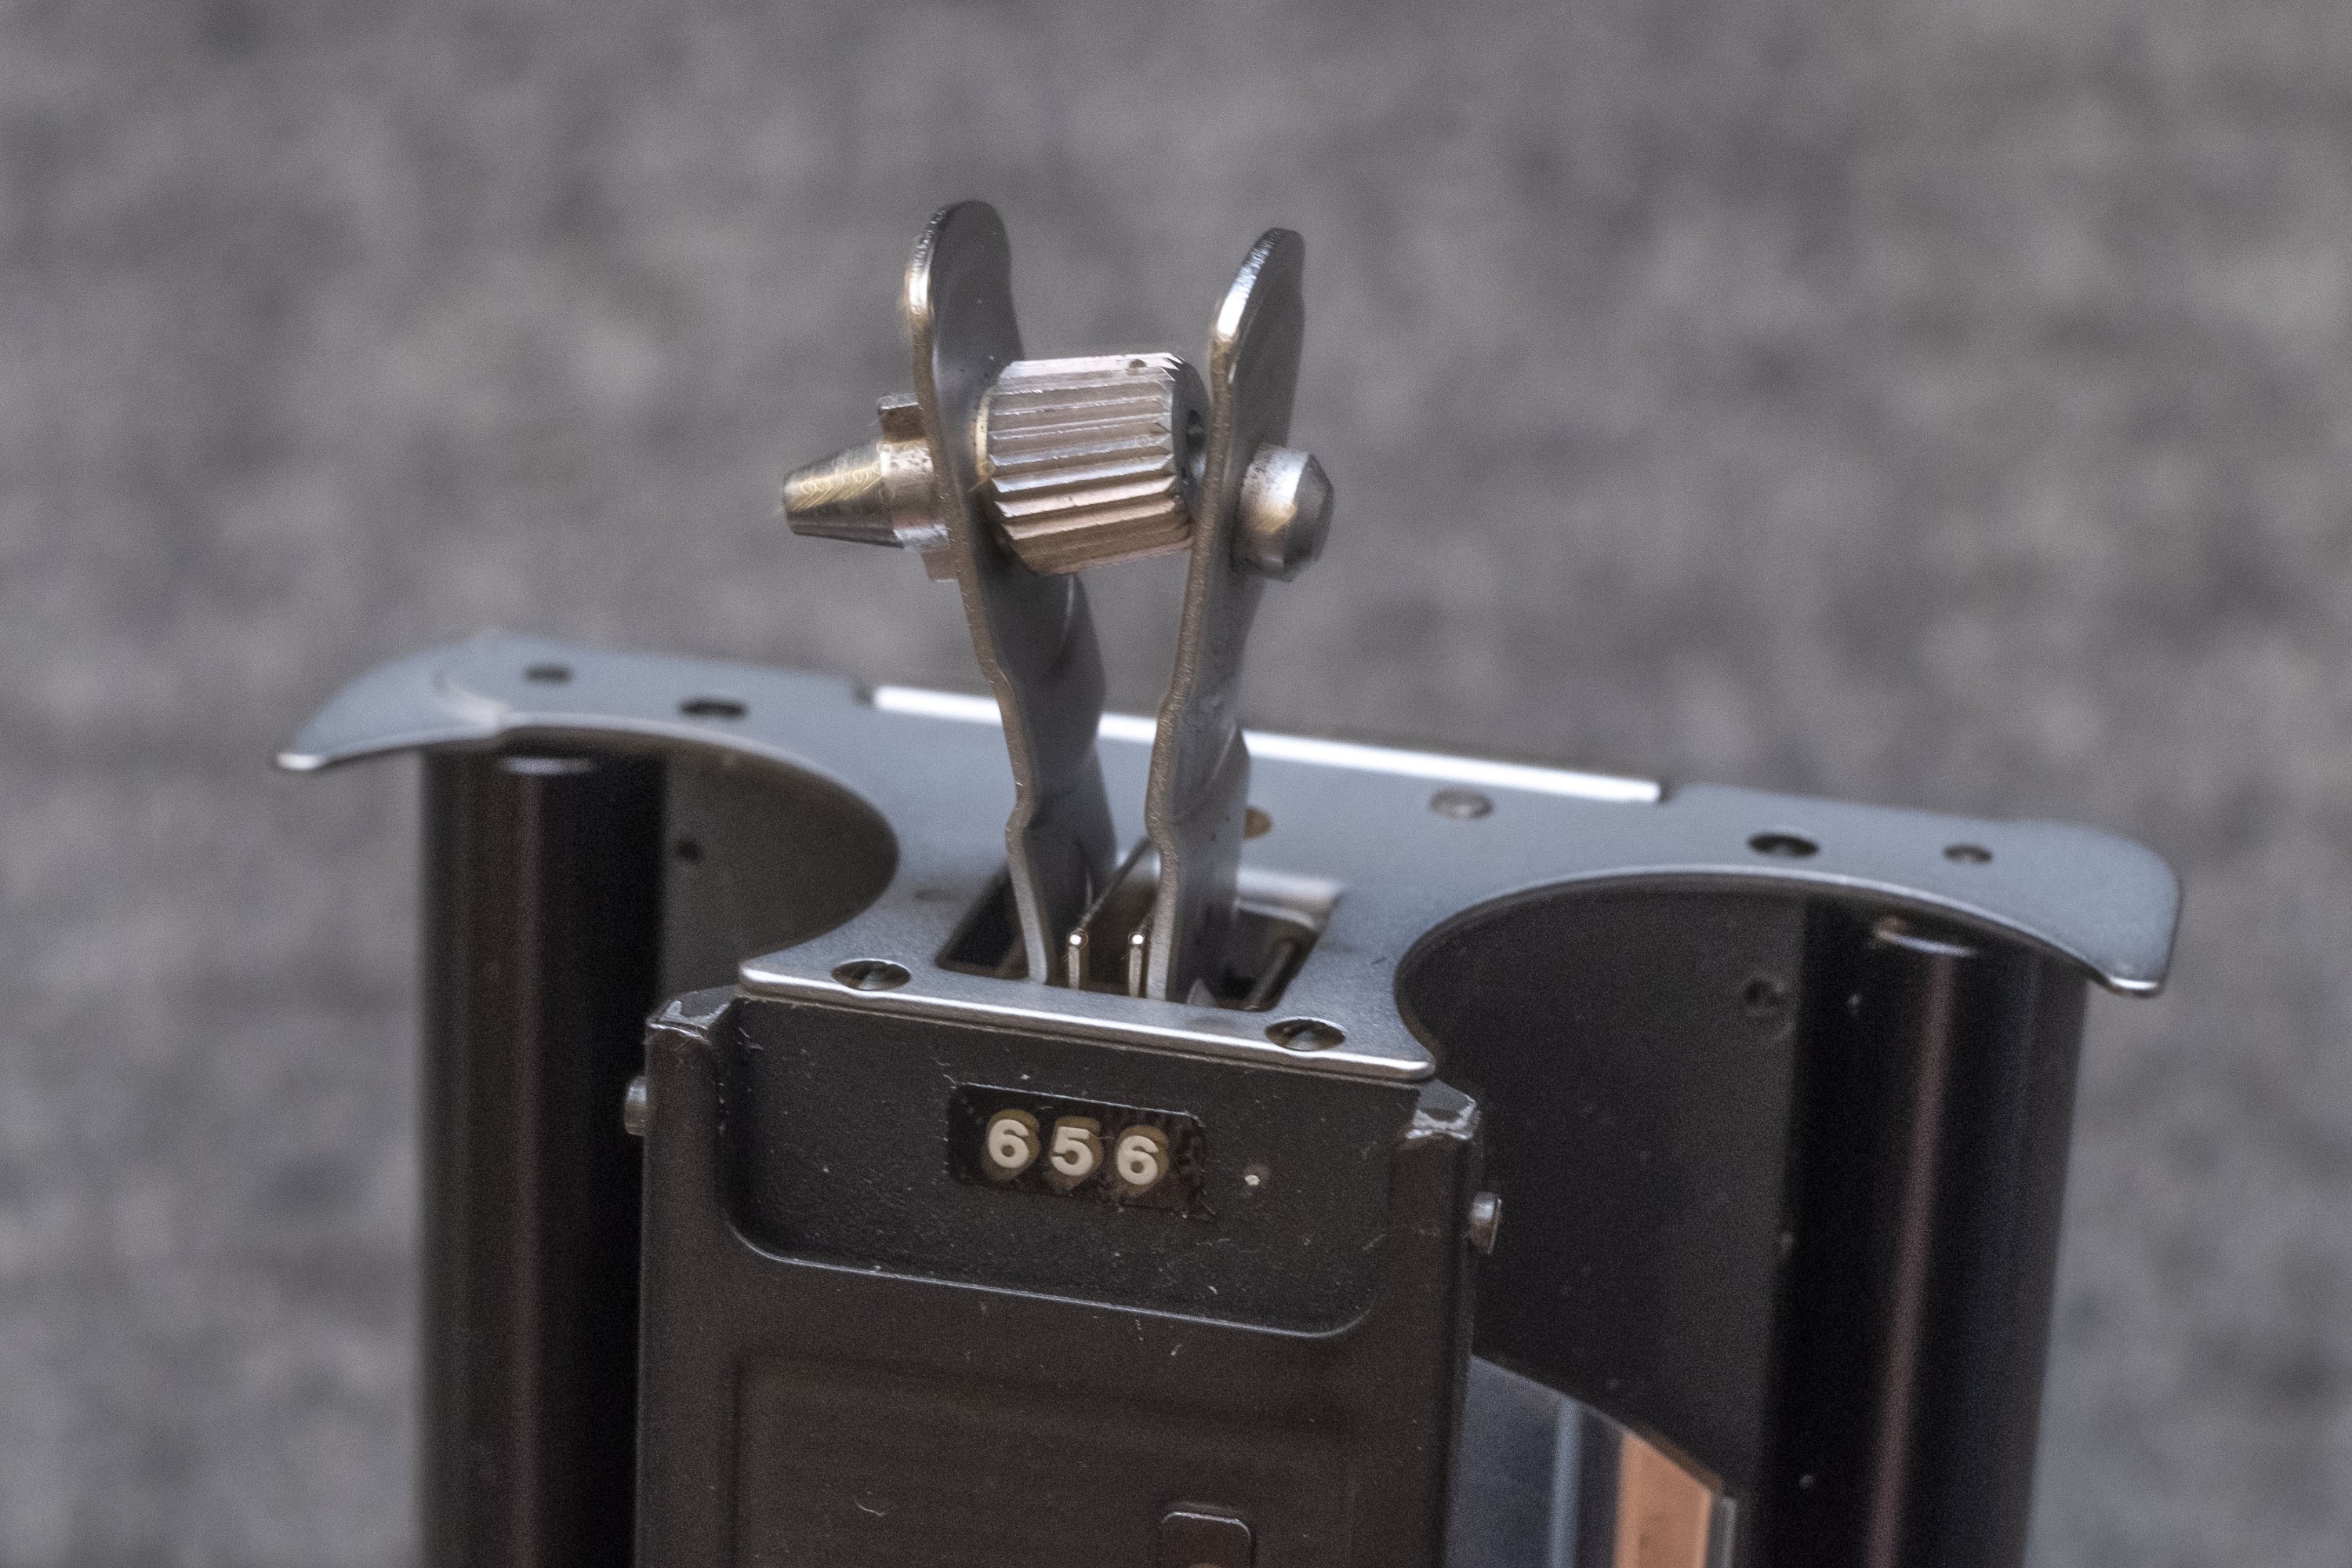
With the film holder out, you have easy access to both the supply and take up side. Hinged metal arms fold out of the way making attaching a 120 film spool very easy. It is easy to identify the take up side as it has a tapered metal post sticking out of one side.
Step 2
To load film, first move an empty spool to the take up side, and then load in a new roll of film into the other side. The take up side is the one with the knurled metal post on one side. The direction of the film is critical when loading as the black backing paper must face AWAY from the film holder. Wrap the paper leader around the metal roller, across the film plane, then around the other metal roller and onto the take up spool just like you would any medium format camera.
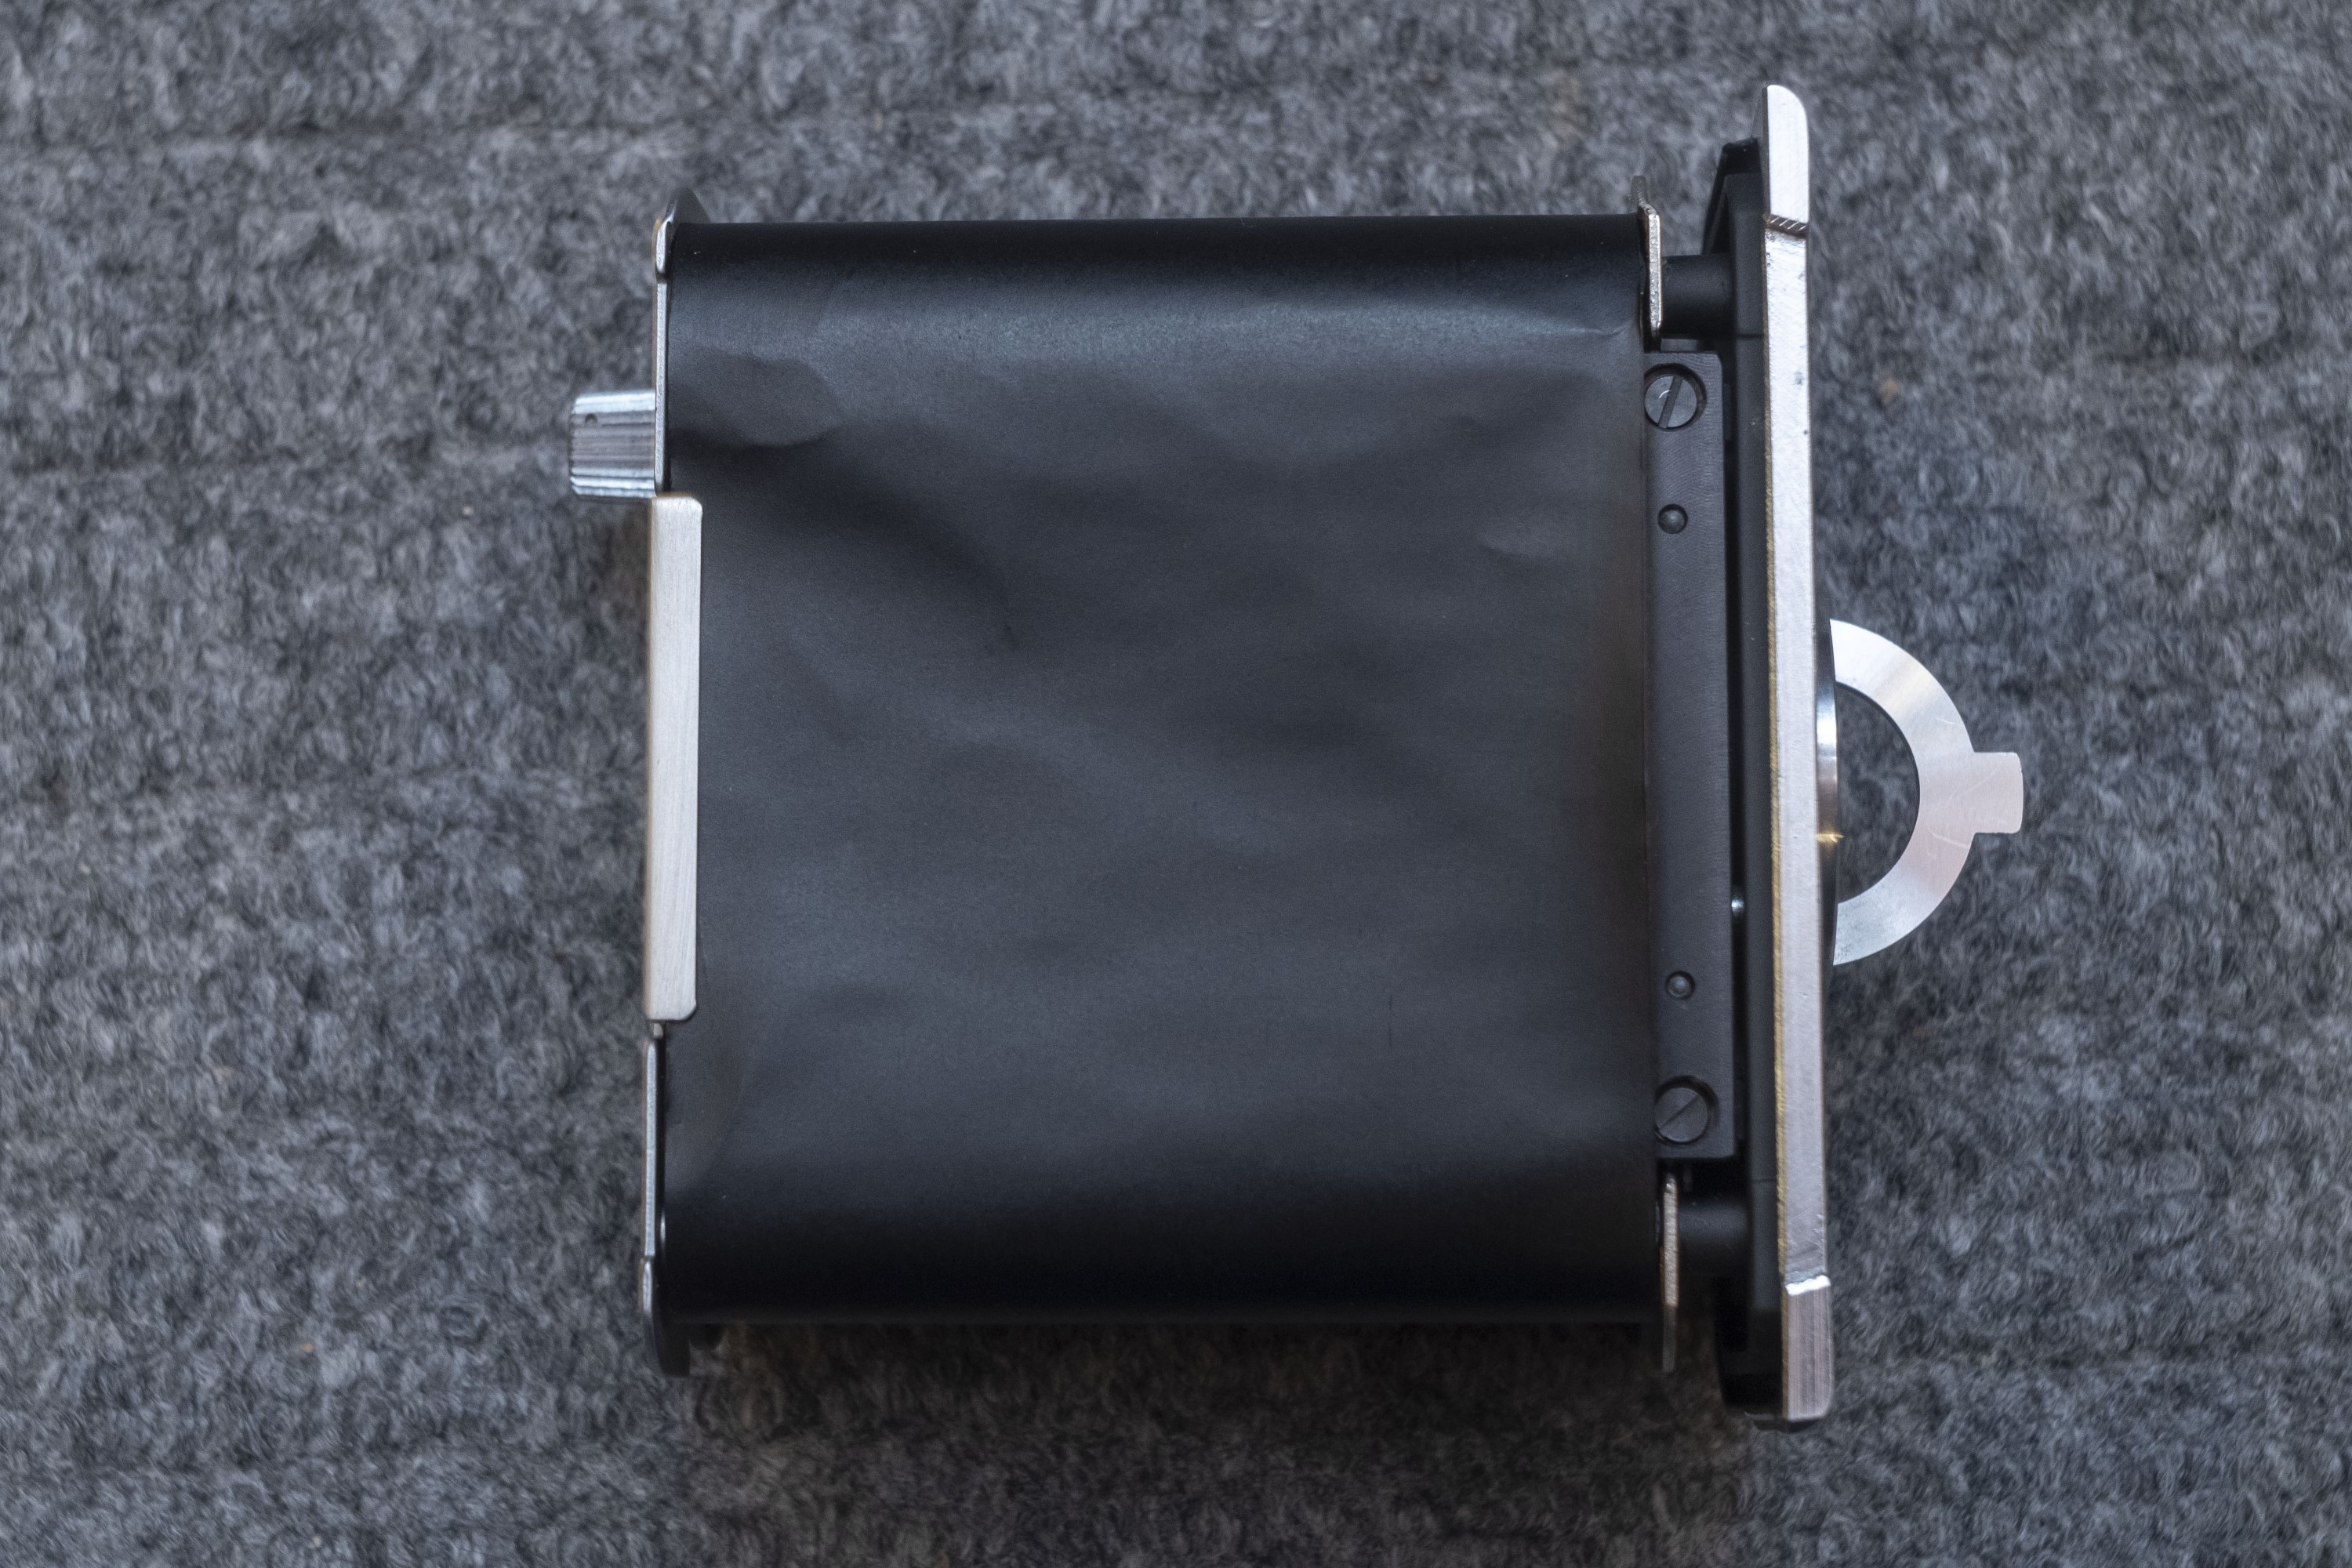
There is a thin metal strip on the side of the film holder on the same side as the folding arms that you must thread the film backing paper under. The Hasselblad 500 C manual refers to this as a “film clamp”. This is only possible if you remembered to return the folding release handle back to it’s original position after pulling the film holder out of the magazine in Step 1. If the film clamp is pressed tightly against the pressure plate, the handle is in the wrong position.
In the image to the left, you can see the backing paper correctly loaded under the film clamp. Also note that the black backing paper is facing outward like it should. If you can see any printing on the backing paper facing out, you have the film loaded backwards!
Step 3a – Using 500 C/M Magazine Only
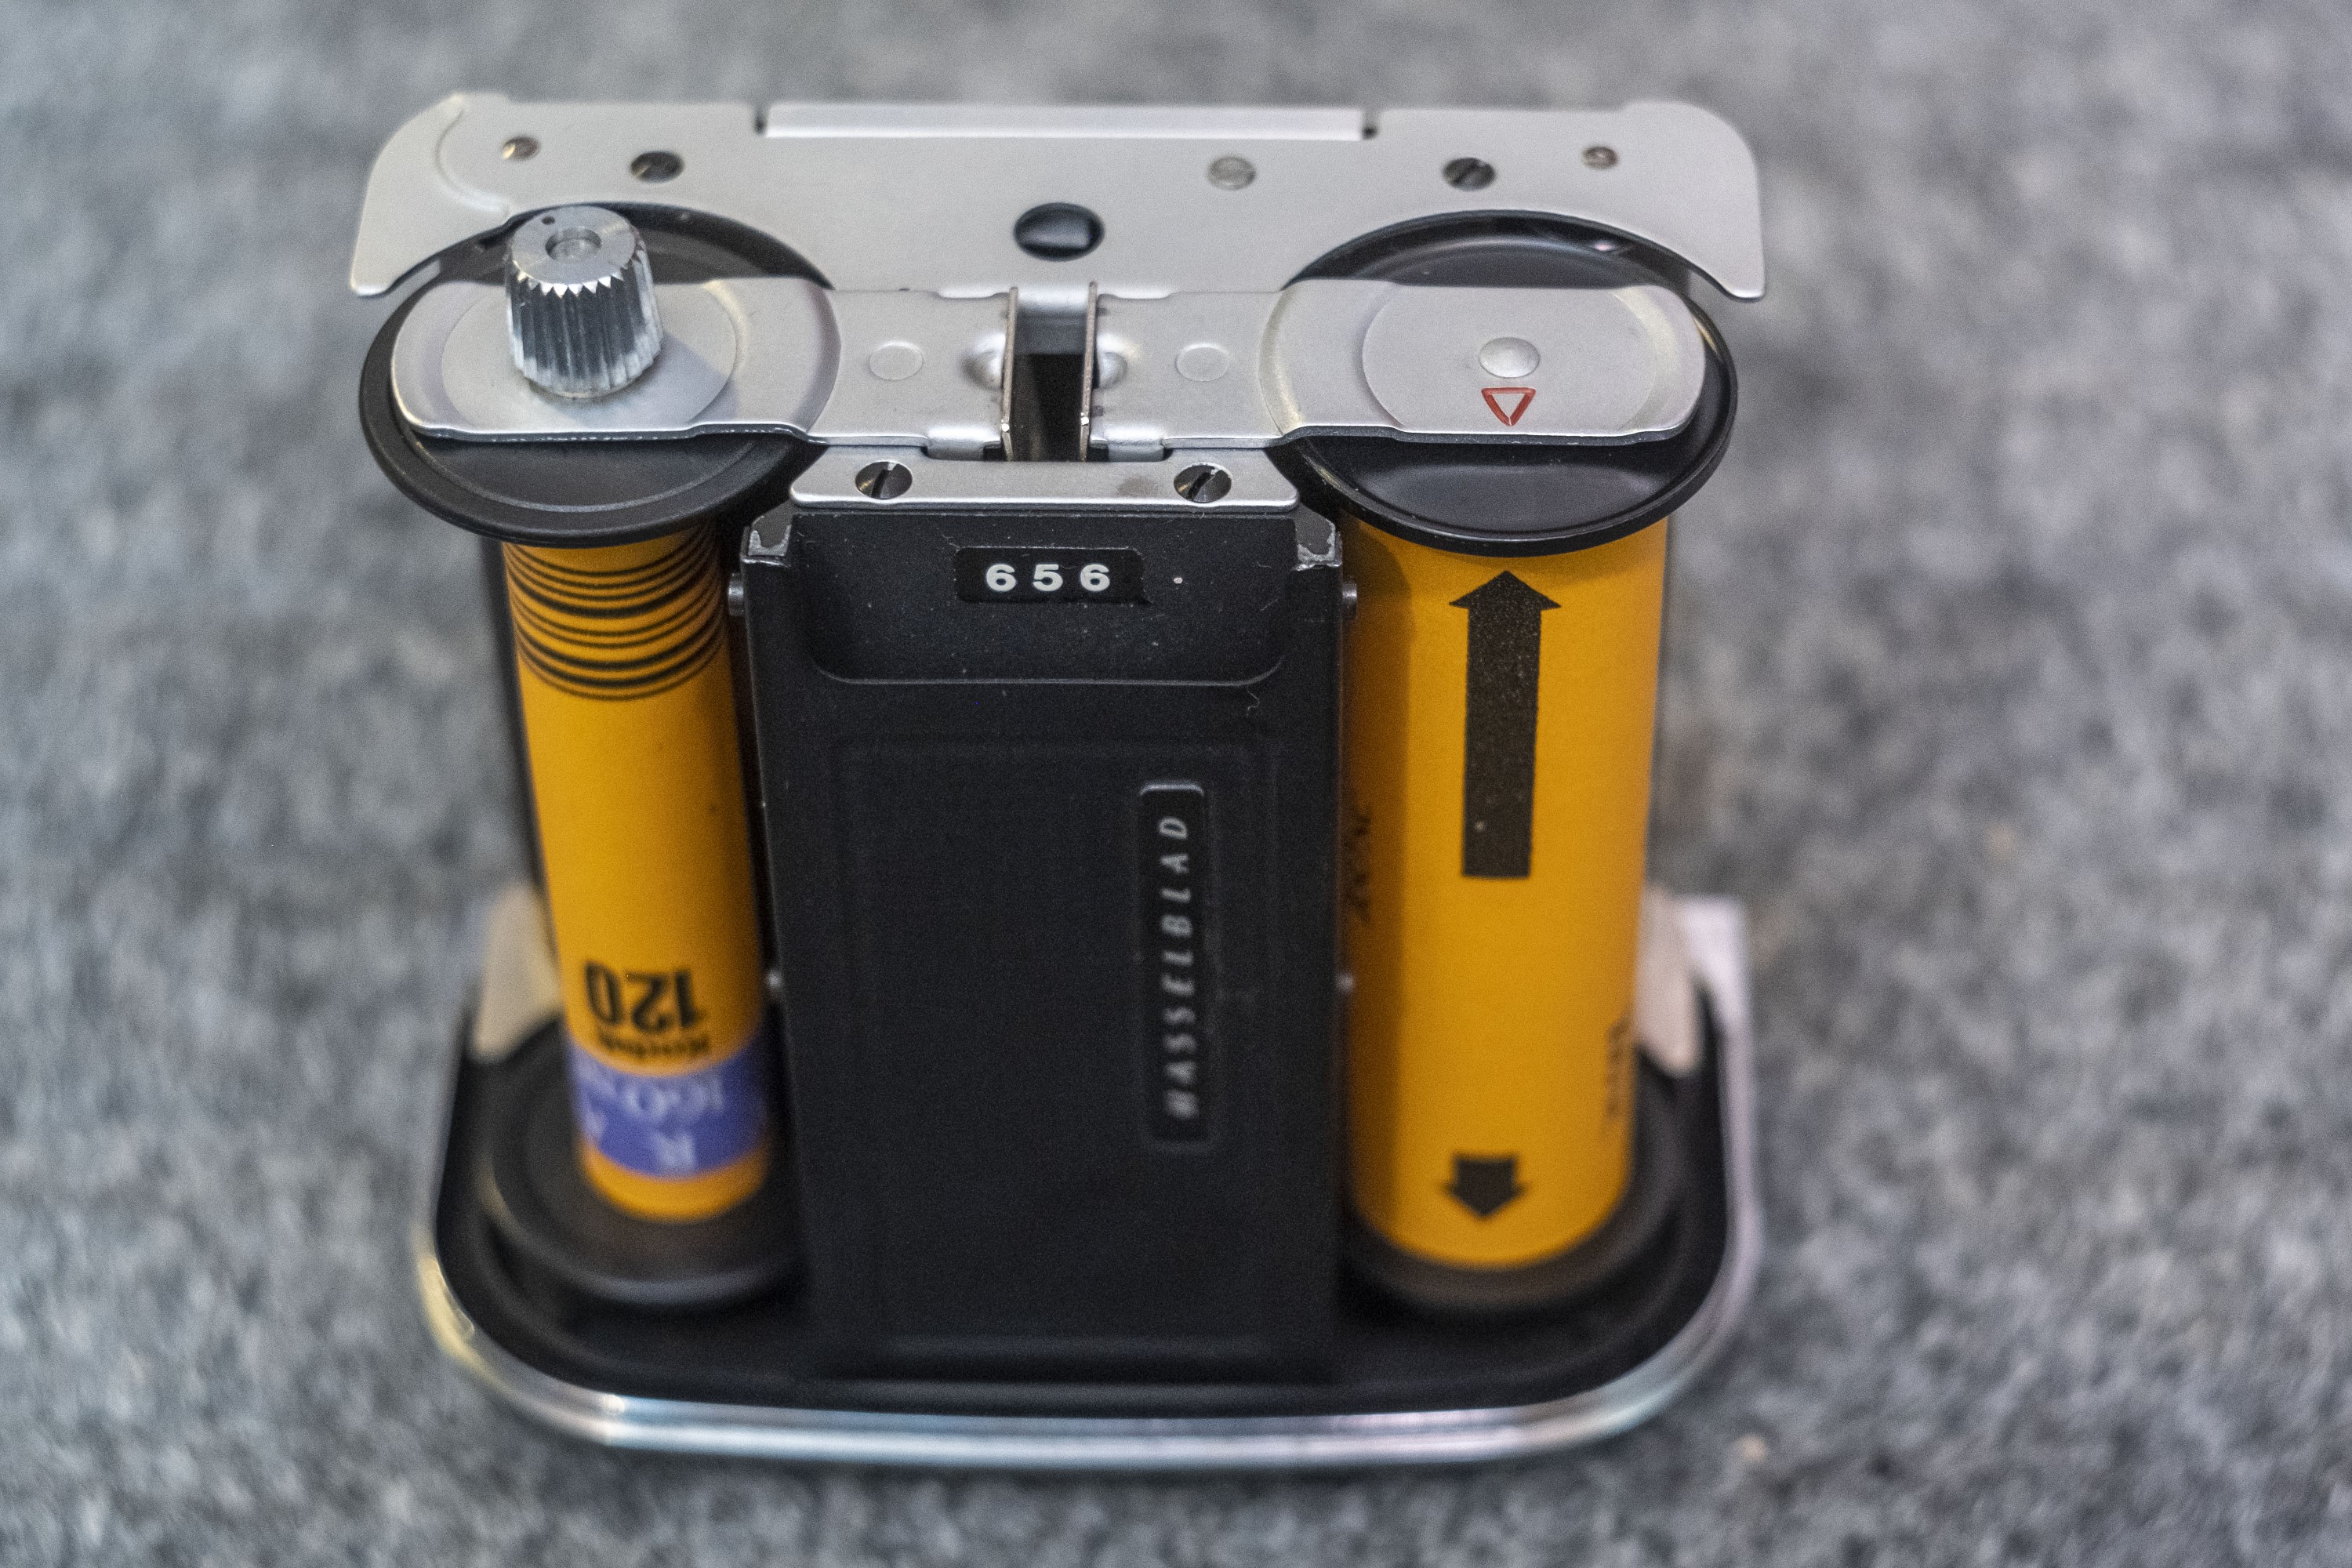
The next step is to manually advance the film using the knurled metal post on the take up side until the Start mark on the new roll of film lines up with a red triangle on top of the supply side. The Start mark will look different on different types of films, but all modern 120 films should have one. In the image to the right, I have Kodak Portra 160 NC loaded and the black Start mark is correctly lined up with the red triangle.
Once the film is correctly set in this position, you must once again turn the chrome handle on the film holder counterclockwise to tighten the film clamp and insert the film holder and film back into the magazine. Once the film holder is back in the magazine, turn the chrome handle clockwise one more time to lock the holder in place and loosen the film clamp.
If at any point, there is resistance inserting the film holder back into the magazine, do not force it. Pull it back out and confirm the backing paper is still under the film clamp and has not come loose.
Step 3b – Using 500 C Magazine Only
The original 500 C magazine does not have the auto film start feature, so once you’ve installed new film into the film holder, there is no need to line up any arrows. Turn the chrome handle on the film holder counterclockwise to tighten the film clamp and insert the film holder and film back into the magazine. Once the film holder is back in the magazine, turn the chrome handle clockwise one more time to lock the holder in place.
If at any point, there is resistance inserting the film holder back into the magazine, do not force it. Pull it back out and confirm the backing paper is still under the film clamp and has not come loose.
With the film holder securely loaded into the magazine, open the round door on the back of the magazine and look through the hole to the backing paper of the film you’ve loaded. Make sure you do this somewhere with subdued light as there is no red window on the magazine to protect the film from direct sunlight.
Next, using the film advance handle on the opposite side of the magazine, rotate it clockwise until the printed number 1 from the backing paper shows through the hole, then turn the film advance handle counterclockwise as far as it will go, to set the exposure counter on the magazine to 1. With the number 1 from the backing paper visible through the hold and the number 1 on the exposure counter, close the door on the back of the magazine and you have completed the film loading procedure. I did not have access to an original 500 C magazine for this review, but the image to the right shows a very similar setup on the Arsenal Salyut camera where you can see the backing paper through a hole in the back of the magazine.
Step 4
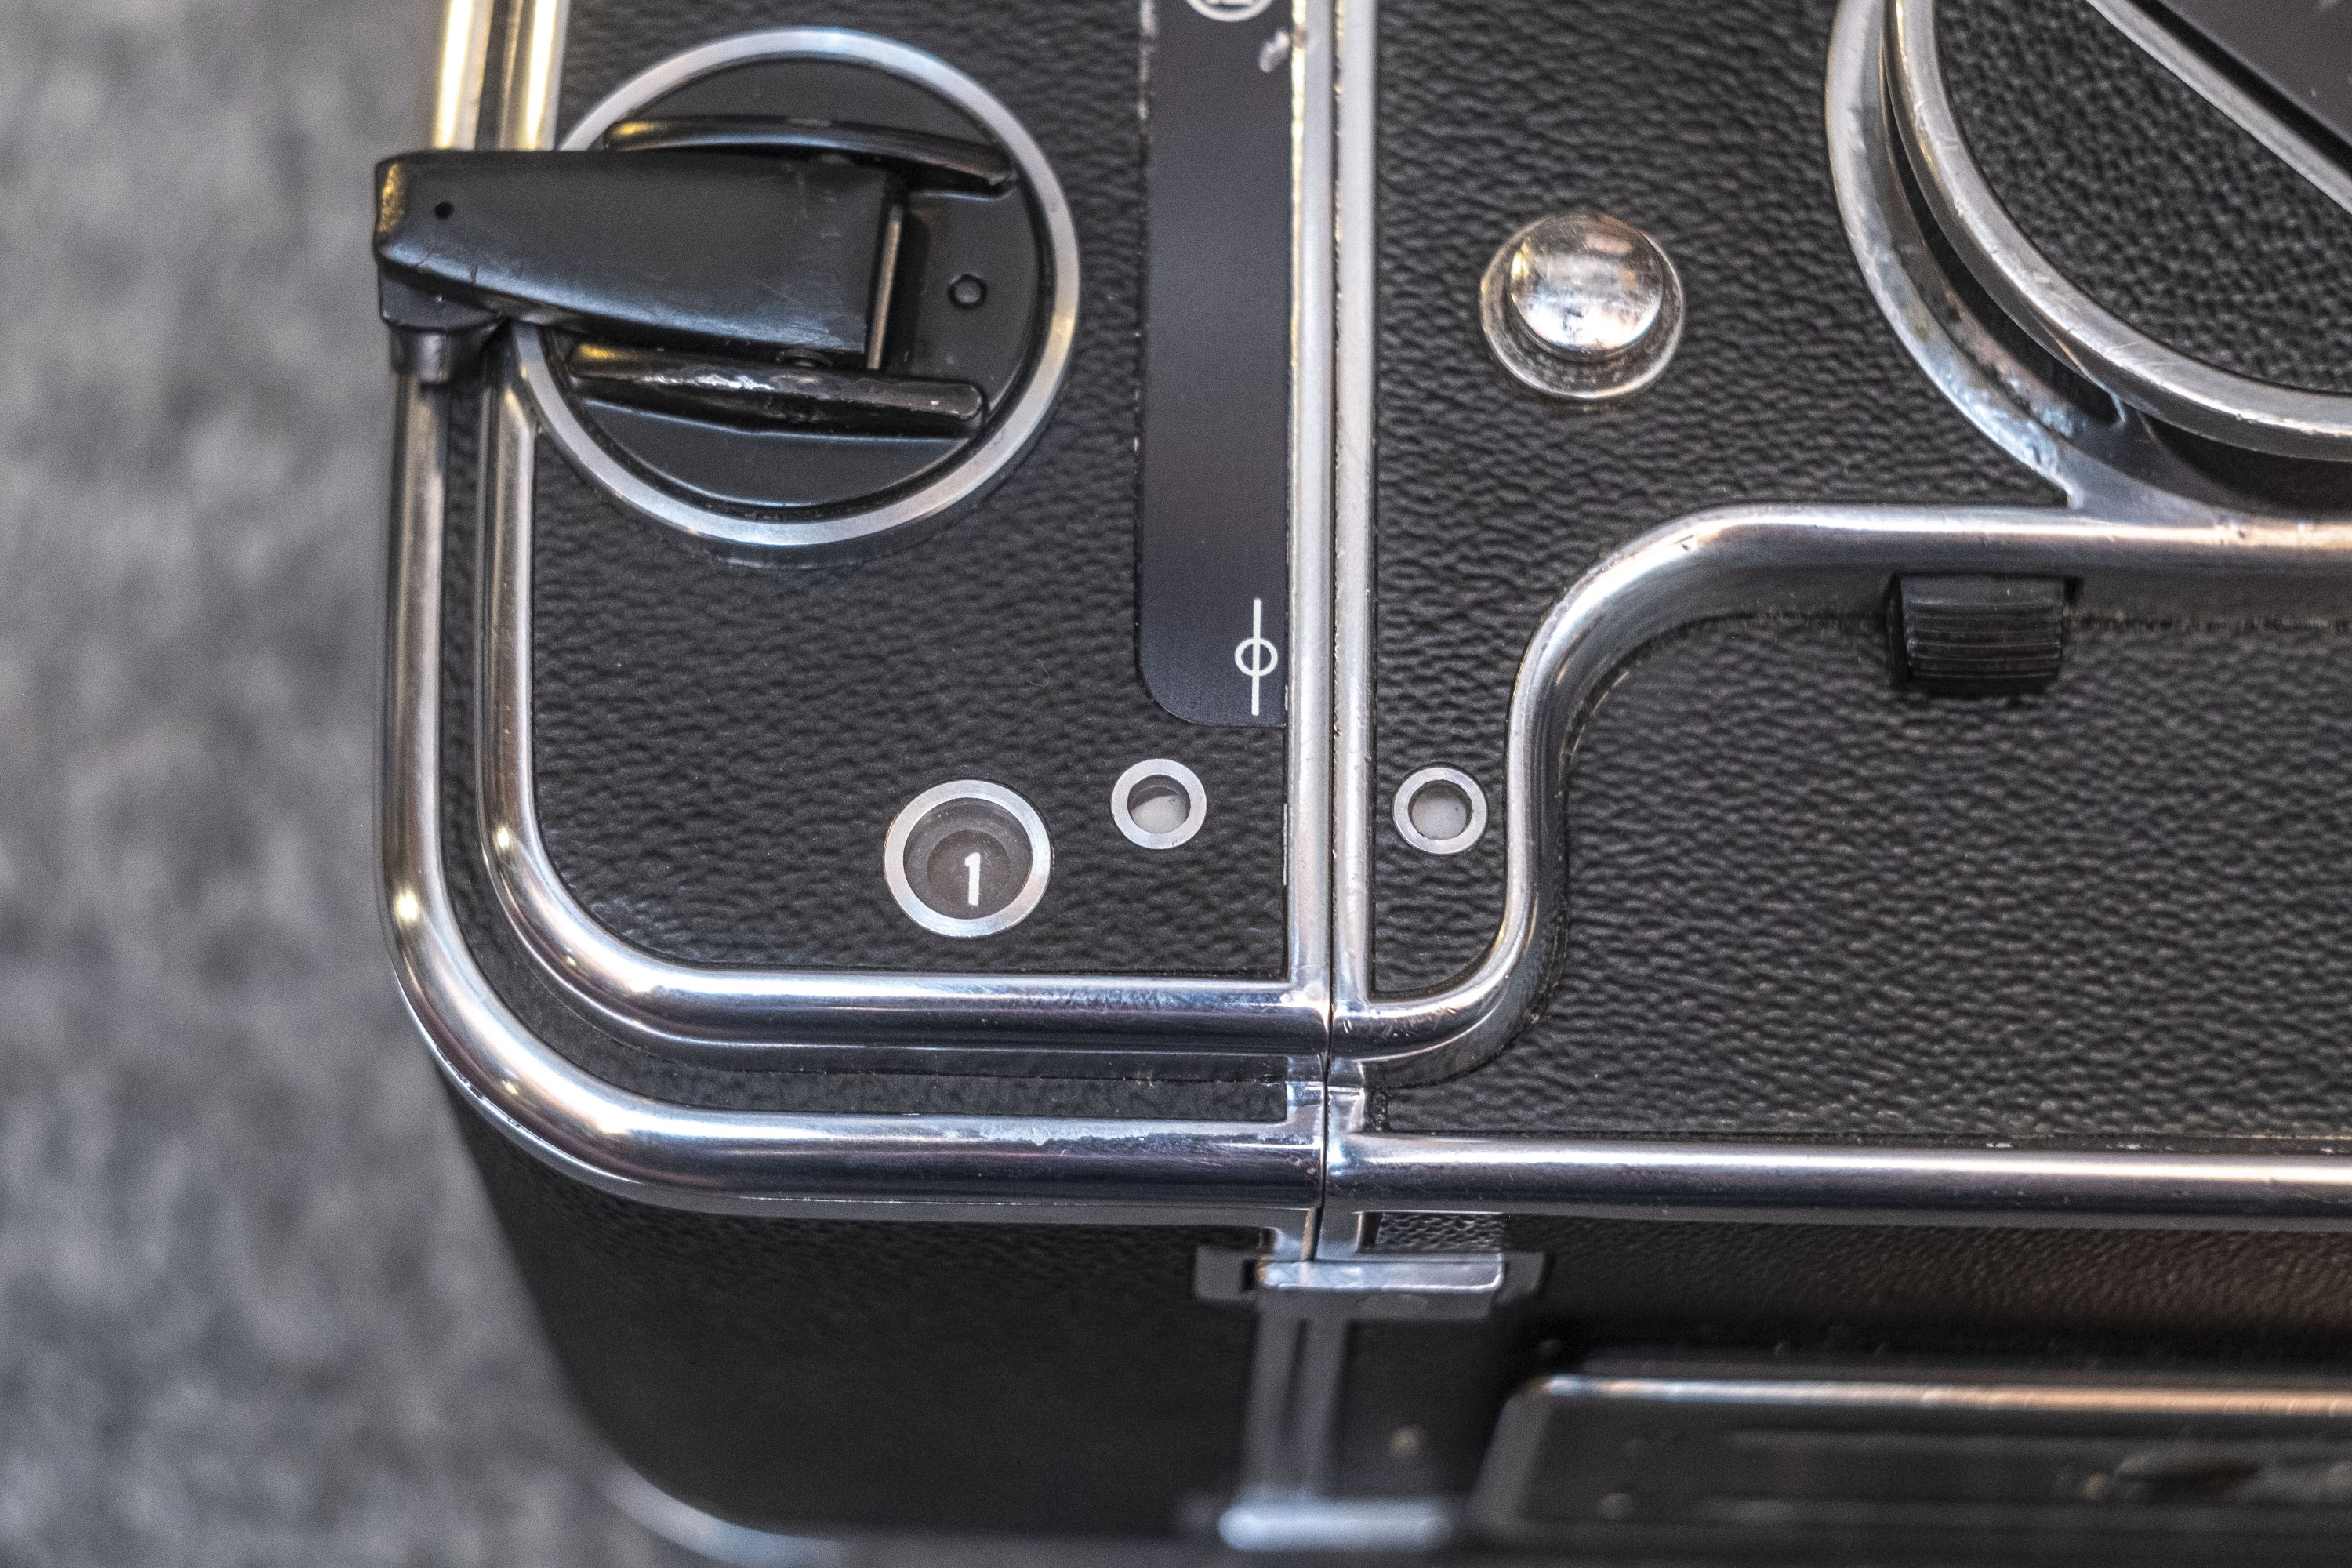
With film loaded into the magazine ready for it’s first exposure and the exposure counter set to 1, you are ready to make your first exposure. Check the status of the shutter using the two round status windows on the right side of the camera as explained earlier in this review. Both windows should be white, indicating that the magazine and shutter are both ready. If the magazine window is white, but the shutter is red, you’ll need to temporarily detach the magazine from the camera (with the dark slide in place) wind the film advance lever to ready to shutter, and then reattach the magazine and now both windows should be white.
Step 5
With the camera loaded, you will rely on the exposure counter on the site of the magazine to know how many exposures have been made. Do not continue to open the round door on the back of the magazine to see the exposure numbers on the backing paper throughout the rest of the roll.
After the last exposure, you must use the manual film advance knob on the magazine to wrap up the backing paper in preparation for removing the film from the magazine. As one last step, you may want to insert the dark slide into the camera to prevent the shutter from accidentally being released.
My Results
With the excitement looming of finally being able to shoot a Hasselblad, for it’s first roll, I picked a roll of (mostly) fresh Kodak Portra 160NC. I think this film expired in 2017, but was close enough that it should produce accurate colors. I loaded it up in late spring 2021 and carried it with me on a trip to my parent’s house.


Sometimes no matter how much you think you’ll like a camera, or how badly you want to get good results from one, it just doesn’t always happen. Although I was aware this Hasselblad 500 C had some issues, I thought for sure I’d be able to make it all the way through a couple rolls of film to show you some results.
As I inspected my first roll, I immediately noticed a strange black triangle in the corner of every image. After further inspection of the negative and the camera, I discovered that a piece of light seal material in the magazine around where the dark slide goes in had come loose and was partially blocking the film gate. Of course with light seal material coming loose opens the film compartment up to light leaks, which show up in almost every image on the roll.
Beyond the light seals and light leaks, every image on the roll developed a strange color cast that I didn’t expect to see on 2017 expired Kodak Portra. Upon close inspection of the Planar lens, I did notice some separation near the edges, and the lens had yellowed over time, but nothing that I think should have caused such out of character colors.
If these were the only issues of the camera, I could have taped up the light seals and perhaps used some black and white film to negate any color casts, and shot another roll in the camera, but after finishing the roll and looking at the camera again, I noticed the iris wasn’t stopping down when firing the shutter. I could see the leading edge of the diaphragm blades wanting to stop down, but nothing else.
With so many issues, I decided to just call it a day and go with the dysfunctional roll I got for this review.
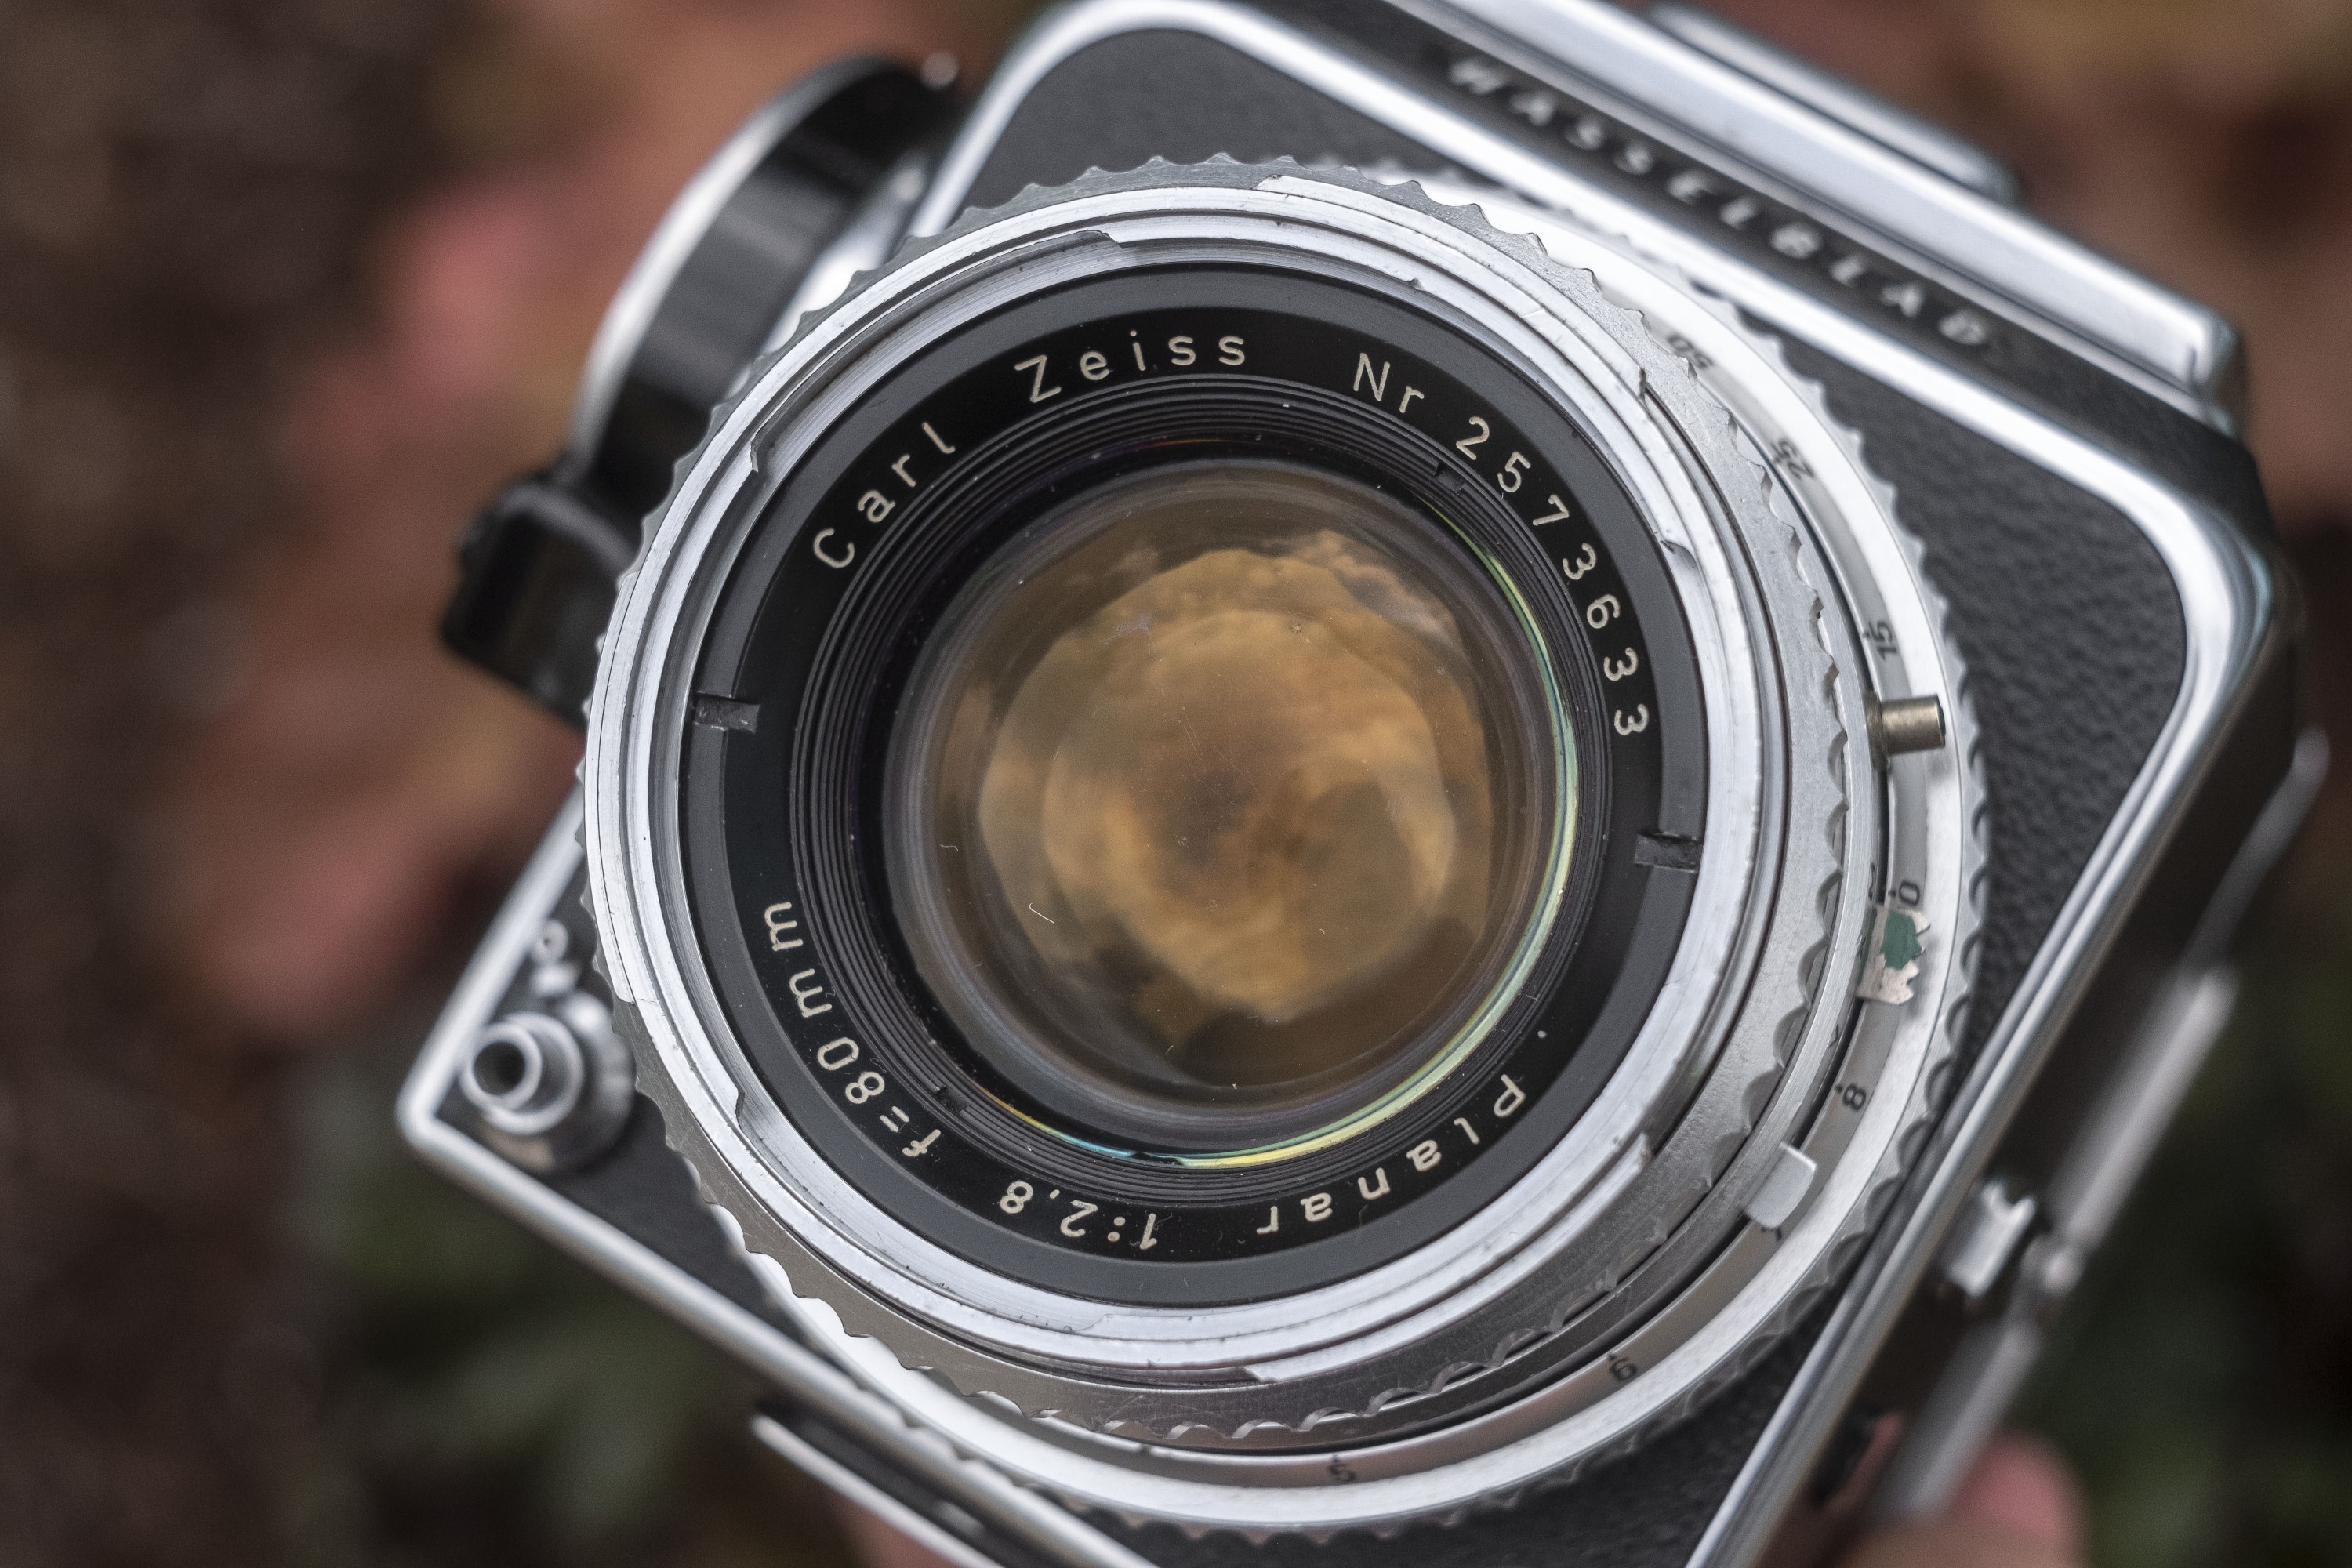
Looking at the images however, I can clearly see that in good working order, the Carl Zeiss Planar would have delivered sharp images corner to corner. Not that I expected anything less of a such a highly regarded lens. Carl Zeiss was no stranger to making quality lenses, and this 7-element Planar is no slouch. The Hasselblad 500 C was an enormously successful camera for a variety of reasons, one of which was this lens, so for those of you hollering at your screen for my decision to review such a messed up camera, know that I absolutely do not fault the quality of it’s lens.
In the past when I’ve written reviews for non, or barely functional cameras, I often get some criticism from readers telling me I’m not doing that model justice and I should reserve judgement for a better example.
I guess in some respects, they’re not wrong. If I am reviewing a camera, I probably shouldn’t do it on one with so many issues. The problem is, the Hasselblad 500 C is not a cheap camera. With eBay sold prices for working copies nearing four figures, this is not a camera I can, or even want to afford. I was fortunate enough to be able to borrow this one camera, and I’ve reviewed enough different models over the years, that I feel as though I can extrapolate what conclusions I’d likely come to had I had access to a mint condition example.
There is little I can say about the Hasselblad 500 C that isn’t already well documented online. If you already own this camera and enjoy using it, then by all means, keep using it. If you don’t own one and were hoping to see more sample images from me, hopefully the rest of the historical and instructional information here has still made this article a worthwhile read.
Hasselblad made excellent cameras. In good working order, the Hasselblad 500 C is part of a flexible system with a wide variety of lenses and accessories that will deliver excellent results every single time you use it.
The thing is though, is that there are other, less expensive options out there that can do the same thing. I won’t say the 500 C is exactly the same as a Bronica or a Soviet Kiev, but if all you want is a 6×6 SLR, you have other options. If you are in this market however, my advice to you is to ask yourself what you really want. If you just want a camera that shoots nice square images on 120 film, I’d recommend something else, but if you really want to get into the Hasselblad system, then by all means, do it. They’re great cameras. Just remember though, no matter how great a Hasselblad 500 C is, it is not impervious to the perils of time, and you’ll need to make sure get one that’s recently been serviced, or you might end up having the same experience as I did.
Related Posts You Might Enjoy
External Links
https://en.wikipedia.org/wiki/Hasselblad
https://www.hasselblad.com/inspiration/history/500-series/
http://www.alexluyckx.com/blog/index.php/2015/09/09/ccr-review-19-hasselblad-500c/
https://shootitwithfilm.com/hasselblad-500-cm-film-camera-review/
The light seals are an easy and inexpensive DIY project. The issue with the iris might be hardened lubricant, but it might also be a broken spring. Unfortunately parts for the chrome C lenses are pretty much gone. I have a 500 C/M kit with two magazines and three lenses that I bought in 2001 for less than the cost of one of the lenses today. The run up in prices makes selling it very tempting, but I am so used to its idiosyncrasies that I suspect I would miss it.
I own and use both a 500c/m and a 1000F. Call me old fashioned but I do prefer the 1000F. It does require manual stop down of the lens before shooting, but also eliminates the reliability issues that always plague any form of automation.
I keep waiting for you to find and review the original Rolleiflex model. Now there is a camera that a person can rely on. Little more than a box camera with improved focus and shutter function……and still available at fairly reasonable prices. Look for the 4.5 Tessar. I think it a better rendering lens.