
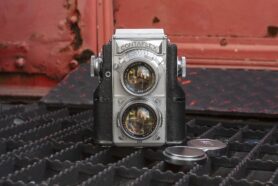
The Zeiss-Ikon Contaflex 860/24, produced in Dresden between 1935 and 1940, was Zeiss-Ikon's ambitious attempt to build a premium 35mm reflex camera to sit above the already impressive Contax rangefinder. As the only 35mm Twin Lens Reflex ever made with interchangeable lenses, it combined a Rolleiflex-style 6cm waist-level finder with an 8cm Sucher-Objektiv viewing lens, a vertically traveling metal focal-plane shutter borrowed largely from the Contax, and the world's first built-in selenium exposure meter. A total of eight lenses were made for its unique breech-lock bayonet mount, ranging from a 3.5cm Biogon to a 13.5cm Sonnar, though most examples used the common 5cm f/1.5 or f/2 Sonnars. At release the camera was extremely expensive—up to $435 in 1936, equivalent to thousands of dollars today—and given its complexity, few were sold, making surviving working examples rare today.
The author's example came from the Kurt Ingham collection in inoperable condition and required a roughly 14-month restoration by Radu Lesaru of 3R Camera, one of the last people willing to service these cameras, involving a full shutter rebuild, mirror replacement, leather removal/reinstallation, and even reviving the selenium meter. Handling the camera revealed it to be extremely dense (1474 grams with the f/1.5 lens) and ergonomically bewildering: the exposure meter uses uncoupled sliders and a confusing needle/diamond display requiring multiple steps to translate readings into actual camera settings, while the shutter speed selector groups speeds into four categories requiring a two-step rotation-and-alignment process. Shooting a test roll of AGFA Aviphot Pan 80 with the 5cm f/1.5 Sonnar produced excellent, contrasty results (though soft wide open, sharpening notably by f/5.6), confirming the lens quality despite being uncoated. The waist-level finder, while praised as the standout feature for its large, bright 6cm ground glass reminiscent of medium format cameras, still suffered limitations like fixed frame lines and reliance on an auxiliary finder for wide-angle lenses.
The author's verdict is that the Contaflex TLR is historically fascinating, beautifully built, optically superb, and undeniably "cool," but not genuinely enjoyable to shoot due to its poor ergonomics, confusing meter, and awkward controls. It's deemed a worthy and important collector's piece rather than a great practical camera, with the author cautioning readers against impulse-buying one, despite being personally glad to own and have restored this example.
AI-generated summary. May not capture every detail — read the full article below for the complete picture.
This is a Zeiss-Ikon Contaflex, a 35mm Twin Lens Reflex camera produced by Zeiss-Ikon AG Dresden between the years 1935 and 1940 in Dresden, Germany. The Contaflex TLR is one of only a few TLR style cameras designed for 35mm film and the only one that supports interchangeable lenses. It is a true TLR design, with a large 6cm wide waist level finder, a magnifier for precision focus, and a clever Albada sports finder with projected frame lines. Most significantly, the Contaflex TLR was the first camera to have a built in selenium exposure meter. For it’s day, it was an extremely innovative, complex, and expensive camera and as a result few were sold, making them extremely difficult to find in working order today.

Film Type: 135 (35mm)
Lens (Taking): 5cm f/1.5 Carl Zeiss Jena Sonnar uncoated 7-elements in 3-groups
Lens (Viewing): 8cm f/2.8 Carl Zeiss Jena Sucher-Objektiv uncoated 4-elements in 3-groups
Lens Mount: Contaflex TLR Breech Lock Bayonet
Focus: 3.6 feet to Infinity (w/ 5cm f/1.5 Lens)
Viewfinder: Waist Level Coupled Reflex Viewfinder with Multiple Frame Lines and Albada Sports Finder
Shutter: Vertically Traveling Metal Focal Plane
Speeds: B, 1/2 – 1/1000 seconds
Exposure Meter: Uncoupled Selenium Cell w/ top plate match needle
Battery: None
Flash Mount: None
Weight: 1474 grams (w/ 5cm f/1.5 Sonnar Lens), 1220 grams (body only)
Manual: https://mikeeckman.com/media/ZeissIkonContaflexTLRManual.pdf
 Upon its release in 1932, the Zeiss-Ikon Contax rangefinder represented a pinnacle of design and function in the world of 35mm cameras. Conceived as a way to compete with Ernst Leitz’s Leica camera, the Contax featured a large number of new technologies and features which differentiated it from Oskar Barnacks Leica. I’ve covered the features and development of the Contax in my review for that camera, so rather than repeat too much here, I recommend you check out that review if you want to learn more about the Contax’s development.
What I did not cover in that review however, was that after the release of the Contax, Zeiss-Ikon had a desire for an even more premium 35mm camera, one that would push the limits of design and engineering beyond that of even the lofty standards of the Contax. For as great as the Contax was, it lacked a few features such as a light meter, self-timer, and TTL (Through the Lens viewing). Furthermore, rangefinder cameras have tiny viewfinders and weren’t the easiest to use with wide angle and telephoto lenses.
Reflex cameras had already been around for a number of years in large format, and since the late 1920s with the Rolleiflex, but these cameras were large and didn’t typically have interchangeable lenses. At the time, the world was still a couple years away from the first 35mm SLR, so the idea of a reflex 35mm camera was something that no one had figured out yet, but it was a challenge that Zeiss-Ikon decided they wanted to tackle.
With the decision to create a new 35mm reflex camera, the priorities for this camera were:
- 24mm x 36mm exposed images in the “double frame” format popularized by the Leica and Contax – At the time, 18mm x 24mm images which matched that of many cinema cameras were commonly referred to as “single frame”.
- Ground glass reflex viewfinder with an optional direct vision sports finder – It was deemed that for a 35mm camera to have a reflex viewfinder, it must have an image larger than 24×36 as that was too small for composing at waist level. At the time, the Rolleiflex’s 6cm x 6cm viewfinder was considered ideal, so a 6cm wide viewfinder was chosen.
- Interchangeable lenses – The Contax already had a lineup of high quality interchangeable lenses, so Zeiss-Ikon wanted its new camera to use the same lenses, but they found the Contax’s lens mount to be inadequate, so the new camera would share the same optical designs, but with a new mount.
- A vertically travelling focal plane shutter with a wide range of speeds – The shutter from the Contax was ideally suited for this purpose and was largely reused, but with some changes for it to work in the new camera.
- A delayed action shutter release mechanism (self-timer) – This was a feature that wasn’t present on the Zeiss-Ikon Contax, but the designers of the new camera decided it needed to have one.
- Available accessories which could be purchased separately for use as a true system camera – A variety of lens hoods, a microscope adapter, close focusing rangefinder, and a plate film adapter would eventually be produced for the camera.

The Zeiss-Ikon Contaflex TLR was released in September 1935, but such a complex camera had to have been in development for quite some time. In my research for this article, I found no start date or estimated length of time the camera was being developed. While it did share a good number of shutter parts with the Contax rangefinder and its optical lenses, the Contaflex TLR was a tremendous engineering feat which my best guess couldn’t have been completed in less than three years, which if true, puts the start of Contaflex development right around the same time the Contax was released.

Who was responsible for the camera’s design is a little less clear. Depending on where you look, both Dr. Heinz Küppenbender and Hubert Nerwin are mentioned in the creation of the camera, however further research shows that Senior Design Engineer Oskar Bergen was most responsible for most of the camera’s creation. Küppenbender’s influence on the camera was its shutter and the exposure meter which he designed. Later patents for the camera such as US2058086A and US2084618A feature his name, but this was likely done for administrative reasons. The reason Hubert Nerwin‘s name is in this mix is that the mid 1930s saw a lot of changes in Zeiss-Ikon’s leadership and with Küppenbender taking on more of a leadership role, Nerwin was tapped to head up design of the upcoming Contax II and III which were released in 1936, so he was likely there for at least part of the Contaflex’s design. Although each of these three men can be included in the history of the Contaflex, it should be noted that many other employees were also involved in its creation.
Why is the Viewfinder Lens a Different Focal Length? If you’re used to medium format TLRs that shoot 6cm x 6cm images, you are used to the taking and viewfinder lenses having the same focal length. On the Zeiss-Ikon Contaflex however, the viewfinder lens is an 8cm design, yet the standard lens is 5cm, why is this?
As mentioned earlier, Zeiss-Ikon wanted to build a 35mm reflex camera, and with SLRs still a couple years away, they went with a Twin Lens Reflex design, which at the time was very popular with the Franke & Heidecke Rolleiflex. Of course, the Rolleiflex shoots 6cm x 6cm images on medium format film, and the Contaflex shoots smaller 24mm x 36mm images.

The design of a TLR requires that the taking and viewfinder lenses are coupled together and capture the same visual information (excluding parallax error) but if the Contaflex was going to make 24mm x 36mm images, for the viewfinder to show an image that same size, it would have been very small. The designers knew that they needed to increase the physical size of the viewfinder to make it easier to use so they went with a design similar to the Rolleiflex in which the viewfinder would be 4cm tall and 6cm wide. The shorter 4cm height was due to the rectangular aspect ratio of 24×36.
By increasing the physical size of the viewfinder, this not only made the image larger, but it also improved depth of field, making “seeing” focus easier. In order to produce a larger image, the camera required a lens with a larger image circle so a brand new 8cm f/2.8 Carl Zeiss Jena Sucher-Objektiv 4-element lens was created specifically for the Contaflex TLR viewfinder. Interestingly, the 8cm Sucher-Objektiv would be the only lens made specifically for this camera, as all other lenses were based off existing designs.
If you’re wondering how two different focal length lenses can capture the same visual information, remember the crop factor for 6cm x 6cm images down to 24mm x 36mm is approximately 0.64x, meaning a 80mm viewfinder lens would capture the same visual information as a 51.2mm taking lens on 35mm film.
All Contaflex TLR lenses were taken from existing Contax designs but reworked to fit the Contaflex’s new lens mount. There were two reasons the Contaflex TLR needed a new mount, the first was that lenses for the Contax rangefinder had a flange distance of 34.85mm which if these same lenses were to be used in the Contaflex TLR, they needed to be the same distance away from the focal plane and this required the lens to be mounted deeper into the camera. The second reason was that by locating the physical mount closer to the front of the lens, its weight could be better supported and would prevent them from sticking too far out of the camera. This wouldn’t have been possible had the Contaflex been designed as an SLR as the lenses would interfere with the mirror, but that would not be a problem in a TLR.

When the camera was released in September, three normal and three telephoto lenses were available, they were:
- 5cm f/2.8 Carl Zeiss Jena Tessar
- 5cm f/2 Carl Zeiss Jena Sonnar
- 5cm f/1.5 Carl Zeiss Jena Sonnar
- 8.5cm f/4 Carl Zeiss Jena Triotar
- 8.5cm f/2 Carl Zeiss Jena Sonnar
- 13.5cm f/4 Carl Zeiss Jena Sonnar
In March 1936, a single 3.5cm f/2.8 Carl Zeiss Jena Biogon wide angle lens was added, plus a 3.5cm f/4 Carl Zeiss Jena Orthometar which appeared in Zeiss-Ikon promotional materials, however only 2 are known to exist. Although the Contaflex TLR was always intended to have wide angle lenses available, the built in viewfinder did not offer a 3.5cm view, so included with the purchase of the 3.5cm Biogon, an auxiliary viewfinder was included. It stands to reason that had the f/4 Orthometar been widely available, it would have come with the same viewfinder.

Of the seven lenses made in moderate quantities for the Contaflex TLR, the 5cm f/1.5 and f/2 Sonnars were the most common and the 8.5cm f/4 Triotar the least common. It is difficult to ascertain how many of each lens were made as production of each lens coincided with production of the same lenses in Contax mount. According to “Zeiss and Photography” by Larry Gubas, Carl Zeiss Jena did not typically make batches of lenses for more than one camera together as lens batches were usually dedicated for a specific system, however Contaflex TLR lenses were seemingly taken at random in the middle of Contax lens production, clearly showing that both systems were considered of equal importance to the company. In at least one publication, it was suggested that lenses could be converted from one mount to the other, perhaps by sending them back to the factory, however I was not able to find any concrete information if this is true and if so, if it was ever done.
Including the extraordinarily rare 3.5cm f/4 Orthometar wide angle lens, a total of eight lenses were made for the Contaflex. Had the camera been more successful, it stands to reason that more might have been offered.


Upon its release, the Zeiss-Ikon Contaflex TLR was the most premium camera in Zeiss-Ikon’s lineup and carried a price comparable to a top tier camera. In Zeiss-Ikon’s 1936 US catalog, the camera carried a very high price of $321 with the f/2.8 Zeiss Tessar lens and up to $435 with the f/1.5 Zeiss Sonnar. Prices quickly dropped however, as the third image above comes from Zeiss-Ikon’s 1939 US catalog which shows the prices had dropped to $250 and $372 with the Tessar and Sonnar lenses respectively. Even at the lower 1939 prices, when adjusted for inflation, these numbers compare to an eye watering $5870 and $8730 today.

Unlike the Contax rangefinder in which significant internal and external changes were made to the camera throughout its production, the Contaflex TLR saw fewer changes, at least externally. Also unlike the Contax, Contaflex TLR variants are not divided up into sub-models to identify differences, however the most common visible changes are:
- The size of the Zeiss-Ikon logo stamped into the leather on the back of the camera changed size at least twice.
- The size of the plate and typeface of the CONTAFLEX logo covering the meter changed. The logo on earlier versions of the camera is larger.
- Early versions of the camera have an additional Zeiss-Ikon achromat logo on the front, below and to the left of the viewfinder lens.
- The design of the ring around the viewfinder lens changed from being flat on early cameras to having a ridge on later ones.
- The entire design of the viewfinder hood and magnifier changed. Early ones were smaller and possibly more flimsy. In addition, the release button for the magnifier changed as well.
- There are also versions of the camera in which the meter’s film speed scale is measured in Scheiner speeds and some in DIN.
To date, there has been no known research that specifies which serial numbers have which versions of the above features, but generally, cameras with a “Y” date code in the serial number have most of the early options, with some “Z” serial numbers having some but not all.
Although it is generally believed that the Contaflex TLR was produced until 1940, I believe that a majority of the production was concentrated between the years of 1935 to 1936. I came to this conclusion based on an unscientific review of 12 different examples for sale on eBay at the time I was writing this article in which the serial number was visible, and they all had date codes of Y, Z, or A. In addition, Larry Gubas’s Zeiss book also has images of several cameras, all of which have Y, Z, or A serial numbers. Zeiss-Ikon cameras produced between 1937 to 1940 would have date codes of C to M, and I was unable to find a single example like that. My best guess is that production of the camera was heavy front loaded and new, unsold inventory continued to be offered until the end of the decade. If you have a Contaflex TLR with a later serial number, please let me know in the comments section below.
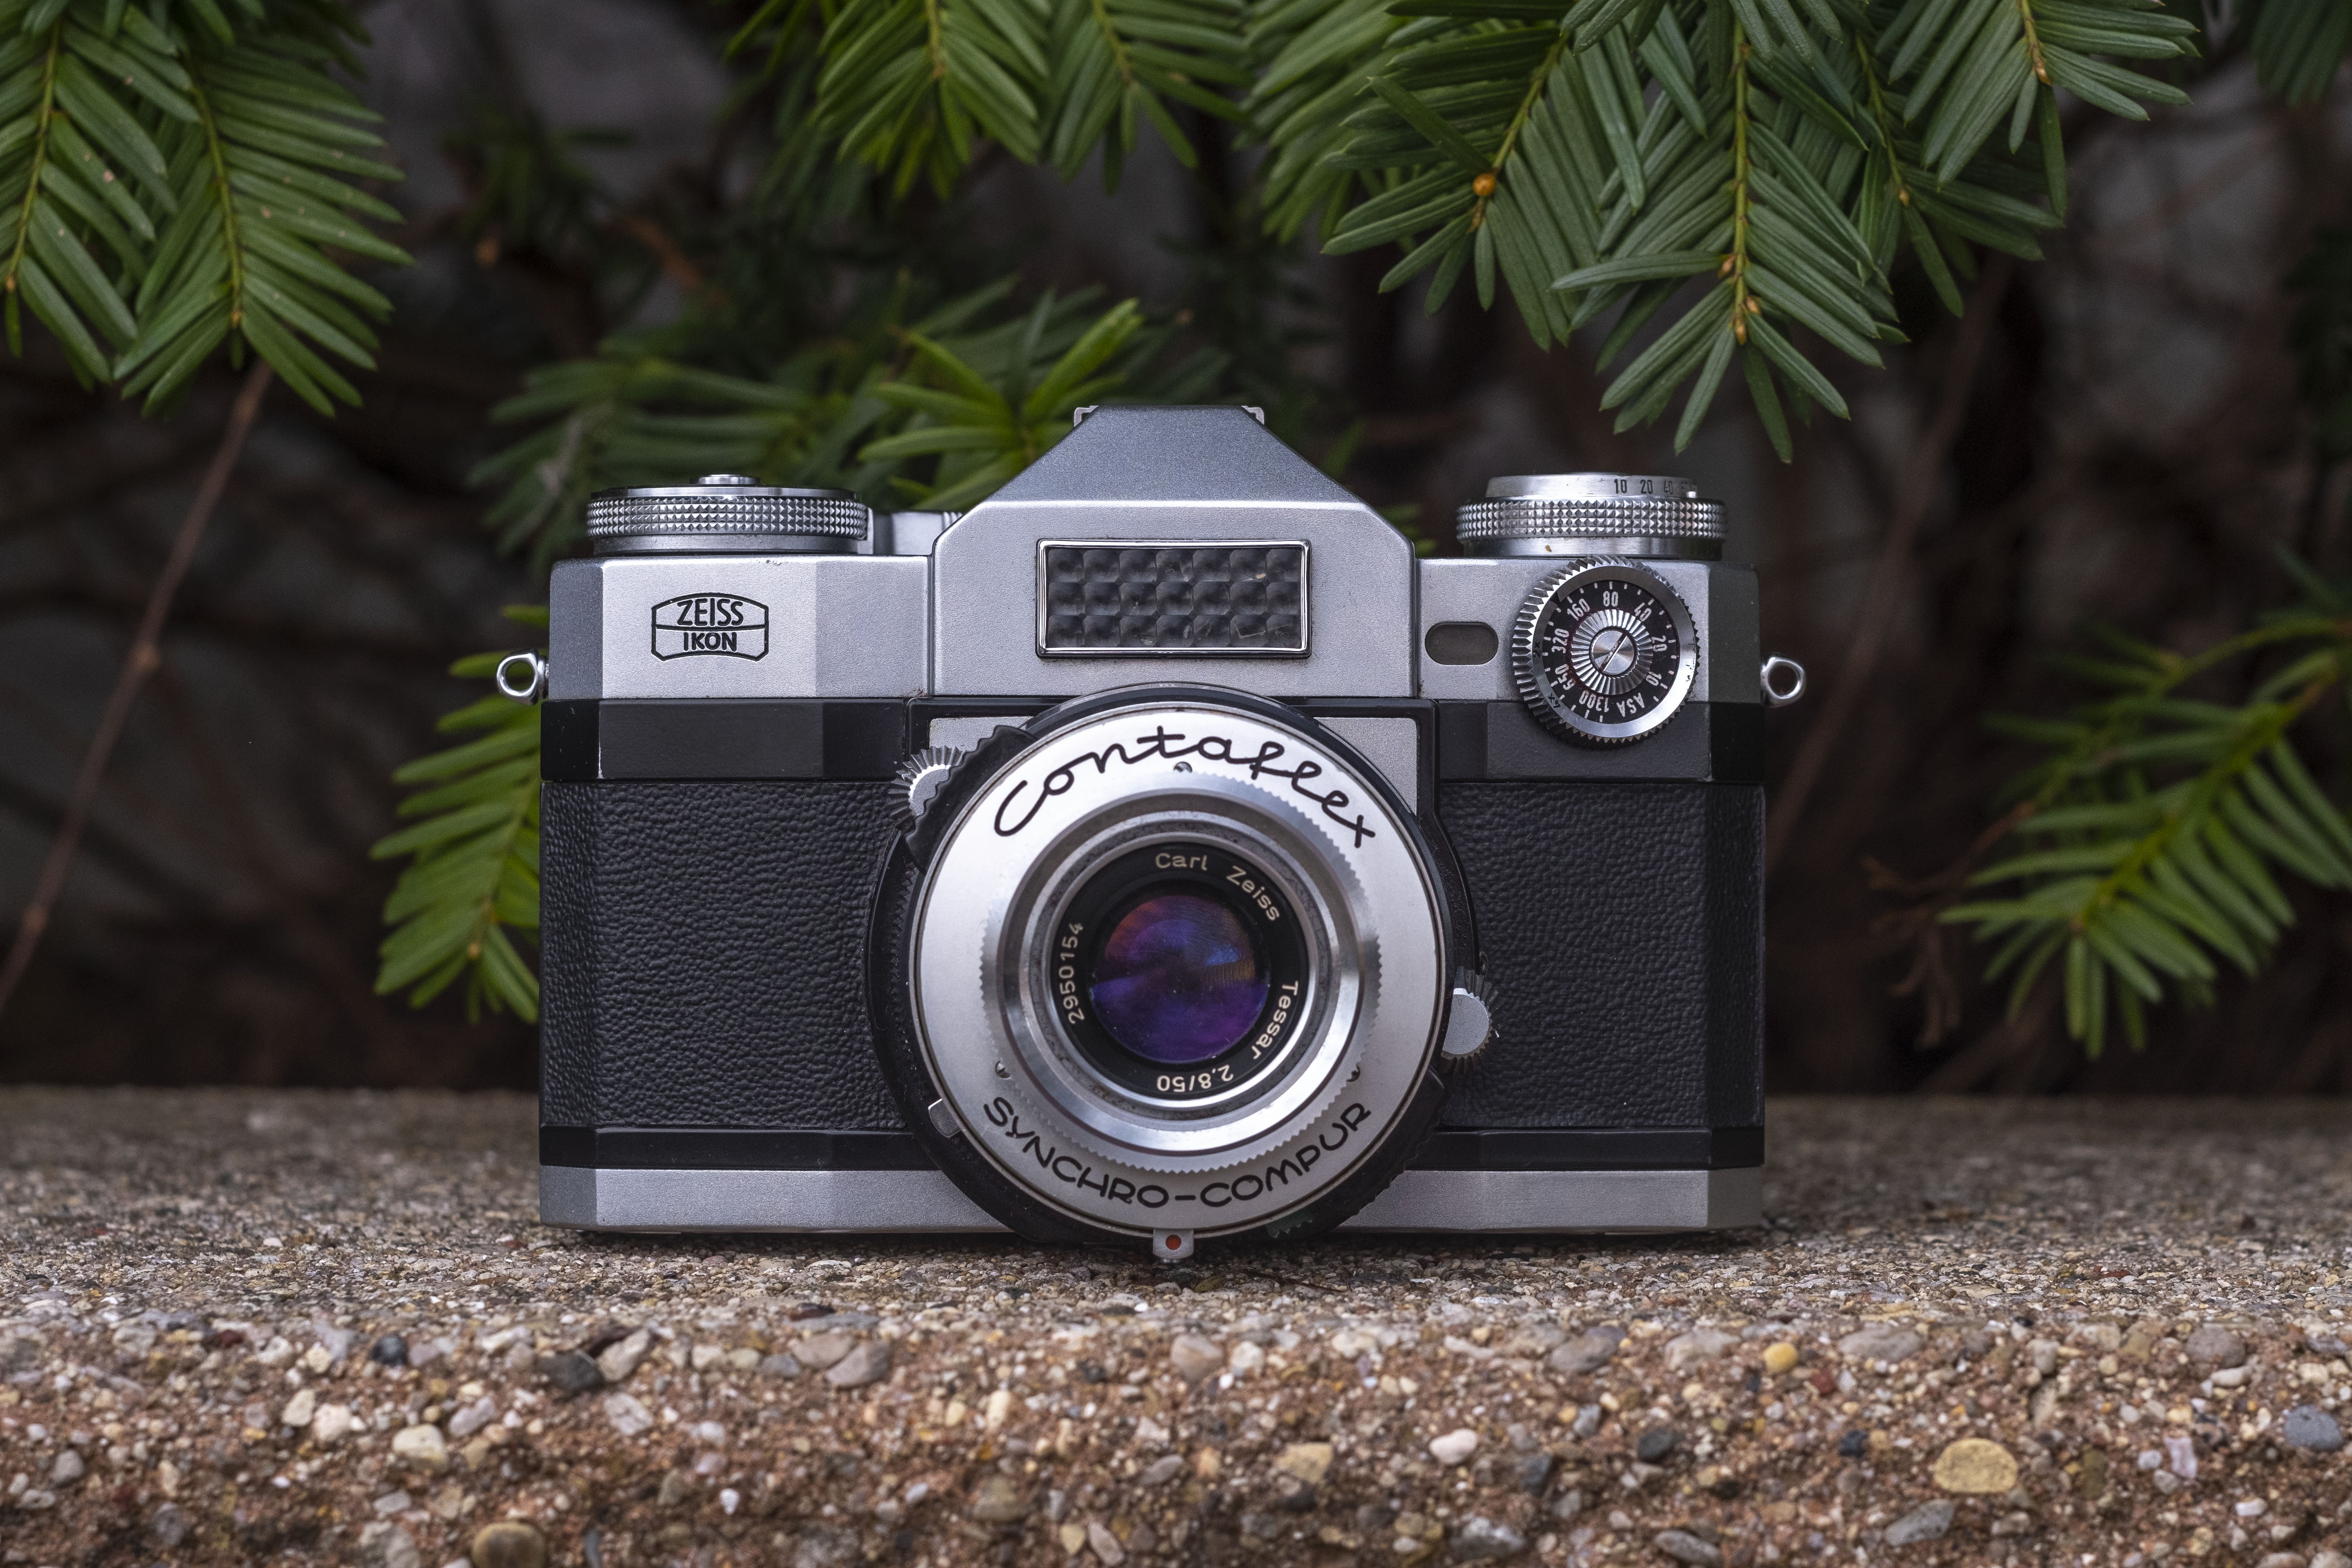
Production of the Contaflex TLR was not continued after the war, nor was any other 35mm TLR, however Zeiss-Ikon would reuse the Contaflex name twice, once for a successful lineup of leaf shutter 35mm SLRs in the 1950s, and again for a prototype camera which would eventually become the Contarex SLR. Apart from being 35mm reflex cameras, the prewar Contaflex TLR shares nothing with the postwar SLRs.

For camera collectors, the Zeiss-Ikon Contaflex TLR needs little introduction. This is the type of camera that appears on covers of camera collector’s books, on a shelf in the background of YouTube influencer videos, and often sits at the top of the wanted list for many collectors.
This camera is well known for a reason, it looks like no other ever made, it had an insane amount of technology for the day, and it represented the absolute pinnacle of what German manufacturers were doing for 35mm cameras in the 1930s. Of course, all this complexity comes with a cost, which is that when these things break, there’s almost no one left who can fix them.
For years, the most well-known person who would take a stab at repairing a Contaflex TLR was Henry Scherer, the famed Zeiss repair guy with a waiting list longer than a decade. As seems to happen with mortal creatures, Mr. Scherer’s time in this world came to an end and he is no longer able to repair cameras. That left one person, Radu Lesaru from 3R Camera in Naples, Florida. If you’ve heard me mention Radu’s name before, it is because he also CLAd my Contax I and he did a wonderful job on that.
When this Contaflex came to me from the collection of Kurt Ingham, it was like most, beautiful, but completely inoperable. Although the Contaflex TLR shares a similar vertically traveling metal shutter as the one used on the Zeiss-Ikon Contax, the internal mechanism is very different. In addition to complexities of the shutter, the film transport, the focus mechanism, viewfinder, exposure counter, and selenium meter all add additional complexities on top of just another Contax (which is already a complicated camera to repair).
When I asked Radu if he wanted to take a stab at repairing my Contaflex, he begrudgingly agreed, warning me it would take him a very long time. I was patient and figured, this might be the last time I’d ever find anyone in the world to give the Contaflex TLR a CLA, so I sent it to him. I’ll spare you what happened in between, but about 14 months after sending in the camera, I had the camera back again. Radu was able to completely rebuild the shutter with new straps, he disassembled and cleaned every single moving part within the camera. Before beginning, he warned me that in order to open the camera, he would have to peel off all the original leather, and that he couldn’t guarantee that he’d be able to get it back on, or if he did, if it would look good. I let him know I understood the risk and told him to proceed.
Under the leather, the entire body was covered in rust, the insides were filled with broken pieces of film, dried lubricants, and nearly a century’s worth of grime. In addition to cleaning all that up, rebuilding the shutter, he also replaced the reflex mirror with a brand new one, and against all odds, was even able to get the selenium meter working again. He didn’t provide me many specifics about what he had to do, but it involved sanding some surface of the meter to somehow clean off oxidation which got the electrons flowing again.
Below is a gallery of images Radu took of my camera while it was being repaired.


After taking the camera out of the box Radu shipped it to me in, I was blown away at how nice it looked. While I was prepared to have a working, but ugly camera with missing leather, Radu did an amazing job saving the original leather and reglueing it to the body. If you look very closely, there are areas in which very small pieces of leather had flaked away over time, but beyond these tiny areas where it was damaged before Radu touched it, the body covering was completely in tact. The camera was clean, the viewfinder was way brighter than any 1930s TLR I’ve seen, the meter responded to light, and the shutter worked. Radu had clearly worked his magic, but apparently it took a toll on him as he has since told me and at least one other person who asked, he will not agree to repair another ever again, so don’t ask.

For those of you who have never handled the Contaflex TLR, you probably don’t need me to tell you, this is an intimidating camera. In addition to its complexity, this is also one of the most dense cameras I’ve ever handled. I’ve heard people refer to the Berning Robot II as one of the densest cameras ever made, but at least the Robot is small. With the standard 5cm f/1.5 Sonnar lens mounted, the camera weighs in at 1474 grams, narrowly losing out only to the mighty Mamiyaflex interchangeable lens medium format TLR at 1516 grams.
When the designers at Zeiss-Ikon were creating this camera, it was clear they had a clean slate as the ergonomics of this thing are unlike any camera ever. A good long read of the original user’s manual (or this review) is a must for anyone wanting to play with this camera. Even armed with this information, I was still intimidated. It is actually a good thing I own this camera as if this had been a loaner, I might have been too terrified to take it out into the world to shoot it.

Looking down upon the top of the camera, you see the folding hood of the waist level finder. A clear semi-reflective mirror is visible through a rectangular hole which functions as a sports finder. To open the hood, press a medium domed button on the side of the hood, near the upper right corner. There is a second, smaller button next to it which is the self-timer release. If the self-timer is not engaged, pressing this smaller button doesn’t do anything, so if you’re trying to open the hood and you can’t get it to open, you’re probably pressing the wrong button.

With the hood open, you can see the ground glass which represents a full 5cm image but at nearly twice the size of what will be exposed to film. One of the biggest benefits of the Contaflex TLR’s design is that the viewfinder lens has a focal length of 8cm like a medium format camera. This produces a physically larger image which is easier to compose with and provides greater depth of field for more precise focus than it would have had with a normal 5cm design for 35mm film. Engraved into the glass are additional frame lines for 8.5cm and 13.5cm lenses. As mentioned above, when this camera was repaired, it received a brand new reflex mirror and the focus screen was also cleaned, so the viewfinder is brighter than you should expect to see on most other Contaflex TLRs out there. Inside the viewfinder hood is a flip up magnifying glass for precision focus if you need it. To get the magnifier to open, a small chrome tab on the right side of the front hood can be pressed.

The Contaflex TLR also has a sports finder, which requires you to flip up the magnifier to get it out of the way, but once you do, peering through the rear rectangle, allows you to see through a semi-reflective mirror which is in the front of the viewfinder hood, which amazingly has Albada type projected frame lines for 5cm and 8.5cm lenses. Strangely, lines for the 13.5cm lens which do appear on the regular ground glass, are not here. I can’t be sure of this, but I believe this is the first camera to feature projected frame lines. On this example, the frame lines were quite dim, but still usable.

Also visible from the top of the camera to the left of the waist level finder is the exposure meter display. This display is similar to the one found on the Contax III camera in which is there is a diamond, a circle and two hash marks. A needle which is coupled to the meter cell moves with available light. I read the original Zeiss-Ikon Contaflex TLR user manual to learn how the meter display works and came back more confused than before I started. While exposure meters were still pretty new in the 1930s when this camera was made, it seems that people’s ability to explain how to use them was far behind the technology itself.
After playing with the camera and pointing it at various light sources and guesstimating what readings I should see, I was able to decipher what the meter was telling me. A small dot near the front is a zero-index mark. This is the point at which the needle should be pointing when no light is entering the meter. If you have an otherwise working meter and the needle is not pointing to this dot, you need to adjust the zero-position using an adjustment screw in front of the display. Assuming the needle points to the zero-index with no light, your meter is properly calibrated.
A large diamond near the middle of the display is the exposure mark, and where you want the needle to be pointing for correct exposure. Exactly which f/stop and shutter speed you need to set to get proper exposure requires three steps. First, you must understand that the actual aperture ring on the lens and the shutter speed dial on the side of the camera are not coupled to the meter. Changing any of these settings does nothing to the display. Instead, you must use separate shutter speed and aperture sliders immediately above the viewfinder lens. With the camera at chest level and looking down at the front of the camera, a scale of numbers closest to the viewfinder lens is the film speed setting.
Scheiner Film Speeds: Some versions of the Contaflex TLR displays film speeds using the DIN scale, but this one displays film speeds using the Scheiner scale which was popular before the advent of the DIN scale in 1935. From what I can tell, there were both an American and a European Scheiner scale which are very different. This being a German camera, I can only assume you should use the European scale which is equal to DIN+10. So for example, ASA 100 speed film, which is DIN 21, would be European Scheiner 31.
Above the Scheiner scale are two curved sliders, one engraved with f/stops from f/1.5 to f/22 and the second with shutter speeds from 16 seconds to 1/1000. Moving both of these curved sliders changes the needle in the exposure display window. To properly set the film speed, first move the aperture slider so that a red index mark is opposite the correct film speed. Once you have this set, do not continue to move the aperture slider. Adjustments to the meter should only be done by moving the curved slider with the shutter speeds on it.

While pointing the camera at your light source, observe the position of the needle in the exposure display. Ideally, you want the needle to point to the diamond. If it is not, continue to move the shutter speed slider until the needle lines up. When this happens, choose a combination of shutter speeds and f/stop that a lined up. Under average light, you should have multiple options. Using the image to the right, with Kodak Tri-X 100 loaded and the meter set to Scheiner 31 and the needle pointing to the diamond, you may see combinations like f/5.6 and 1/50 on the two sliders. But you may also see f/8 and 1/25 and f/4 and 1/100. Each of these three combinations will all still give you correct exposure. Notice that the shutter speed slider has speeds from 1 second down to 16 seconds which are not speeds you can select on the camera. These must be manually timed with the shutter in Bulb mode.
The final step is to actually change the aperture on the lens and the shutter speed on the camera to match whatever the meter is recommending. Remember that the selenium meter is only coupled to the sliders above the viewfinder lens and not to the actual aperture ring or shutter speed controls. This last step is crucial as moving the sliders around does not actually change the exposure settings of the camera.

If that’s not complicated enough, the meter display also has three vertical lines which the Contaflex manual explains as multipliers. The three lines extending away from the diamond represent a 2x, 5x, and 10x multiplier. What these actually mean is 1 stop, 2, stop, and 3 stops of over exposure. The explanation in the manual for how 5 x 1/10 = 5/10 or 1/2 is far more complicated than just saying 2 stops of compensation. So if you decided you wanted to over expose your images using the meter display, with the needle pointing at the first line, you need to manually choose a shutter speed or aperture setting that is equal to 1 stop of over exposure. With it pointing to the second or third line, you would manually set 2 or 3 stops of overexposure. If this has completely melted your brain, you’re not alone…just shoot Sunny 16!

Moving on to the sides of the camera, the left side is pretty straightforward, containing only the rewind knob and exposure counter beneath. The exposure counter is additive, showing how many exposures have been made on the current roll and must be manually reset after loading in each new roll. Resetting the exposure counter is done by gripping the knurled ring and rotating it until the number ‘0’ lines up with the index mark.

On the right, we start with the delayed action timer in the upper left corner. To activate the self-timer, lift this lever as far up as it will go. Assuming you have a Contaflex TLR which has not been serviced in decades, I would not advise trying this, but since this one had been serviced, I gave it a go and can confirm it works mostly like any other self-timer. The only difference is that the delayed action does not activate with the normal shutter release, you must press the tiny button next to the viewfinder hood release, which I previously mentioned in this review.
The largest feature of this side of the camera is the combined film advance knob and shutter speed selector. The film advance knob works as you’d expect, simply turn it in the direction of the arrow as far as it will go to advance the film to the next exposure, cock the shutter, and advance the exposure counter by one. The shutter speed selector requires a bit more explanation.

The way shutter speeds are changed on the Zeiss-Ikon Contaflex TLR is very similar to how you do it on the Zeiss-Ikon Contax I which I’ve explained in that review if you want to read it. That both shutters were designed by Dr. Heinz Küppenbender suggests that Herr Doktor must have had a fondness for this design in which shutter speeds are isolated together into four different groups based on how you might use the camera. According to the Contaflex TLR manual, the four groups are:
- Time Group – B (Bulb) and 1/2 second (both indicated in red)
- Night Pictures Group – 1/5 and 1/10 (also indicated in red)
- Normal Group – 1/25, 1/50, and 1/100 (indicated in black)
- Sports Group – 1/150, 1/250, 1/500, and 1/1000 (all indicated in black)
The manual advises that you may change shutter speeds with the shutter set or not set, however they caution that changing to the slower speeds (indicated in red) will require more force if you do it while the shutter is cocked. The first step when choosing a shutter speed is to first select which group you want. This is done by rotating the collar closest to the body of the camera to select between the four groups. You may rotate this collar either clockwise or counterclockwise until one of the dots on the collar lines up with a small metal post sticking out of the body. In addition to this visual aide, you should feel a very noticeable click as the shutter group becomes properly set. It is critical that you do not leave the camera halfway between a group.

Depending on which group you’ve chosen, only the speeds shown in the bullet list above will be visible. To then select one of these speeds, pull the film advance knob away from the camera and rotate it until one of two dots on this knob lines up with your desired speed. It is important to pay attention to the color of the shutter speeds you are selecting as B through 1/10 are red and 1/25 and up are black. The film advance knob has both a red and a black dot on it, so when choosing a red shutter speed, you must line it up with the red dot. To choose a black shutter speed, you must line it up with the black dot. This probably feels pretty self-explanatory, however it is easy to forget to do when out shooting with the camera. Regardless of whether you’re choosing a red or black shutter speed, once you have the appropriate dot lined up with your desired speed, let go of the film advance knob and it should slide back into a recess inside of the camera, locking it at that speed.
To the right of the film advance and shutter speed dial is the shutter release lever. With your desired speed chosen and the shutter cocked, press down on this lever to fire the shutter. A threaded cable release socket is just around the corner from the shutter release on the front of the camera if you wish to use a cable release.
Finally, the last thing you’ll see on this side of the camera is a domed button below and to the left of the combined film advance knob and shutter selector. The function of this button is to deactivate the film transport for rewinding film at the end of a roll. True to the over complication of this camera, the Contaflex TLR manual refers to this button as a “Knob for releasing re-spooling device”. The first time I handled this camera, I had no idea what the heck that meant. It was only until I later realized that I couldn’t find a way to rewind film that I pressed this button and saw that the sprocket shaft in the film compartment could freely turn while this button was held down. Why the author of the manual chose the name “Knob for releasing re-spooling device” instead of “Rewind button” is strangely appropriate given how complicated so much of this camera is.

Moving on to the bottom of the camera, there are two film door locks which look the same as those found on Contaxes of the same era in which you flip them up, rotate 180 degrees and then slide the bottom and back of the camera off. These two locks not only serve the purpose of keeping the film back secure to the camera, but they also open and close Contax style film cassettes which were designed to be used in this camera. These special cassettes are not required however, as a normal 35mm cassettes and take up spools will work. In the center is a raised foot with the tripod socket. This particular camera has a 1/4″ threaded hole, but I suspect there is an adapter here possibly reducing it from 3/8″ which was common at the time. I did not try to remove it however.

With the back of the camera removed, we have access to the film compartment which sorta resembles a squished version of the Contax’s film compartment. Both the Contaflex TLR and Contax rangefinders use a vertically traveling metal slat shutter which externally looks the same, but based on Radu’s repair notes, the shutters do have some internal differences. When placed side by side, the Contaflex TLR is roughly 3cm narrower than the Contax rangefinder, but it is thicker, so the film compartment uses this additional forward space to wrap the take up and supply spools closer to the front of the camera. The Contaflex TLR supports both cassette to cassette film transport, or winding onto a traditional take up spool. Film transports from left to right and loads similarly to how it does on the Contax. If you are loading a traditional 35mm cassette, you’ll need a take up spool which is removable. Original Zeiss-Ikon Contax spools are preferred, but if you don’t have one, the plastic core from a 35mm cassette will work, you’ll just need to tape the leader to the spool when loading. You can load the leader onto the spool with it in the camera, however it is much easier to pull it out first.

The film compartment predates the use of foam light seals, however there is a strip of black yarn in the upper channel near where the top of the film back meets the body. On this example, the yarn was still in tact and appeared to be doing its job, so Radu saw no reason to replace it. My suspicion is that assuming no one has tampered with it, these should all still be working. The best thing to ensure light doesn’t leak onto your film is to make sure your camera has the original door. Since the doors are removable, they could be swapped from another camera. To ensure this hasn’t happened, the camera’s original serial number is stamped into the inside of the film back. In fact, the Contaflex TLR’s serial number is on this camera in three locations, inside the film back, below the film gate, and on the film advance knob. Not all versions of the Contaflex TLR have the serial number on the film advance knob however.

Up front is the Contaflex name plate which covers the selenium cell. Unlike some other cameras with doors covering a selenium cell which have tiny holes in them allowing the cell to work in bright daylight with the door shut, that is not how this one works. You must open the door to use the meter. To open it, press a small button on the right side of the hinge. Below the meter are the curved shutter speed and aperture sliders for use with the exposure meter. In case you haven’t read that section of this review yet, these are only used for the meter, and do not actually change the shutter speeds or the lens diaphragm. Next is the 8cm viewfinder lens which is used to feed light into the viewfinder. To the right of the viewfinder lens is a focusing arm which rotates both the viewfinder and taking lenses for accurate focus. Optionally, you may grip the taking lens and rotate it, but that risks also changing your f/stop and just isn’t as easy as using the focusing arm.

Below the viewfinder lens is the taking lens which has a unique interchangeable breech lock bayonet mount. Changing lenses is a two step process, the first requires you to press in on a small tab with a red dot immediately below the taking lens. This releases a lock that prevents the bayonet from accidentally moving. With this button pressed in, two “ears” on opposite sides of the lens must be rotated counterclockwise to release the breech lock. On this camera which has had a recent CLA, releasing the breech lock is still moderately tight, but on another example with dried lube, releasing the breech lock can be extremely difficult to do. Once you’ve released the breech lock, the lens pulls straight off. You do not turn the lens while removing it. Reinstalling a new lens is the opposite of removal, just be sure that the breech lock is in the farthest counterclockwise position and that a red dot in the inside of the lens mount lines up with a red dot on the lock button. One final detail is that you’ll notice four bayonet mounts in each of four corners around the taking lens which are attachment points for some optional Contaflex TLR accessories such as sunshades and a few things which I do not have.

Now with the basic operation of the camera out of the way, it comes time to use it. The Contaflex TLR is almost two cameras in one. On one hand it was a top of the line professional quality camera with innovative and exciting new features such as a selenium exposure meter, a fast 1/1000 focal plane shutter, the largest viewfinder ever found on a 35mm film camera, and support for some of the best lenses ever made. Yet, on the other hand, the Contaflex TLR is an ergonomic nightmare with confusing controls, an extremely illogical exposure meter display, an equally confusing shutter speed selector, and an internal complexity in which we may have reached the point where there is no one left on the planet who can repair one. But this one works, I’ve read the manual a variety of times, and I’m willing to answer the hard questions for you all, so I loaded in some film and took the Contaflex TLR out to shoot, and report back my findings.
For the first roll of film in a 90 year old camera which recently came back from a frame up restoration, I did what anyone would so, I loaded into a camera I had never shot before, a film that I had also never shot before. In this case, it was a recently spooled roll of AGFA Aviphot Pan 80, a fine grained black and white panchromatic film which slightly favors the near IR spectrum adding contrast and deep shades to blue skies and green trees. I figured that the increased contrast might be a good pairing to the uncoated Zeiss lenses.


Although I do have the 8.5cm f/2 Carl Zeiss Sonnar for the Contaflex TLR, the entirety of my test roll was shot using the 5cm f/1.5 Sonnar. The lens was in extremely good condition with minimal scratches and dust, and no haze or fungus. The images I got using this lens had better contrast than I expected considering uncoated prewar lenses are usually noted for being low in contrast. Perhaps the use of a near-IR film like AGFA Aviphot Pan 80 helped balance it, but this combination of lens and film was excellent.
Despite the excellent condition and notoriety of the f/1.5 Sonnar lens, it is not impervious to imperfections. As you should expect, the lens is soft wide open and really doesn’t begin to shine until it is stopped down to f/5.6. The images above of the courthouse and others shot in bright sunlight have have impressive sharpness, but those with the lens at or close to wide open are understandably soft. For anyone who reveres the f/1.5 Carl Zeiss Sonnar, it is a great lens, but it is important not to have unreasonable expectations of it.
I do plan on shooting some color in this camera and possibly even with the telephoto lens, but as it was winter when I was writing this article, I didn’t want to wait months for temps to warm up for me to get out and get some useable color images. I will update this review at whatever time I get some color images from it.

I know that there are those people who read my reviews and skip all the stuff above and go straight to the bottom to see what my thoughts are on whatever camera I’m writing about. When it comes to an uncommon and valuable camera like the Zeiss-Ikon Contaflex TLR, there are those who have never seen one before, those who have seen one but say they could never afford to own one, and then there are those who do own one, but theirs doesn’t work and they wish it did.
Regardless of which category you most closely belong in, I acknowledge that my opportunity to use the Contaflex TLR is special, and is one that I am thankful for. I do not know if what I’m about to say will make any of you feel better or worse, but I’m sorry to say, the Zeiss-Ikon Contaflex TLR is not an enjoyable camera to use.

Before I get into why that is, I want to start out with my favorite part of the camera which is the viewfinder. Zeiss-Ikon’s decision to go with a larger viewfinder was definitely a good one. Composing your images on the 6cm wide ground glass can briefly cause you to forget this is a 35mm camera as it so closely resembles a medium format TLR. Comparing the view through the Contaflex TLR to a later Ihagee Exakta’s waist level finder is night and day and I wish there were more 35mm cameras with huge viewfinders like this.
However, for everything I could say about the camera’s quality or innovation, I can equal that with comments regarding its poor ergonomics. The control layout of this camera just isn’t good. Even if you can get past the very confusing selenium exposure meter, the meter display is tiny and so closely smooshed up against the side of the viewfinder hood that its almost impossible to read. Proper exposure is indicated by a tiny needle that hides in the shadows and points to a diamond, which you have to control using two sliders on the front of the camera, and even after you get proper exposure, you need to take the additional steps of changing shutter speeds or aperture settings. The process is extremely slow and could be done much faster using a hand held meter or by shooting Sunny 16 like I did.

The design of the shutter speed selector and its groups does kind of make sense on paper, but in use, provides almost no benefit. It does not help me to group together only the fast action speeds and isolate them from night speeds. If want to shoot at 1/25 in full shadows and then quickly jump to 1/250 in bright sunlight, I should be able to do that without having to first rotate a wheel and make sure I have the correct color dots lined up with whatever speed I want.
The location of both the focus arm and shutter release aren’t terrible, but their locations are so different from any other 35mm camera ever made, that you need to be thoughtful in how you handle the camera so that you can maintain a secure grip on the camera in the field, while still having your fingers where they need to be.

Even the viewfinder which I praised above, still isn’t great. For what was intended to be a premium system camera with interchangeable lenses in at least four focal lengths, you are still bound by the same limitations other non TTL reflex cameras were, including fixed frame lines, differences between what was available in the waist level vs sports finder, and that the camera still has to rely on a auxiliary viewfinder for wide angle lenses since the camera lacks any ability to display images of that size. The Contaflex TLR worked fine as an interim camera before the industry could decide on how a 35mm SLR should work, but as a professional system camera, it would have been extremely limiting.
Don’t get me wrong, the cool factor is definitely there. If you like distinct looking cameras with quirky features, the Contaflex TLR has those in spades. Image quality is also off the charts as these were then, and still today 90 years later, some of the best lenses ever made, so images from this camera are going to look phenomenal, but at what cost? For those of you at home reading this thinking, “I really wish I had one of those cameras so I can go shoot it”, I am here to tell you that you probably don’t. At least not for what you’d have to pay for a working example.
Does that make the Zeiss-Ikon Contaflex TLR a bad camera? Of course not. It is built like a tank, it is pretty, it does have great lenses, it is historically significant, and it does have a high wow factor. But when you add it all up, a long list of pros does not equate to a great camera. I am extremely happy to have this camera in my collection, but if you ever find yourself in a bad GAS situation where your finger is hovering over the “Buy it Now” button for one on eBay, I strongly advise you re-read my review before clicking!
Related Posts You Might Enjoy
External Links
https://camera-wiki.org/wiki/Contaflex_(TLR)
https://www.shutterbug.com/content/twin-lens-contaflex-35mm-tlr
https://www.pacificrimcamera.com/pp/zicxtlrcampg.htm
http://www.earlyphotography.co.uk/site/entry_C287.html
https://corsopolaris.net/supercameras/contaflex/contaflex.html
https://www.photo.net/forums/topic/338294-zeiss-contaflex-tlr-do-you-own-such-a-camera/
OMG… always thought I’d love to have one of these cameras, but I do believe I would now pass. I do happen to love a ZI Contarex Bullseye, but mostly for the superb lenses for them. Great review…Mike
Gary Hill
Thanks for this amazing tour, Mike! Another grail camera that, for someone intending to make images, is best left to the imagination. Andy